

Get started with shift tasks
Shift tasks let you attach a checklist to any shift on the roster, so staff know exactly what needs doing on site — an opening or closing run-sheet, a cleaning schedule, or a compliance check — and you get proof it got done. Checklist items can require a photo or a note, giving you a timestamped record instead of a verbal assurance.
Templates make this repeatable: build a checklist once and apply it across shifts and sites, rather than typing the same list out every time. This guide explains how to activate shift tasks, create your first checklist template, and duplicate an existing template so you can reuse and adapt it.
1. Activate shift tasks
Before you can build a checklist template, you need to turn shift tasks on for your account. This is a one-off step — once activated, Tasks appears as its own item in the main menu and checklists become available to attach to shifts on the roster.
1.1 Activate shift tasks in settings
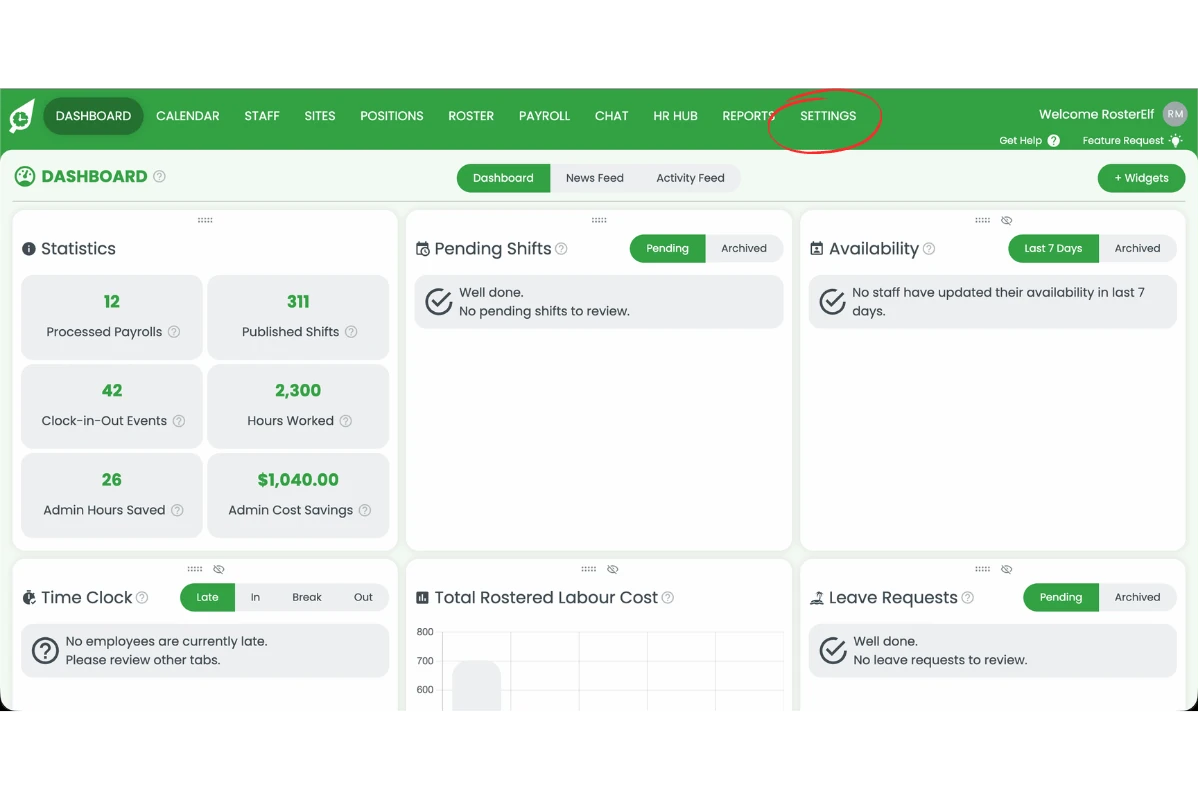
1.1.1 Click Settings.
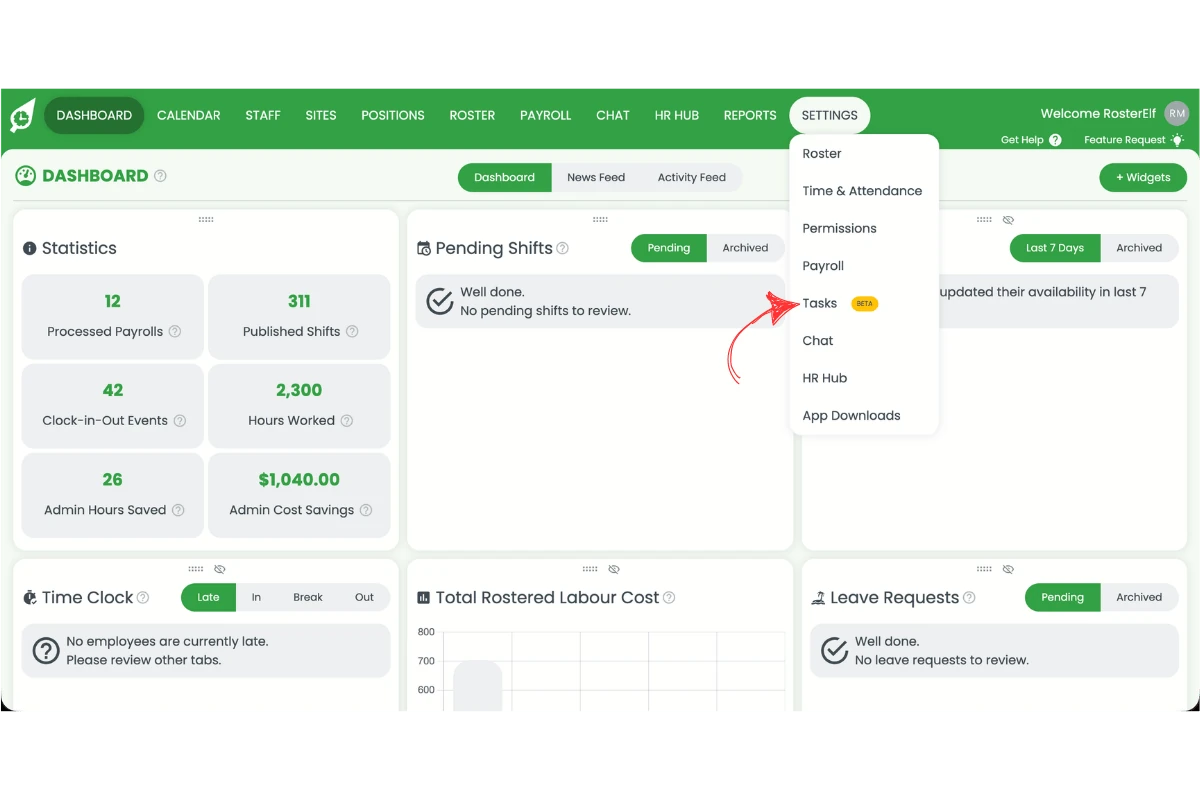
1.1.2 Select Tasks.
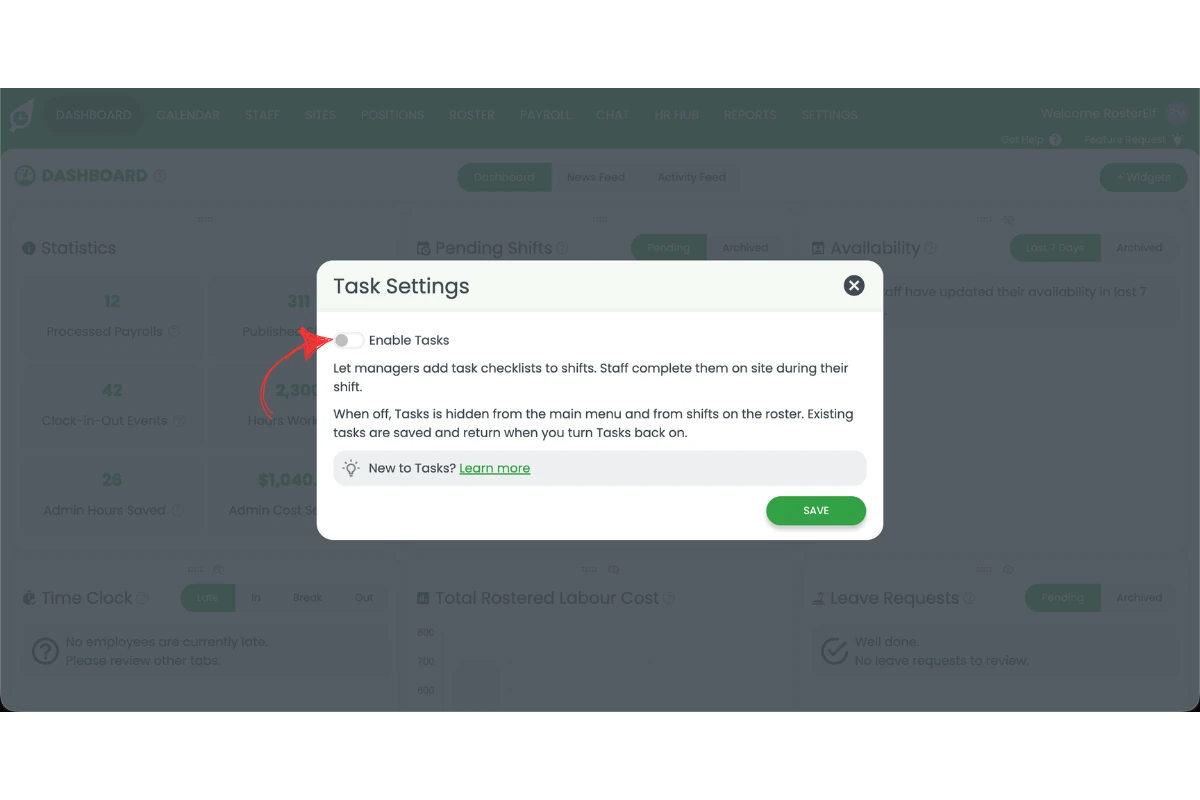
1.1.3 Toggle Enable Tasks on.
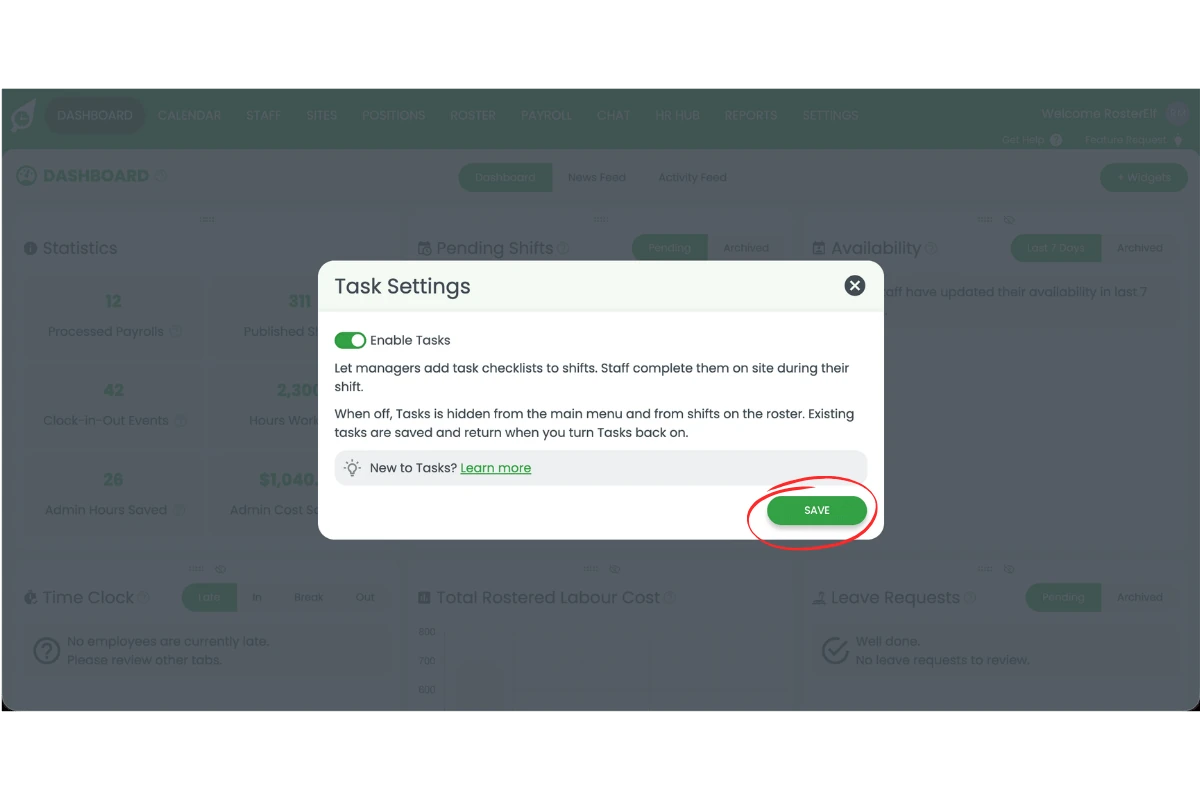
1.1.4 Click Save.
2. Create a shift task template
Once shift tasks is activated, you can build a checklist template. A template can hold as many checklist items as you need, and each item can optionally require a photo or a note before staff can complete it — useful for compliance checks like fridge temperatures, or routine jobs like cleaning tasks.
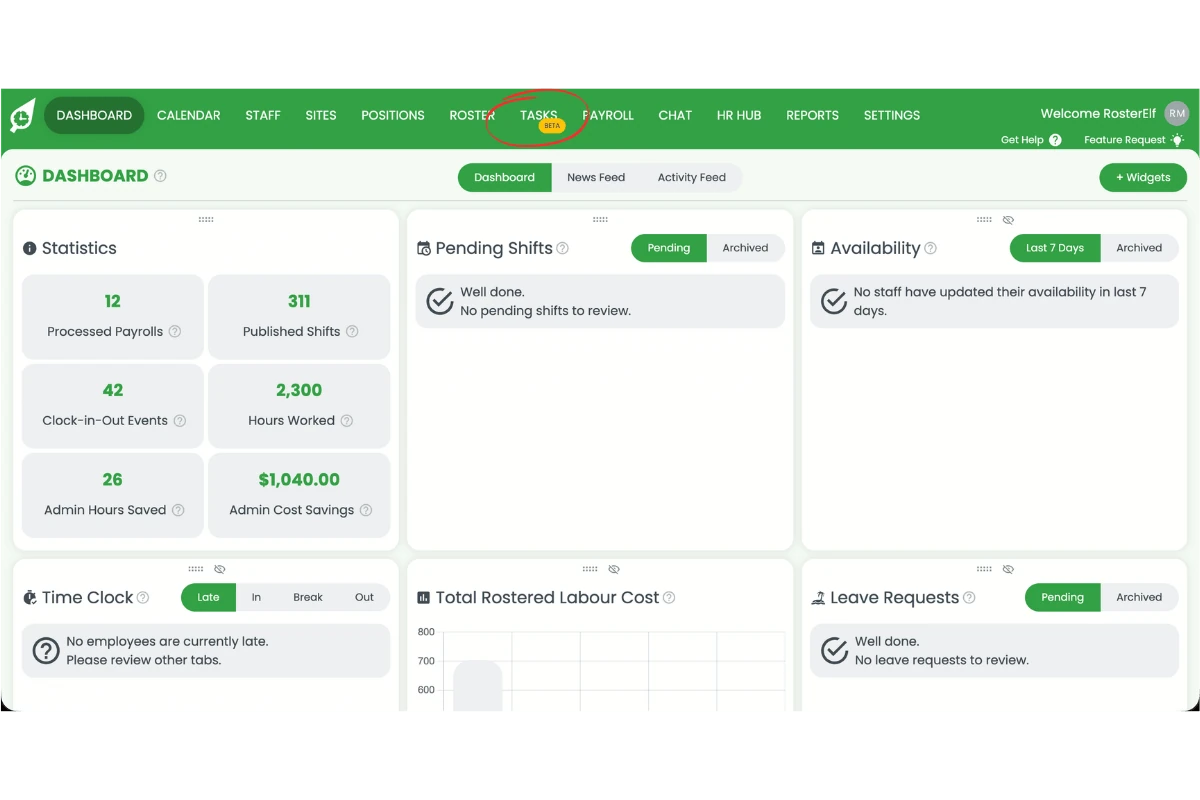
2.1 Open tasks
2.1.1 Click Tasks in the main menu.
2.2 Build your checklist template
2.2.1 Click the plus (+) icon to create a new task template.
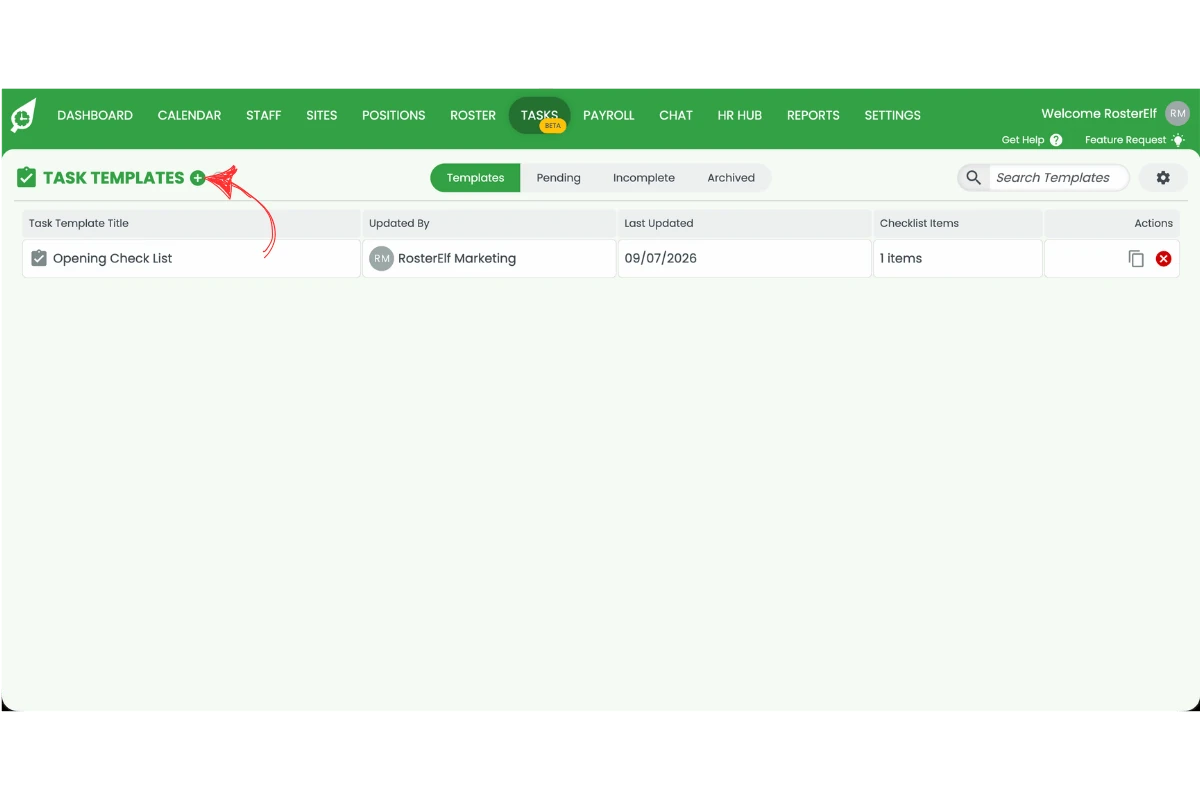
Can't see the plus (+) icon?
This is a display issue, not a settings problem — the icons are hidden when the browser window is too narrow or zoomed in. Maximise your browser window to full screen. If they are still hidden, zoom out (Ctrl and - on Windows, Cmd and - on Mac) until they appear. Still missing? Contact support.
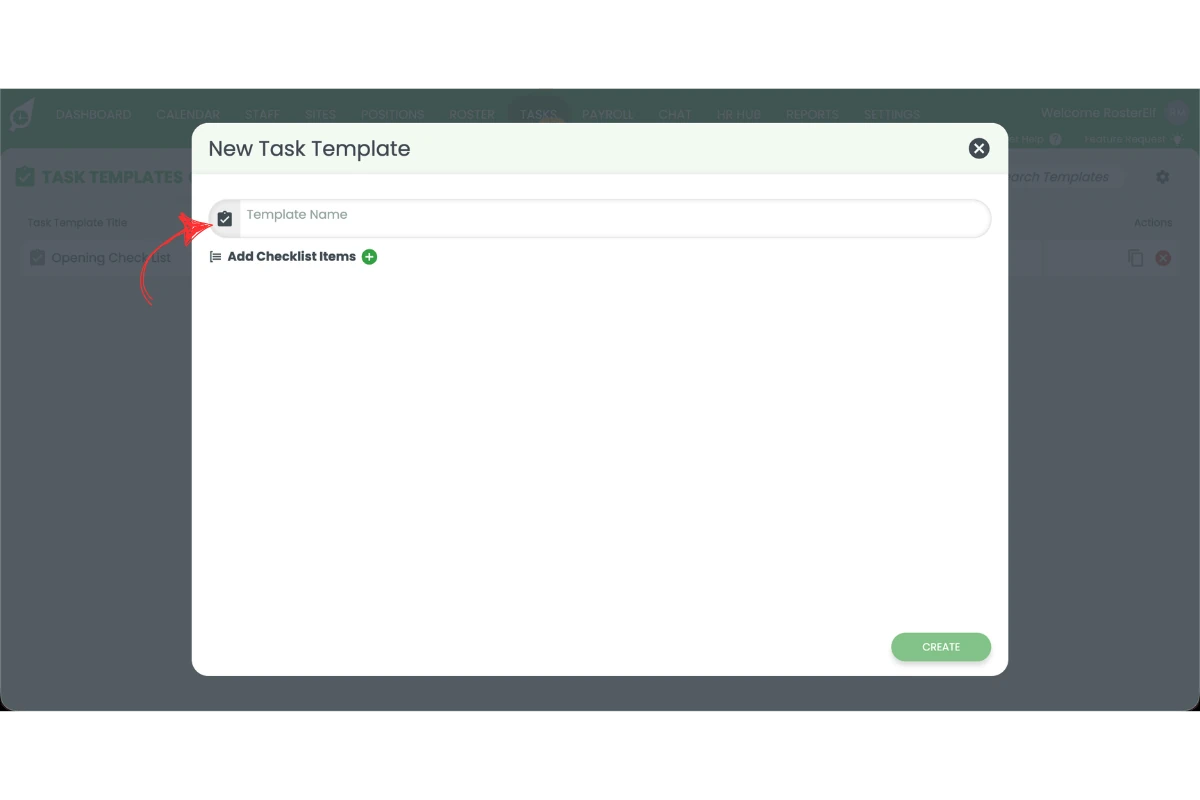
2.2.2 Add a template name.
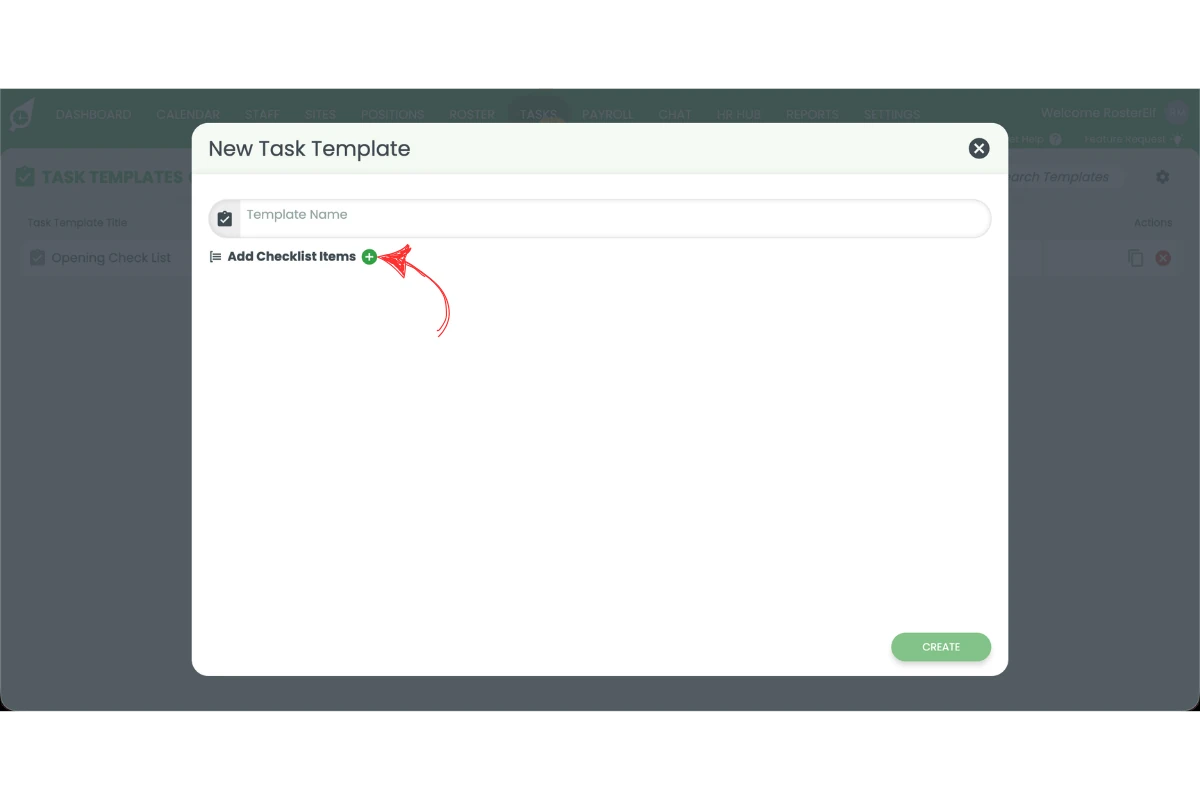
2.2.3 Click the plus (+) icon to add checklist items.
2.2.4 Add a descriptor for the checklist item.
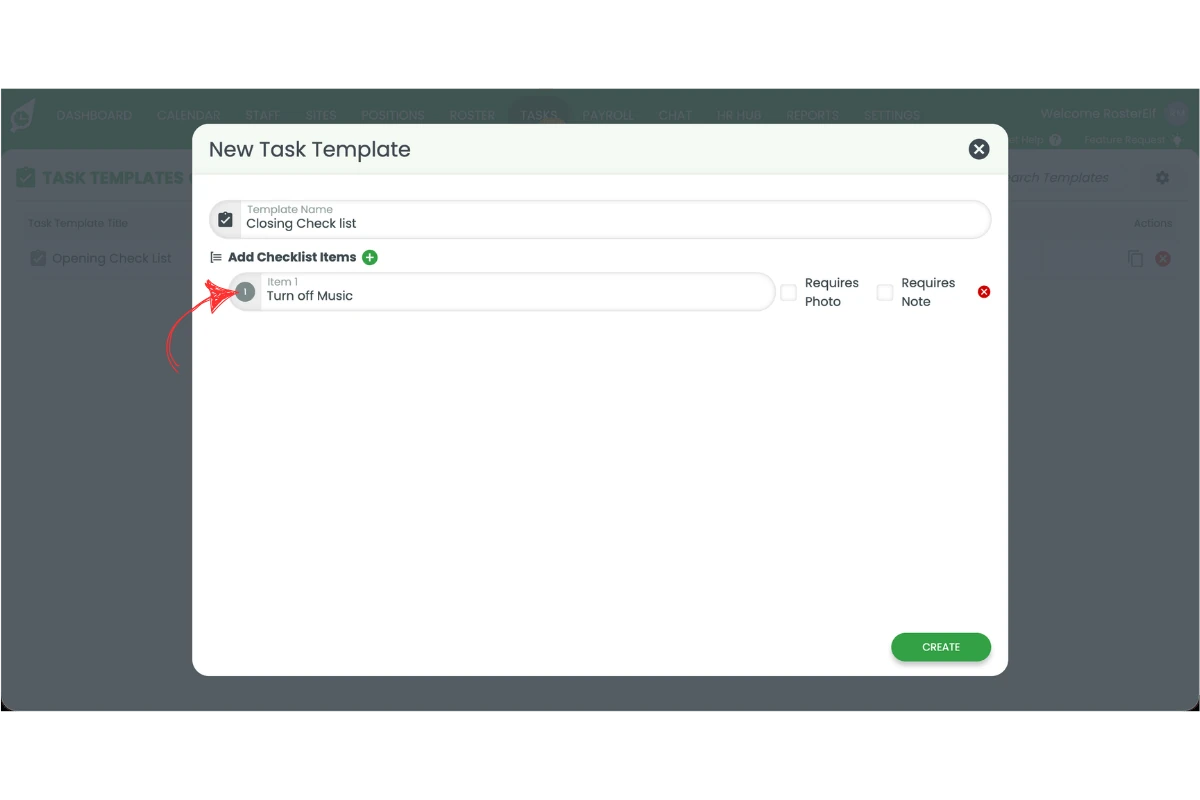
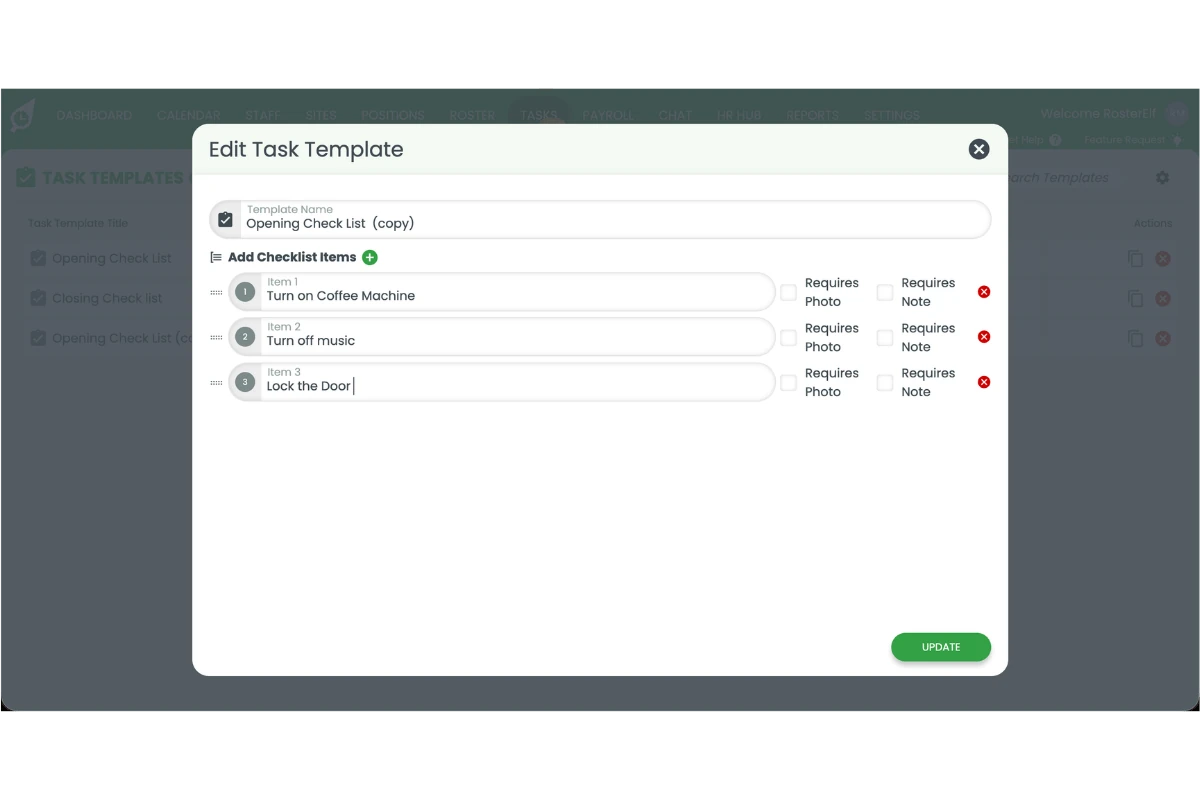
2.2.5 Toggle Requires Photo, if a photo should be required to complete this item (optional).
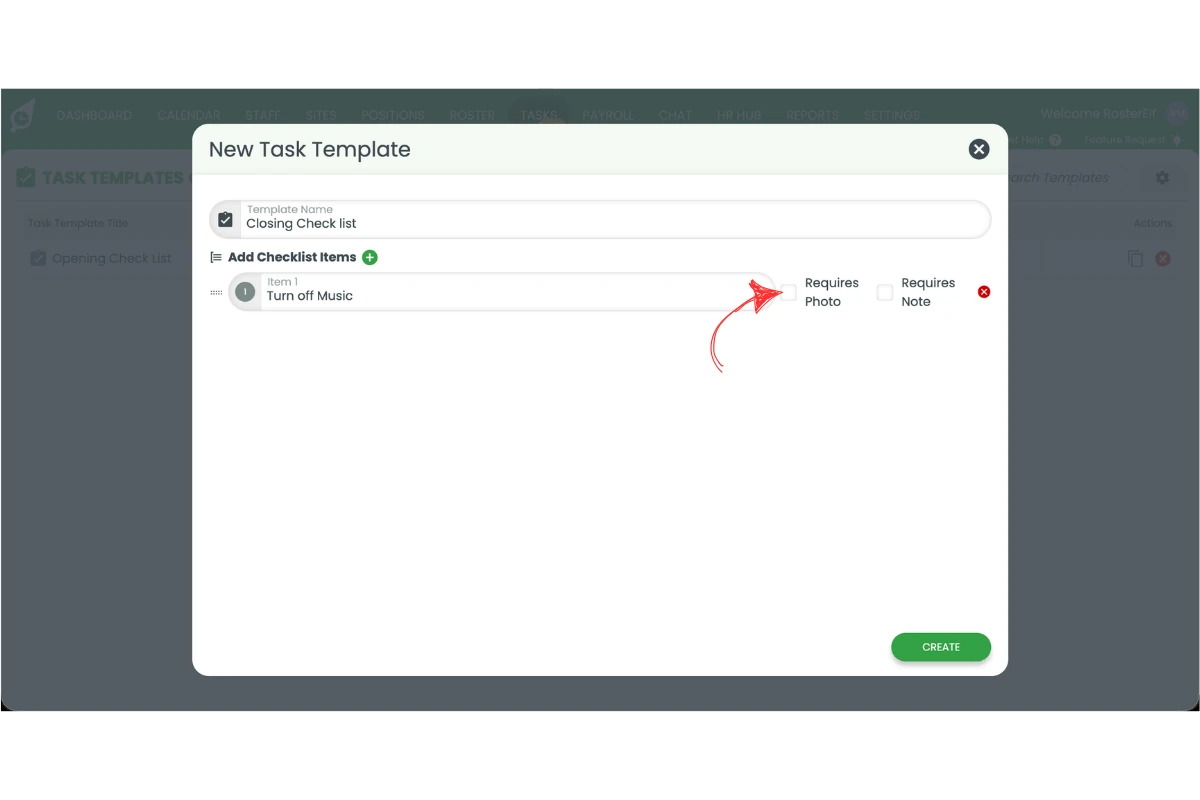
2.2.6 Toggle Requires Note, if a note should be required to complete this item (optional).
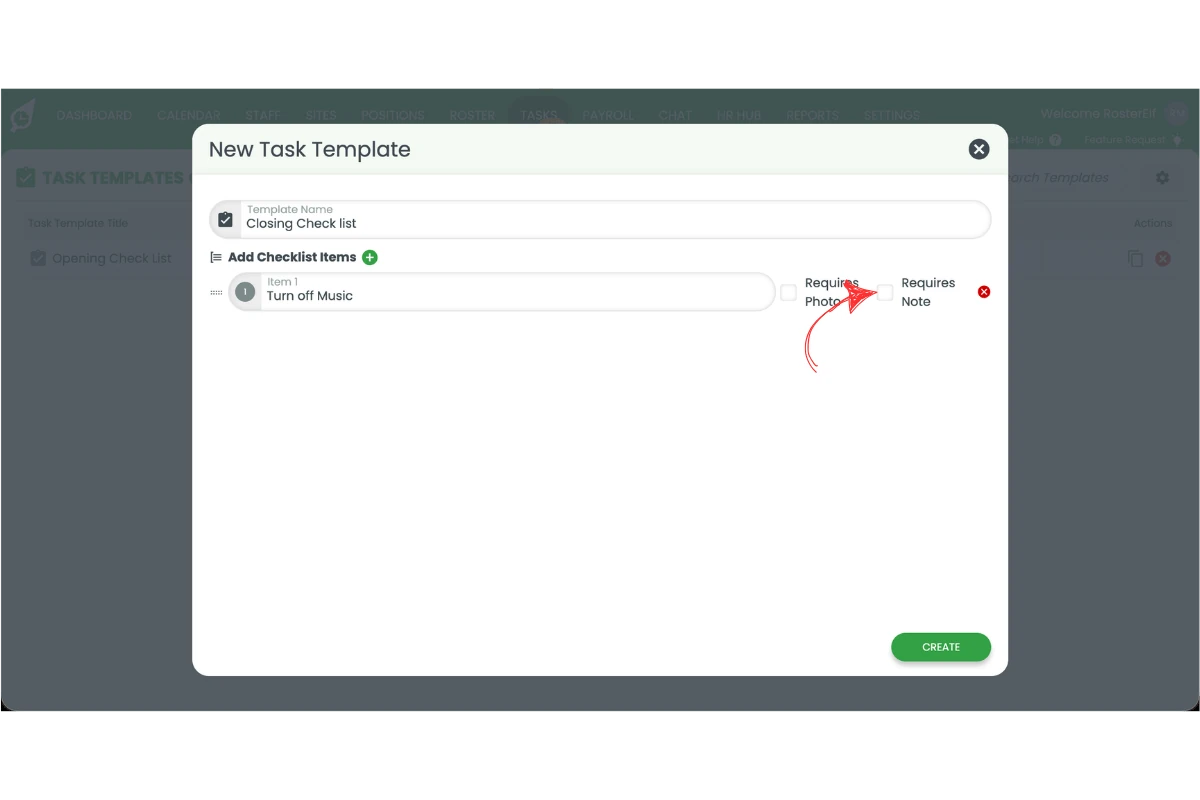
2.2.7 Click and drag an item using the handle on the left to reorder your checklist.
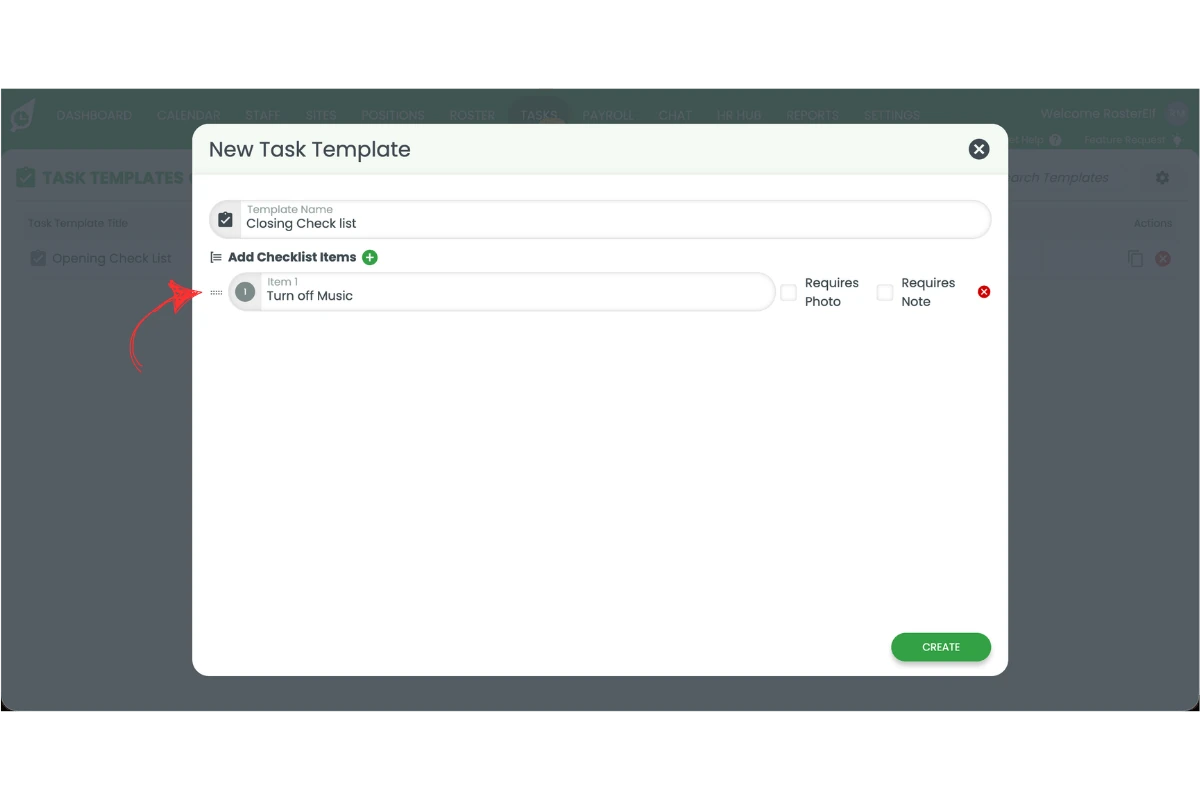
2.2.8 Click the red X to delete a checklist item.
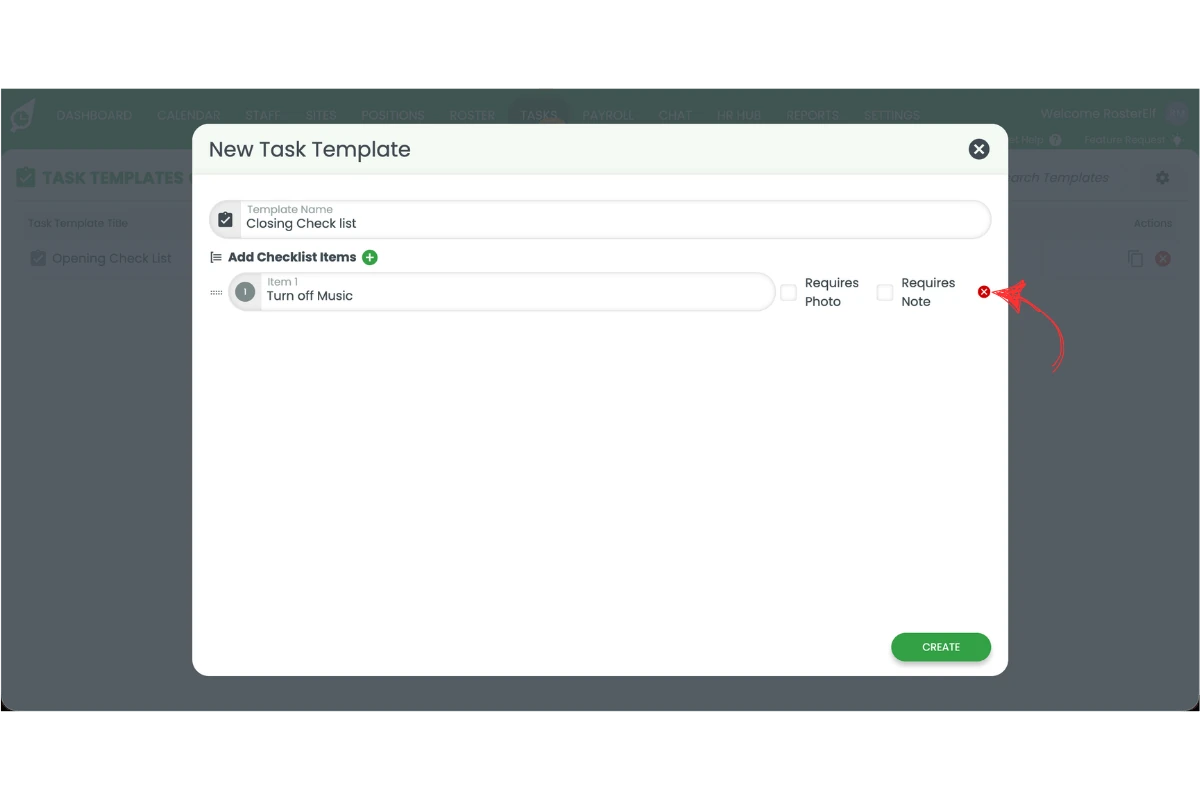
2.2.9 Click Create.
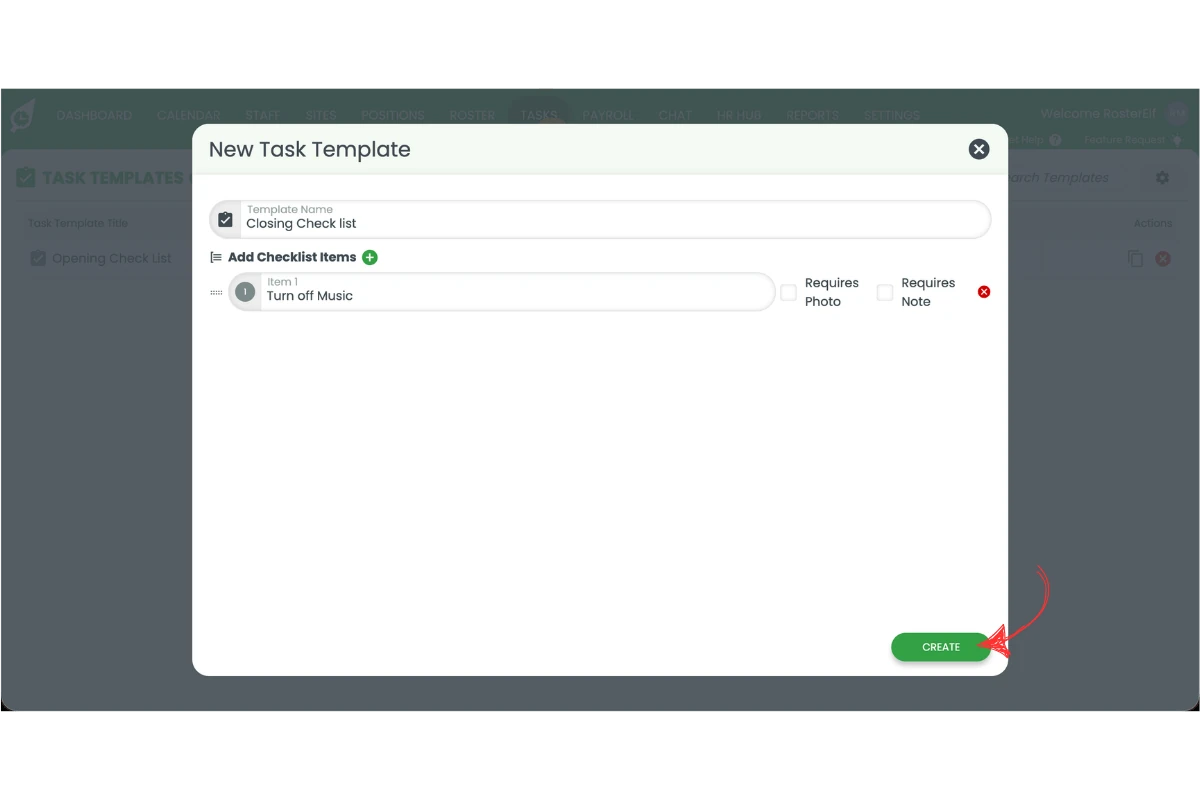
3. Duplicate a shift task template
Rather than rebuilding a similar checklist from scratch, you can duplicate an existing template and adjust it — handy when different sites need mostly the same checklist with a few local differences.
3.1 Duplicate and edit a template
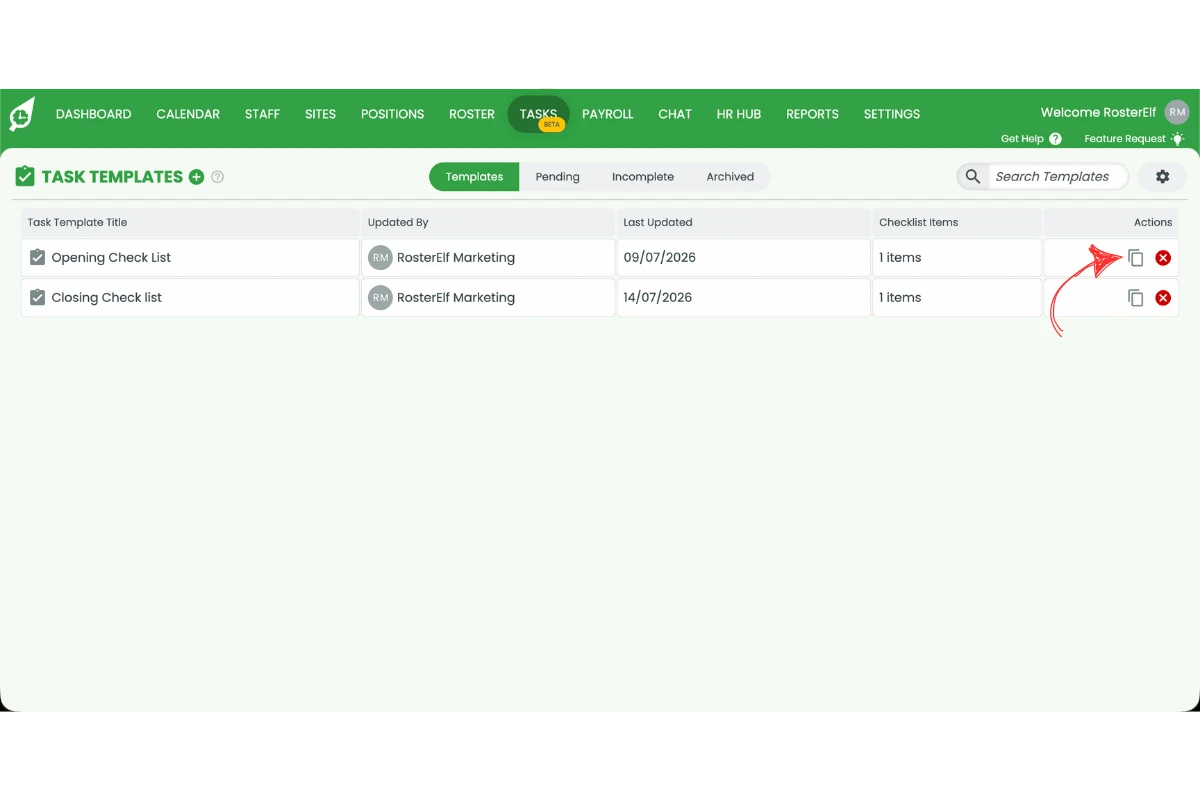
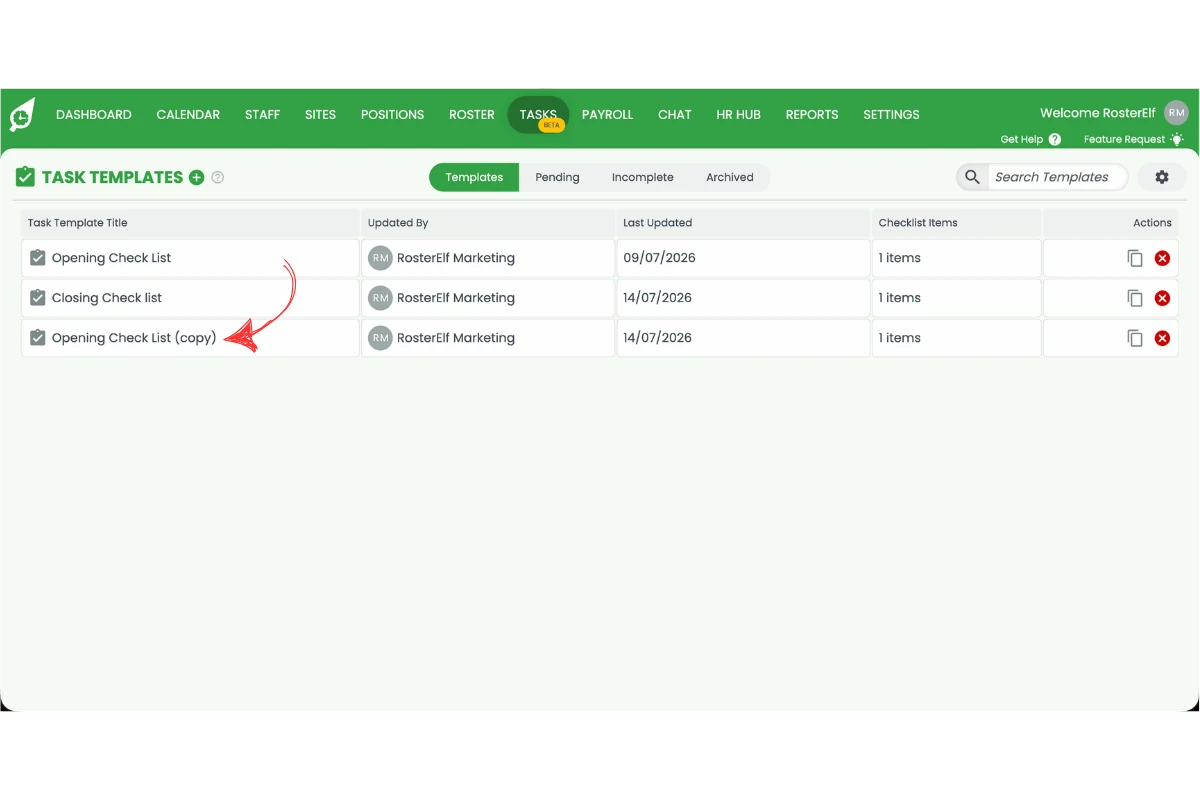
3.1.1 Click the duplicate icon on the template you want to copy.
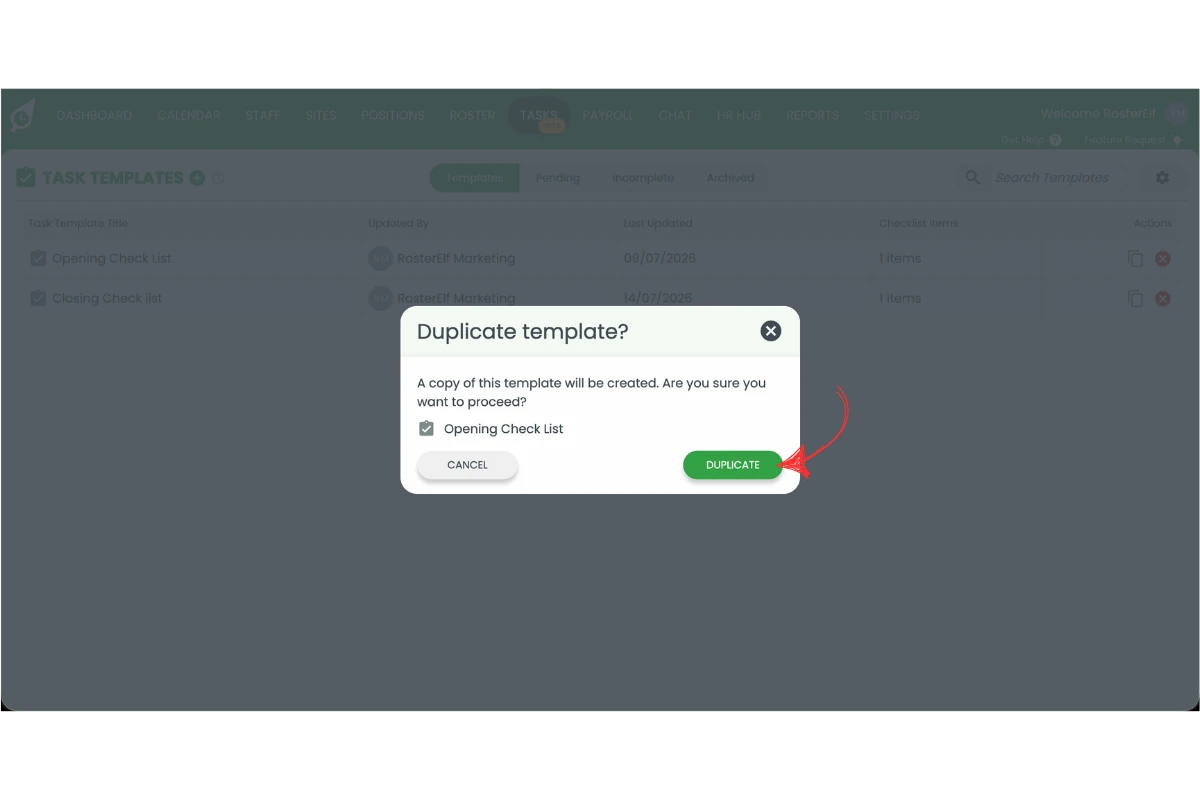
3.1.2 Click Duplicate to confirm.
3.1.3 Click on your duplicated template.
3.1.4 Make your changes.
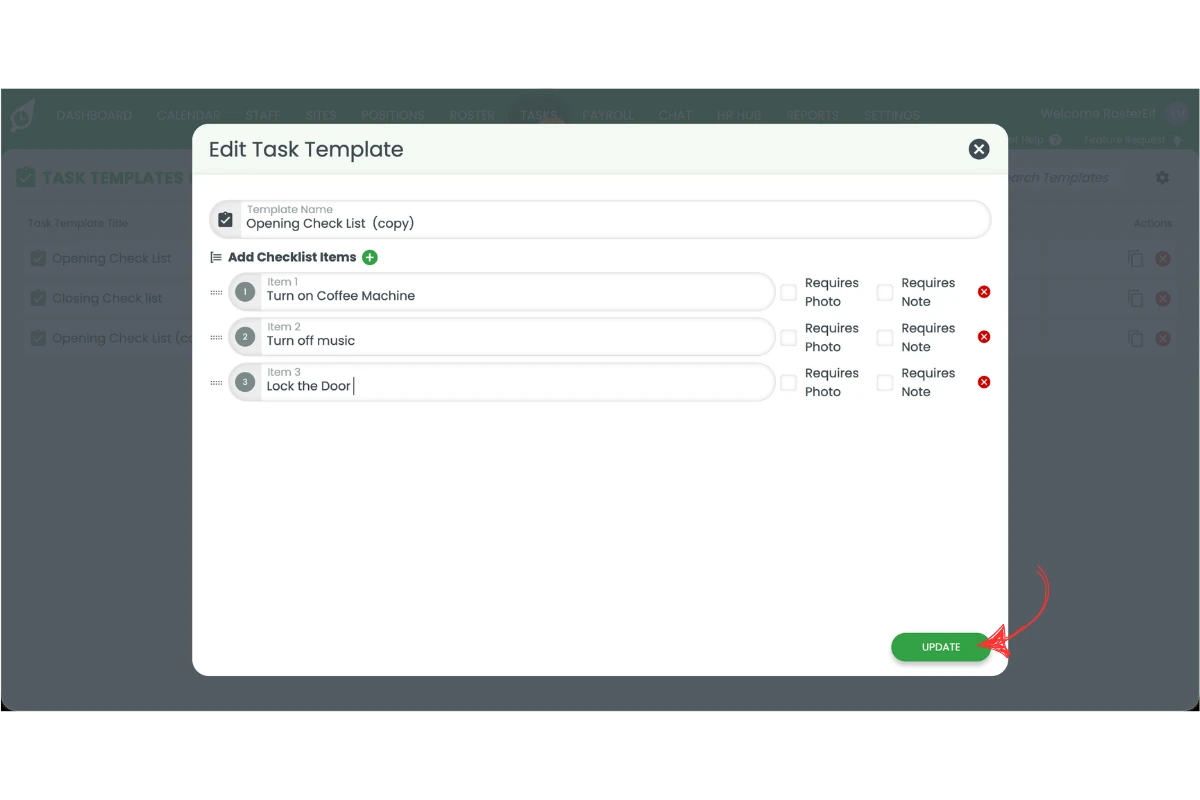
3.1.5 Click Update.
Related guides: Adding shifts on your roster, Enable and manage shift notes for staff in RosterElf, Complete a shift task on the RosterElf app, Complete shift tasks on the Timeclock app.
Frequently asked questions
1. How do I activate shift tasks in RosterElf?
To activate shift tasks, open Settings, select Tasks, toggle Enable Tasks on, and press Save. Once enabled, Tasks appears in the main menu and checklists can be attached to shifts on the roster. If you switch Tasks off again, any existing templates are saved and return when you turn it back on.
2. How do I create a shift task template?
Open Tasks from the main menu, press the plus (+) icon, and enter a template name. Press the plus icon under Add Checklist Items to add each task, then press Create to save the template.
3. Can I require a photo or note for a checklist item?
Yes. Toggle Requires Photo or Requires Note on any checklist item to make staff attach a photo or add a note before they can mark that item complete.
4. Can I reorder or delete checklist items in a template?
Yes. Click and drag an item using the handle on the left to reorder your checklist, or press the red X next to an item to delete it.
5. How do I duplicate a shift task template?
Press the duplicate icon next to a template in the Task Templates list, then press Duplicate to confirm. Open the new copy, rename it and make any changes, then press Update to save it — handy for reusing a checklist across different sites or shifts.
6. Why can't I add checklist items and everything shows as Pending?
This is usually a display issue rather than a setting problem. Tasks can render incorrectly in a narrow or zoomed-in window, which stops checklist items from being added and leaves templates showing as Pending. Maximise your browser window to full screen. If they are still hidden, zoom out (Ctrl and - on Windows, Cmd and - on Mac) until they appear.
7. Why don't I see the plus (+) icon to create a task template?
This is the same display issue as above. If the plus (+) icon isn’t showing on the Task Templates screen, maximise your browser window to full screen and, if it is still hidden, zoom out (Ctrl and - on Windows, Cmd and - on Mac), then reopen Tasks. If it’s still missing after that, contact support so we can take a closer look at your account.
8. Can I attach a shift task to a shift that's already marked as open?
Not straight away. A task can’t be added to a shift while it’s marked as open — you need to assign a staff member to the shift first, then you’ll be able to attach a checklist template.
9. If a shift with a task assigned is marked as open, can I still edit the task?
No. You can still assign a staff member to fill the shift, but the task attached to it can’t be edited while the shift remains marked as open.