This article provides step-by-step guidance on how to add shifts to your roster, including explanations for each setting available in the shift modal. Following this guide, you’ll learn how to effectively add, configure, and customise shifts, ensuring your roster meets all scheduling needs. This includes setting up sites, positions, times, and more. For a better understanding of roster views, filters, and key terms, consider reading An Overview of the Roster. If you’re looking to edit existing shifts, check out our Editing a Shift guide.
1. Getting started with adding shifts
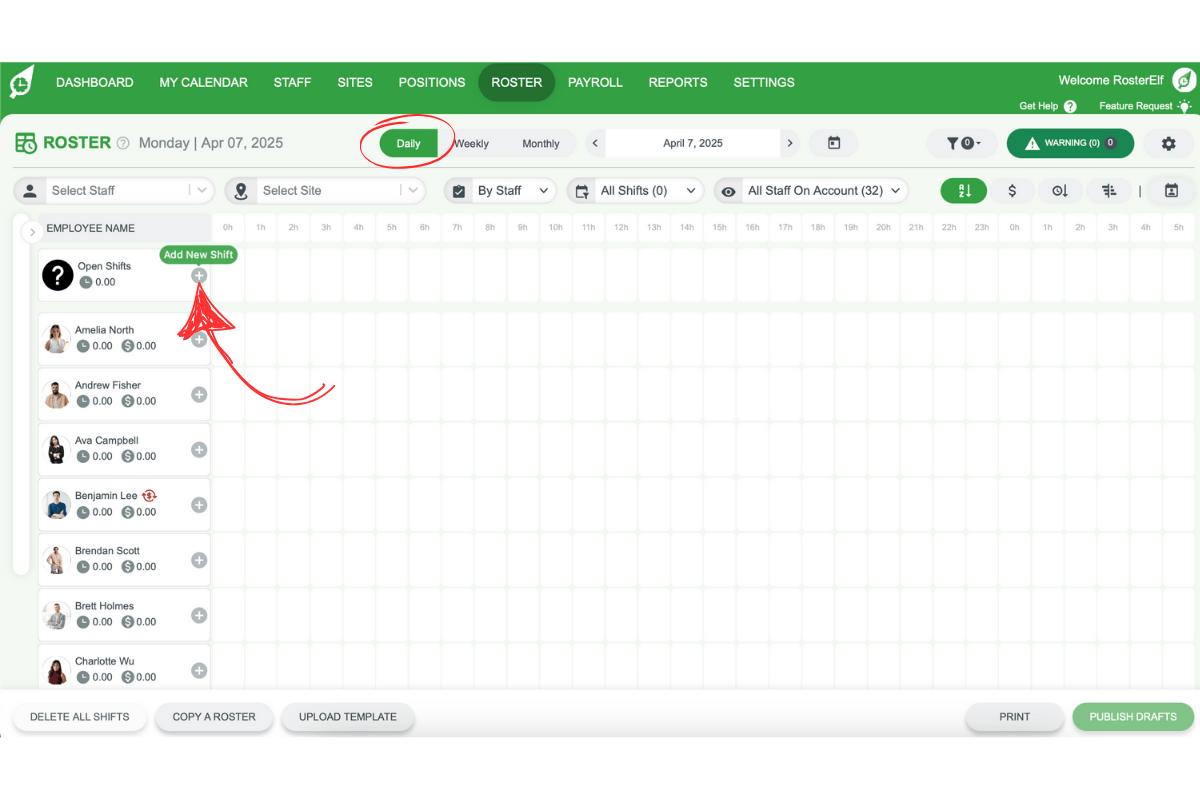
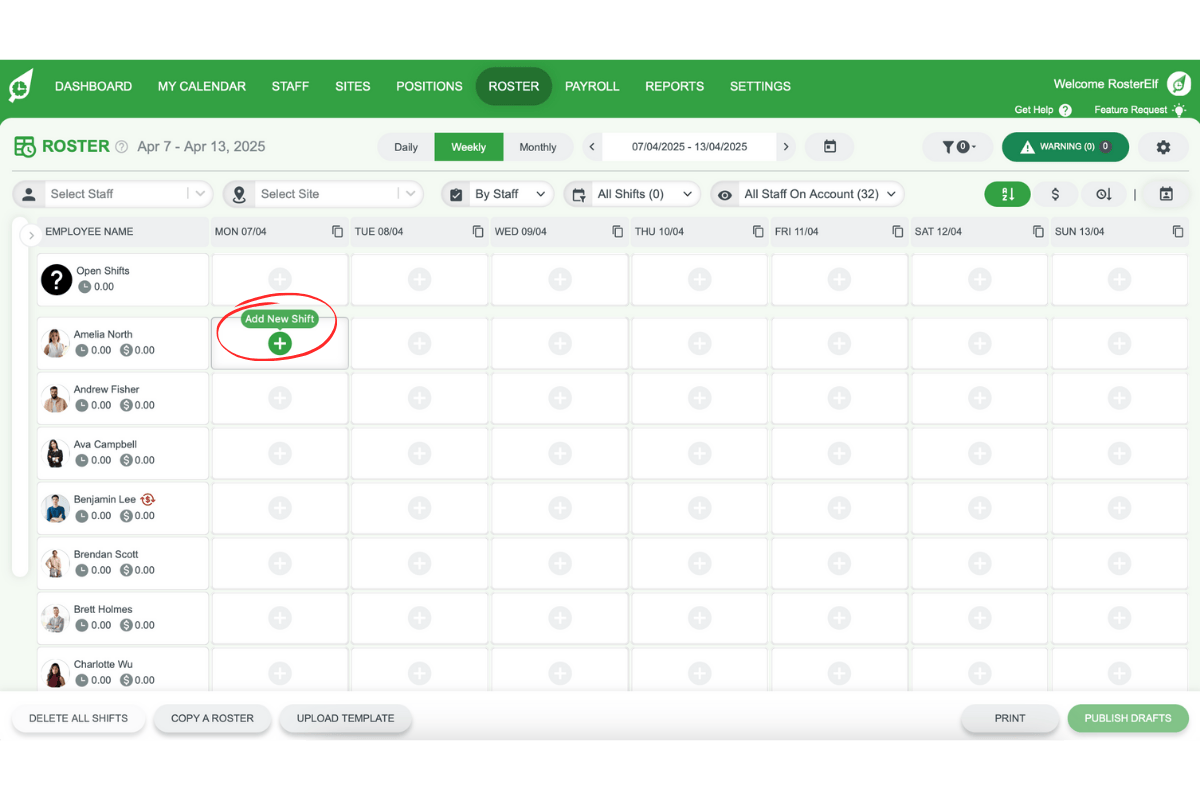
Adding shifts to your roster begins with selecting the correct date and location for each shift. Based on your view in the roster, the row you select can represent either a staff member, position, or site.
1.1 shift placement and view options
1.1.1 In the daily view, click the plus (+) button to the left of the roster for each date and row.
1.1.2 In weekly or monthly views, click the plus (+) button within the cell for each shift.
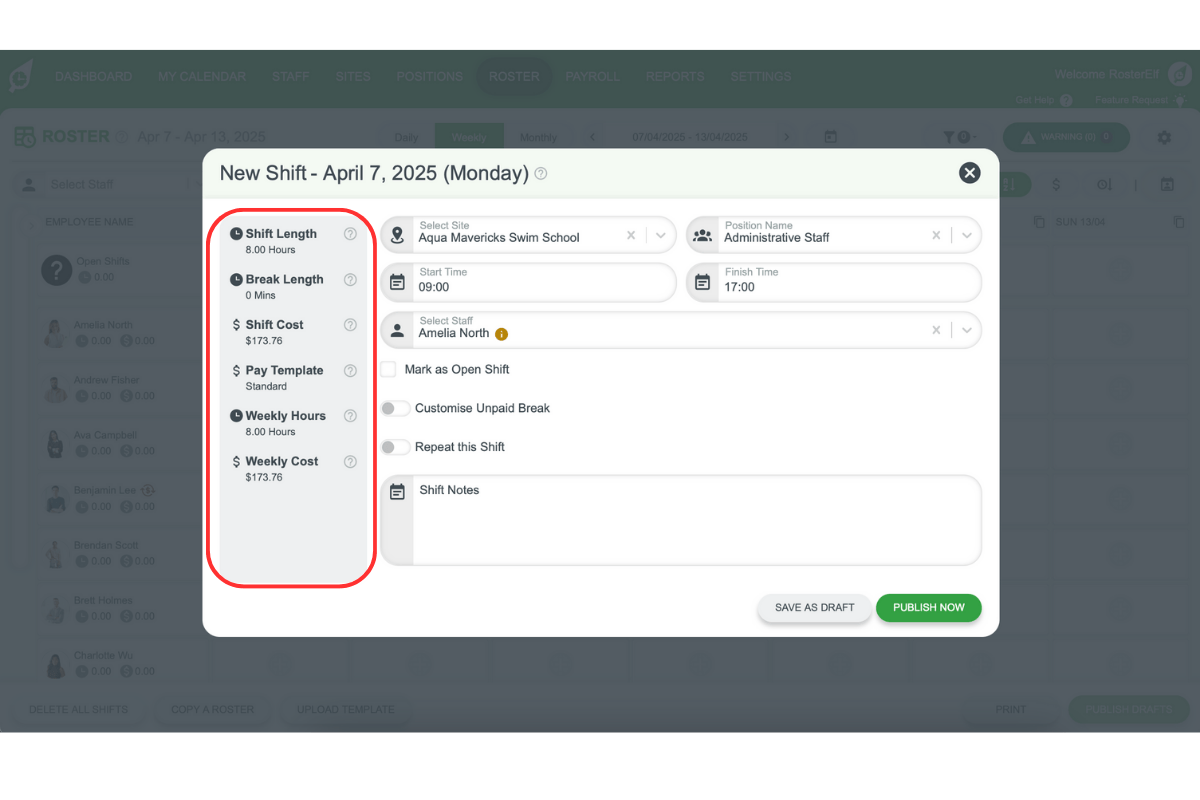
2. Configuring shift settings in the shift modal
The shift modal appears once you select the plus button. Here, you can define various details for your shift, including shift time, location, and assigned staff.
2.1 header and basic shift information
2.1.1 The header shows the shift’s date and day.
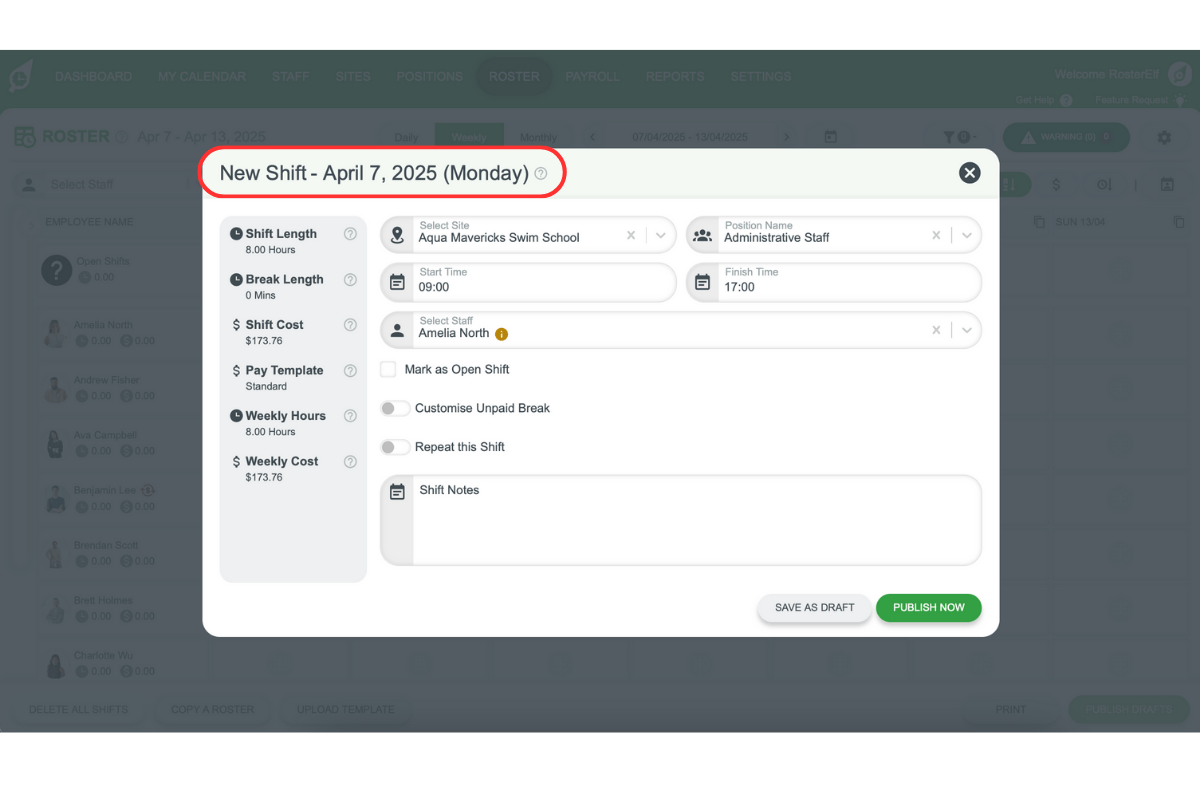
2.1.2 Key metrics like shift length, break length and shift cost appear in the left column and update as details change.
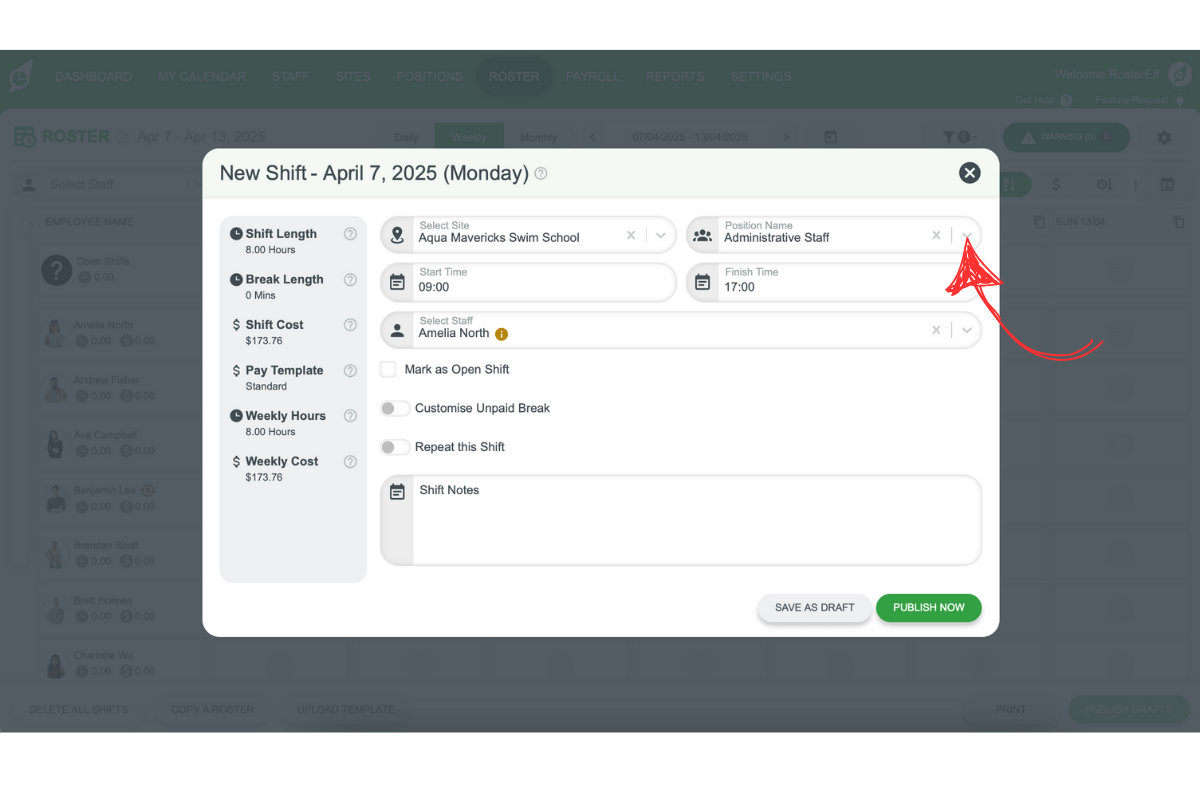
2.2 selecting site and position
2.2.1 In Select Site, choose the site or type and press tab to continue.
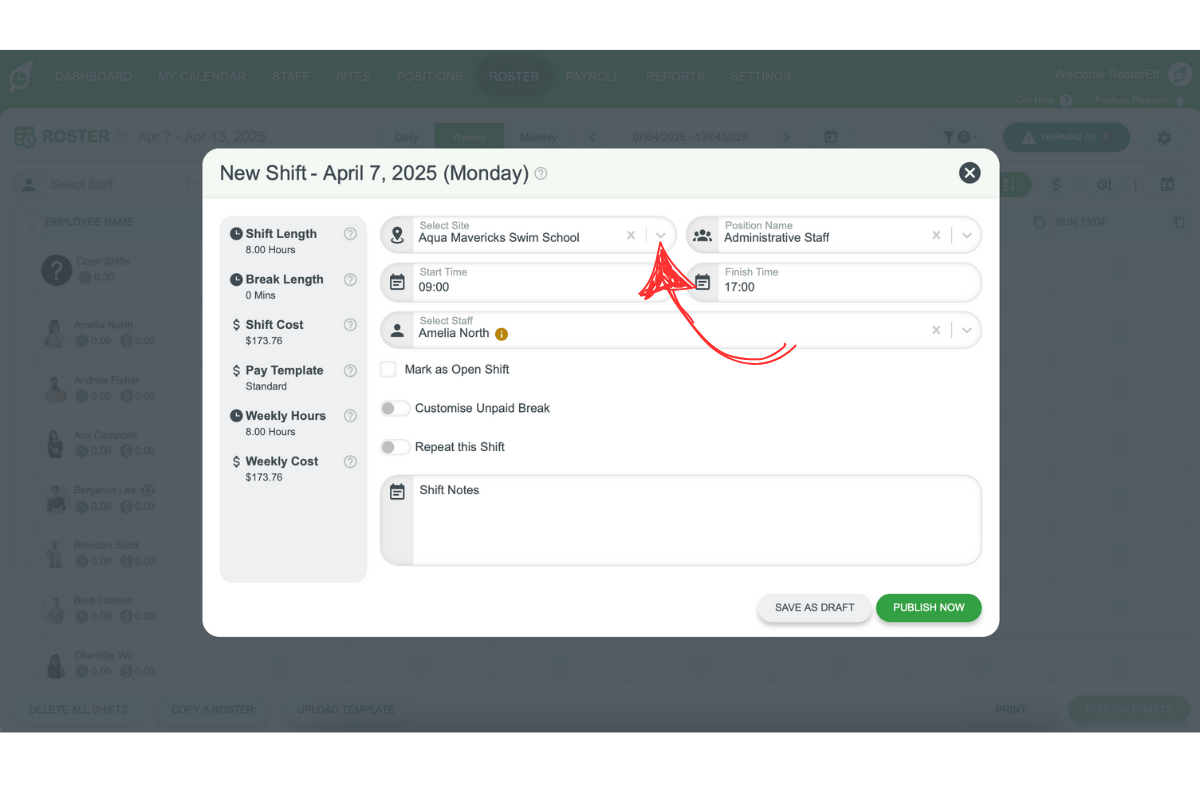
2.2.2 In Select Position, choose the position or type and press tab to move on.
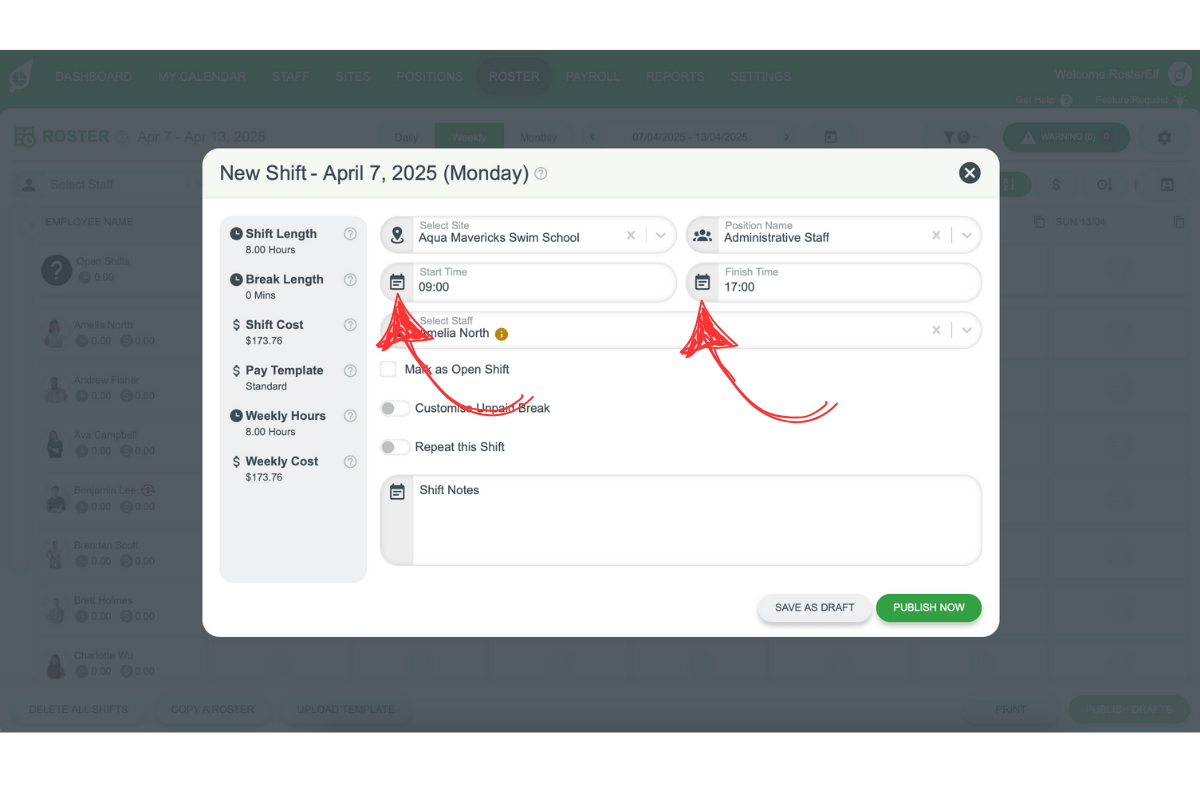
2.3 setting start and finish times
2.3.1 Enter shift times in 24-hour format, from 00:00 to 23:59, without the : symbol.
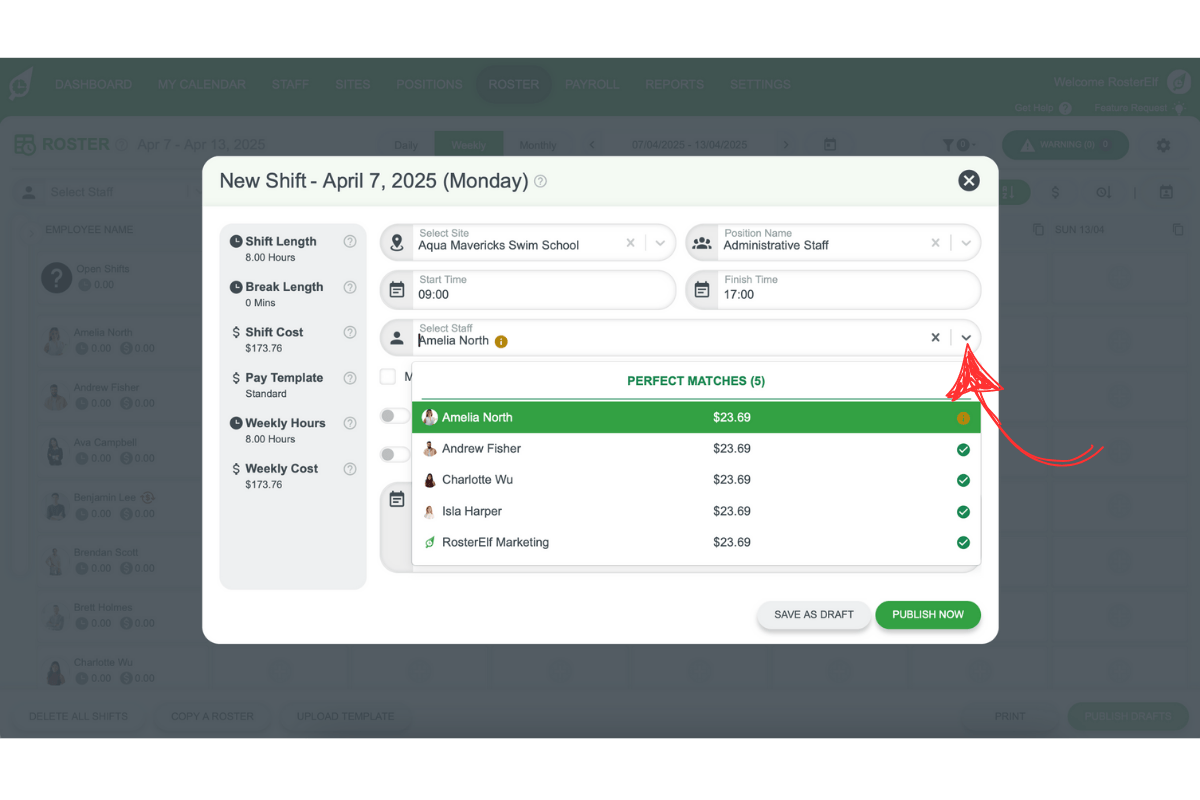
2.4 assigning staff to the shift
2.4.1 Select staff from the dropdown. For optimal matching, select site and position first.
3. Additional shift options
The shift modal includes various options to tailor shifts to specific requirements.
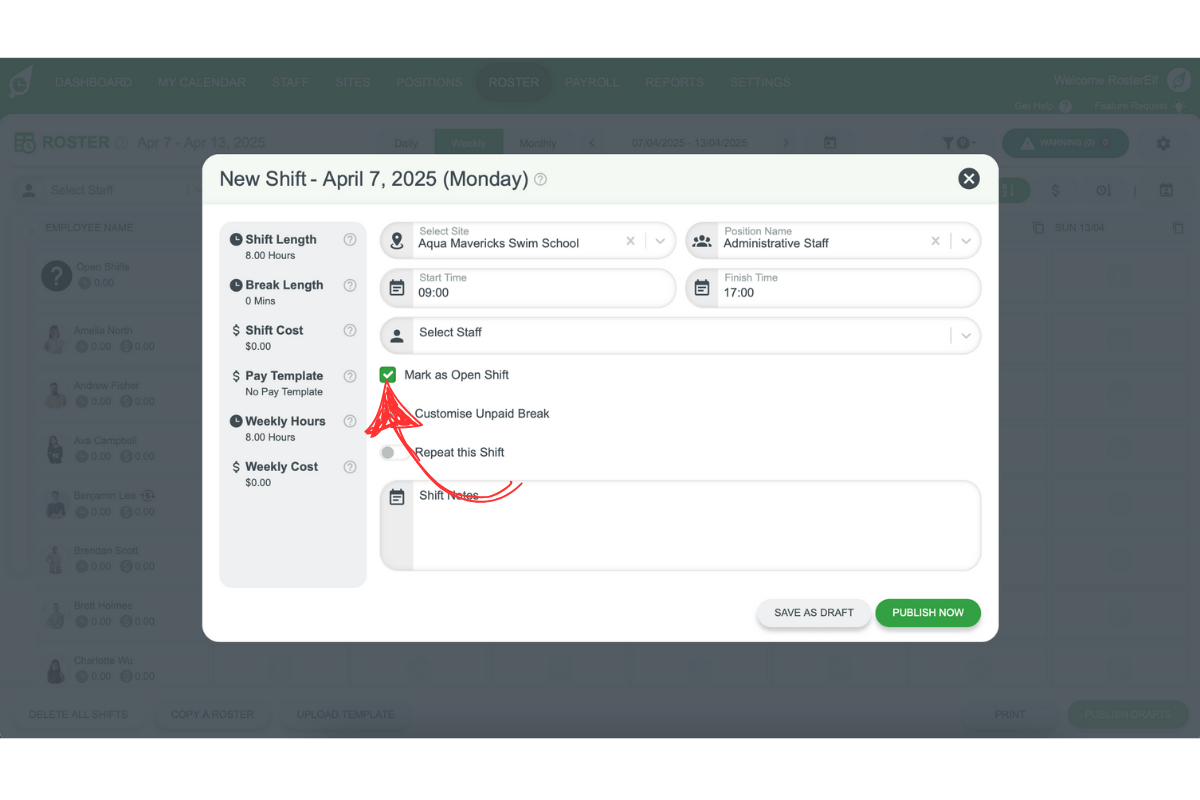
3.1 open shift checkbox
3.1.1 Ticking Mark as Open Shift clears the assigned staff field, sending open shift invitations to all eligible staff. Learn more about Open Shifts.
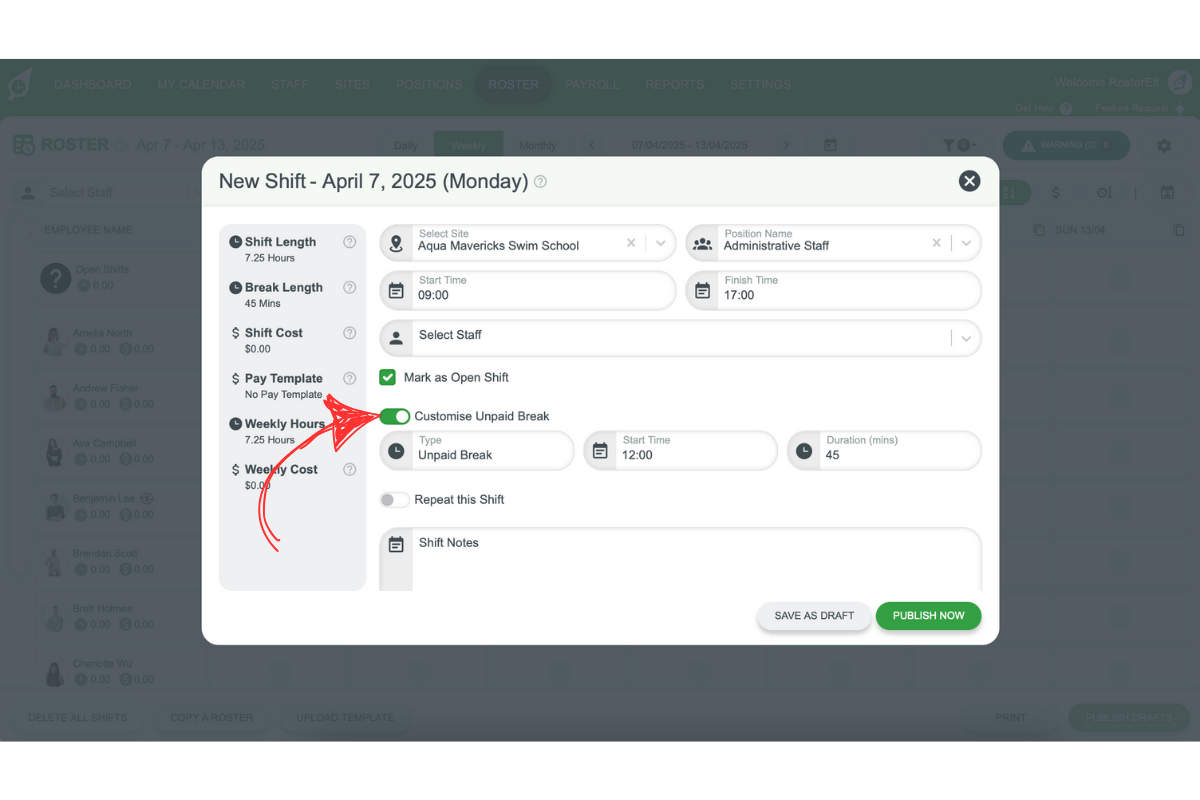
3.2 custom unpaid break toggle
3.2.1 Toggle Custom Unpaid Break to define specific breaks, with start time, duration, and optional labels. To compare standard and custom breaks, see our breaks guide.
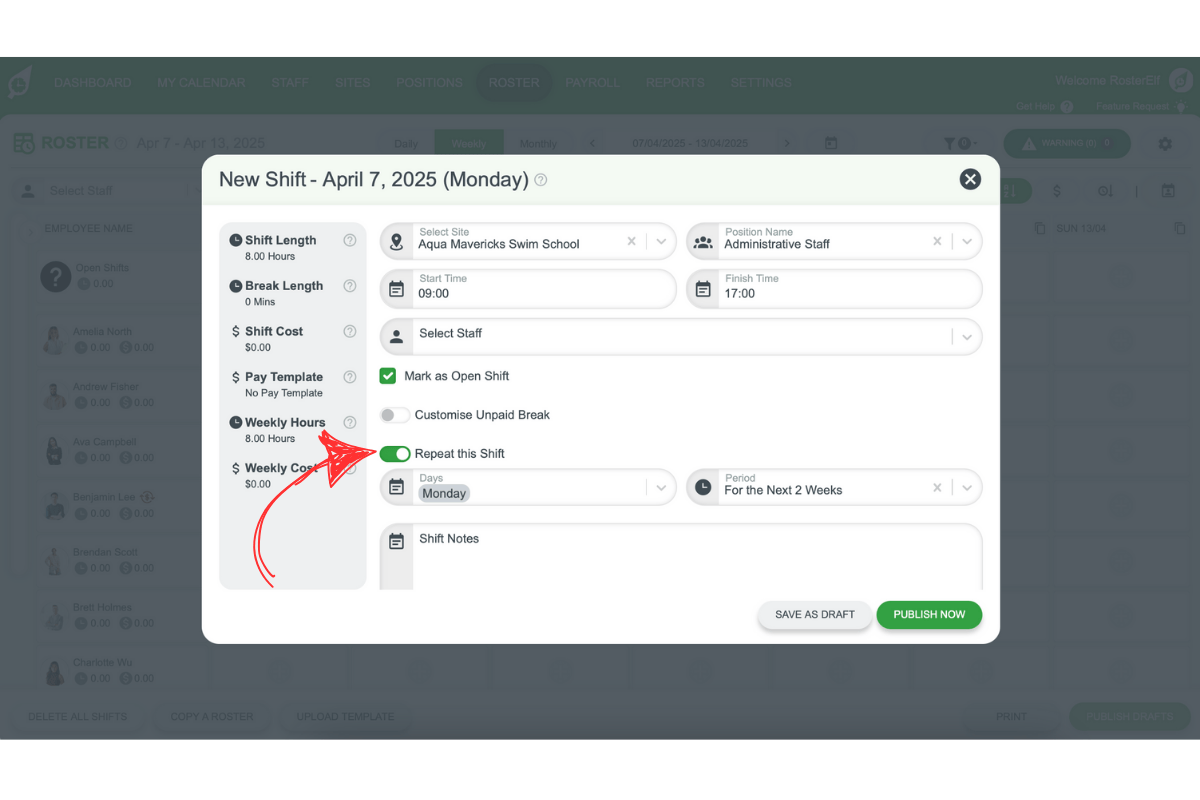
3.3 repeat shift option
3.3.1 Use Repeat this Shift to assign recurring shifts over selected days and weeks, ideal for repetitive scheduling needs.
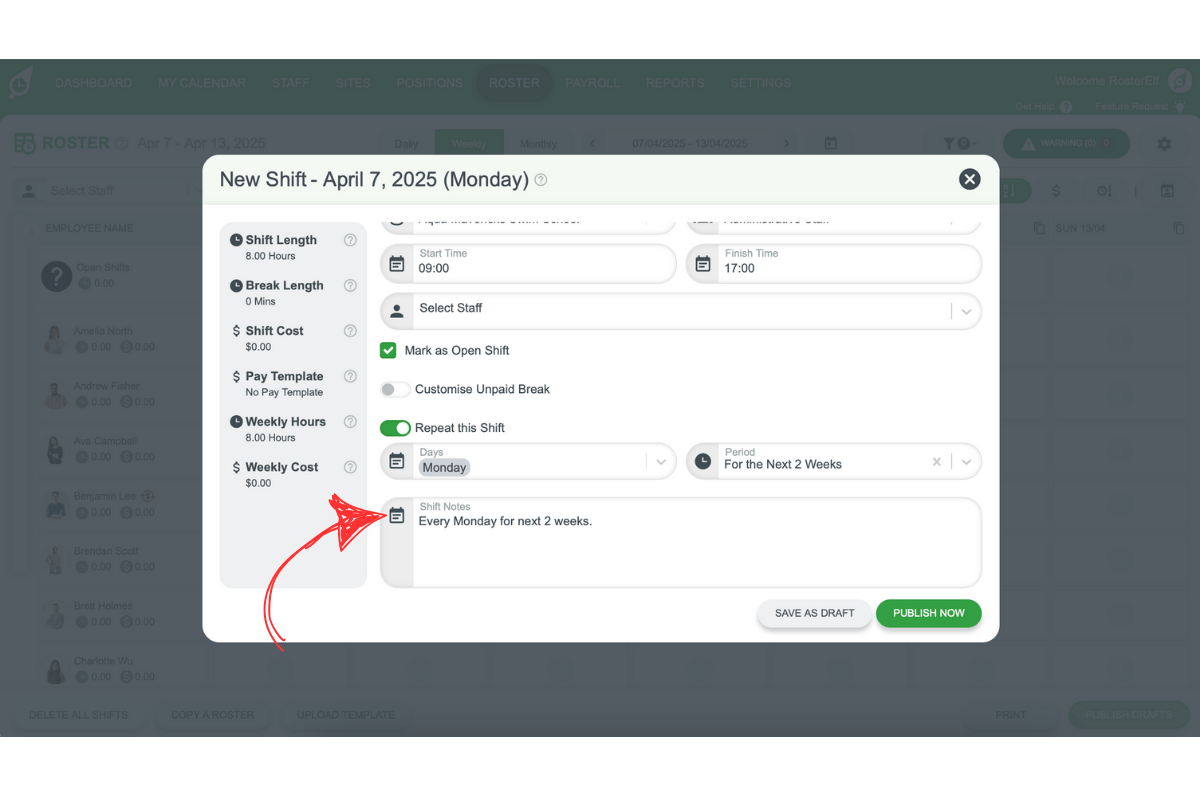
3.4 shift notes
3.4.1 Use Shift Notes to provide essential details, such as client information or event preparations, to the assigned staff. If staff need to complete a checklist during the shift rather than just read a note, see our guide on getting started with shift tasks.
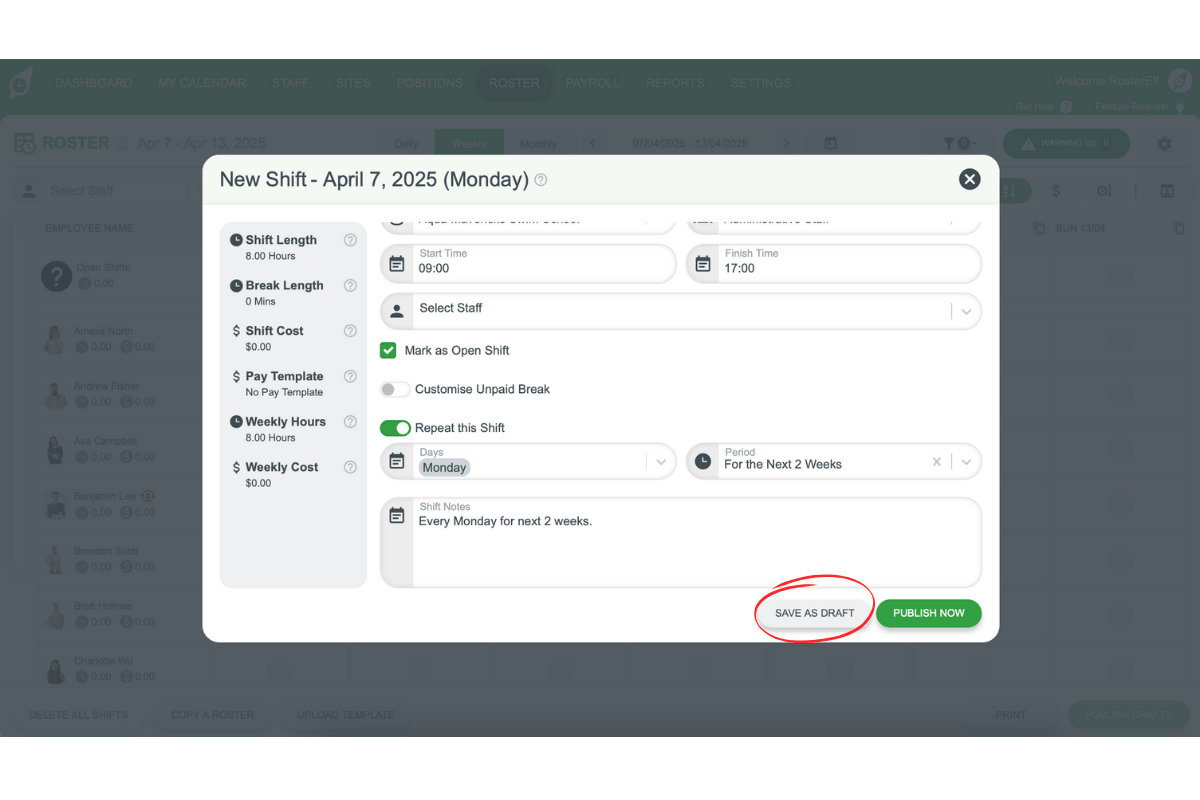
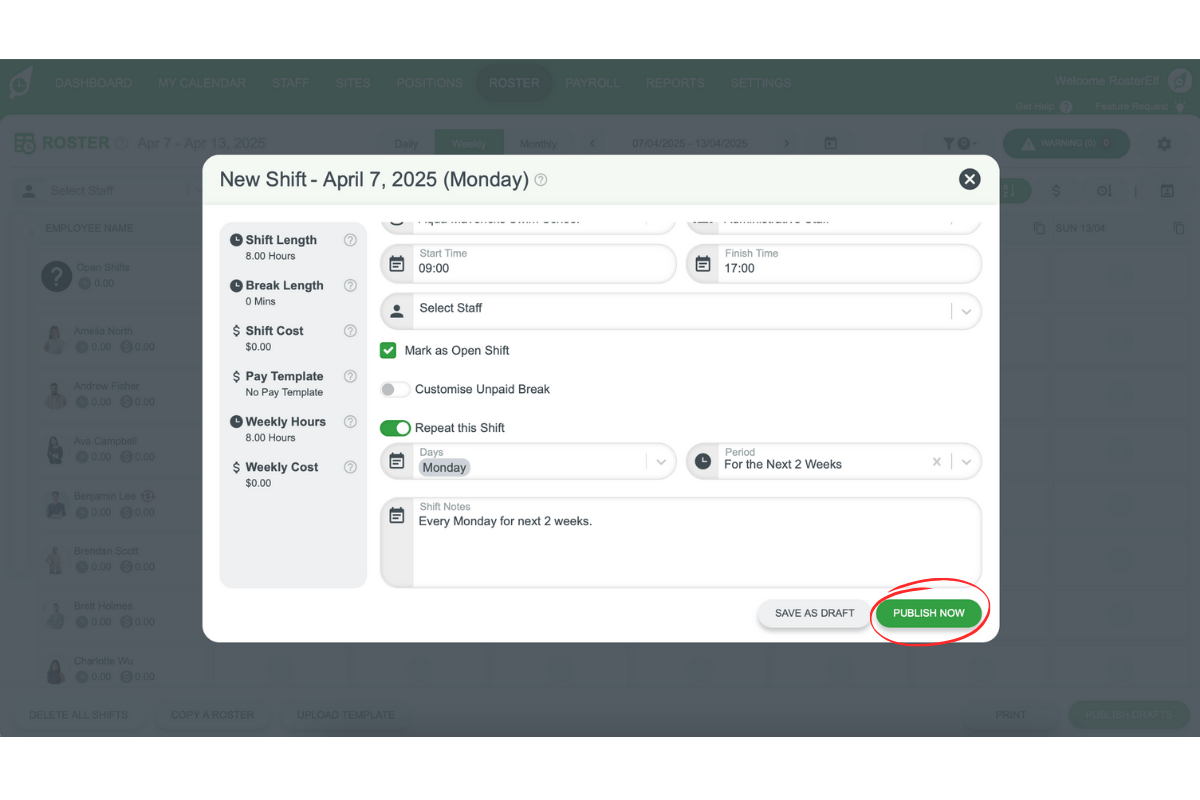
3.5 saving and publishing shifts
3.5.1 Save as Draft for shifts you’re not ready to publish.
3.5.2 Use Publish Shift for shifts needing immediate notification to staff.
Frequently asked questions
1. How do I add a shift to the roster?
To add a shift, select the desired date and location on your roster. Click the plus (+) button next to the row for the date and shift you want to add. You can add shifts in daily, weekly, or monthly views, depending on your preference.
2. What settings can I configure in the shift modal?
The shift modal allows you to set details like shift time, location, and assigned staff. You can select a site, position, start and finish times, and even add custom notes for the shift.
3. Can I assign shifts without assigning a specific staff member?
Yes, by marking a shift as Open Shift, you can leave it unassigned. This sends an invitation to all eligible staff, allowing them to accept the shift.
4. How do I set custom unpaid breaks during a shift?
To add a custom unpaid break, use the Custom Unpaid Break toggle in the shift modal. You can define the break’s start time, duration, and add optional labels for clarity.
5. What does the 'Repeat this Shift' option do?
The Repeat this Shift feature allows you to set up recurring shifts over multiple days or weeks, which is ideal for scheduling consistent shift patterns.
6. Can I edit the date of a shift once it's published?
No, once the shift has been published you can’t update the date. You will need to copy the shift and remove the original one, or click and drag the shift to a new day.