This article explains how to use RosterElf’s budgeting tools to plan your roster by hours, labour cost, or labour percentage. RosterElf’s budgeting system helps you maximise efficiency and control over staffing costs, offering insights to aid in planning based on predicted revenue and costs. Whether you manage a large team across multiple sites or need to track labour costs against revenue targets, these budgeting tools provide clarity and flexibility. In this guide, you’ll learn to utilise features like revenue forecasts, rostered hours, and labour costs to keep your roster aligned with your business goals.
1. Overview of RosterElf budgeting tools
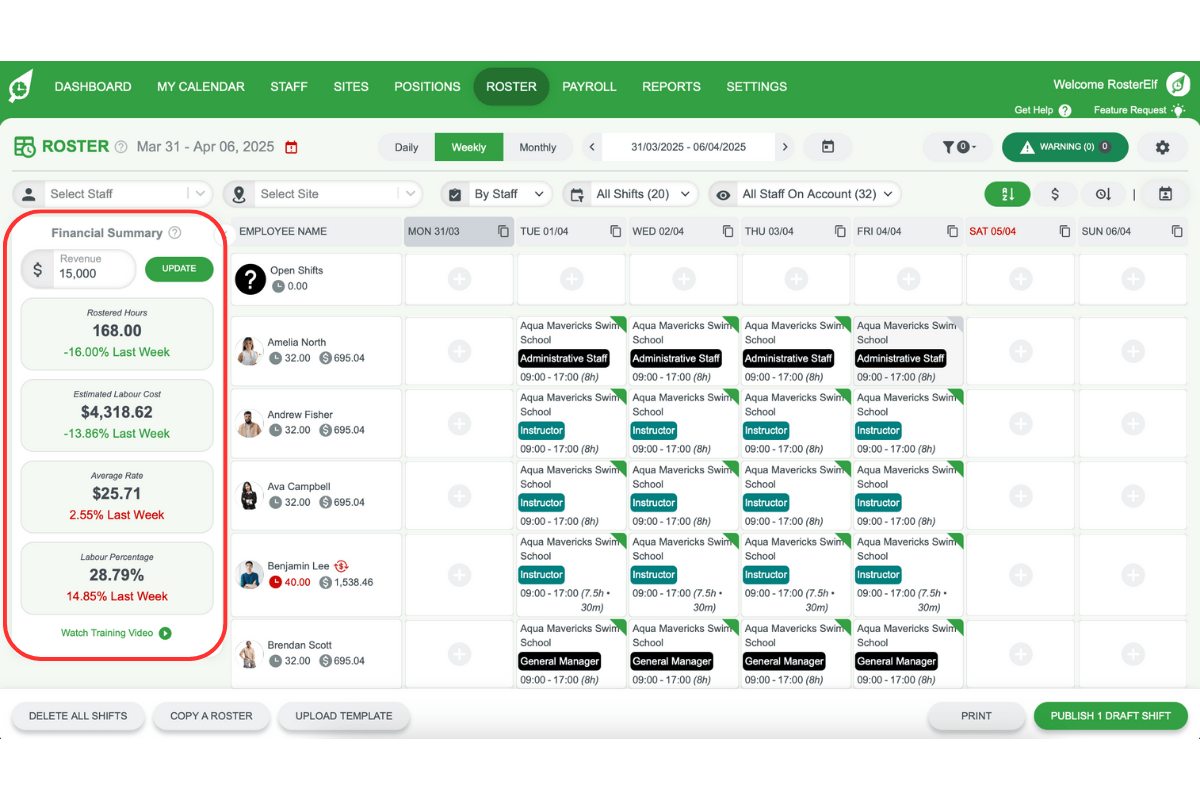
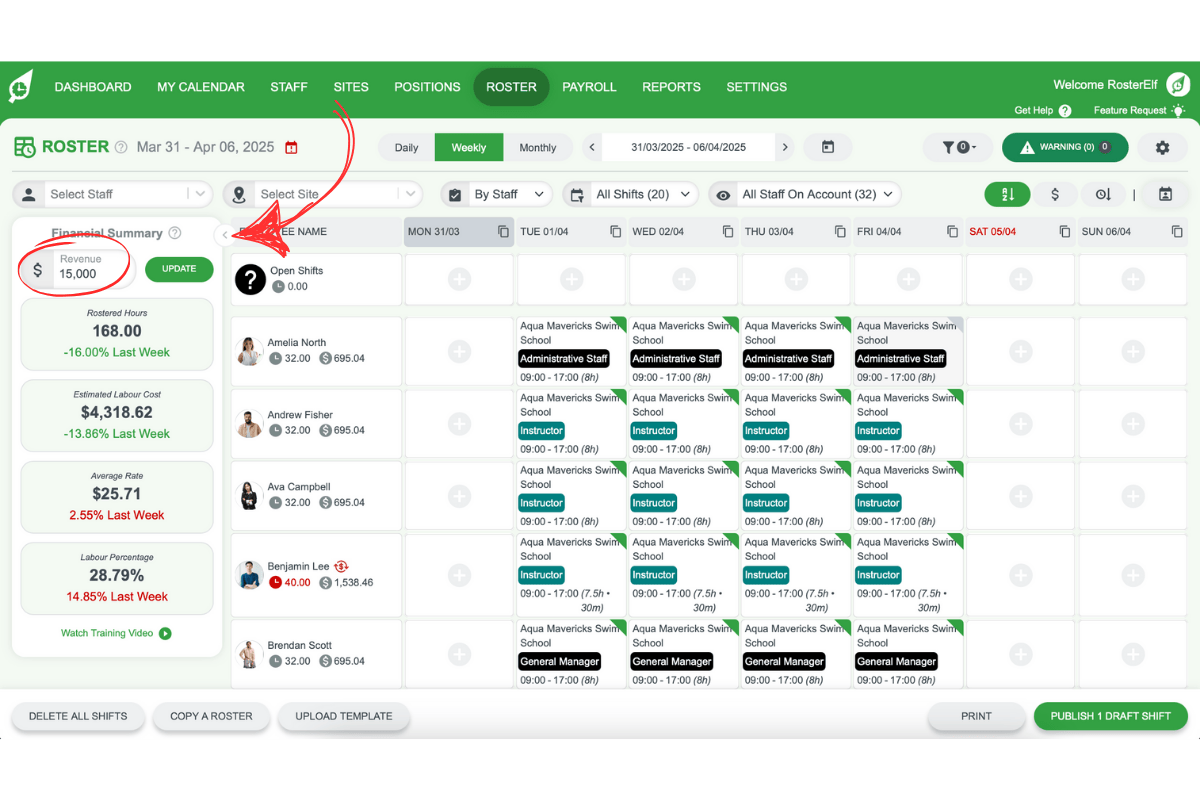
RosterElf’s budgeting tools provide a comprehensive view of projected labour costs and revenue. This section outlines key metrics and how they help in optimising staffing expenses. From revenue forecasts to shift-specific costs, each tool allows you to make data-driven decisions to achieve your budgeting goals.
1.1 revenue forecast
1.1.1 The Revenue Forecast feature allows you to add your estimated revenue for specific periods (daily, weekly, monthly).
1.1.2 Forecasts adjust automatically based on the selected roster view (e.g., switching from monthly to weekly).
1.1.3 Be sure to set forecasts for each period without gaps to maintain consistent data across roster views.
1.1.4 Revenue forecasts remain fixed per period and do not adjust with roster filters.
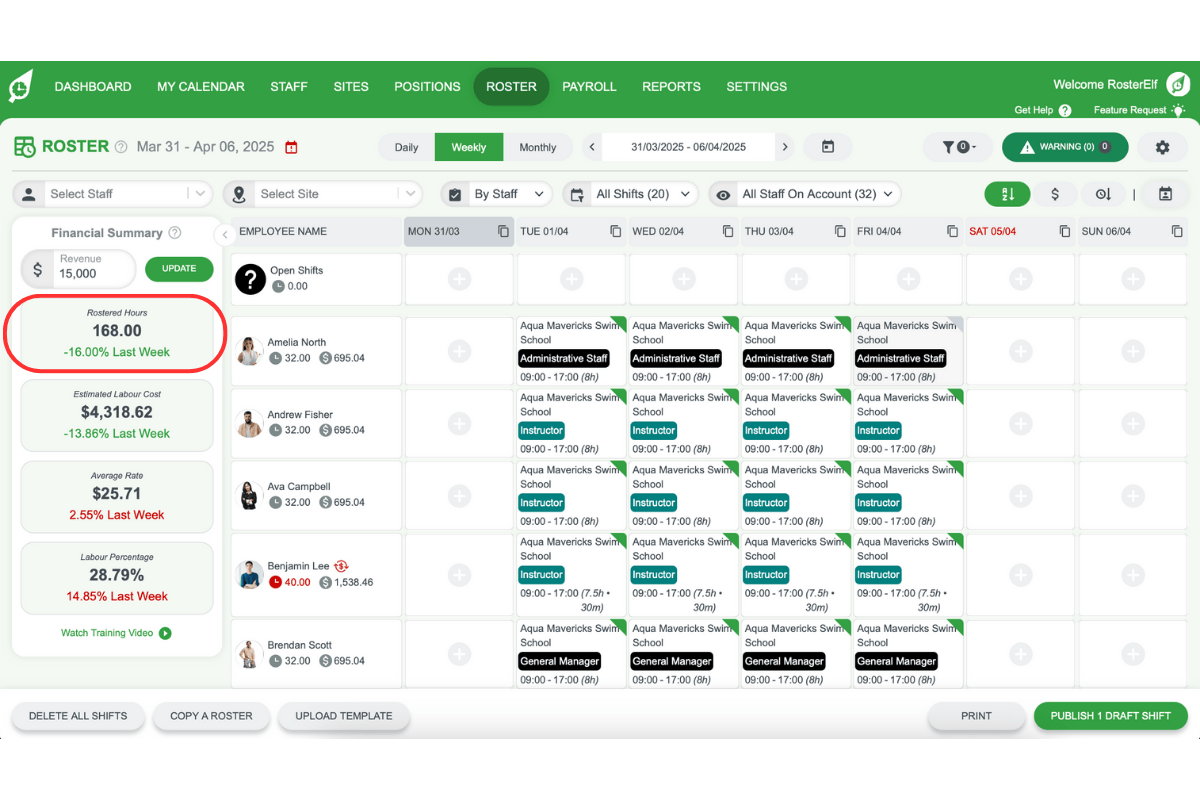
1.2 rostered hours
1.2.1 Rostered Hours represent the total visible hours in your roster.
1.2.2 This metric updates with any changes to shifts, period views, and applied filters.
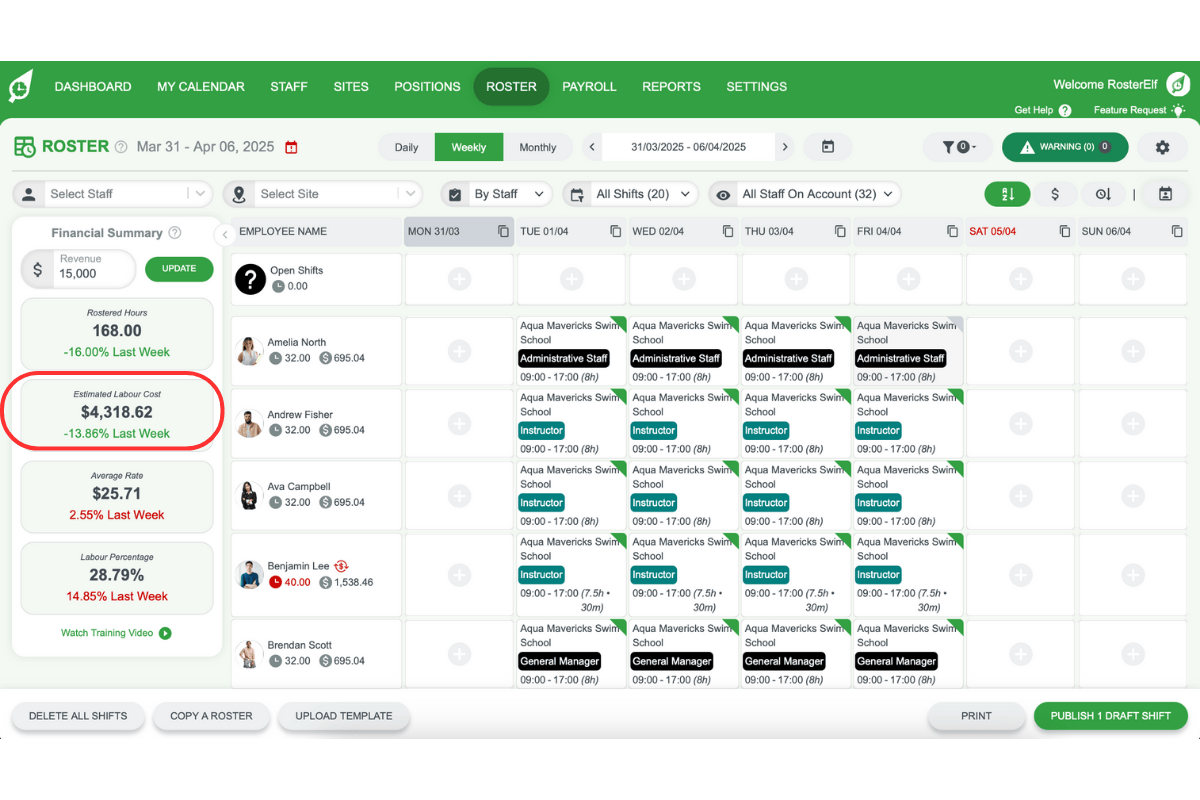
1.3 estimated labour cost
1.3.1 Estimated Labour Cost calculates the total cost for shifts currently visible in the roster.
1.3.2 Costs reflect pay rules and overtime settings based on each staff member’s assigned pay template.
1.3.3 Changes to shifts, period views, and filters automatically update this cost.
1.4 average rate
1.4.1 The Average Rate is calculated by dividing the Estimated Labour Cost by Rostered Hours.
1.4.2 This rate adjusts based on any changes made to shifts, period views, or applied filters.
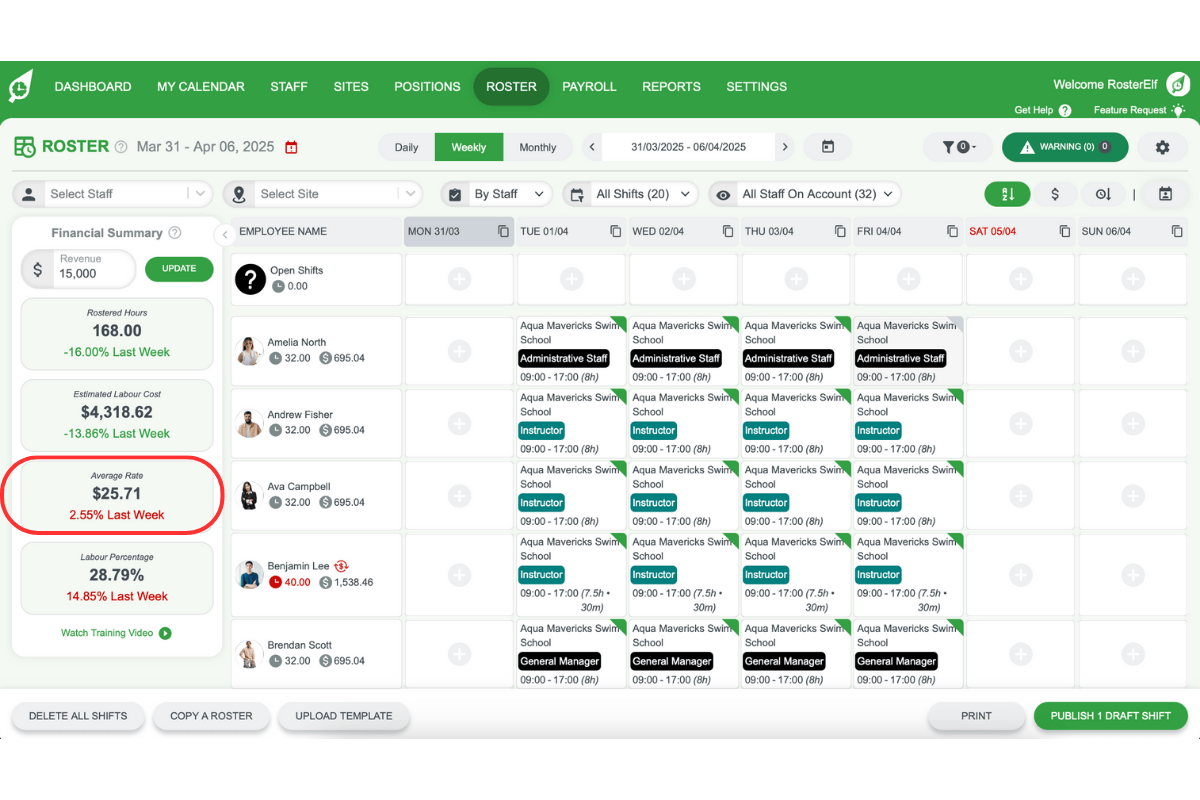
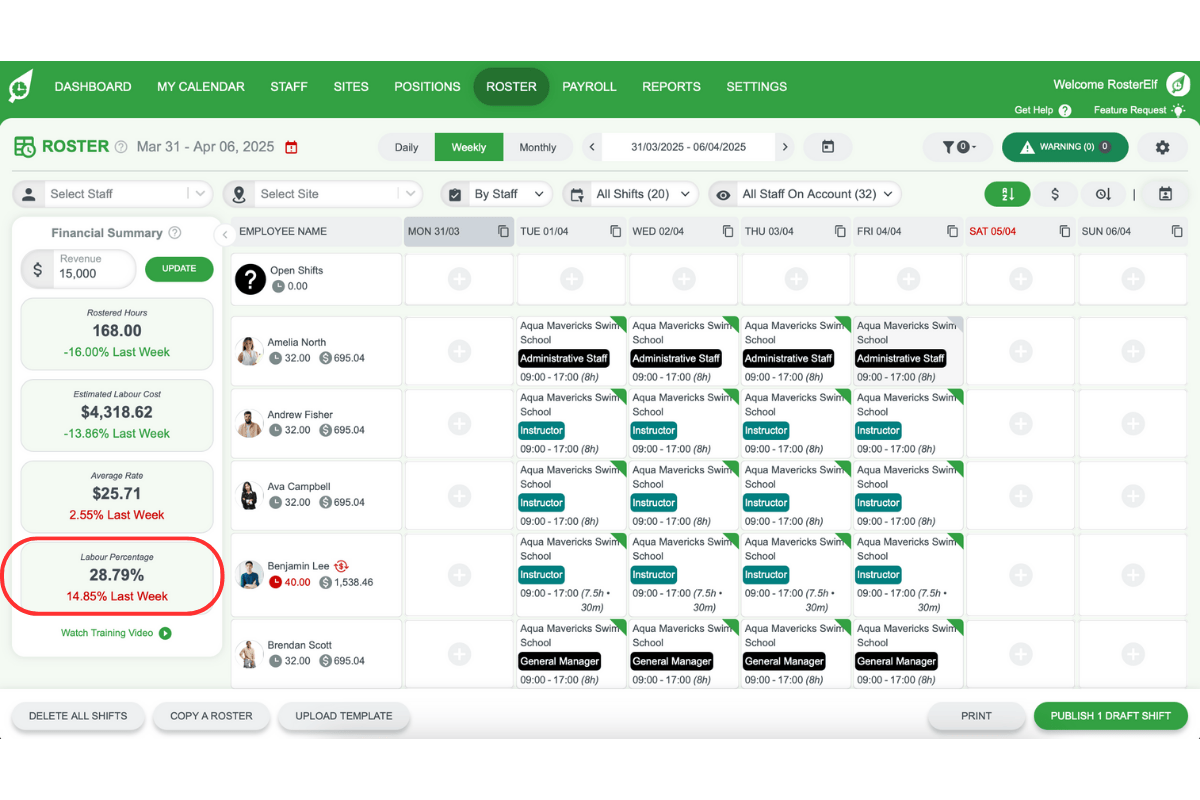
1.5 labour percentage
1.5.1 Labour Percentage shows only if a Revenue Forecast is set, representing the ratio of labour cost to forecasted revenue.
1.5.2 It updates with any changes to the visible roster shifts, period views, or filters.
2. Understanding roster metrics
Roster Metrics provide a detailed breakdown of hours and costs per row in your roster. This section explains how to view hours and labour costs by staff, site, or position, giving you granular insight into labour allocation and expenses across various team segments.
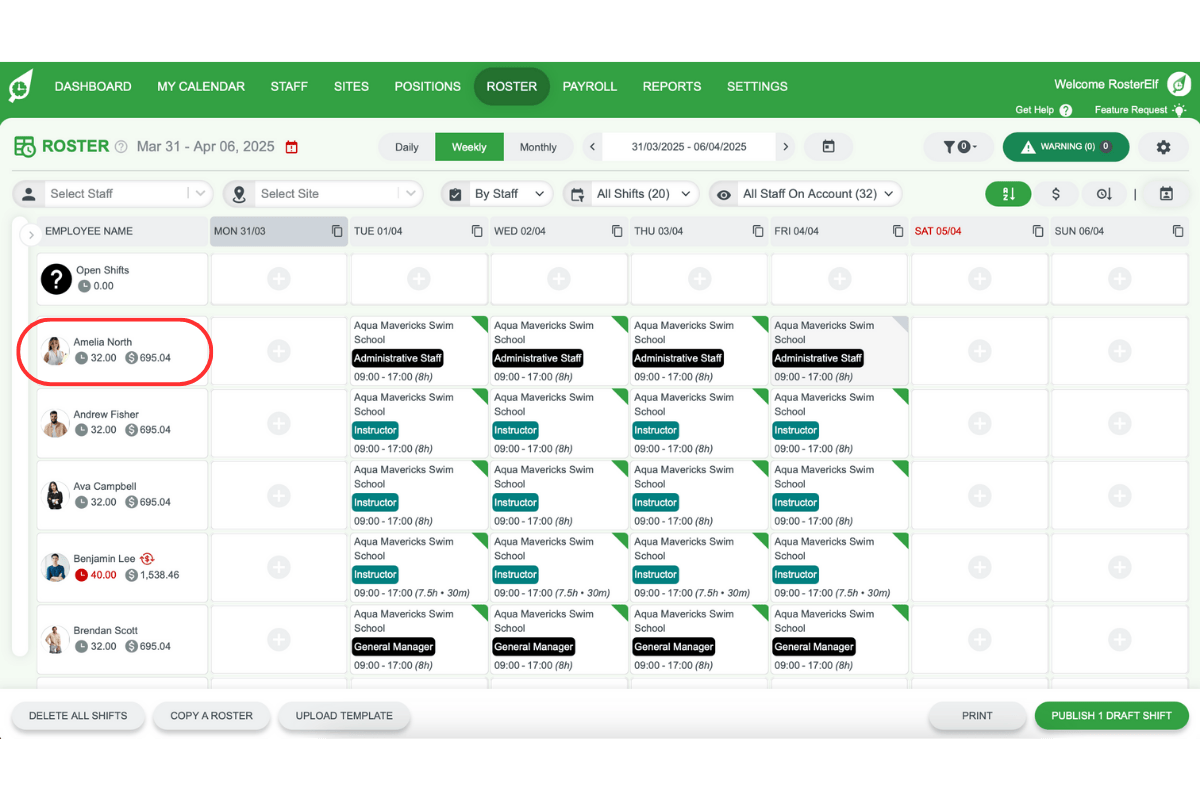
2.1 roster metrics per row
2.1.1 Metrics display on the left of each roster row, showing total hours and labour costs.
2.1.2 Metrics update based on shifts in view, period changes, and applied filters.
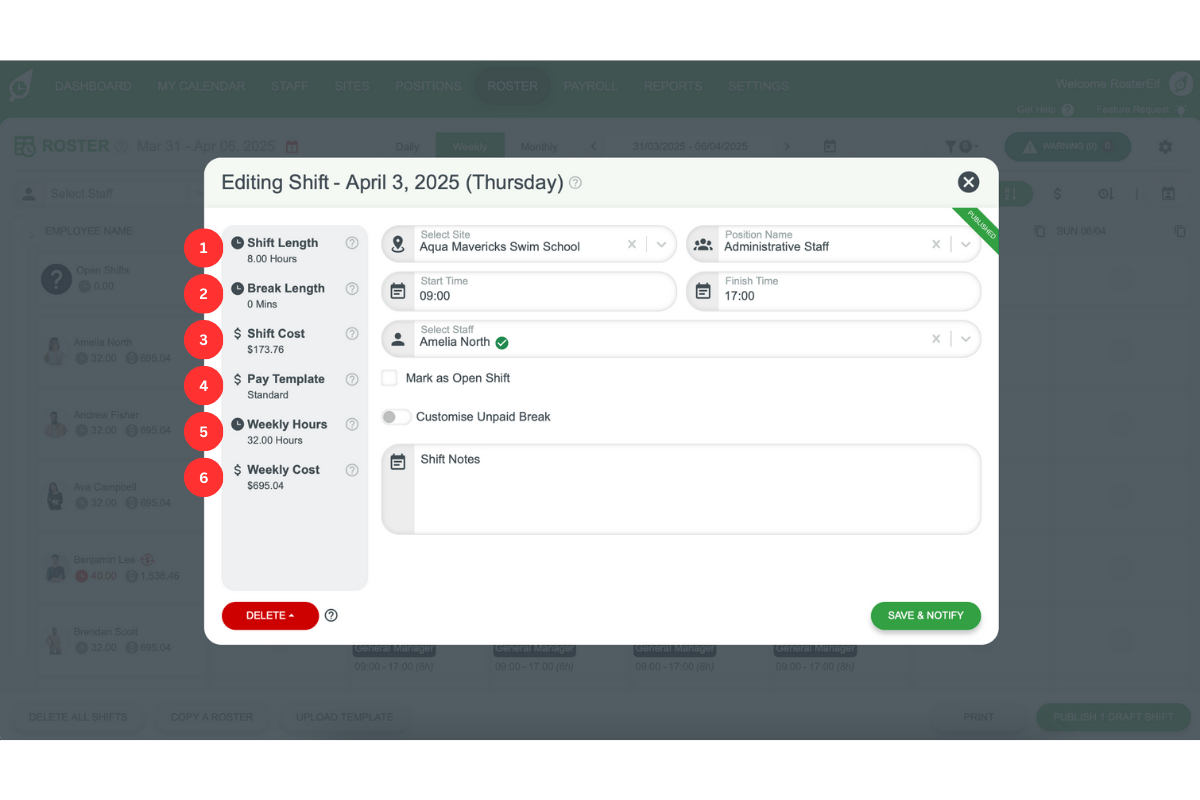
3. Shift metrics explained
Shift Metrics allow you to track costs and hours for each shift individually. This section covers the key fields in Shift Metrics, such as shift length, cost, pay template, and weekly hours/costs for the assigned staff.
3.1 key shift metrics
3.1.1 Shift Length: Shows paid hours per shift.
3.1.2 Break Length: Displays unpaid break minutes per shift, set in custom breaks or roster settings.
3.1.3 Shift Cost: Calculated from paid hours and assigned pay template.
3.1.4 Pay Template: Shows the assigned pay template for the staff, site, or position.
3.1.5 Weekly Hours: Provides total weekly hours for the assigned staff.
3.1.6 Weekly Cost: Provides total weekly cost for the assigned staff.
Note: All fields update with any changes made to shift details.
4. Setting up staff and pay templates
Before budgeting, ensure that pay templates are created and assigned to staff. This section guides you through verifying and setting pay rates to calculate accurate labour costs per shift.
4.1 verify pay rates
4.1.1 Go to Settings - Payroll - Pay Templates to confirm pay rates in your pay templates.
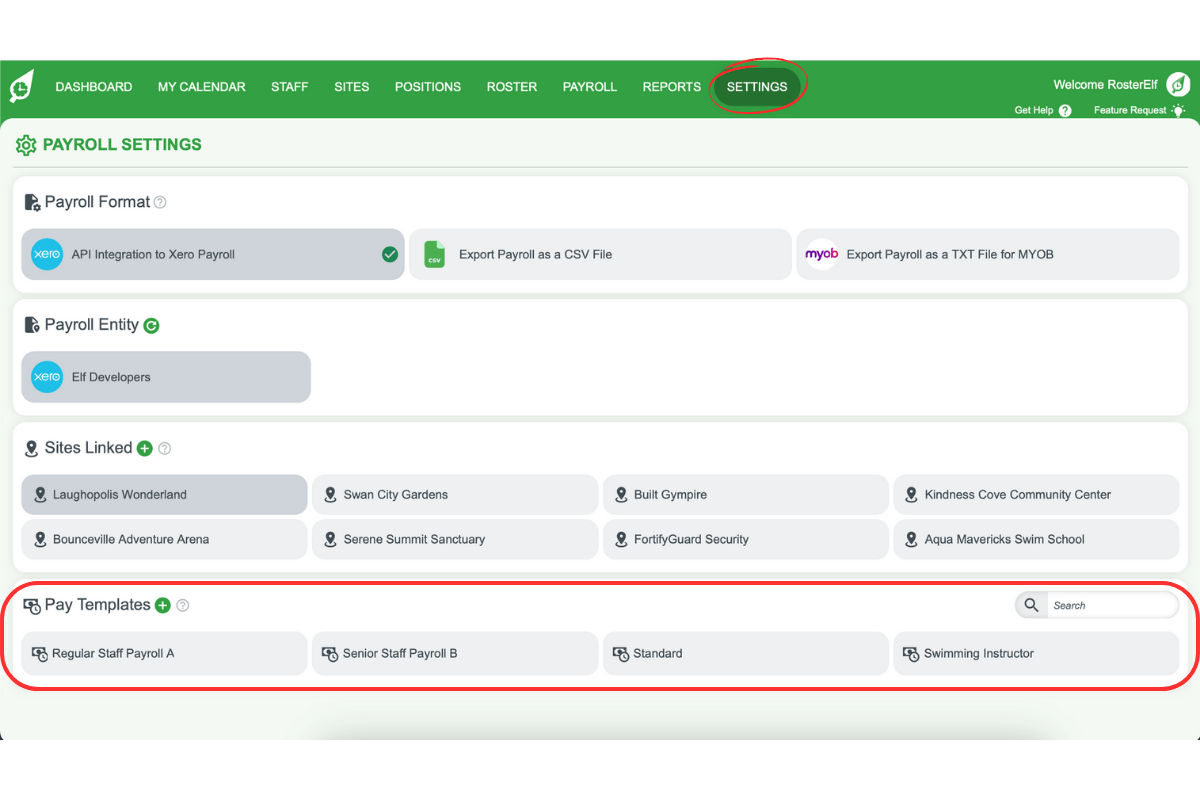
Pay Templates section in RosterElf, where pay rates can be reviewed.”
4.2 assign pay templates to staff
4.2.1 In the Staff tab, select the staff member and open the Payroll tab to assign the correct pay template.
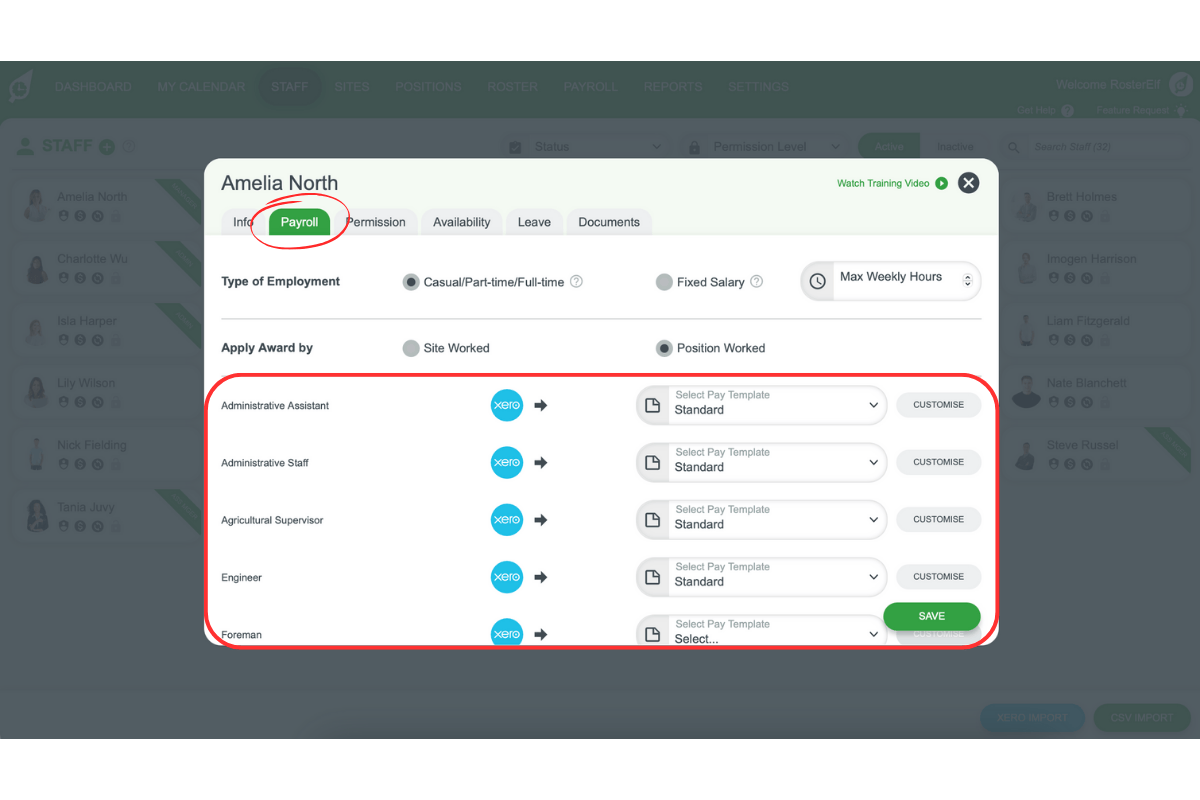
Payroll tab.”
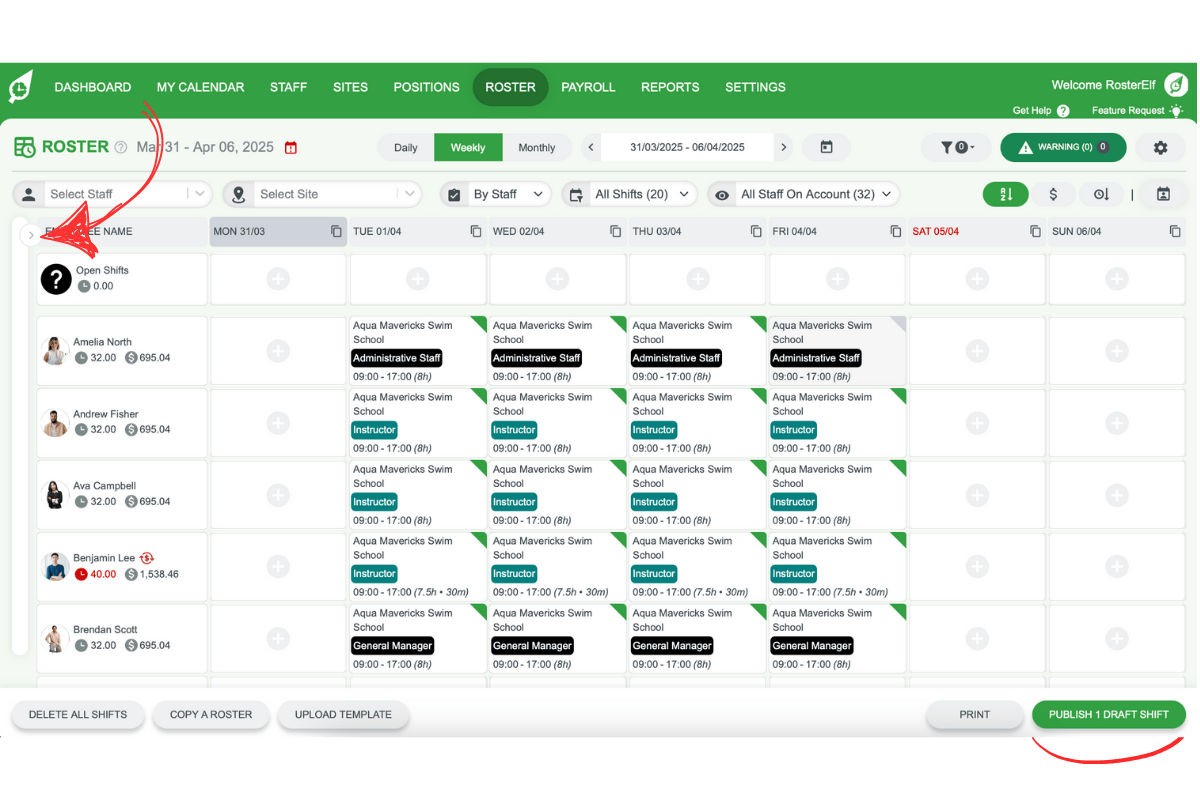
5. Setting up your roster and revenue forecast
Follow these steps to set up your roster and add revenue forecasts. This process enables real-time tracking of hours, costs, and targets compared to previous periods, ensuring your roster aligns with business objectives.
5.1 steps for setup
5.1.1 Select the Roster tab on the main screen.
5.1.2 Add a revenue forecast for the selected roster period.
5.1.3 Add shifts to the roster, allowing RosterElf to calculate labour costs automatically.
5.1.4 View your total hours, estimated costs, and labour percentage in the Financial Summary.
5.1.5 Toggle roster views to drill down into specific timeframes, ensuring revenue forecasts are set for the entire period.
Frequently asked questions
1. How do I view the financial summary for my roster?
Navigate to the Roster tab and look for the financial summary section, which displays total labour costs, hours, and budget information for the selected period.
2. Can I set a budget for roster periods?
Yes. You can set budget limits for daily, weekly, or monthly roster periods to help control labour costs and monitor spending.
3. What information is included in the financial summary?
The financial summary includes total rostered hours, total labour costs, budget vs actual spending, and cost breakdowns by staff, position, or site.
4. How can I track if my roster is over budget?
The financial summary will display budget indicators showing whether your roster is within, approaching, or exceeding your set budget limits.
5. Can I export financial summary data?
Yes. You can export financial summary data through the reports section in PDF or CSV format for further analysis or record keeping.