Tracking breaks accurately helps maintain compliance with workplace policies and ensures transparent timesheets. The RosterElf Time Clock makes starting and finishing breaks directly within the app easy. If photo proof is enabled, you can also capture a selfie to confirm the break’s start or end. Follow the instructions below to manage breaks smoothly.
In this guide, you will learn to select the correct staff member, initiate a break, and confirm it with your password. You will also discover how to end the break with minimal steps and provide any necessary photo verification. Continue reading for a step-by-step overview of handling breaks in the RosterElf Time Clock.
1. Take a break
Use the following steps to start a break in the RosterElf Time Clock:
1.1 Steps to take a break
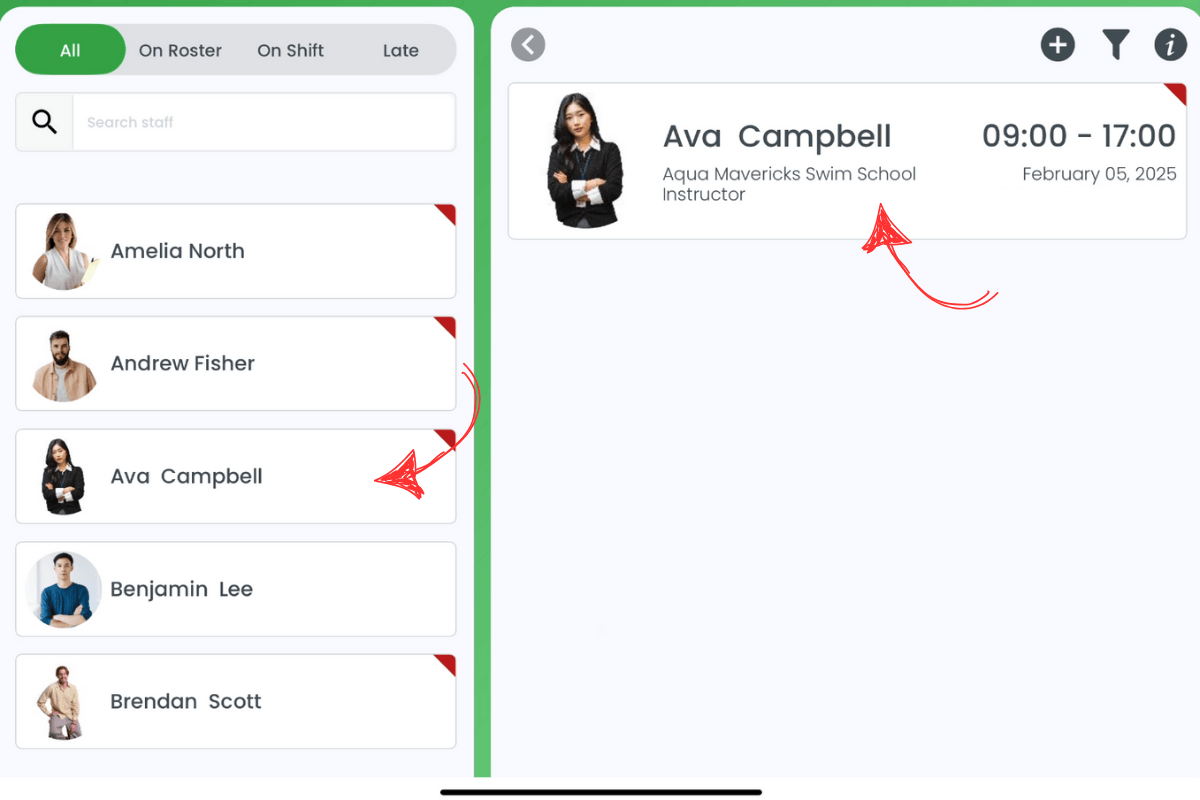
1.1.1 Select the desired staff member from the list on the left side of the screen.
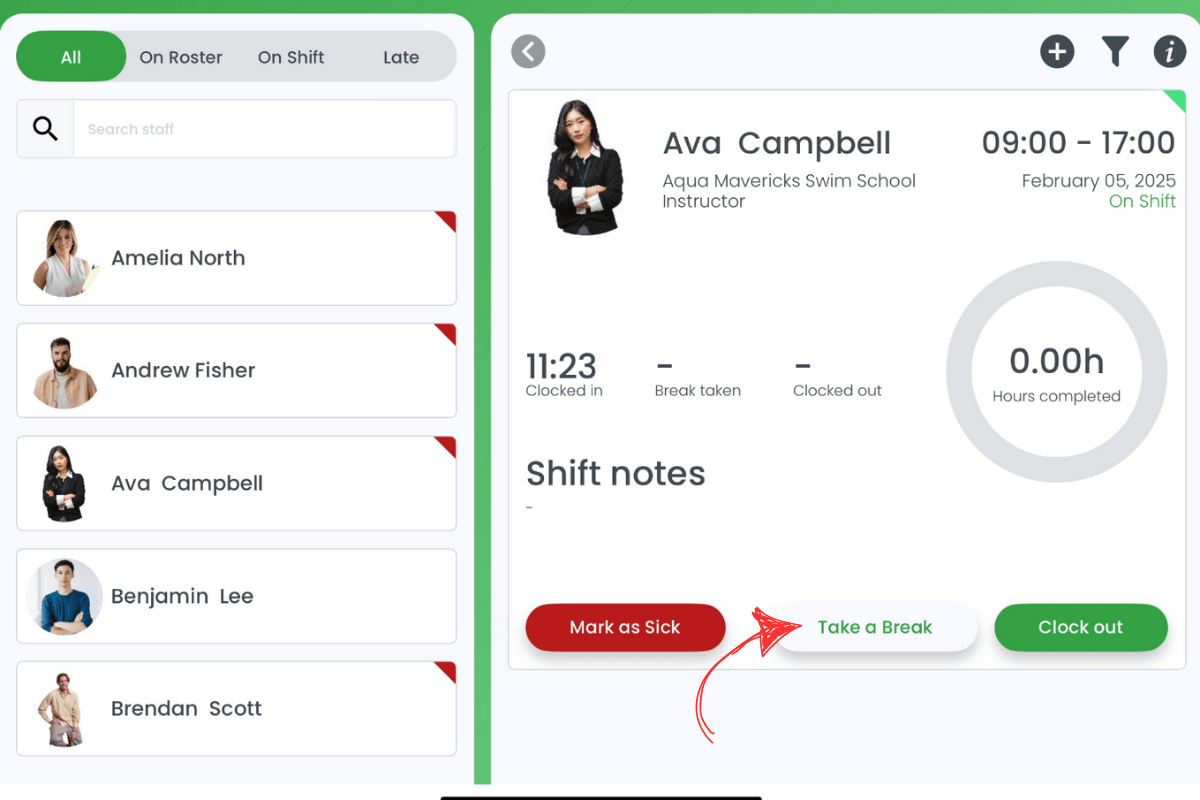
1.1.2 On the right side, the shift information for that staff member appears. Click this information block.
1.1.3 Choose take a break.
1.1.4 In the modal that opens, enter your password, then click confirm.
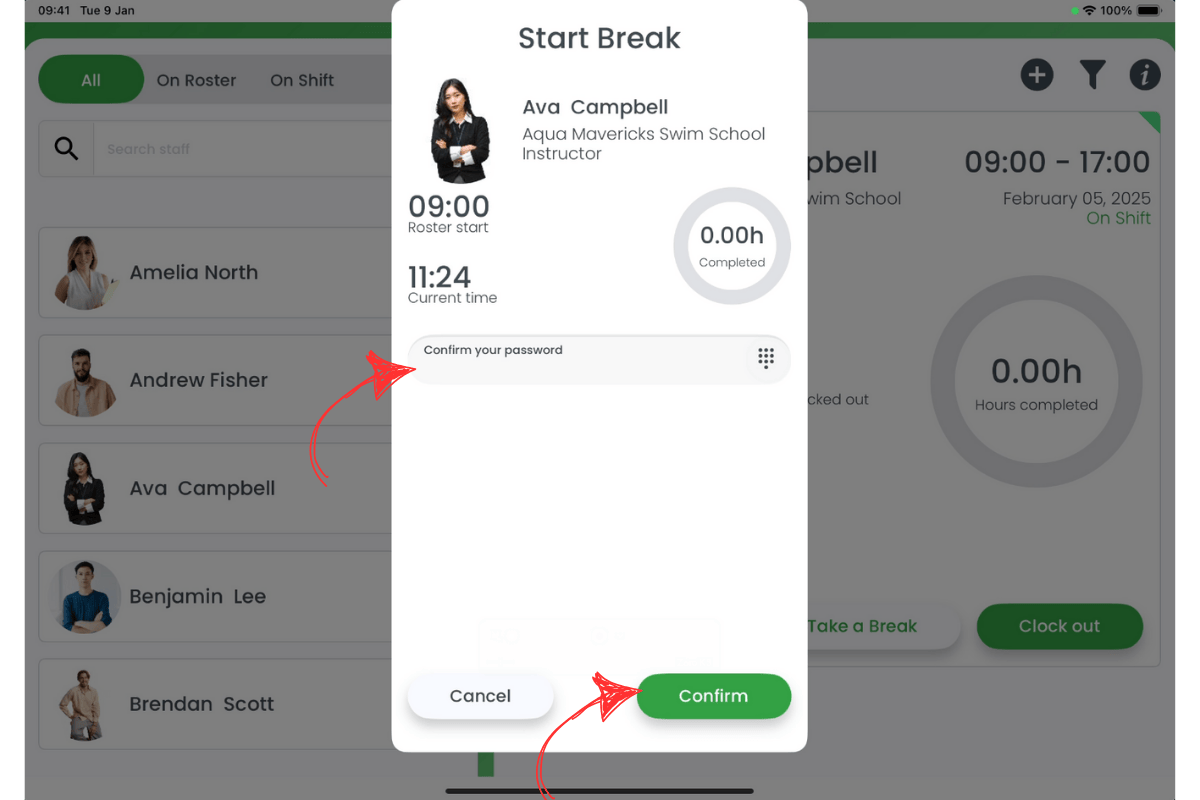
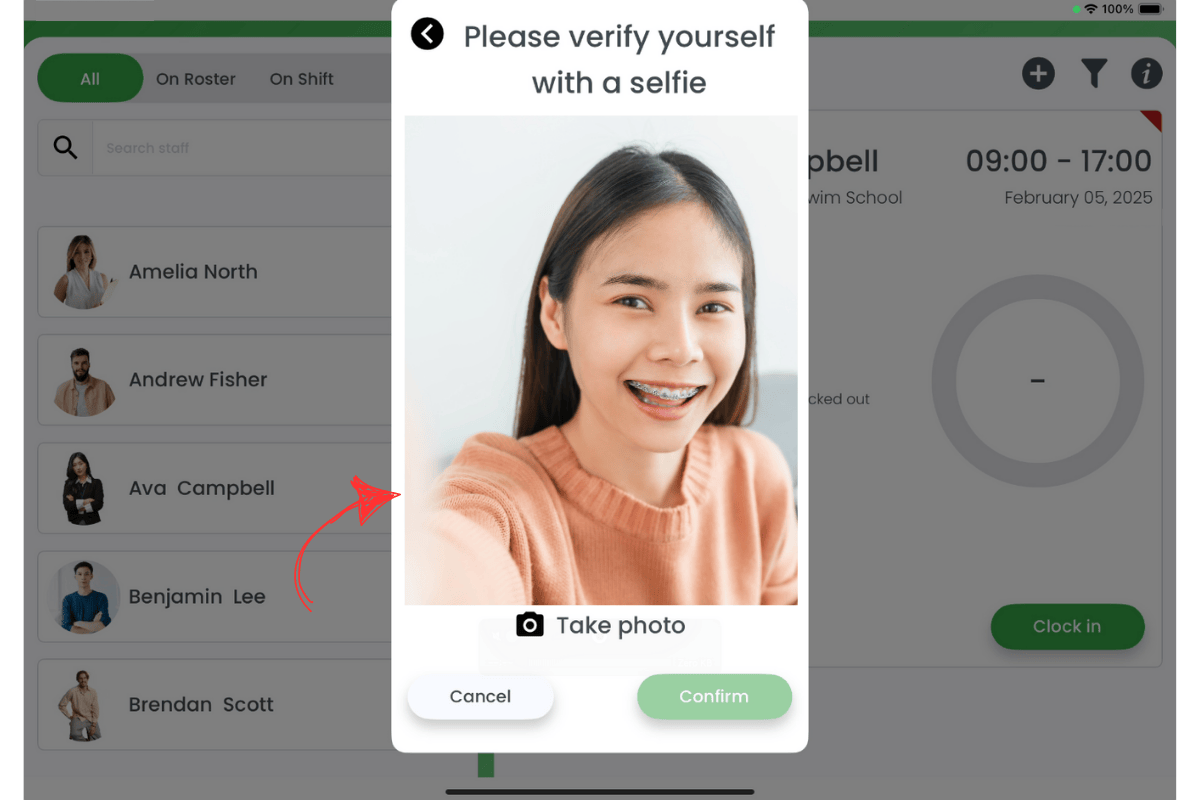
1.1.5 If photo proof is enabled, a new modal appears prompting you to take a selfie. Click take a photo and then hit confirm.

2. Finish a break
Once your break is over, follow these steps to end it and resume your shift:
2.1 Steps to finish a break
2.1.1 Select the desired staff member from the list on the left side of the screen.
2.1.2 On the right side, the shift information for that staff member appears. Click this information block.
2.1.3 Choose end break.

2.1.4 In the modal that opens, enter your password, then click confirm.
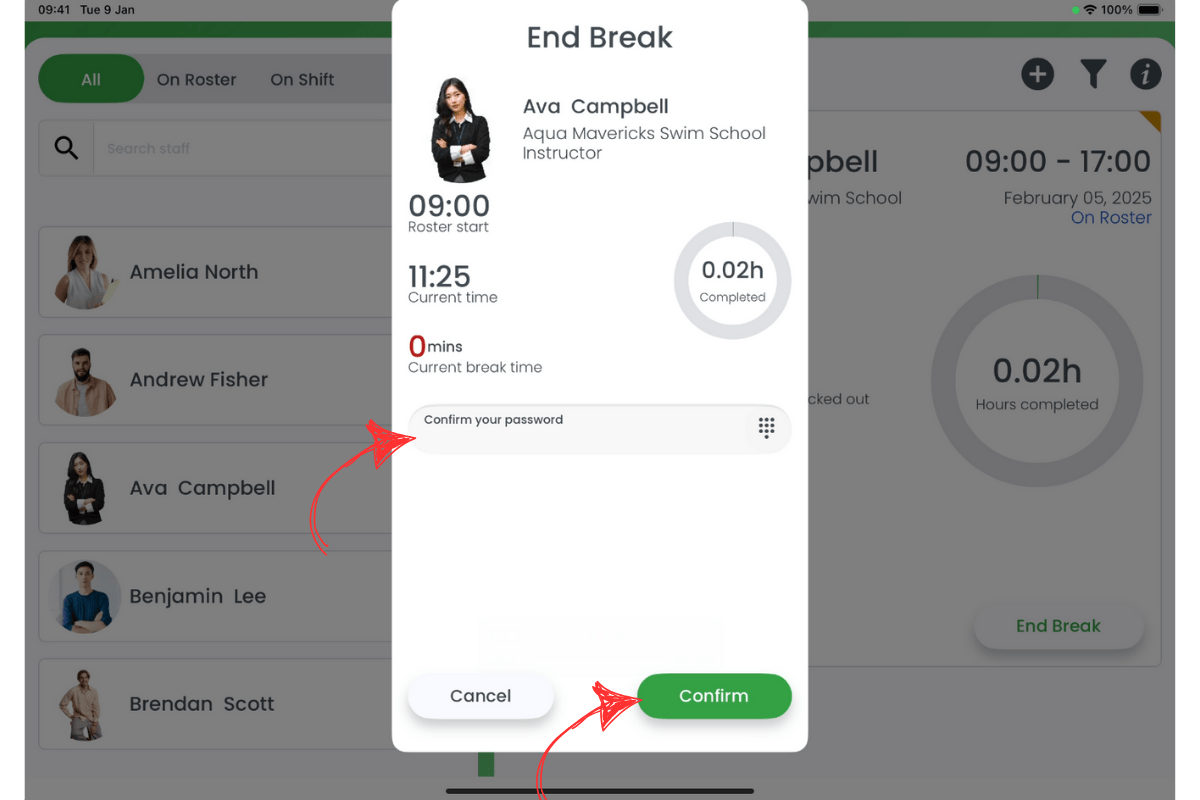
2.1.5 If photo proof is enabled, a new modal appears prompting you to take a selfie. Click take a photo and then hit confirm.
Frequently asked questions
1. Can I skip the password if I take a break?
No, you must confirm your identity with a password each time you start or end a break.
2. Do I have to take a photo proof every time?
Only if photo proof is enabled on your account; otherwise, you can confirm without a photo.
3. Will my manager see how long I took for a break?
Yes, RosterElf tracks break durations and provides this information on timesheets.
4. What if I forget to end my break?
Your manager/admin can edit the timesheet afterwards, but it’s best to end your break promptly for accurate records.
5. Can I take multiple breaks in one shift?
Yes, each break is logged individually, and you can start or end additional breaks as needed.