Clock in and out on the RosterElf time clock
Efficiently recording each shift is crucial for accurate payroll and streamlined staff management. The RosterElf Time Clock makes this process simple by allowing you to clock in or out in just a few steps. Whether you need to verify a late start or capture a photo as proof, the app prompts you for the necessary information without confusion. This ensures all attendance records are accurate and keeps your workplace running smoothly.
In this guide, you will learn how to select the correct staff member, clock in or out, provide any required details such as late or early reasons, and confirm the entry. If your account has photo proof enabled, the Time Clock will also prompt you to take a selfie. By following the steps below, you and your team can maintain precise shift records that promote transparency and accountability. Continue reading to discover how to clock in and out in a matter of seconds.
1. Clock in with the RosterElf time clock
Follow these steps to begin a shift by clocking in.
1.1 steps to clock in
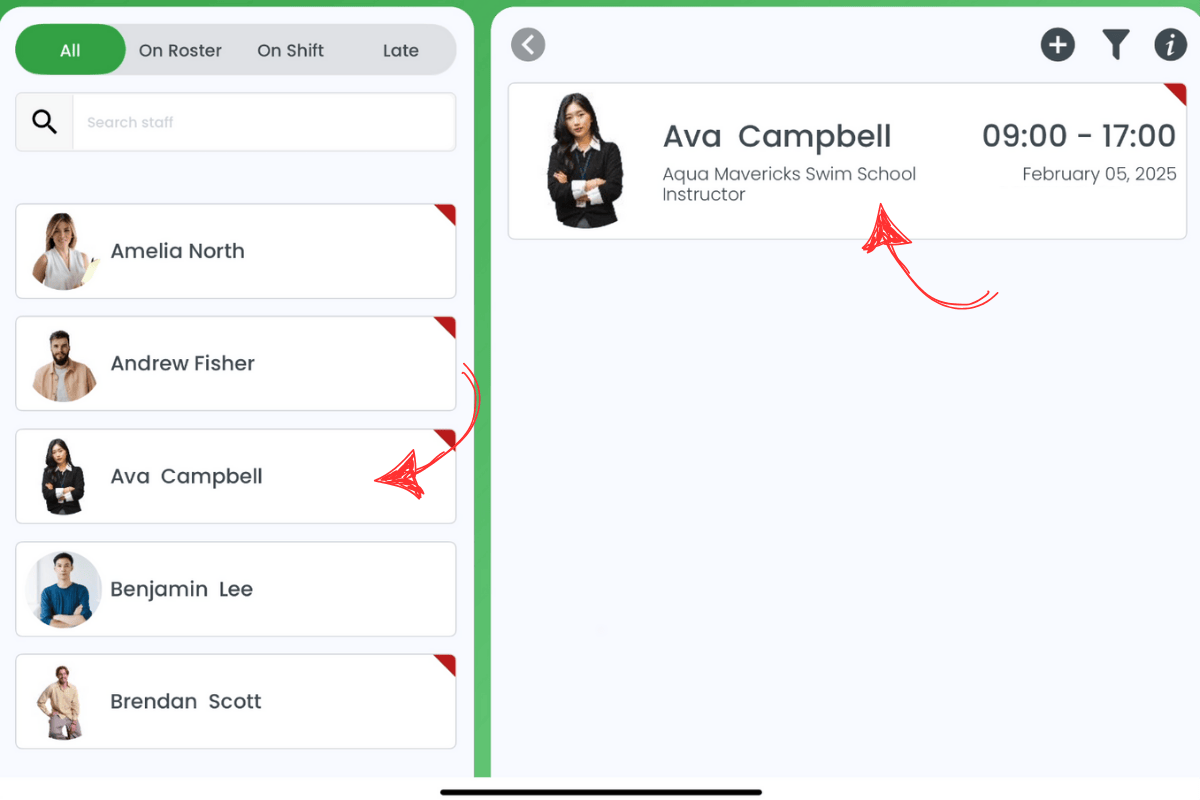
1.1.1 Select the desired staff member from the list on the left side of the screen.
1.1.2 On the right side, the shift information for that staff member appears. Click this information block.
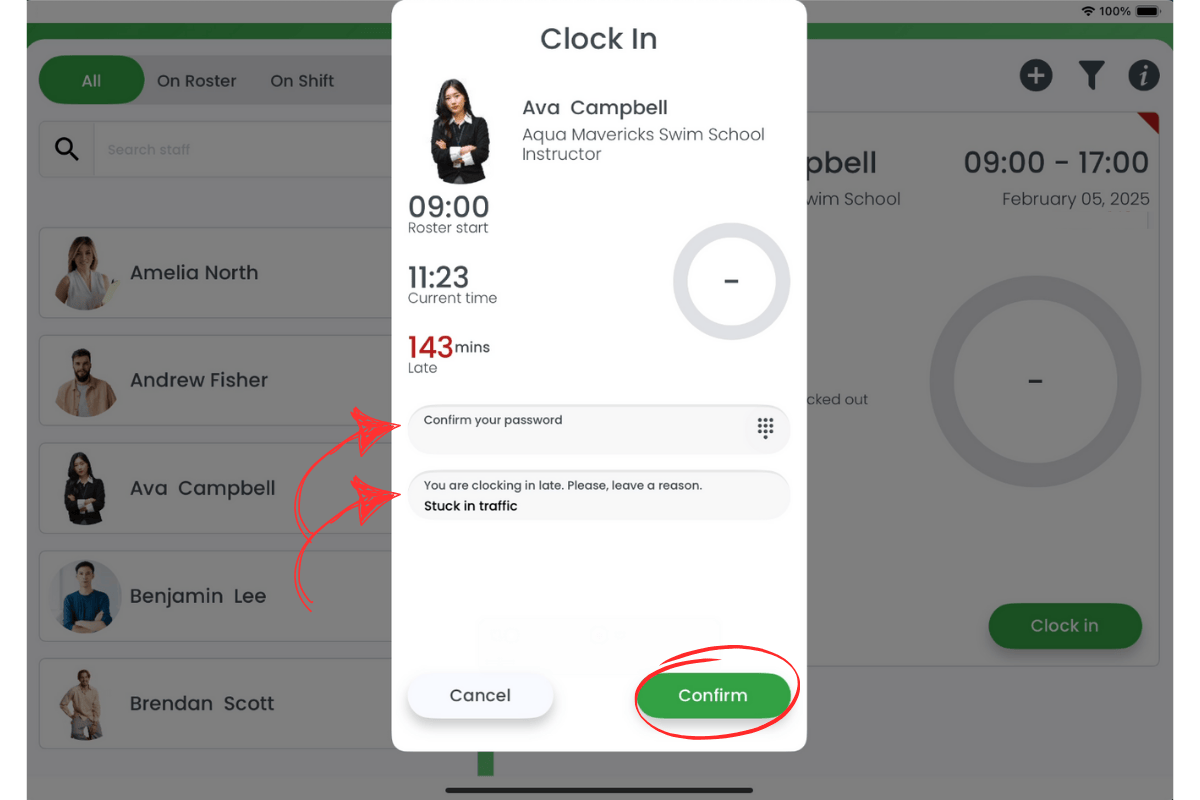
1.1.3 Choose clock in.
1.1.4 In the modal that opens, enter your password. If you are late, you will be asked to provide a reason.
1.1.5 Click confirm.
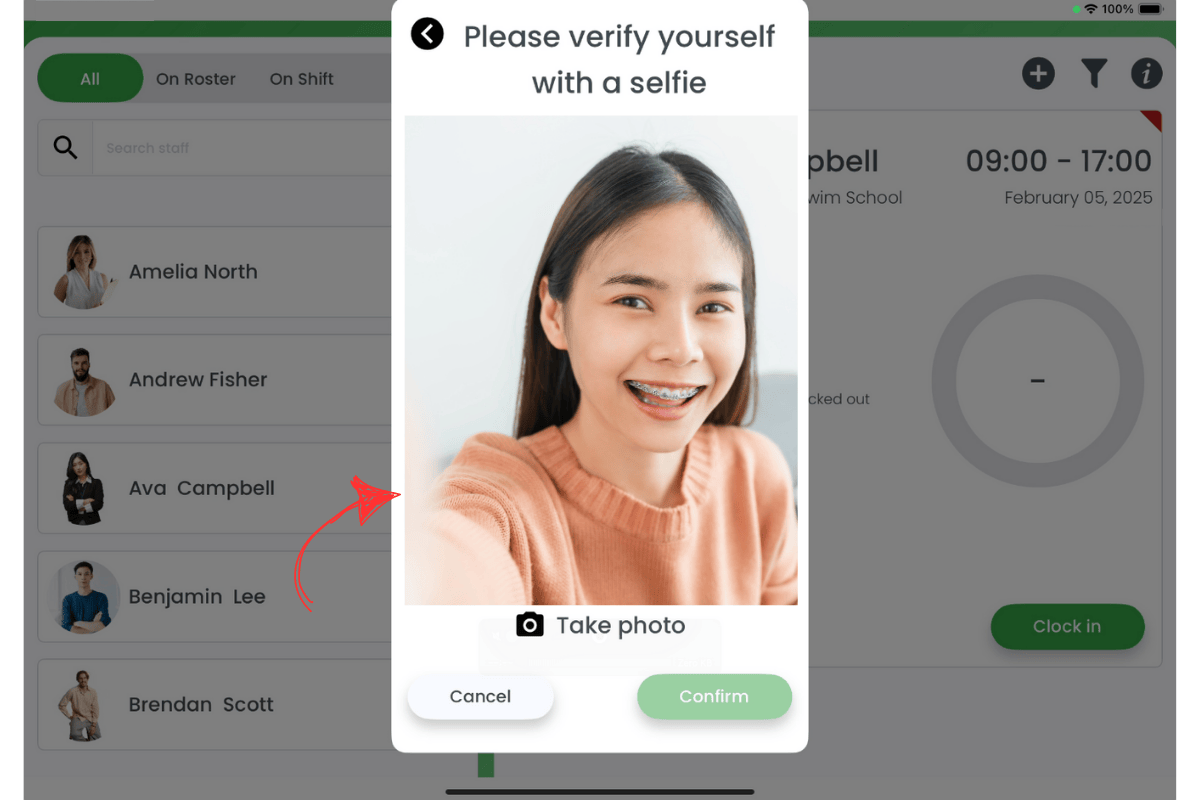
1.1.6 If photo proof is enabled, a new modal will appear prompting you to take a selfie. Click take a photo and then hit confirm.

2. Clock out with the RosterElf time clock
Use the following instructions to end a shift by clocking out.
2.1 steps to clock out
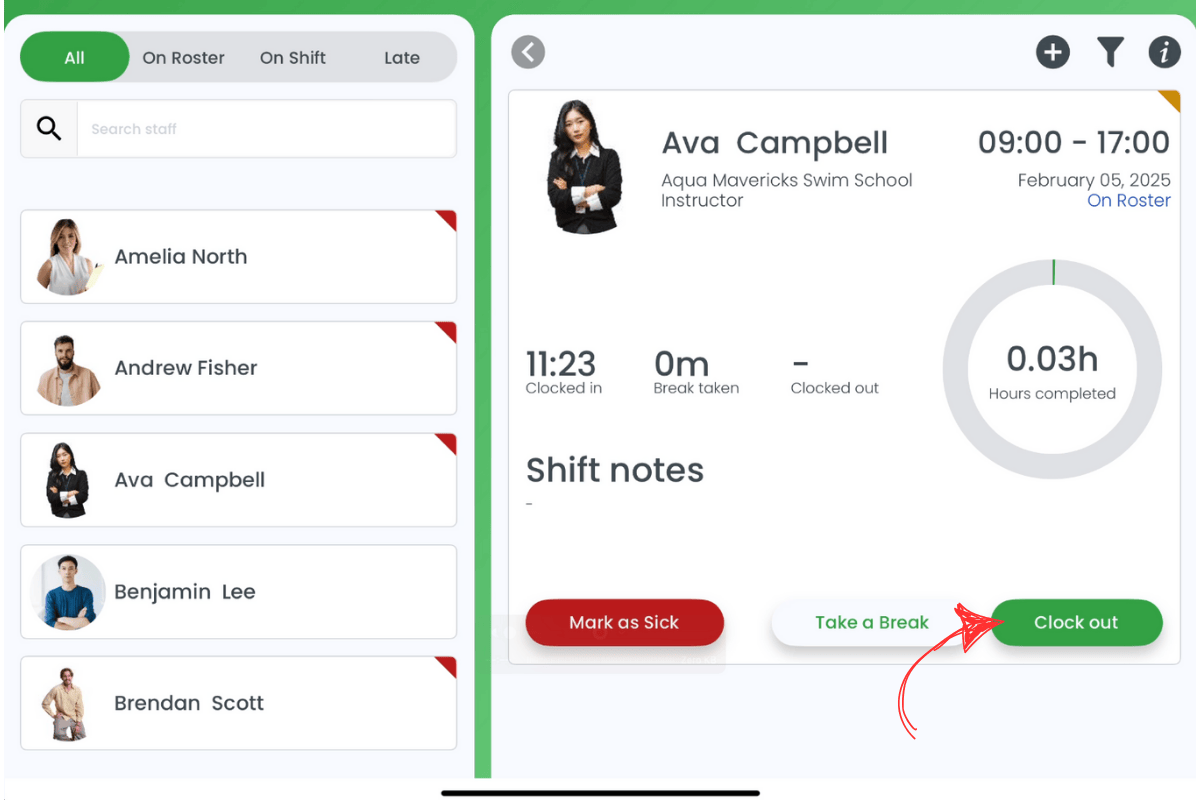
2.1.1 Select the desired staff member from the list on the left side of the screen.
2.1.2 On the right side, the shift information for that staff member appears. Click this information block.
2.1.3 Choose clock out.
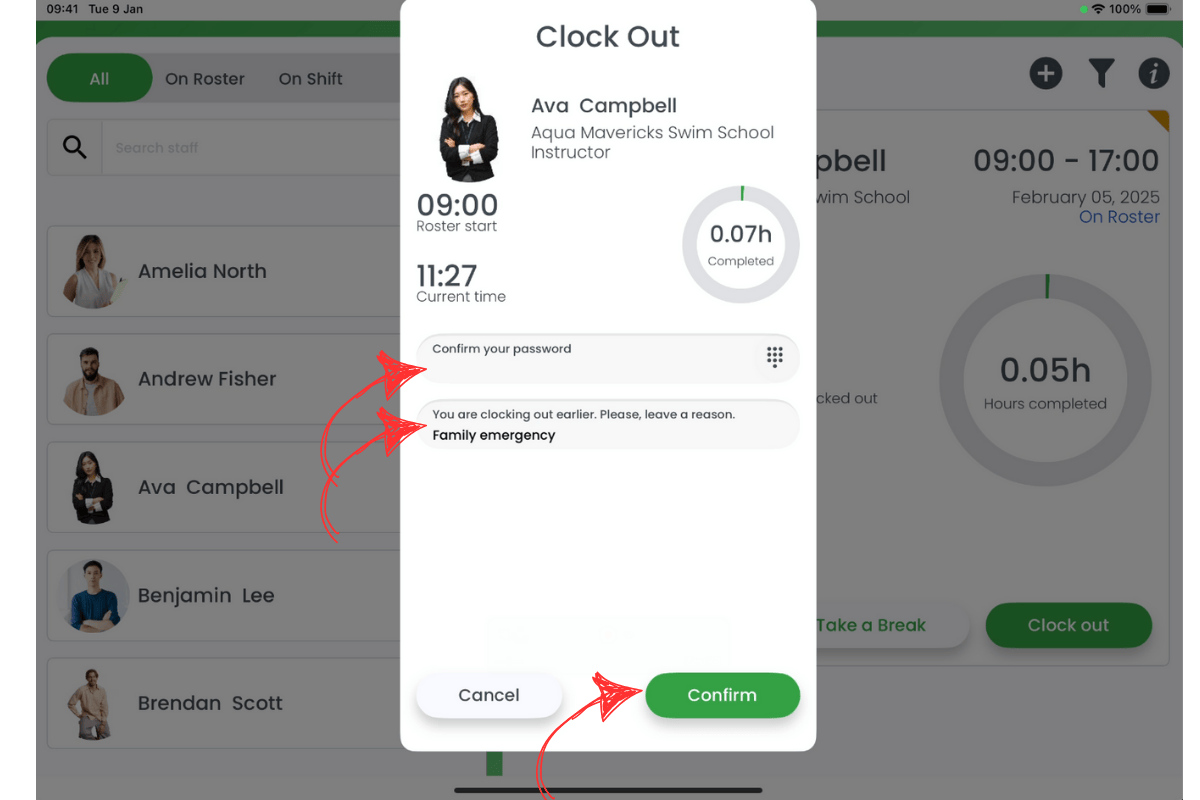
2.1.4 In the modal that opens, enter your password. If you are clocking out early, you will be asked to provide a reason.
2.1.5 Click confirm.
2.1.6 If photo proof is enabled, a new modal will appear prompting you to take a selfie. Click take a photo and then hit confirm.
Frequently asked questions
1. Can any staff member clock in and out without a password?
No, users need valid credentials to confirm their clock in or out, ensuring accuracy and security.
2. What if I forget to clock out at the end of my shift?
Your manager/admin can edit the timesheet later, but it’s best to clock out promptly to maintain accurate records.
3. Do I have to provide a reason if I clock in late?
Yes, the Time Clock prompts you to add a reason for late clock ins or early clock outs, which helps track attendance issues.
4. Does photo proof happen every time I clock in or out?
Only if photo proof is enabled for your account. Your company’s admin determines this setting.
5. Can I clock out of a shift and then clock back in?
No. Once you clock out, that action is final and you cannot clock back in to the same shift. If you need to resume work, ask your manager to create or assign a new shift before clocking in again.