This guide covers the key features and setup instructions for using Time and Attendance clock-in options. By following these steps, you can choose between tablet and smartphone clock-in methods to suit your business needs. Time and Attendance offers customisable settings for each site, helping you streamline time tracking, improve security, and integrate seamlessly with payroll. This article will walk you through setting up and optimising these features for your business.
1. Key features of time and attendance
Learn the primary features available for clocking in and out with Time and Attendance. You can choose either tablet or smartphone clock-ins, allowing flexibility to meet your business\‘s unique requirements.
1.1 Tablet clock-in
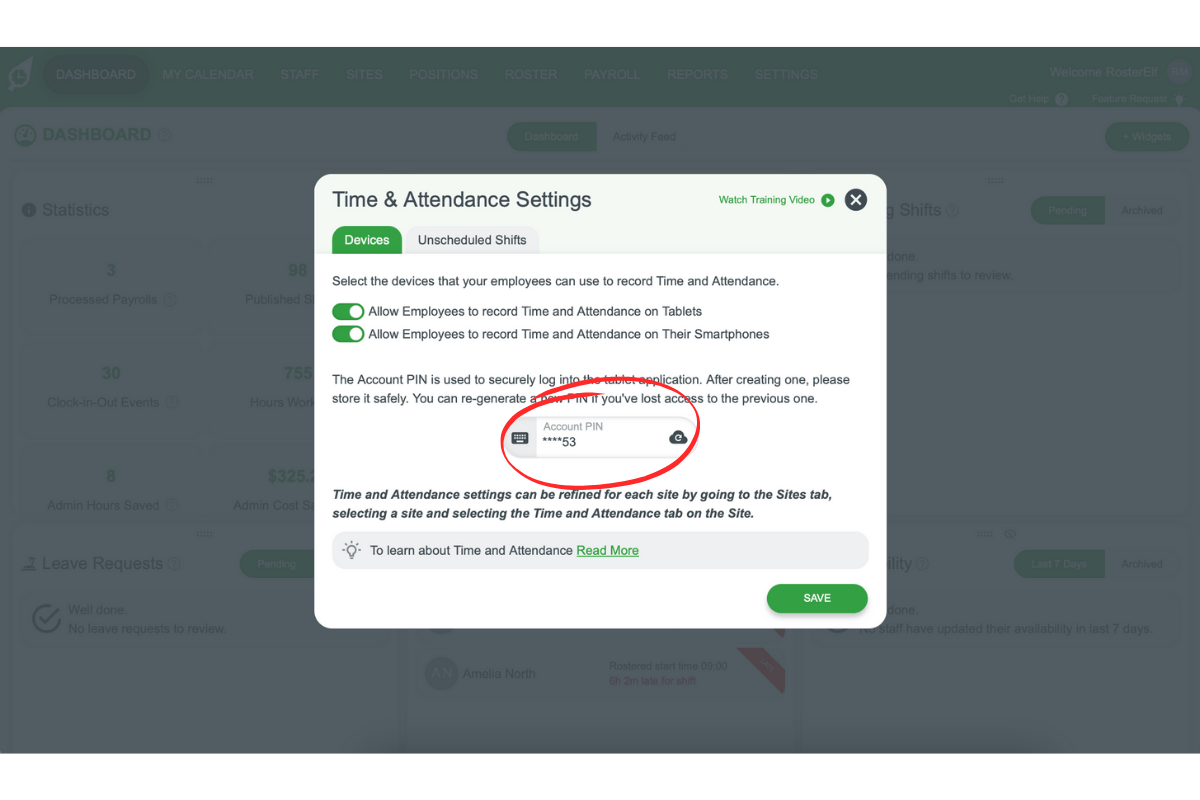
Staff clock in and out using a unique PIN on a tablet. Enable optional photo proof for added security.
1.2 Smartphone clock-in
Staff use their smartphones to clock in when within a set radius of the site\‘s GPS location.
1.3 Customised clock-in options
You can select either or both clock-in methods to suit your business needs.
2. Getting started with time and attendance
This section explains how to set up Time and Attendance for your business. You’ll learn to access global settings and customise site-specific settings for optimal time tracking.
2.1 Global settings
Learn to set up global settings that will apply across your entire organisation.
2.1.1 Access Settings: Go to the Settings tab, then select Time & Attendance.
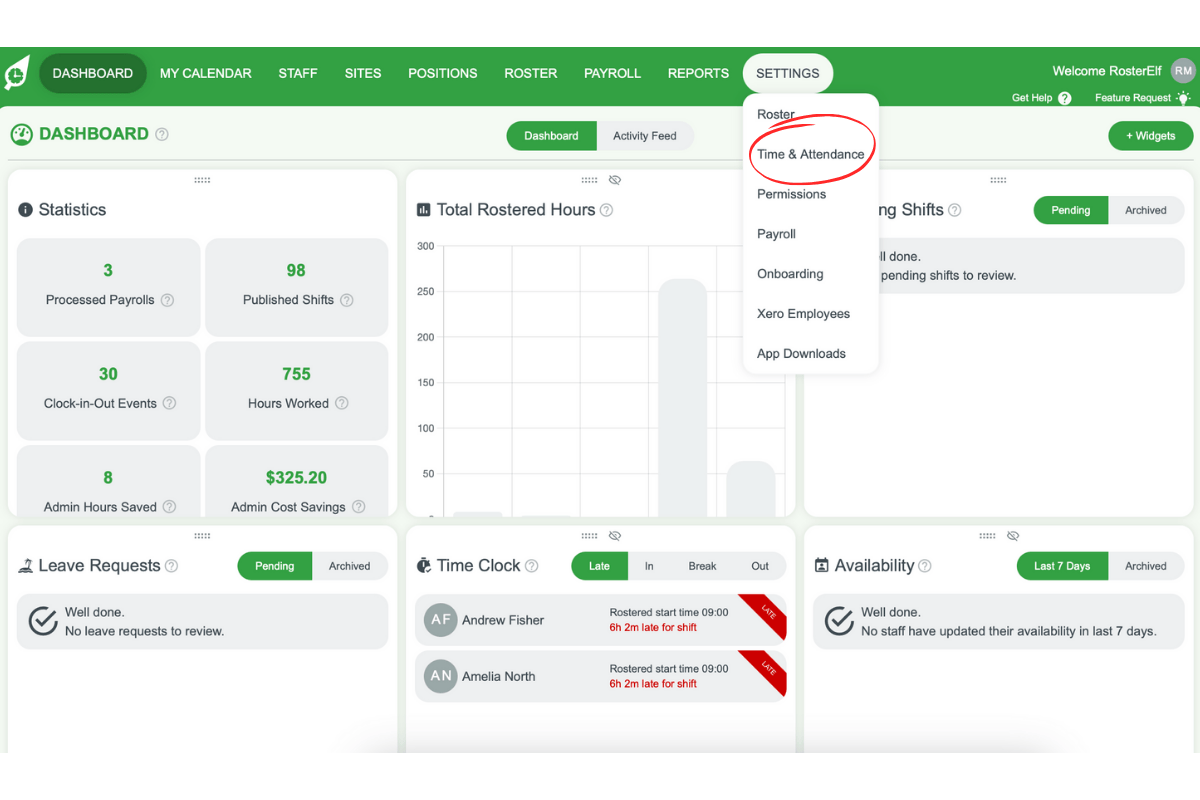
2.1.2 Choose Clock-In Method: Toggle your preferred clock-in method(s) to activate them globally.

2.1.3 Set Up Account PIN: Click here to learn more about setting your Account PIN.
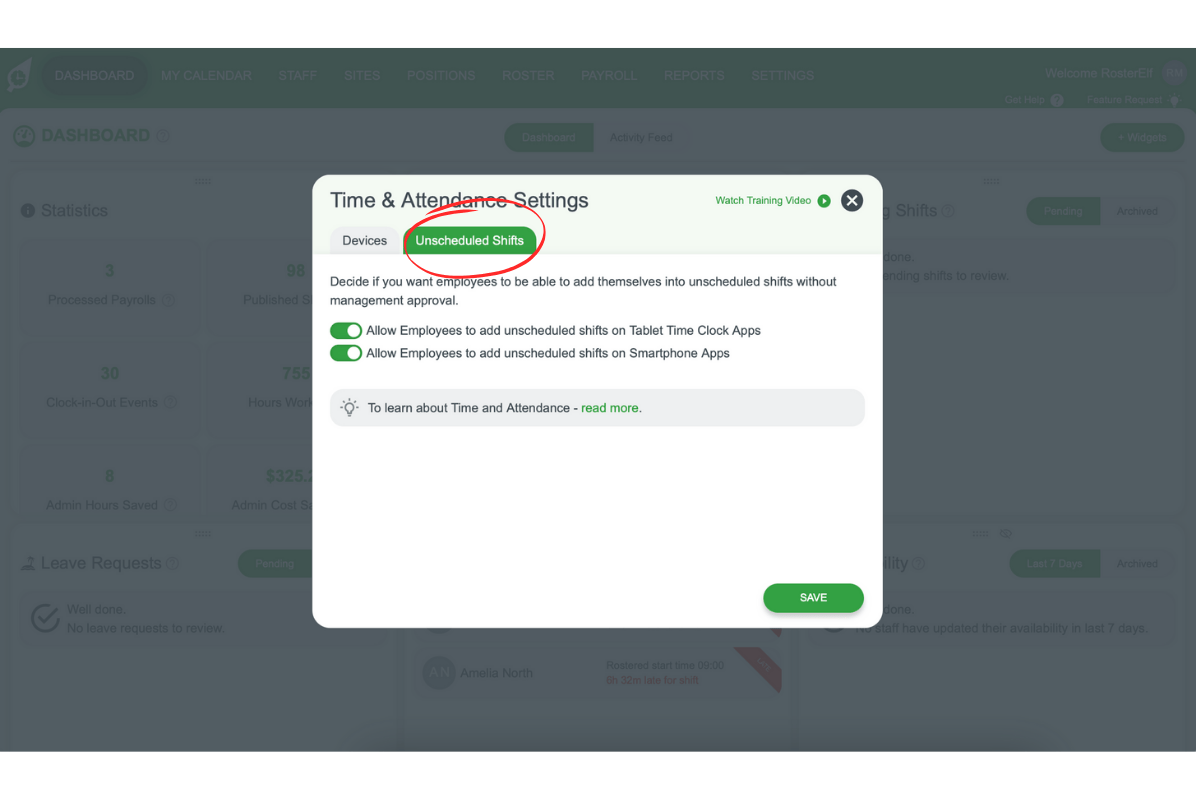
2.1.4 Set Up Unscheduled Shifts: Click here to learn more about setting the Unscheduled Shifts Feature
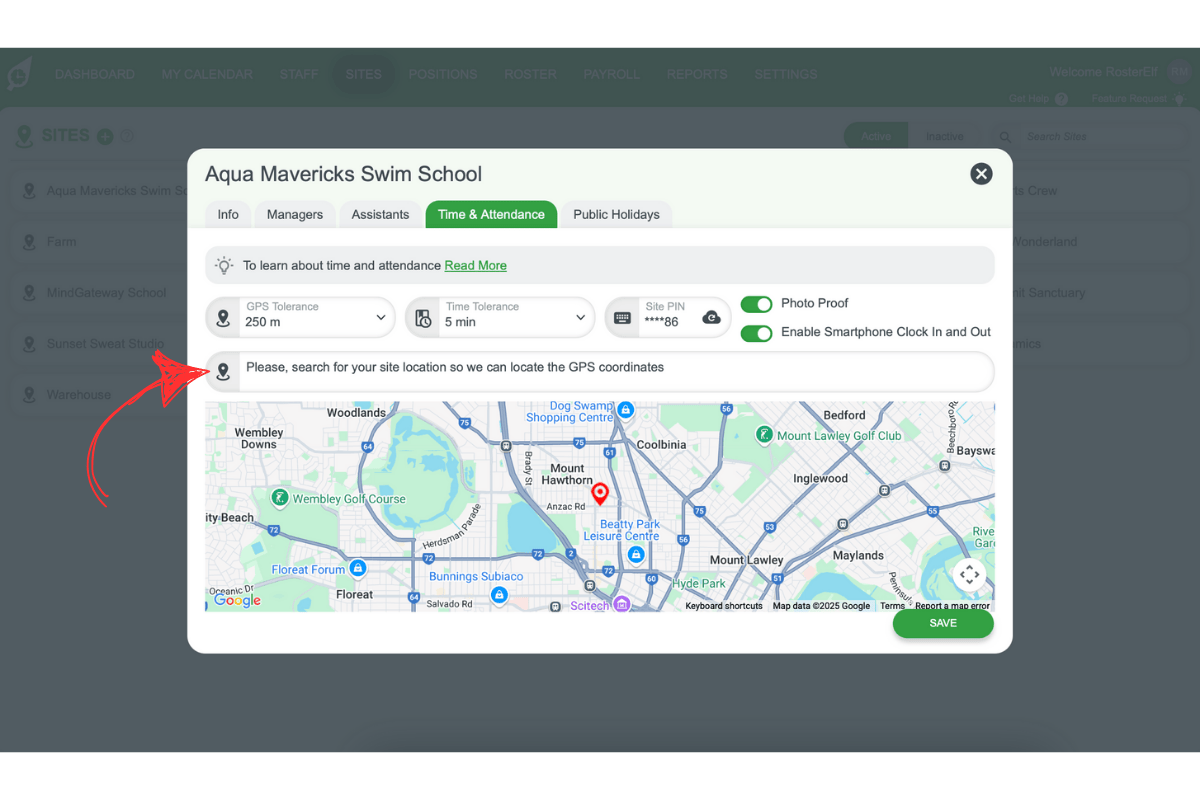
2.2 Site-specific settings
Each site can have customised settings, such as GPS tolerance and time zone adjustments.
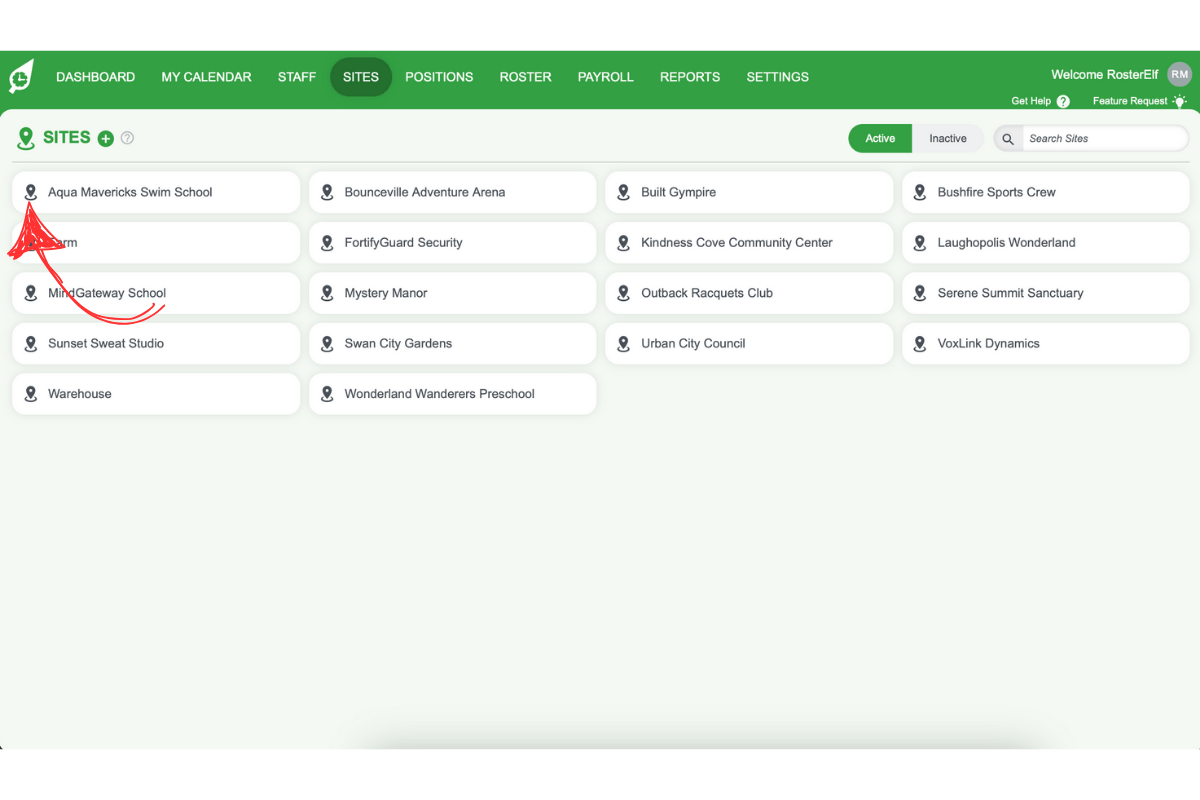
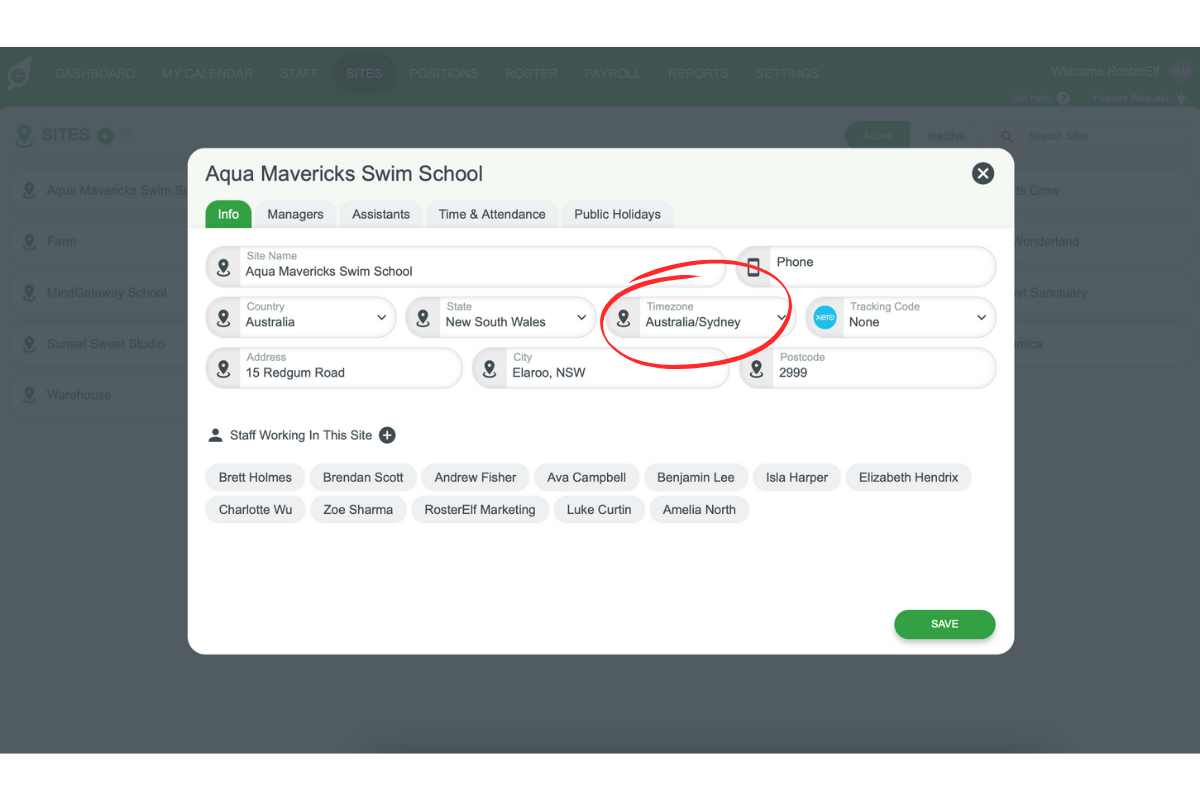
2.2.1 Select Site: Go to the Sites tab and select the site you wish to configure.
2.2.2 Set Time Zone: In the Info tab, set the appropriate time zone.
2.2.3 Configure Time & Attendance: Under the Time & Attendance tab, adjust various settings to suit the site.
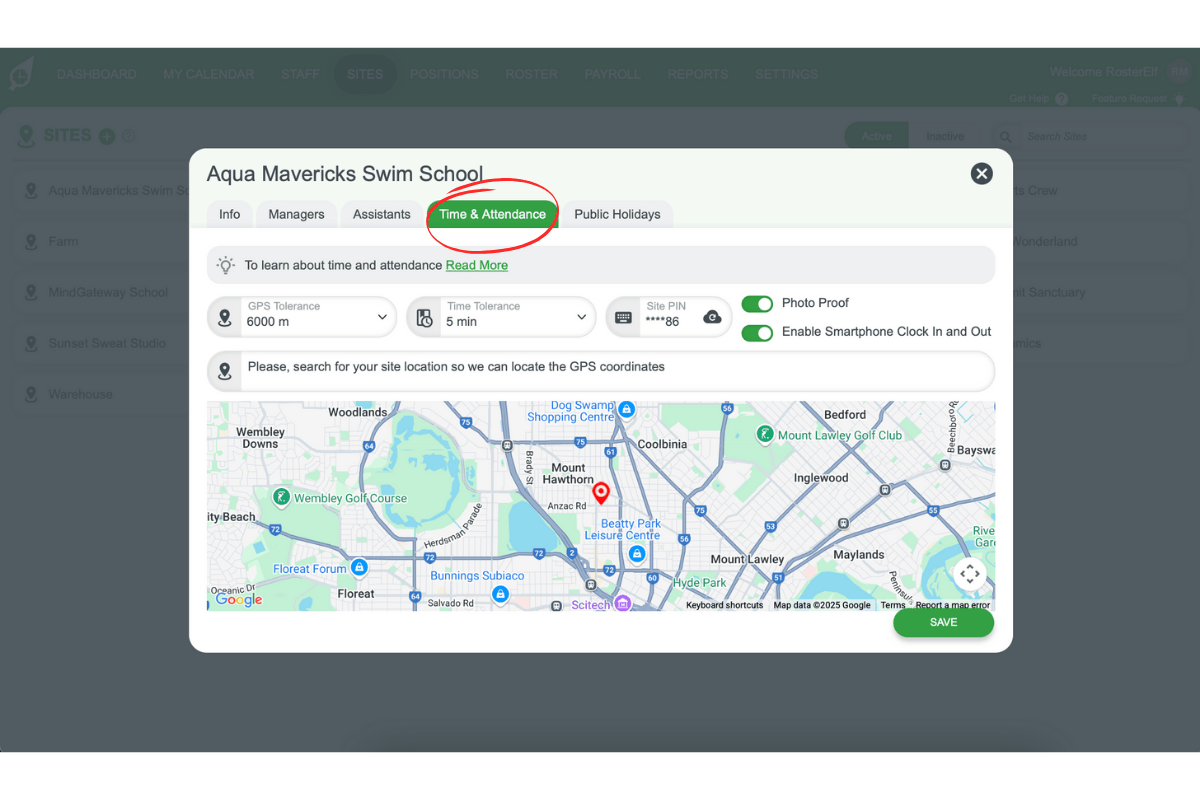
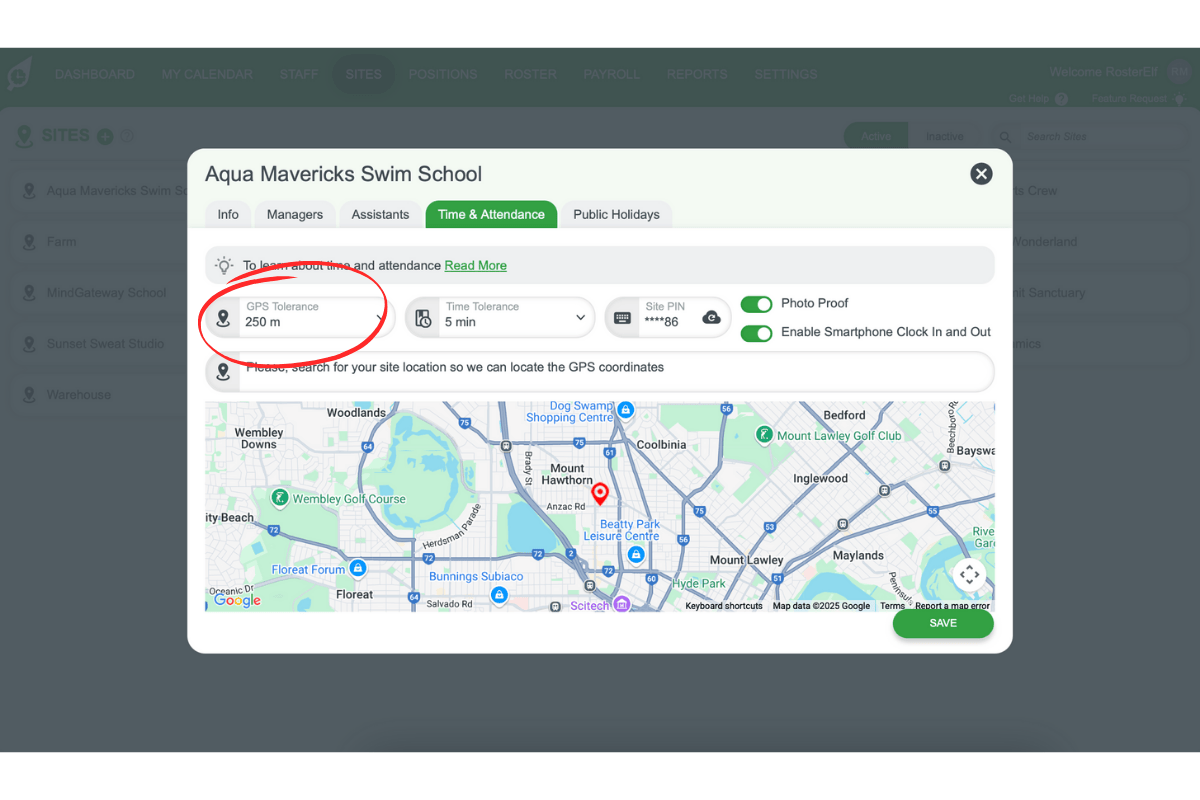
2.2.4 GPS Tolerance: Set an appropriate distance range for smartphone clock-ins, especially for larger sites.
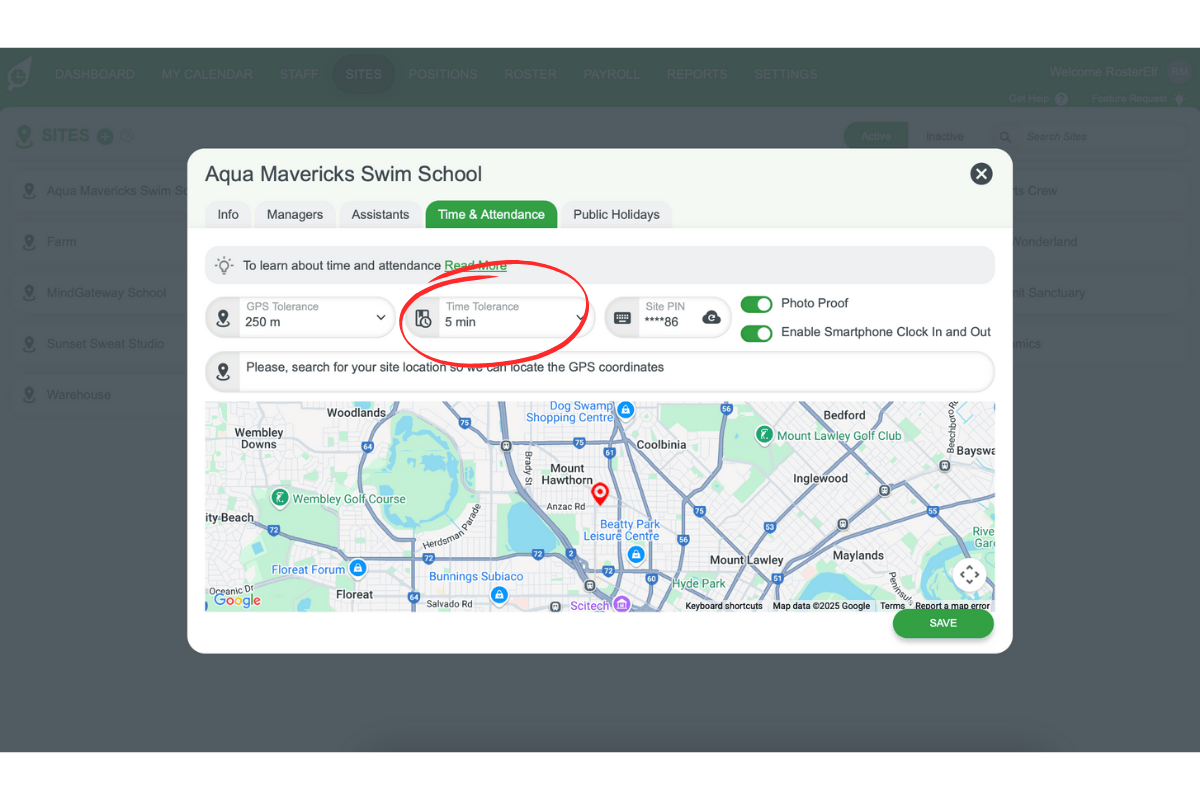
2.2.5 Time Tolerance: Controls when employees are prompted for a reason. Set to 0 to prompt on every clock-in and clock-out (ideal for shift note record keeping), or set a buffer in minutes to only prompt when staff clock outside that window.
2.2.6 Location: Assign a specific location for smartphone validation.
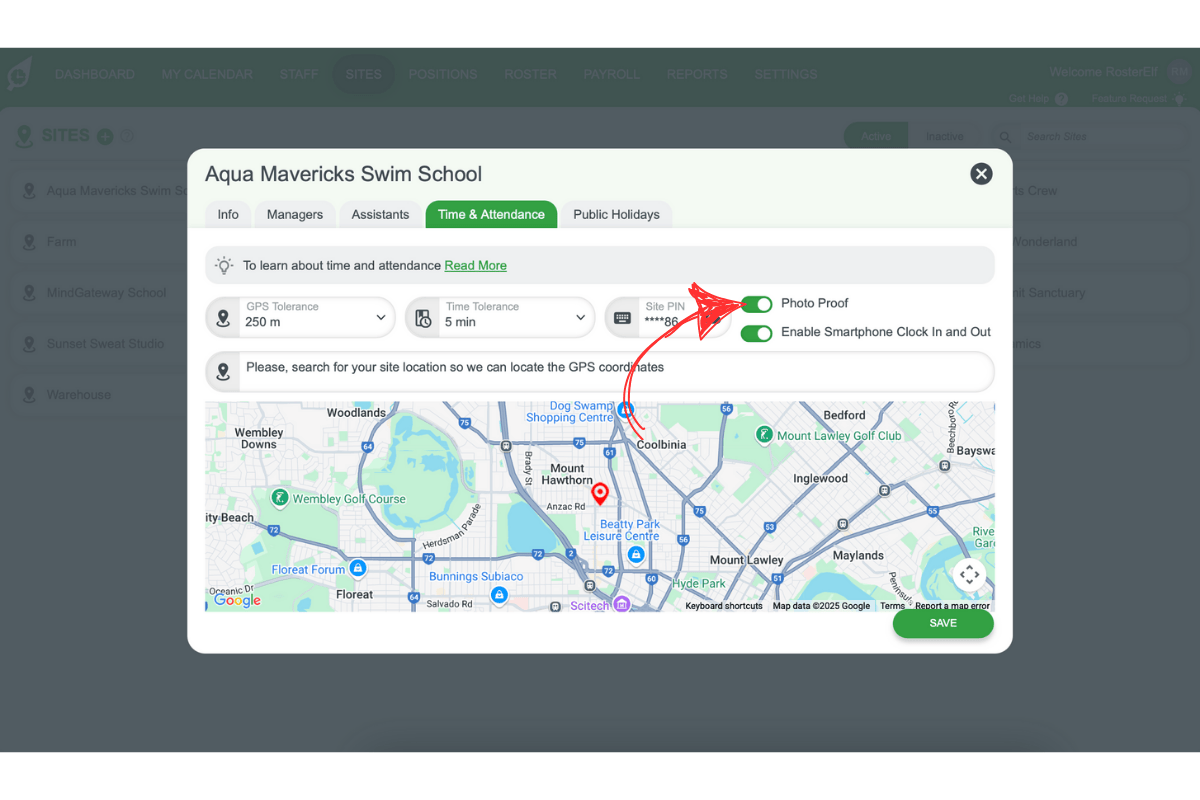
2.2.7 Enable Photo Proof: Activate this option to require a photo for clock-ins/outs.
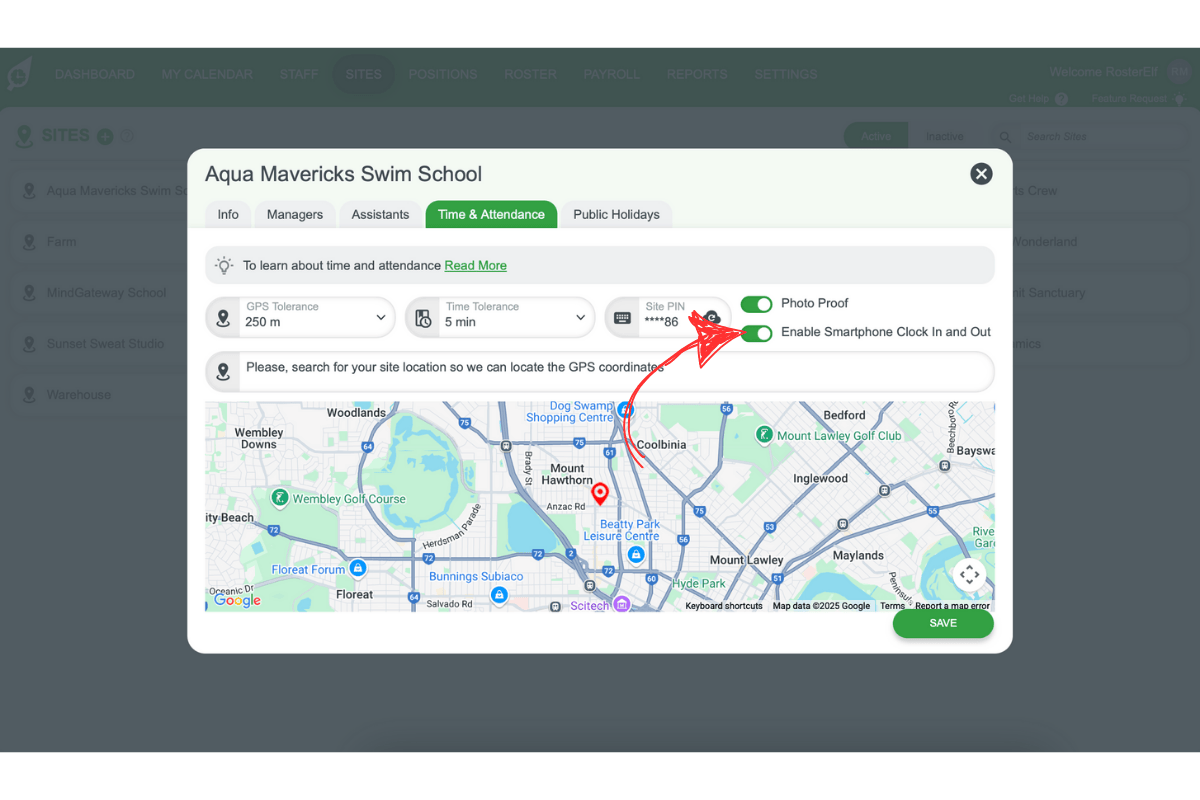
2.2.8 Enable Smartphone Clock-In/Out: Allow employees to use their smartphones for clocking in and out. This site-level toggle works in conjunction with the global Smartphone Clock In and Out setting (Settings → Time and Attendance). Both must be enabled for clock-in controls to appear on employee shift cards — if either is off, the shift card stays collapsed and no clock-in controls are shown.
3. Tips for effective time and attendance usage
Follow these tips to optimise your Time and Attendance setup, ensuring smooth operation and accurate tracking for your business.
3.1 adjust GPS tolerance
Set an appropriate GPS tolerance for the size of each site to avoid clock-in issues.
3.2 enable photo proof
Add a layer of security to tablet clock-ins by enabling photo proof.
3.3 monitor settings regularly
Review and adjust settings periodically as your business needs evolve.
4. Benefits of using time and attendance
Explore the advantages of implementing a digital Time and Attendance system. These benefits include greater accuracy, increased security, and simplified payroll integration.
4.1 enhanced accuracy
Digital clock-ins reduce the risk of errors and discrepancies in time tracking.
4.2 increased security
Features like GPS validation and photo proof ensure only authorised staff can clock in, protecting against time theft.
4.3 streamlined processes
Automating timesheets integrates smoothly with payroll systems, reducing administrative work.
4.4 flexibility
Customisable site-specific settings allow for tailored clock-in options across multiple sites.
5. Best practices for maximising efficiency
Implementing best practices can help you make the most of Time and Attendance, enhancing time tracking, security, and payroll processes.
5.1 regularly update settings
Review GPS and time tolerances periodically to accommodate any changes in your business operations.
5.2 utilise photo proof
Enable photo verification, especially valuable in environments with high staff turnover.
5.3 monitor usage
Keep track of how staff interact with the system and address any issues to ensure smooth operation.
Frequently asked questions
1. What are the available clock-in methods in Time and Attendance?
Time and Attendance offers two main clock-in options: tablet and smartphone. The tablet method allows staff to clock in with a unique PIN, while the smartphone option uses GPS validation within a set radius, giving flexibility based on your business needs.
2. How do I set up the global settings for Time and Attendance?
To set up global settings, go to the Settings tab, select Time & Attendance, and choose your preferred clock-in method(s). This will activate the chosen clock-in method(s) across your entire organisation for streamlined time tracking.
3. Can I customise clock-in settings for each site?
Yes, Time and Attendance allows you to customise clock-in settings for each site. You can set specific time zones, GPS tolerances, and photo proof options to meet the unique requirements of each location.
4. How does GPS tolerance affect smartphone clock-ins?
GPS tolerance defines the radius within which smartphone clock-ins are permitted. Adjusting this tolerance helps ensure accurate clock-ins, especially for larger sites where precise GPS validation is essential.
5. Why should I enable photo proof for clock-ins?
Enabling photo proof adds an extra layer of security by verifying that the correct employee is clocking in. This feature is particularly useful for businesses concerned about time theft or with high staff turnover.