Overview of time & attendance settings
This article explains the Time & Attendance settings and how to configure them. Time & Attendance is divided into two main areas: global settings and site-specific settings. Global settings let you control clock in and out methods for the entire account, while site-specific settings allow customisation for individual sites. Understanding these settings helps you manage employee attendance efficiently and ensures accurate time tracking across your organisation.
1. Accessing time & attendance settings
This section covers how to access and configure global Time & Attendance settings. These settings control how staff members clock in and out across your entire account. Adjusting these settings impacts all users and sites in your organisation.
Global settings allow you to choose which clock-in methods are enabled or disabled for your whole organisation. Changing these settings will apply the preference to every user, ensuring uniformity in attendance tracking. This feature is ideal for organisations wanting consistent clocking methods across all sites.
1.1 Accessing global settings
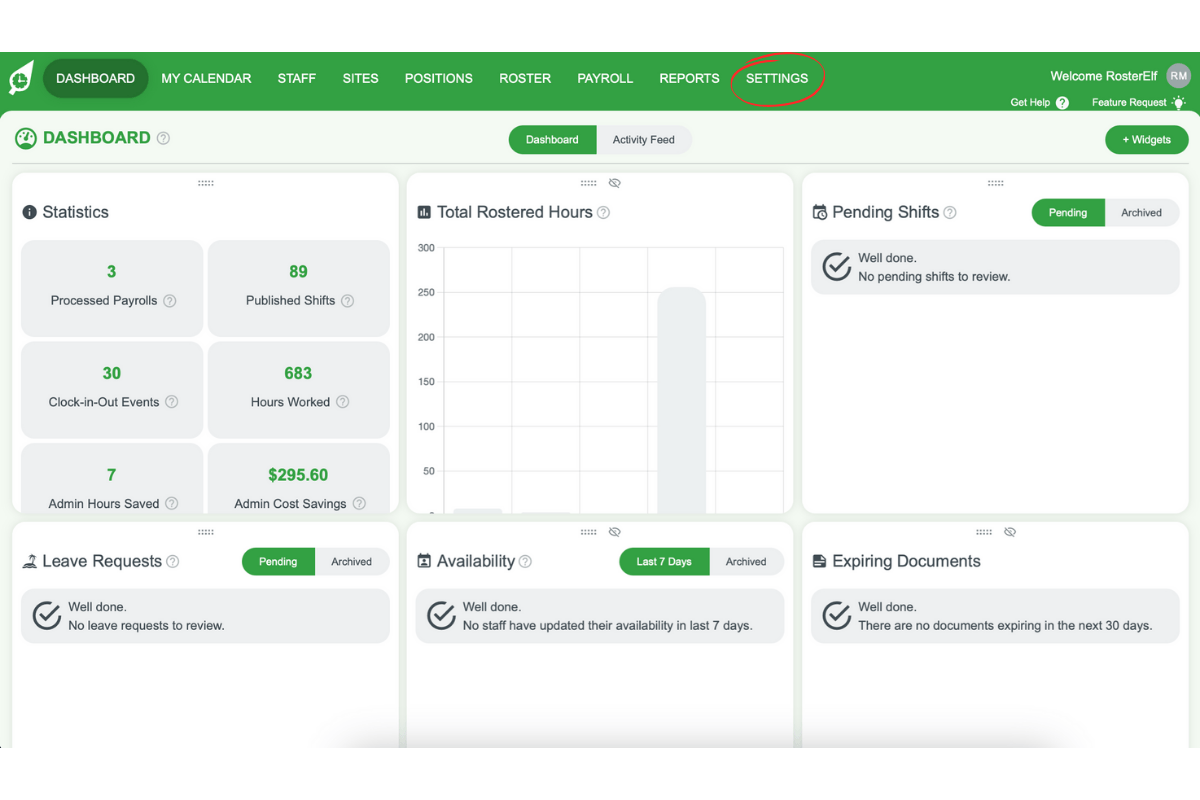
1.1.1 Click the Settings tab from the main menu.
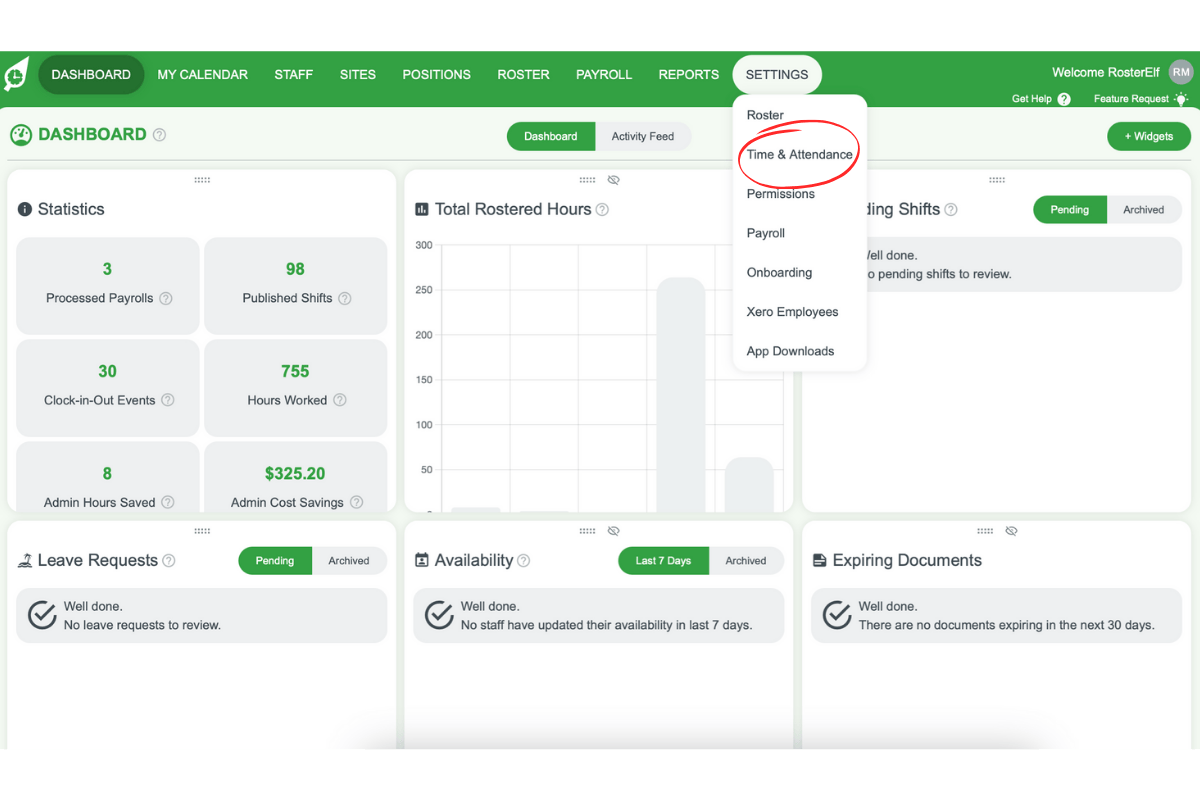
1.1.2 Select Time & Attendance to open the settings page.
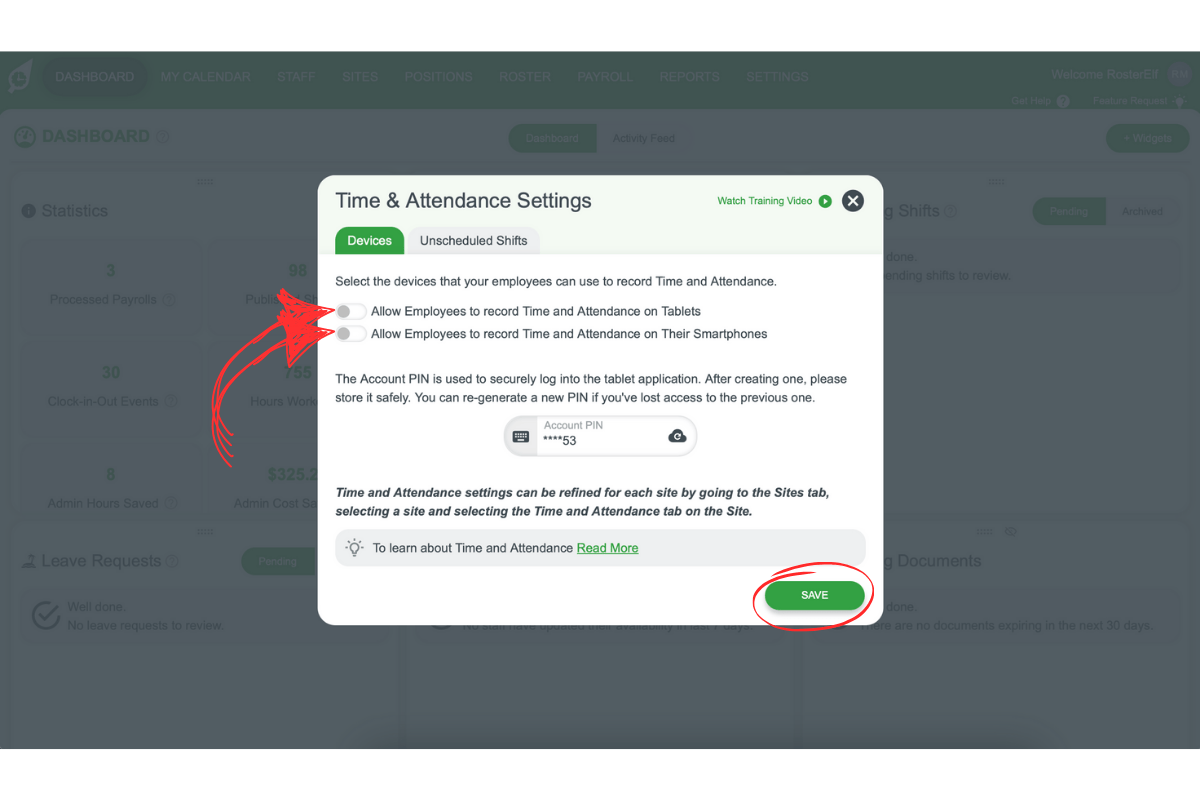
1.2 managing global clock-in methods
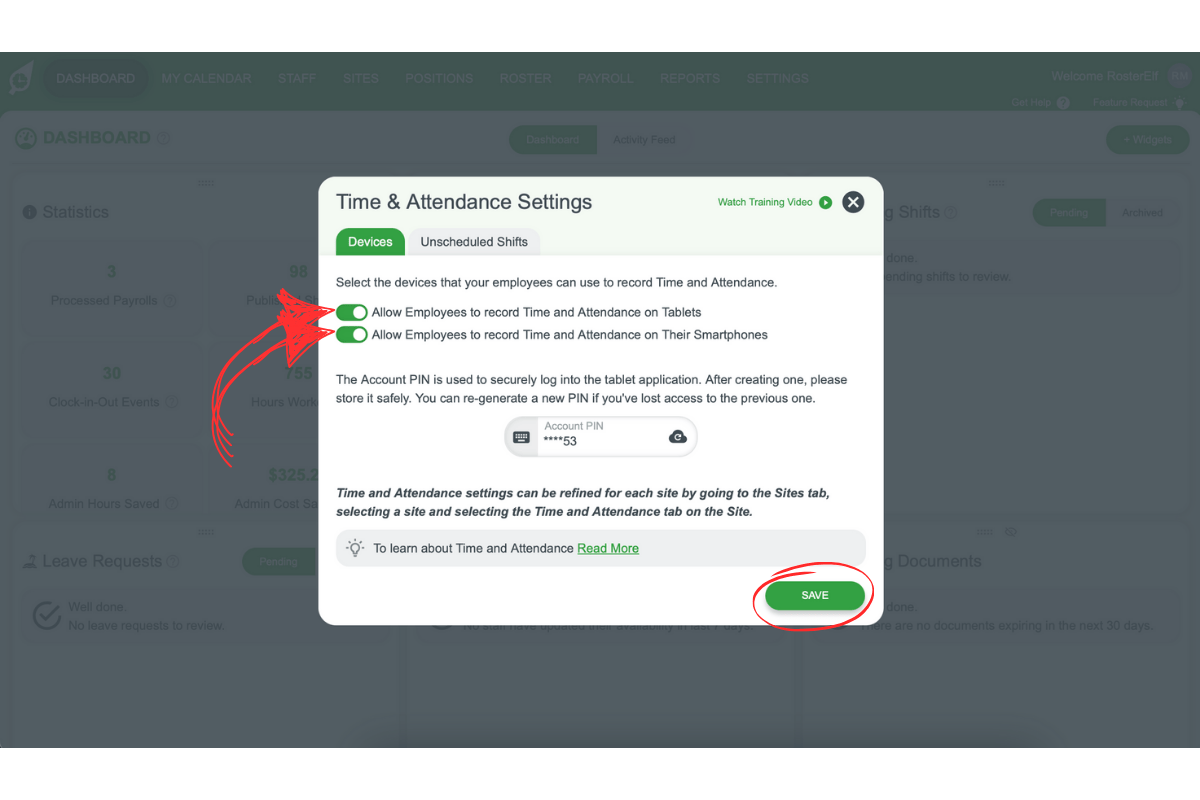
1.2.1 Toggling a clock-in method off will disable it for all staff.
1.2.2 Toggling a method on enables it for use across all sites and employees.
1.2.3 Ensure the settings align with your organisation’s attendance tracking needs.
2. Configuring site-specific settings
This section details how to customise Time & Attendance settings for each individual site. Site-specific settings allow for greater flexibility, adapting to the unique needs of each location.
Site-specific settings let you adjust Time & Attendance rules for different sites. This includes customising GPS tolerance, time tolerance, location settings, and more. It is useful for managing locations with varying requirements for clocking in and out, ensuring accurate time tracking at each site.
2.1 accessing site-specific settings
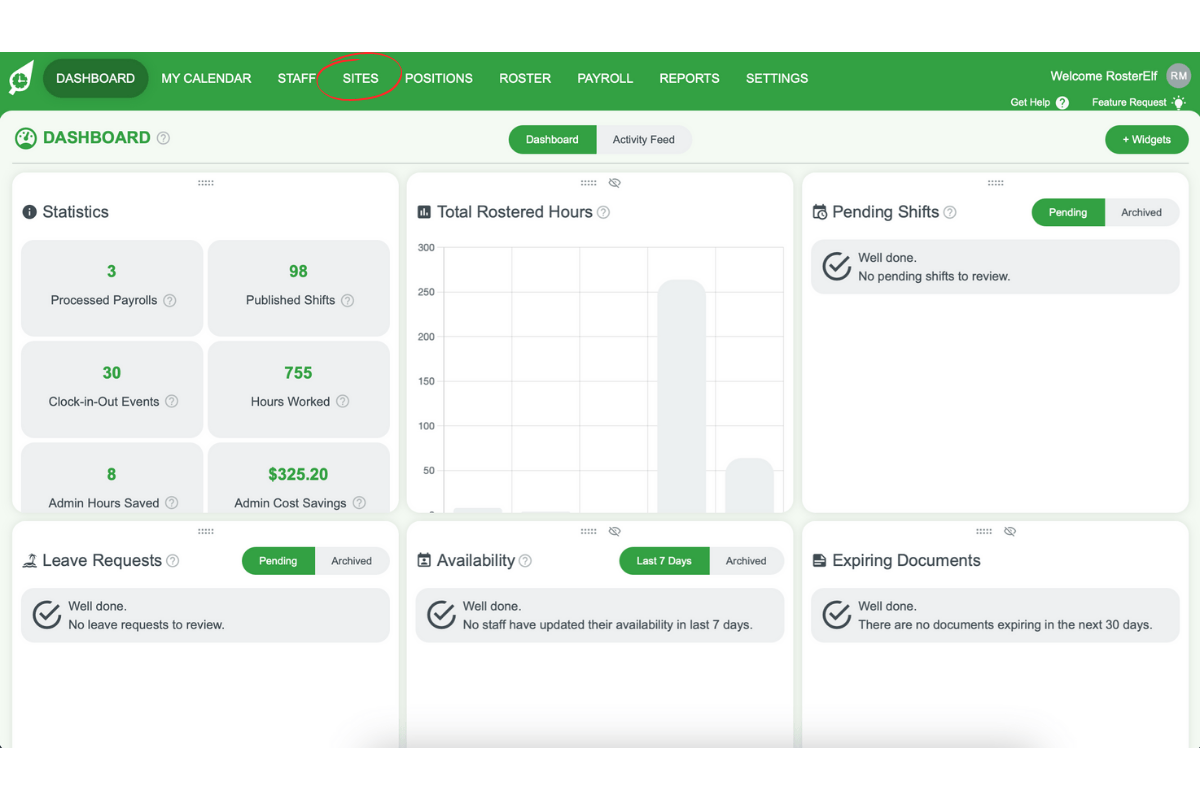
2.1.1 Click on the Sites tab from the main menu.
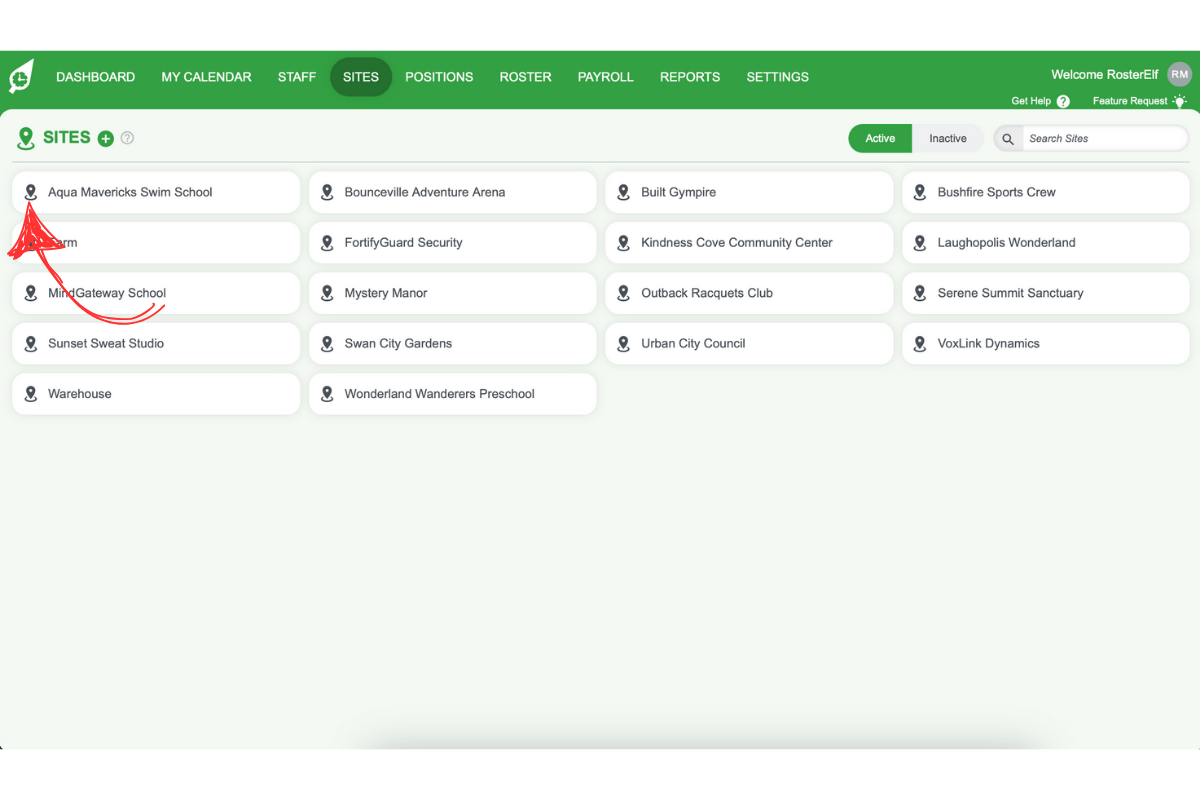
2.1.2 Select the desired Site you want to adjust.
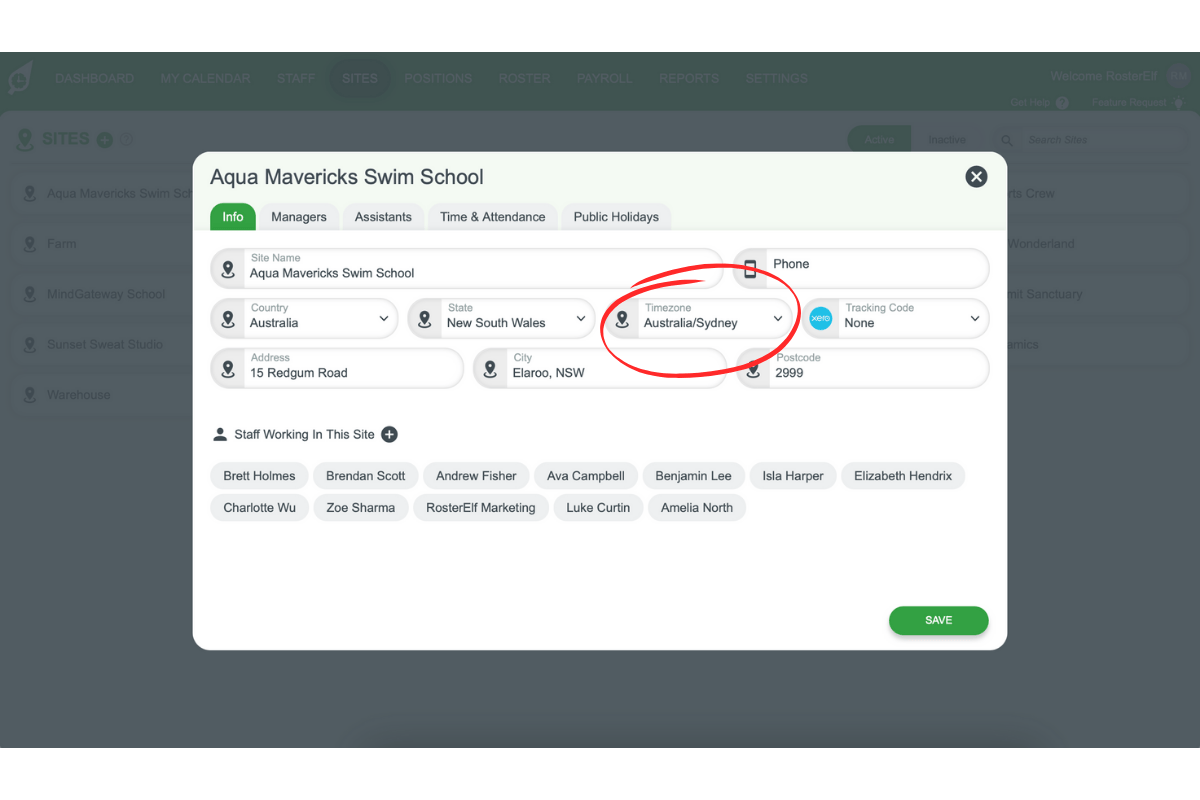
2.1.3 Navigate to the Info tab to set the time zone.
2.1.4 Click on the Time & Attendance tab to access specific settings.
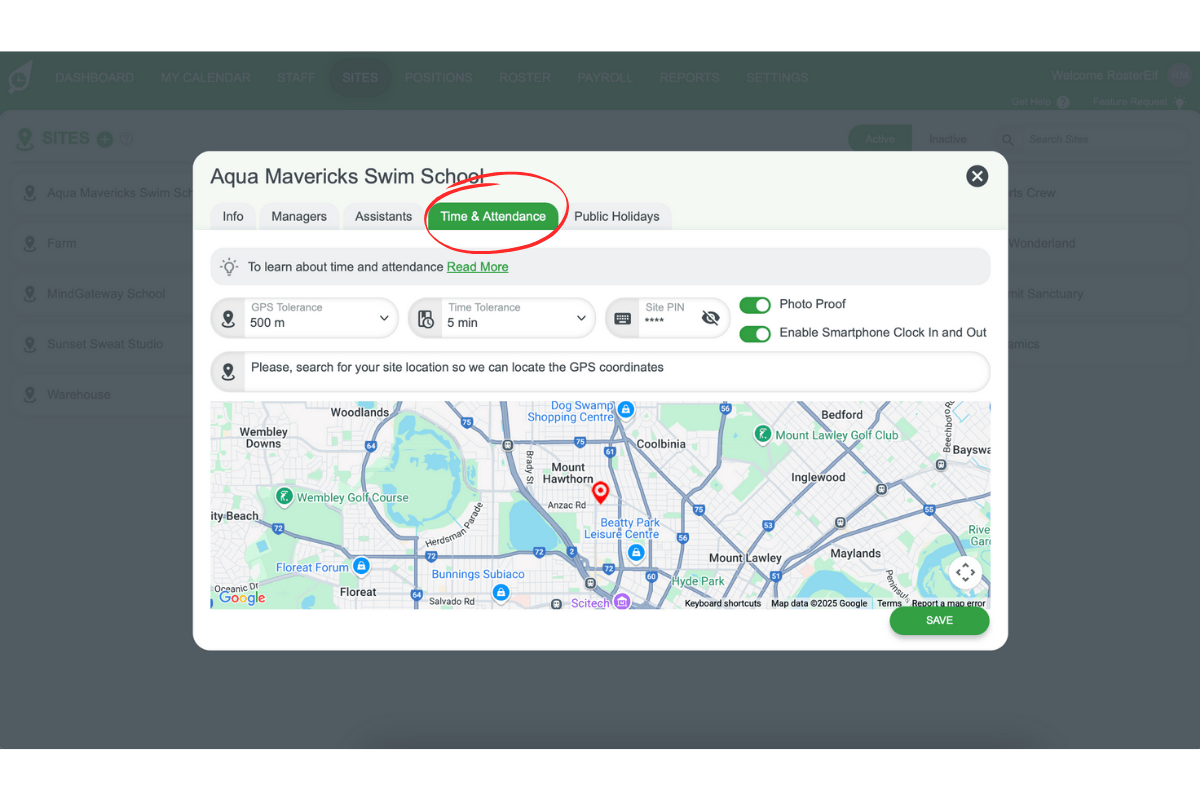
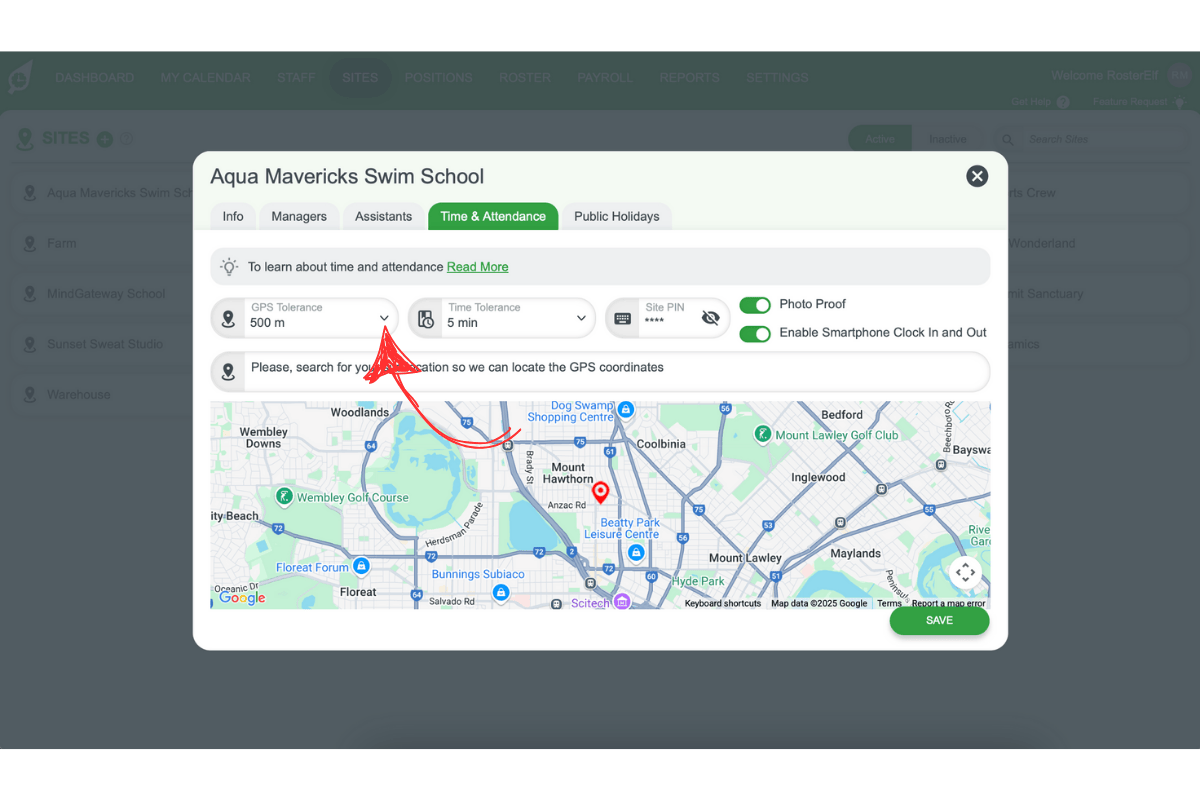
2.2 adjusting GPS tolerance
2.2.1 Use the GPS Tolerance setting to adjust the allowable distance from the site.
2.2.2 Increase tolerance for larger sites to ensure smooth clock-in/out.
2.2.3 Remember: GPS tolerance is based on a pinpoint location via Google Maps and uses geofencing.
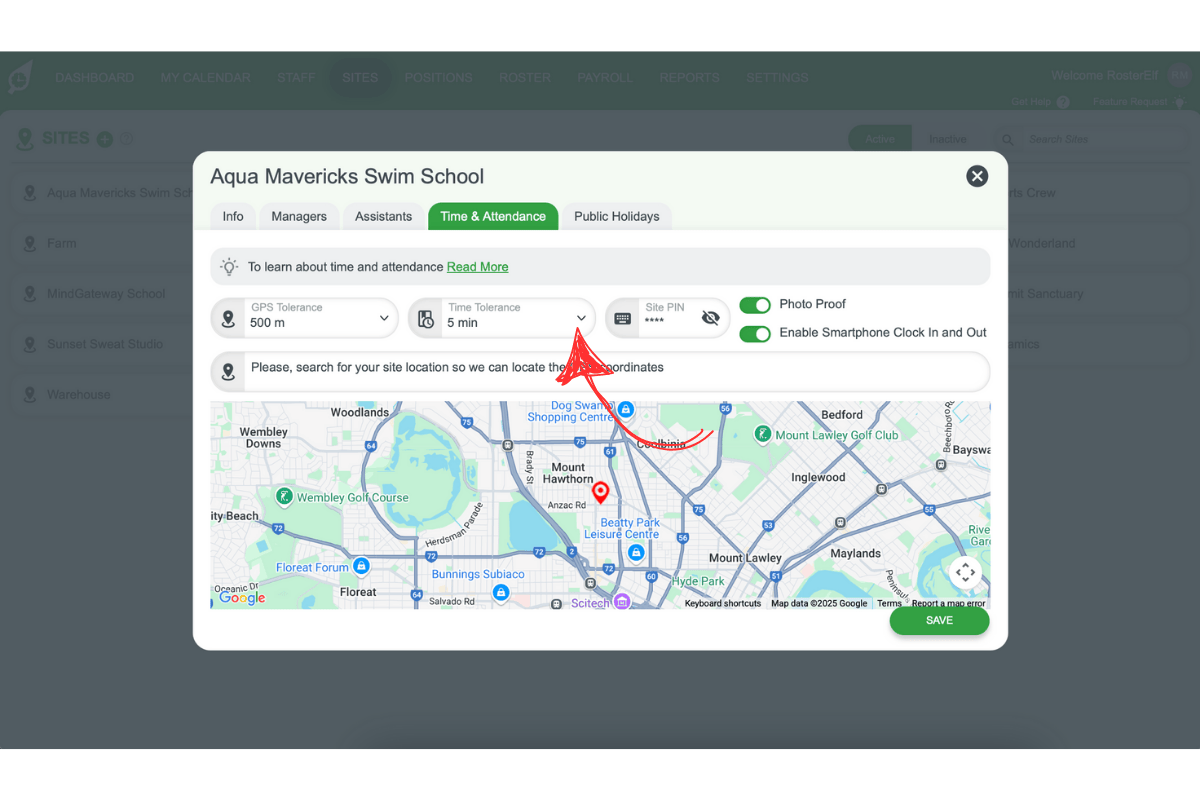
2.3 setting time tolerance
2.3.1 Adjust the Time Tolerance setting to control when employees are prompted for a reason.
2.3.2 Set to 0 to prompt on every clock-in and clock-out — useful for businesses relying on shift notes for record keeping.
2.3.3 Set a positive value (e.g. 5 or 15 minutes) to allow a buffer before a reason is required.
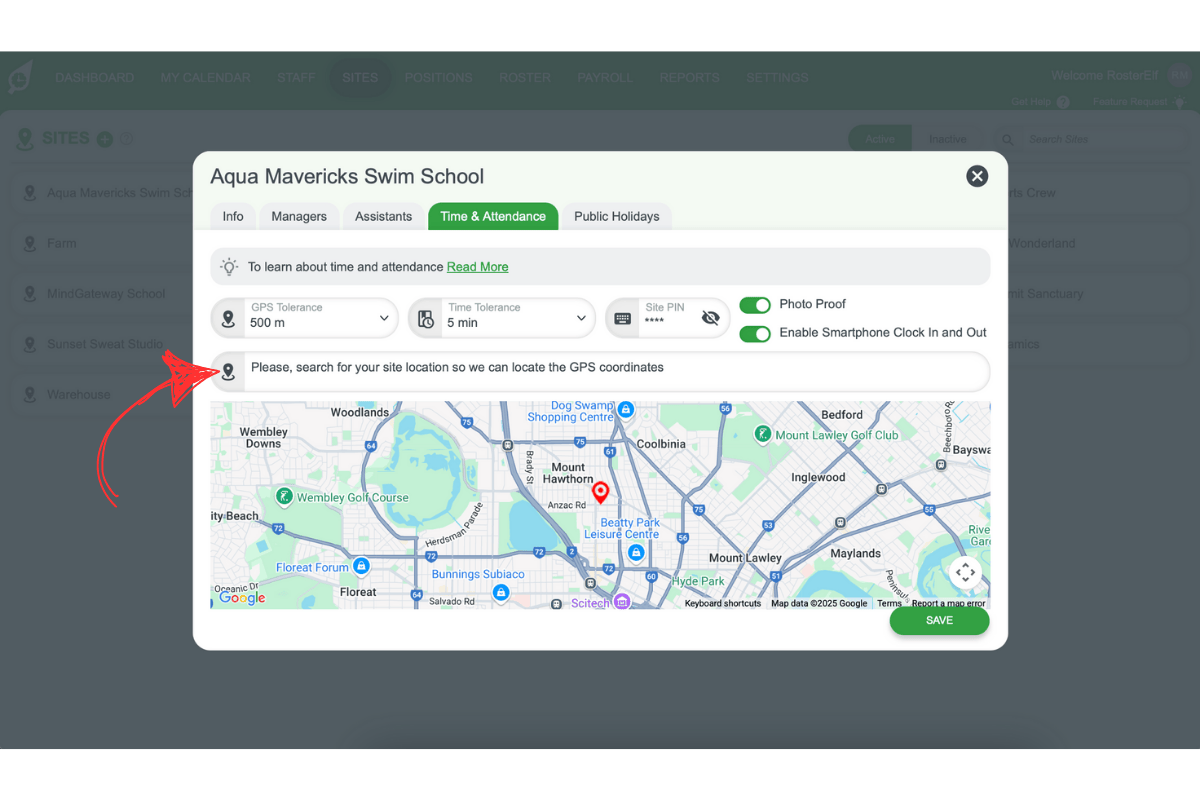
2.4 managing location settings
2.4.1 Set the Location for each site so that RosterElf can verify the staff member\‘s proximity.
2.4.2 This ensures clock-in/out accuracy when using smartphones.
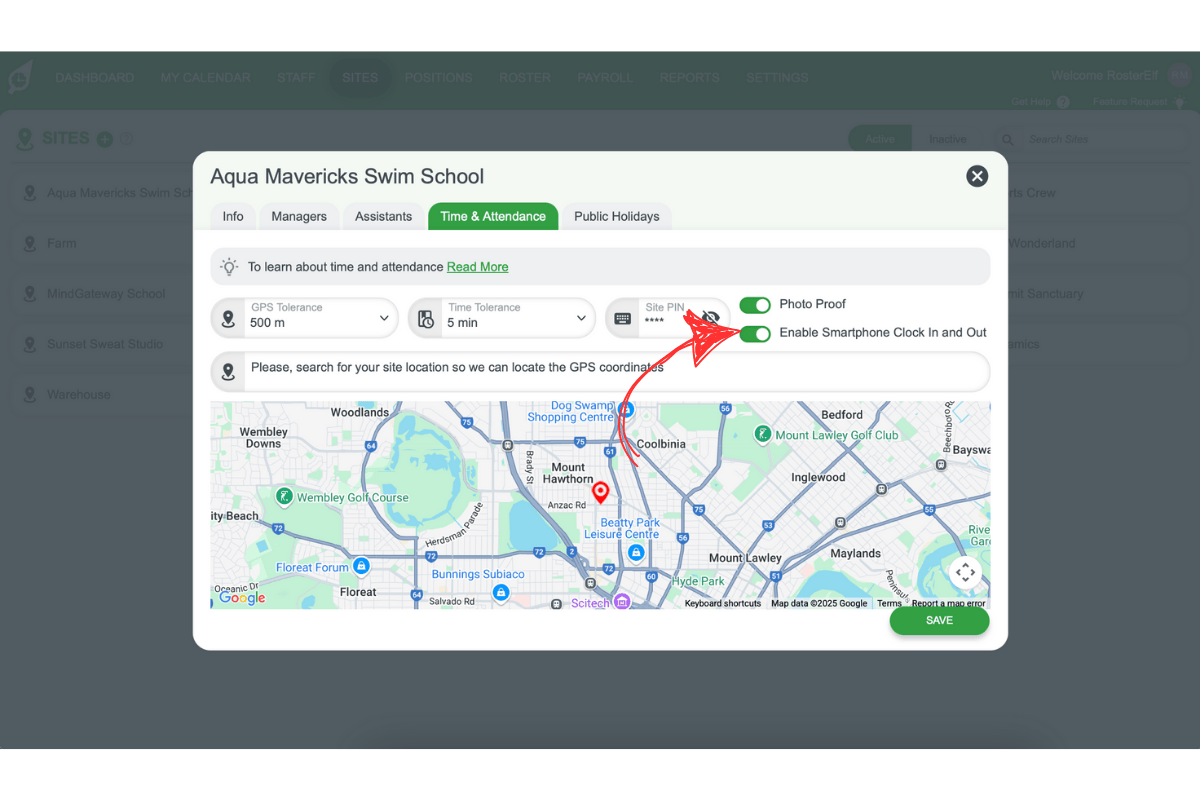
2.5 enabling photo proof
2.5.1 Use the Photo Proof setting to require staff to take a photo when clocking in/out.
2.5.2 This adds an extra layer of verification for attendance tracking.
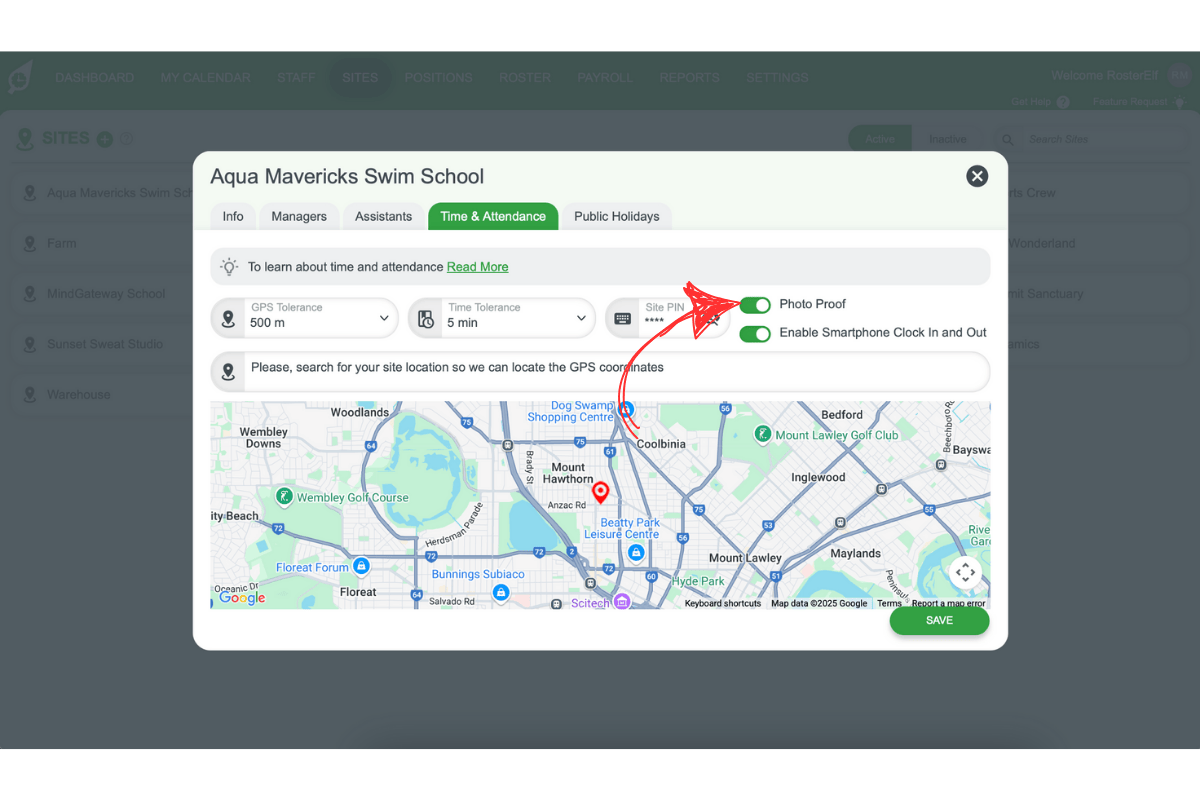
2.6 enabling smartphone clock in/out
2.6.1 Toggle Enable Smartphone Clock In and Out to allow mobile clock-ins.
2.6.2 This feature provides flexibility for staff and supports remote working arrangements.
2.6.3 Note: this site-level toggle must also be paired with the global setting (Settings → Time and Attendance → Smartphone clock in and out). Both must be on for clock-in controls to appear on employee shift cards.
Frequently asked questions
1. What are global Time & Attendance settings?
Global Time & Attendance settings control how employees clock in and out across your entire organisation. Adjusting these settings ensures consistent clocking methods for all users and sites, providing uniformity in attendance tracking.
2. How do I access global Time & Attendance settings?
To access global settings, click on the Settings tab in the main menu, then select Time & Attendance. From there, you can enable or disable different clock-in methods for all users.
3. What are site-specific Time & Attendance settings?
Site-specific settings allow you to customise attendance rules for each location. This includes adjusting GPS tolerance, time tolerance, and location-specific clocking methods, ensuring accurate time tracking for each site.
4. How do I adjust GPS tolerance for a specific site?
To adjust GPS tolerance, go to the Sites tab, select your desired site, and navigate to the Time & Attendance tab. Use the GPS Tolerance setting to specify the distance range for clocking in/out accuracy.
5. Can employees use their smartphones to clock in and out?
Yes, but two settings must both be enabled: the Smartphone Clock In and Out toggle in the global Time & Attendance settings (Settings → Time & Attendance) and the Enable Smartphone Clock In and Out toggle for each relevant site (Sites → [site] → Time & Attendance). Both must be on — enabling only one is not sufficient for clock-in controls to appear on employee shift cards.