In RosterElf, printing a roster allows you to share work schedules quickly and in an organised format. This article will guide you through accessing the roster print feature, adjusting print settings to suit your needs, and sending copies to staff. You’ll be able to customise the print output by selecting a specific period, format, and layout to make the roster clear and informative for your team.
1. Accessing the print roster feature
To print a roster, you’ll first need to access the print feature on the Roster screen. This section covers where to find the print button and how to initiate the print process.
1.1.1. Select the Print button at the Roster screen\‘s bottom right.
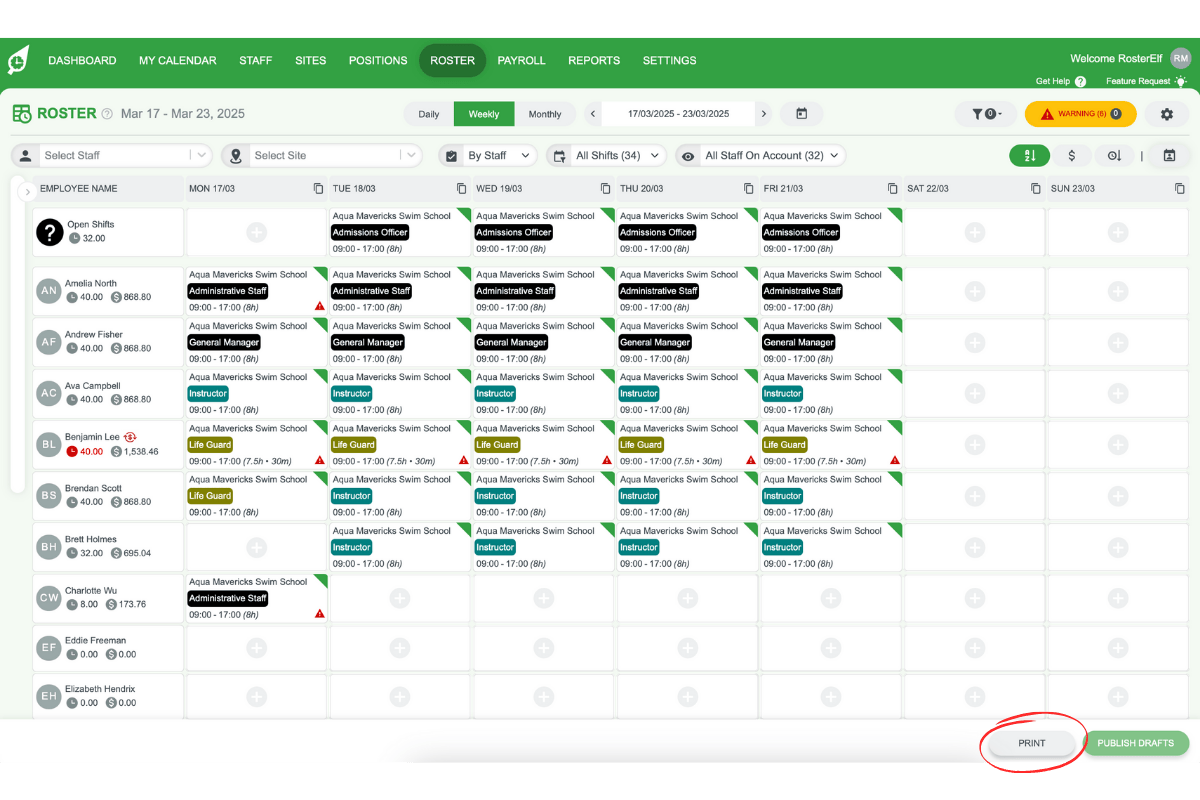
1.1.2. This action opens the Print Roster Options modal, pre-selecting options based on your current roster view.
2. Customising print settings
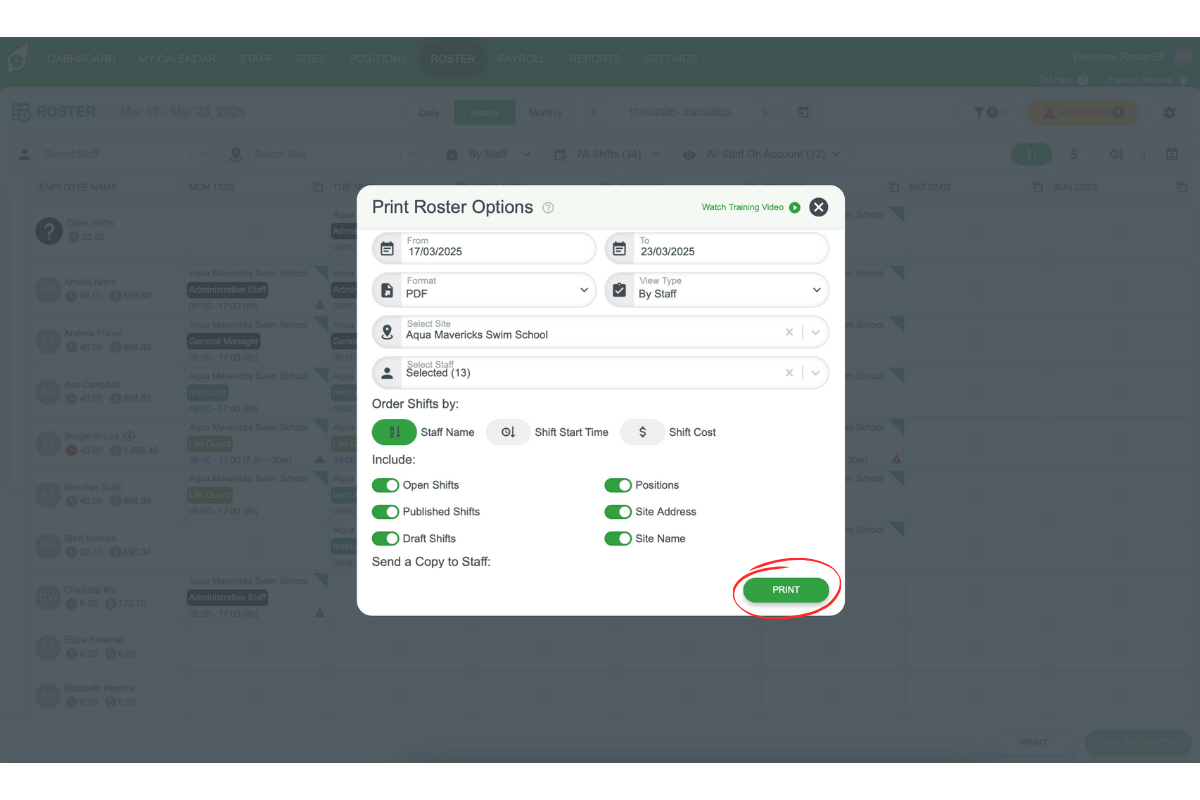
The print roster modal offers various settings that let you tailor the printed roster to your needs. Options include selecting the period, format, view type, and which shifts and staff are displayed. Follow these steps to customise your print settings.
2.1 selecting print options
2.1.1. Period: Choose the time period for the roster you wish to print.
2.1.2. Format: Select either PDF or CSV for your roster format.
2.1.3. View Type: Decide how to group shift rows by staff, sites, or positions.
2.1.4. Sites: Choose All Sites for a full roster or select specific sites.
2.1.5. Staff: Choose All Staff or select specific staff members to include in the print.
2.2 choosing display details
2.2.1. Open Shifts, Draft Shifts, Published Shifts: Toggle to show or hide shift types as needed.
2.2.2. Positions: Hide or show the position label on each shift for a more compact view if required.
2.2.3. Site Address: Toggle the site address to show in the print footer.
2.2.4. Site Name: Toggle the site name label on each shift to simplify the print layout, especially if all staff are assigned to one site.
3. Sending a copy to staff
In some cases, you may want to email a copy of the roster to staff directly from the platform. This section explains how to send an email copy to everyone listed on the roster.
3.1.1. Send Copy to Staff: Toggle this on to automatically email a copy to staff listed on the roster screen.
3.1.2. Note: A printed roster will not update if changes are made after exporting. Staff using the smartphone app may not need a printed copy unless required by your business.
4. Completing the printing process
Once all settings are customised, you’re ready to print and email the roster. This final section covers the steps to complete the process and what to expect.
4.1. Click Print.
4.2. The printed roster will be emailed to you once it’s generated. For larger rosters, please allow several minutes for the email to arrive.
Following these steps ensures a smooth process for printing and sharing rosters with your team. Adjust the settings as needed to create a clear, accurate, and customised roster for everyone involved.
Frequently asked questions
1. How do I access the print roster feature in RosterElf?
To access the print roster feature, go to the Roster screen and select the Print button at the bottom right. This opens the Print Roster Options modal, with options pre-selected based on your current roster view.
2. Can I customise my roster before printing?
Yes, you can customise your roster by selecting the period, format, view type, and which shifts and staff to include. Options are available in the Print Roster Options modal for further adjustments to fit your needs.
3. What print formats are available in RosterElf?
RosterElf offers two formats for printing rosters: PDF and CSV. You can choose your preferred format in the Print Roster Options modal under the Format section.
4. How do I send a printed roster copy to my staff?
Toggle the Send Copy to Staff option in the print settings to automatically email a roster copy to all staff listed. This option allows team members to receive an up-to-date roster directly.
5. Will my roster update if I make changes after printing?
No, printed rosters remain unchanged if you make updates later. Ensure all changes are final before printing. Staff using the RosterElf app can always access the most current roster details digitally.