Introduction
This article explains how to delete and amend newsfeed posts in RosterElf. Managing your newsfeed posts ensures your team always receives accurate and relevant information. You may need to delete a post if it is no longer required or contains incorrect details. You may also need to amend a post to update information, correct errors, or add additional context.
RosterElf makes it simple to manage your newsfeed posts directly from the platform. You can access the newsfeed, locate your post, and either delete or edit it in just a few steps. This ensures your communication remains clear and up to date for your staff.
Following this guide will help you quickly remove outdated posts or update existing ones, improving team communication and ensuring your staff always see the most relevant information. To learn how to create a post, see how to use the newsfeed in RosterElf to share updates.
1. Delete newsfeed post in RosterElf
This section explains how to delete a newsfeed post in RosterElf. Deleting a post is useful when the information is no longer relevant or was created in error. Removing outdated posts helps keep your newsfeed clean and easy to follow for your staff, ensuring your team only sees current and important updates.
1.1 Delete newsfeed post steps
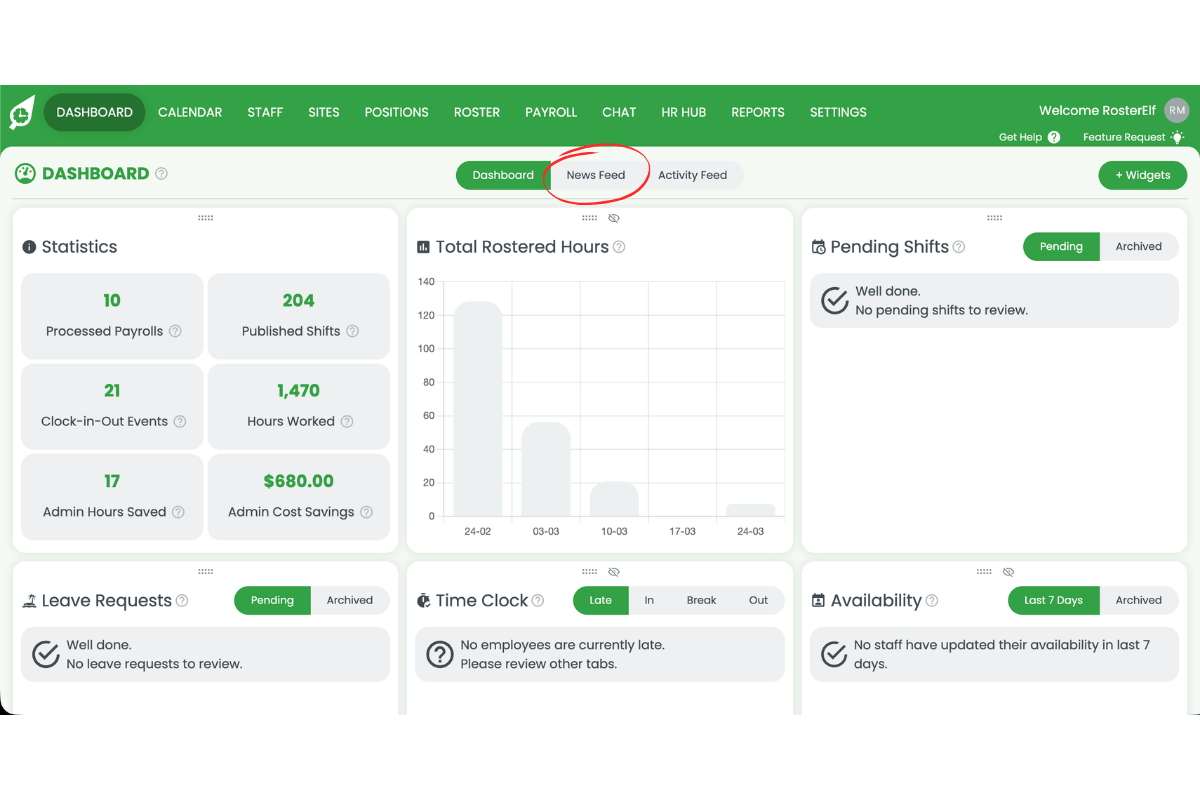
1.1.1 Open RosterElf. You will land on the Dashboard by default.

1.1.2 Press the News Feed tab at the top centre of the Dashboard.
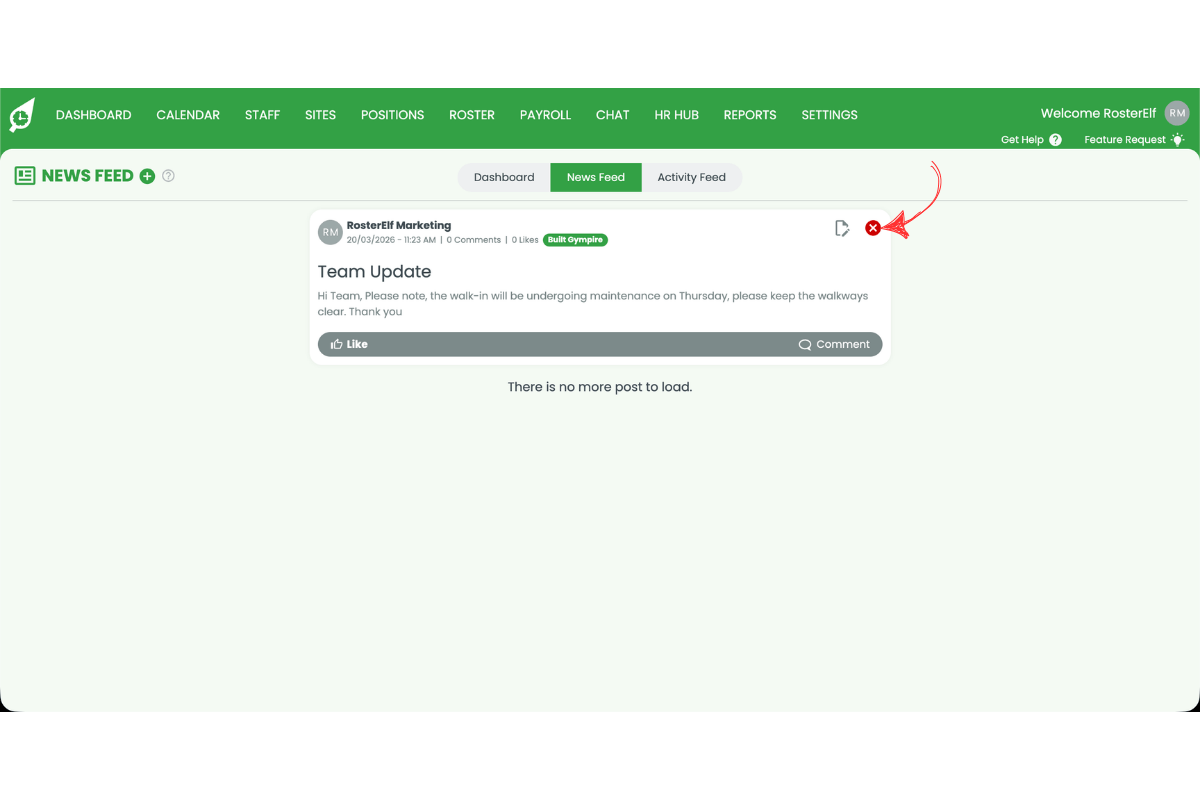
1.1.3 Press the red X icon in the top-right corner of the post you want to delete.
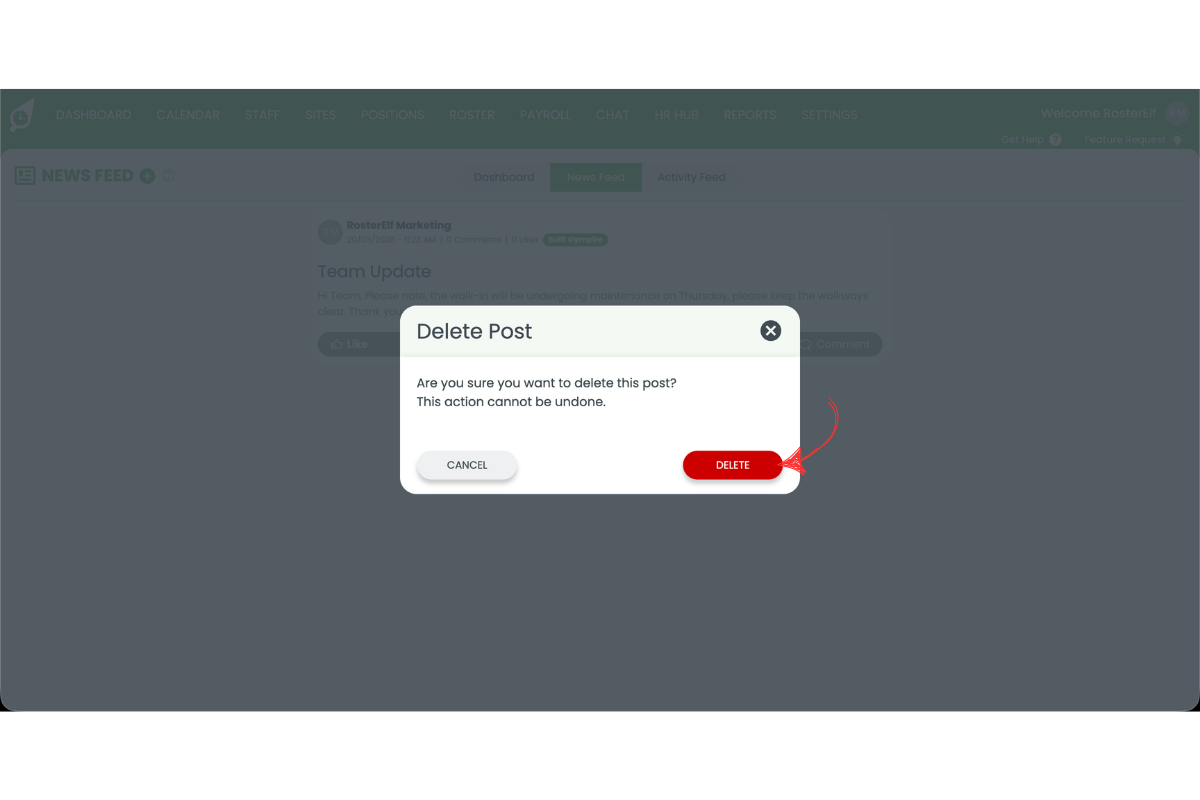
1.1.4 Press Delete in the confirmation modal to permanently remove the post.
Warning
Deleting a post is permanent and cannot be undone. Check the content carefully before confirming deletion.
2. Amend newsfeed post in RosterElf
This section explains how to amend a newsfeed post in RosterElf. Editing a post allows you to update information, fix errors, or add new details. Keeping your posts accurate helps ensure your staff receive correct and useful communication.
2.1 Amend newsfeed post steps
2.1.1 Open RosterElf and press the News Feed tab at the top centre of the Dashboard.
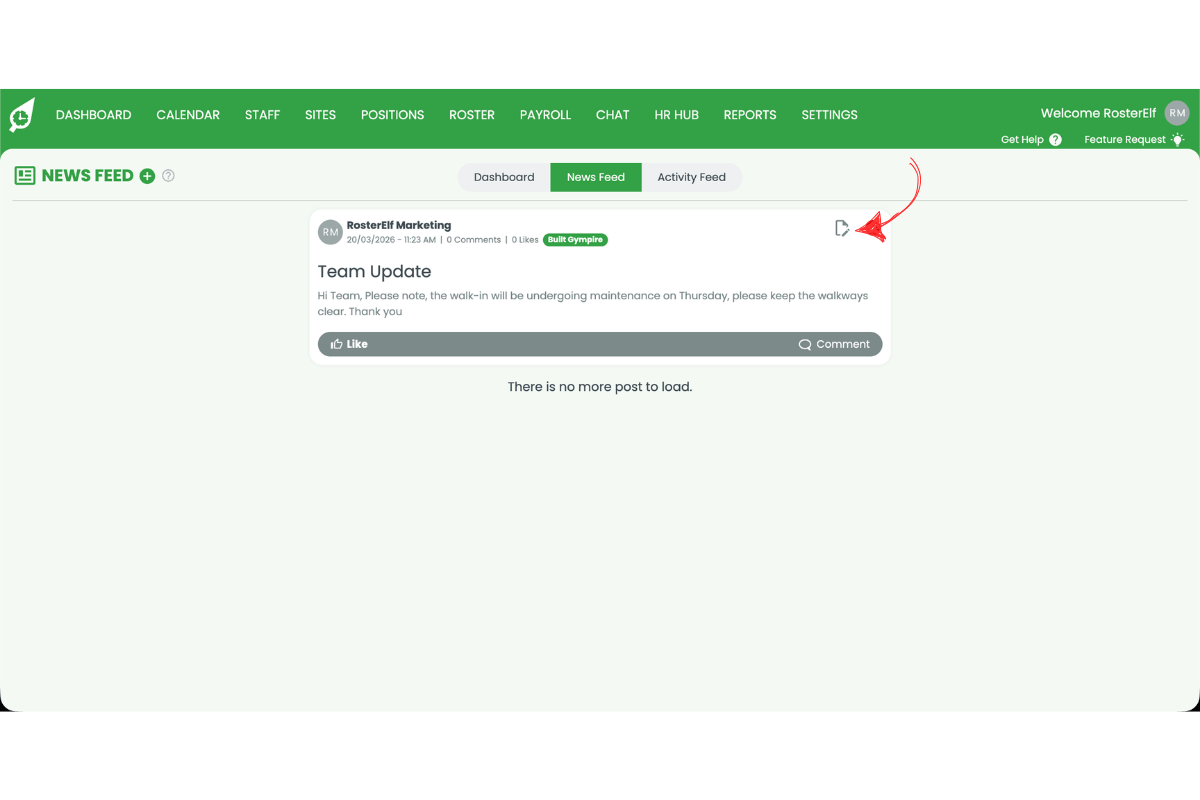
2.1.2 Press the pencil icon in the top-right corner of the post you want to edit.
2.1.3 The Edit Post form will open with the existing content pre-filled. Make your amendments to the title, description, site, or attachments as needed.
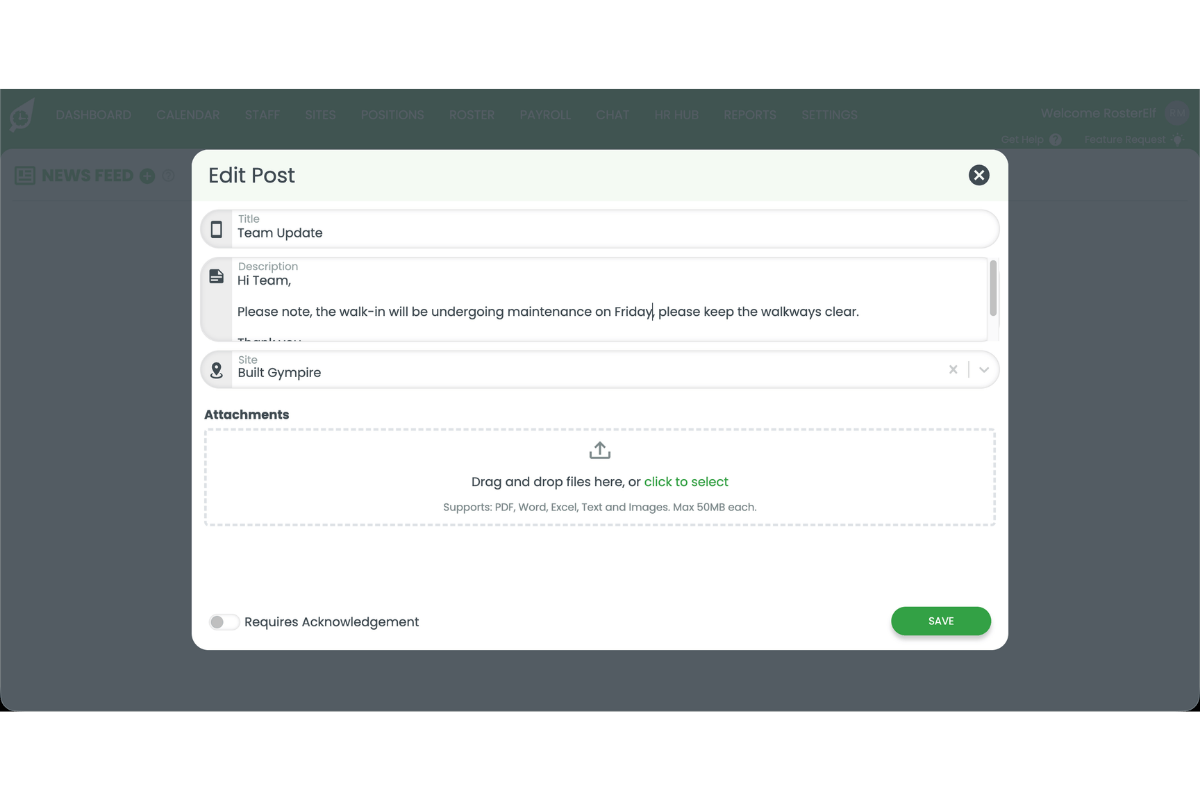
2.1.4 Press Save to publish the updated post.
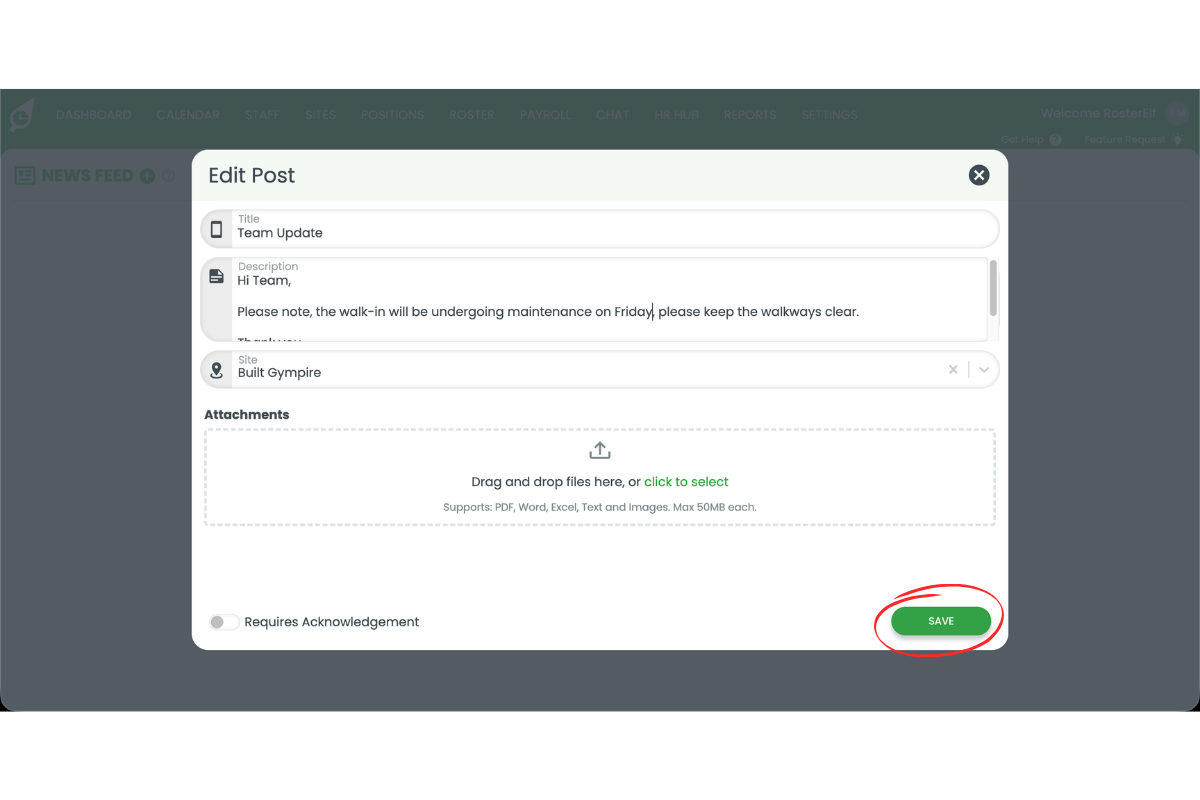
2.1.5 The post will be updated and the amended version will be visible to staff at the selected site(s).
Note
If Requires Acknowledgement is toggled on, the post cannot be edited. You will need to delete the post and create a new one with the correct information.
Frequently asked questions
1. How do I delete a newsfeed post in RosterElf?
To delete a newsfeed post in RosterElf, open the platform and go to the newsfeed. Select the post you want to remove, press the red X icon, and confirm by selecting Delete. This will permanently remove the post from the newsfeed.
2. How do I amend a newsfeed post in RosterElf?
To amend a newsfeed post in RosterElf, open the newsfeed and locate the post you want to update. Press the pencil icon, make your changes, and press Save. This will update the post for all staff to view.
3. Can I recover a deleted newsfeed post in RosterElf?
No, once you delete a newsfeed post in RosterElf it cannot be recovered. Check the content carefully before confirming deletion to avoid losing important information.
4. Why should I amend a newsfeed post instead of deleting it?
You should amend a newsfeed post when you need to correct or update information without removing the entire message. This helps maintain communication history while ensuring your team sees accurate and updated details.
5. Why can't I amend my post?
If you have toggled on Requires Acknowledgement, you will not be able to edit the post. To make changes, you will need to delete the post and create a new one.