Create and manage employment contracts in RosterElf HR Hub
This guide explains how to create, edit, and manage employment contracts in RosterElf HR Hub. You’ll learn how to add contract templates, customise content, send digital contracts to employees, and manage signed documents — all from one place.
The Employment Contracts module simplifies onboarding by storing all signed agreements securely in HR Hub. Placeholders automatically populate company and employee details, reducing manual data entry when sending contracts to staff.
For a broader overview of HR Hub features, see Manage and enable HR Hub access. To run a report on all staff contracts, see Track and maintain staff contracts in RosterElf.
Note
The HR Hub is available as an add-on to your RosterElf subscription. Only Admins can create, edit, and send employment contracts. Employees can view and sign their contracts through My HR Hub.
1. Navigating the employment contracts module
1.1 Tabs overview
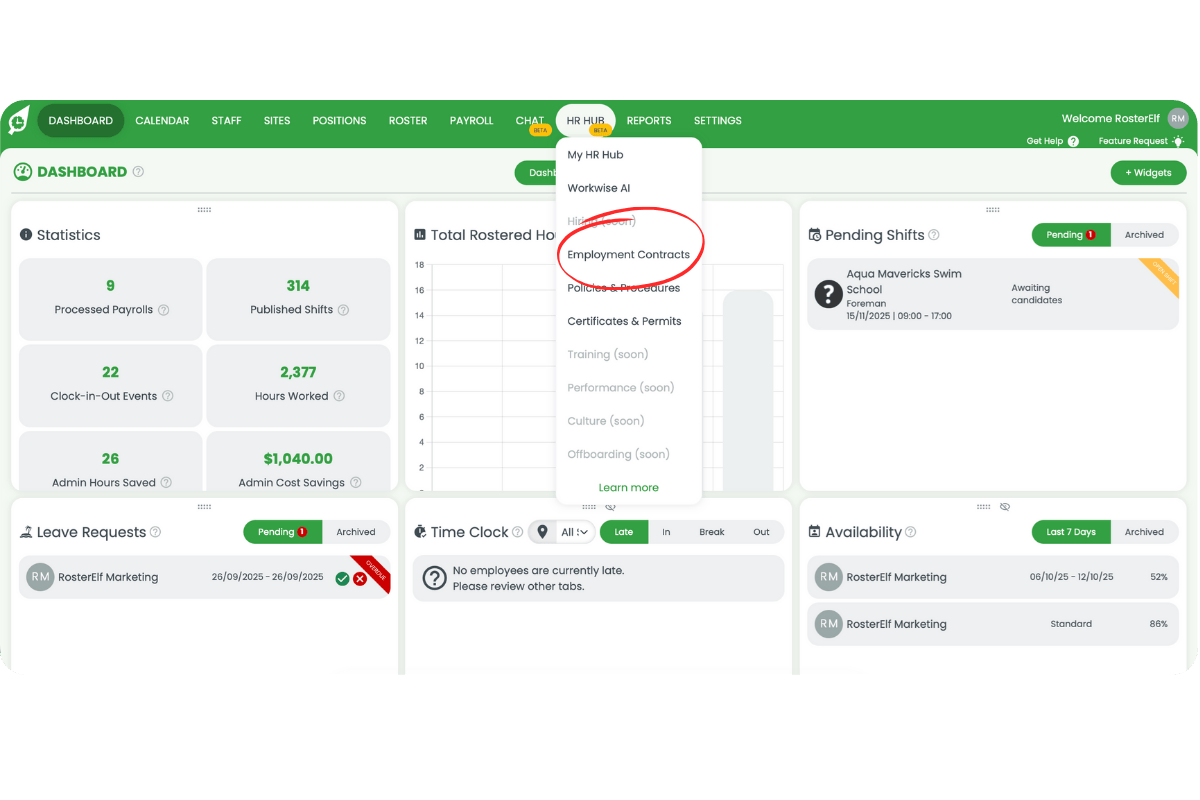
1.1.1 Click HR Hub and select Employment Contracts.
1.1.2 The top right shows three tabs: Active, Library, and Inactive.
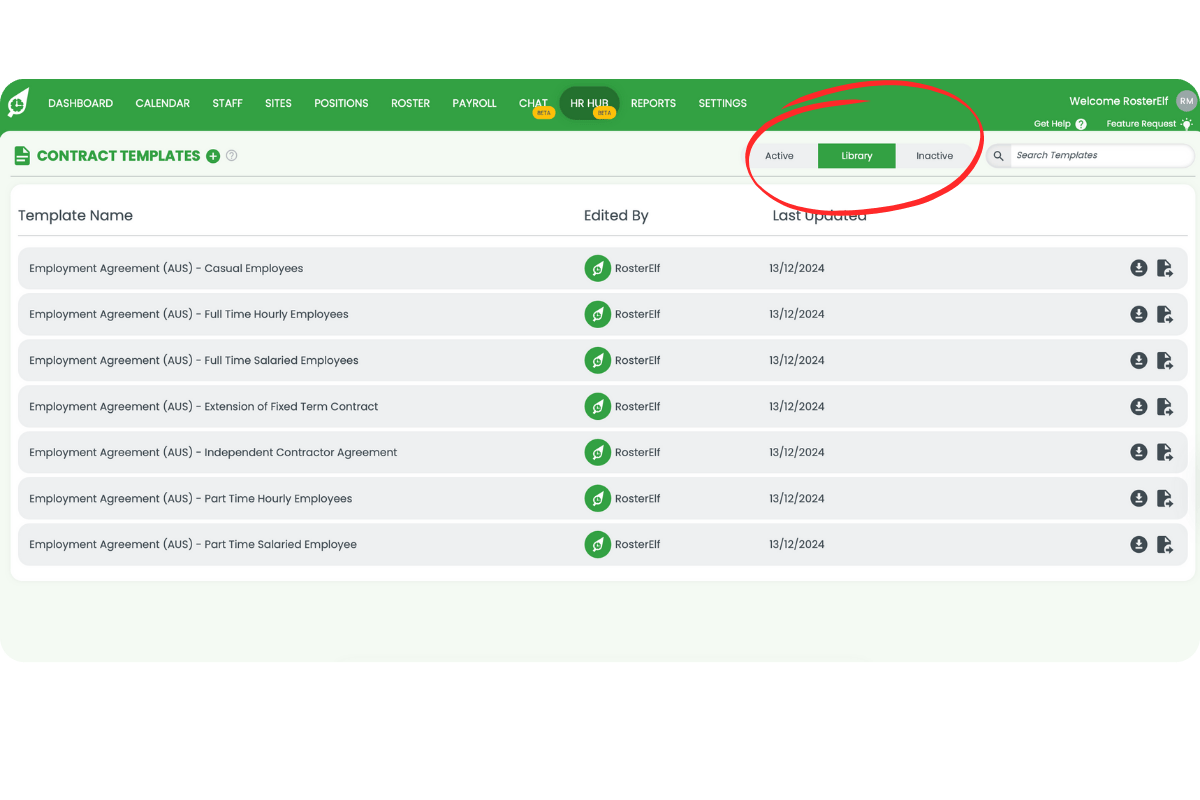
1.1.3 Active lists the contracts your team is currently using.
1.1.4 Library contains draft templates you can customise and review.
1.1.5 Inactive displays contracts that are no longer in use.
1.1.6 Click any tab to switch between views.
2. How to add a new employment contract template
2.1 Create and review an employment contract
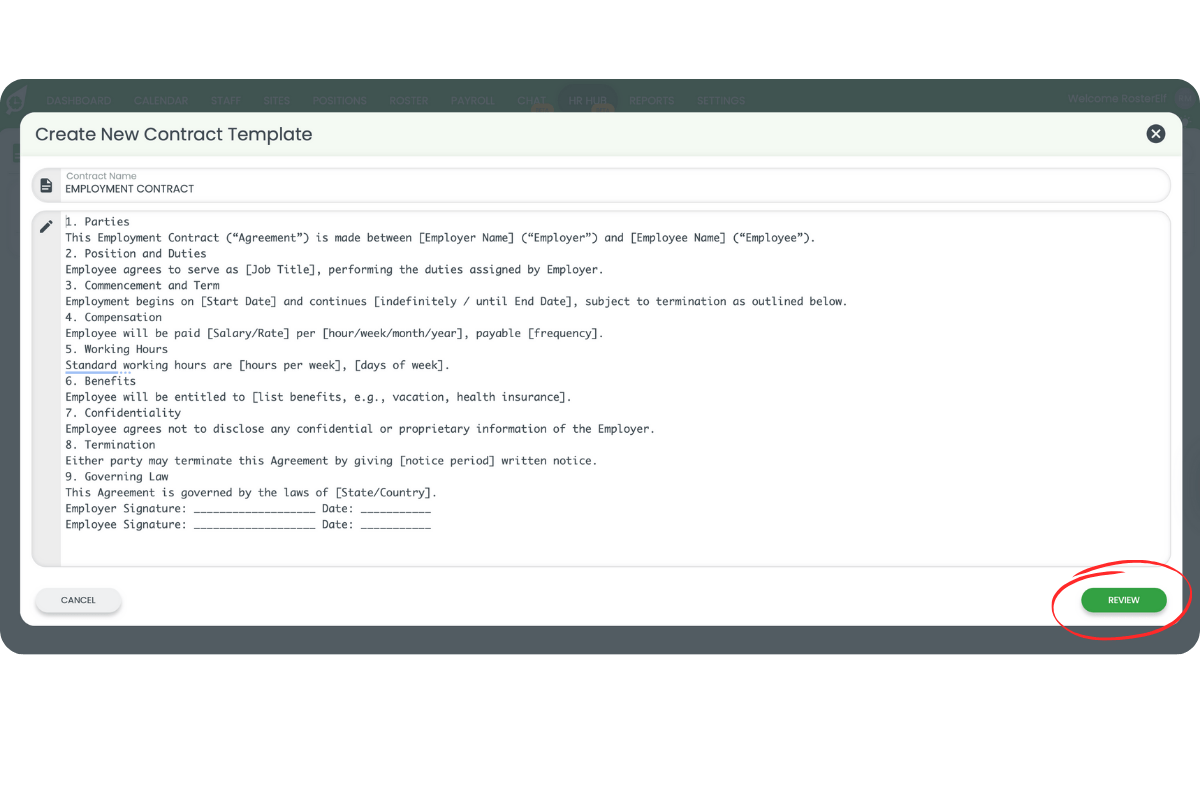
2.1.1 Click the + icon next to Contract Templates in the top left.
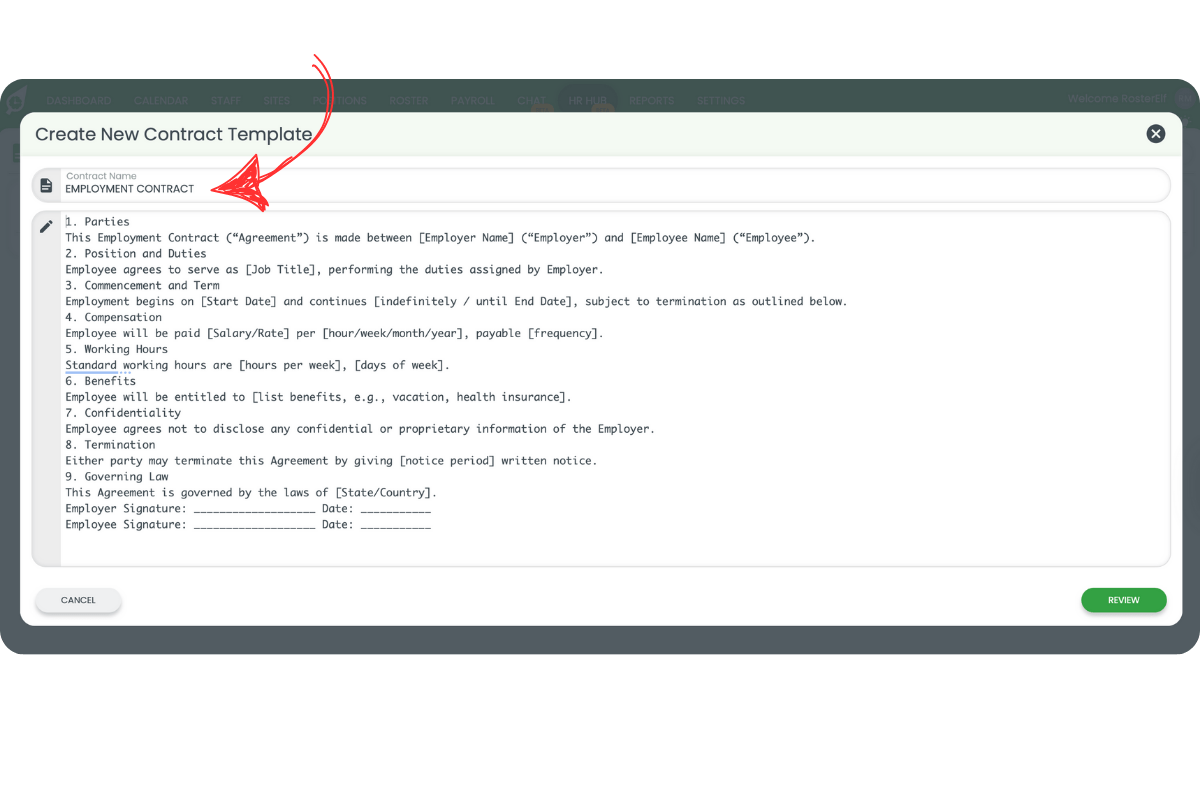
2.1.2 In the modal, enter a contract name.
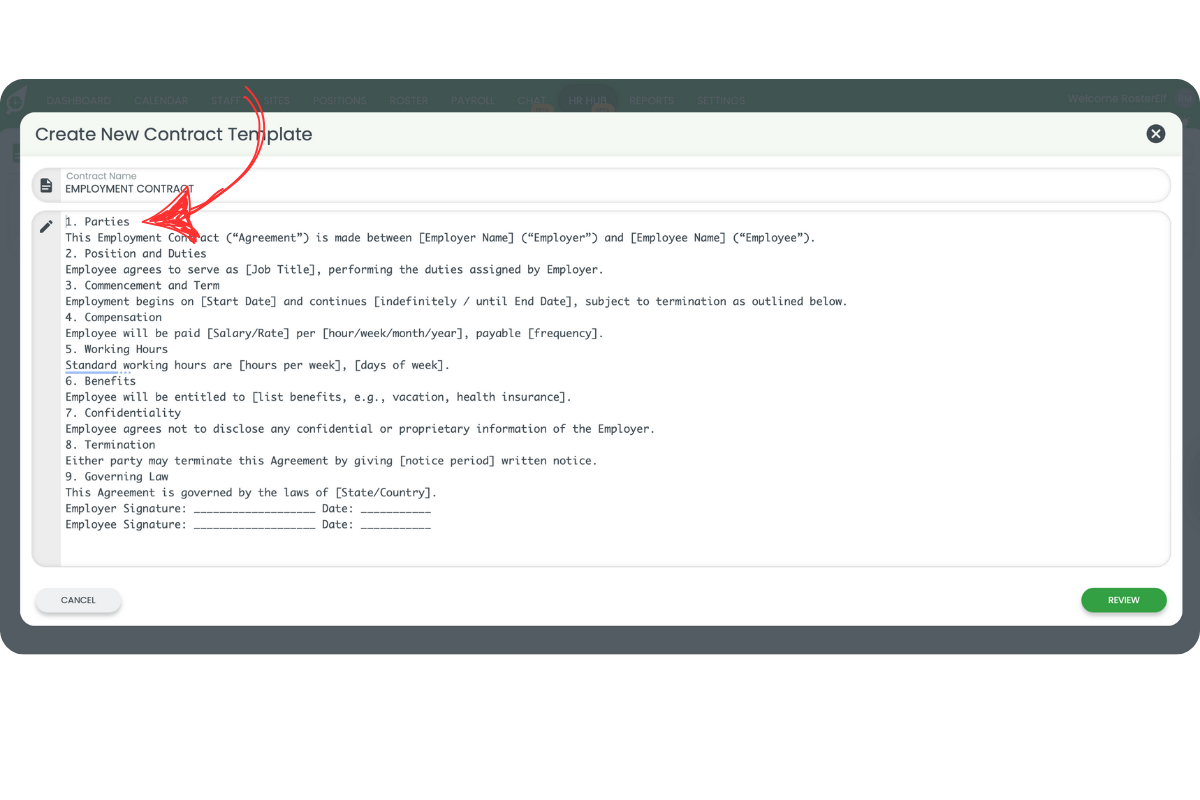
2.1.3 Paste your contract text into the field.
2.1.4 Click Review to confirm your changes.
3. How to edit employment contracts
3.1 Using simple mode
3.1.1 Hover over a paragraph to reveal the + and x icons.
3.1.2 Click + to add a new paragraph below.
3.1.3 Click x to delete the paragraph.
3.1.4 To edit, click the paragraph — a modal will open.
3.1.5 Highlight text to apply bold, italic, or underline formatting.
3.1.6 Choose heading styles from the top menu.
3.2 Using placeholders in employment contracts
3.2.1 Placeholders automatically fill in data like company name or employee name when a contract is sent.
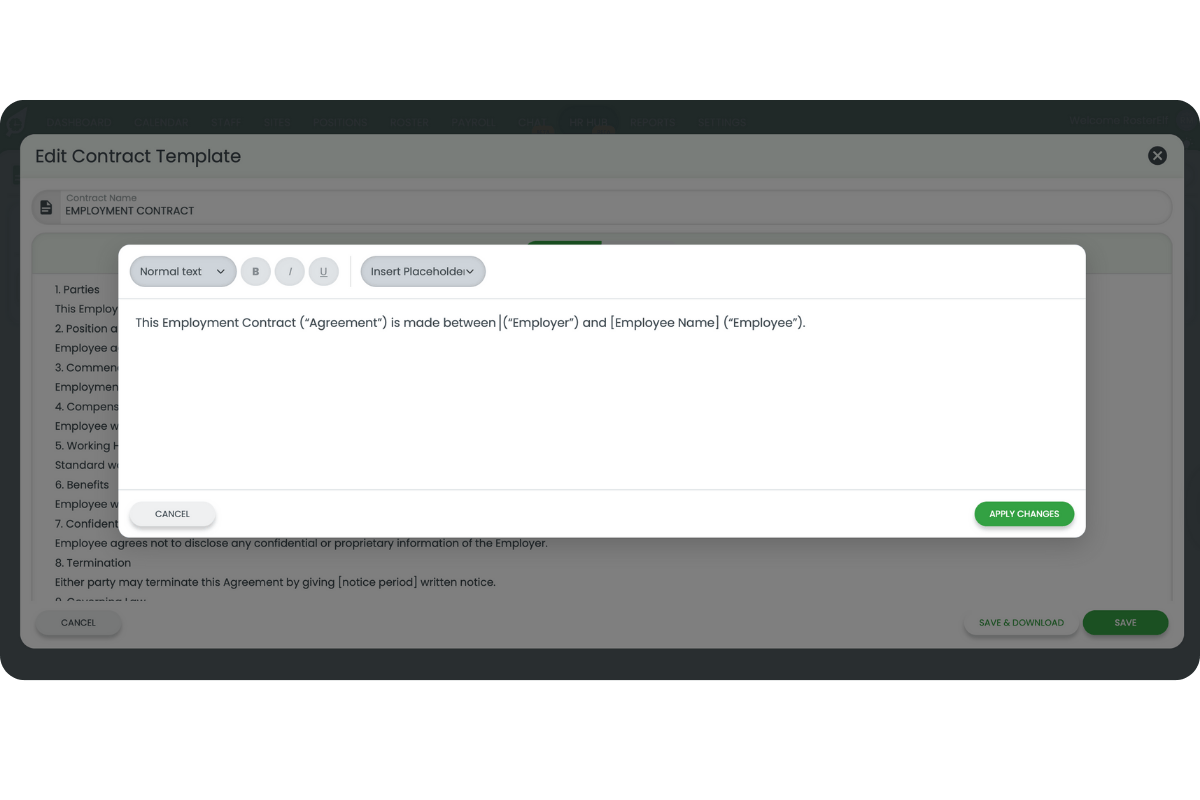
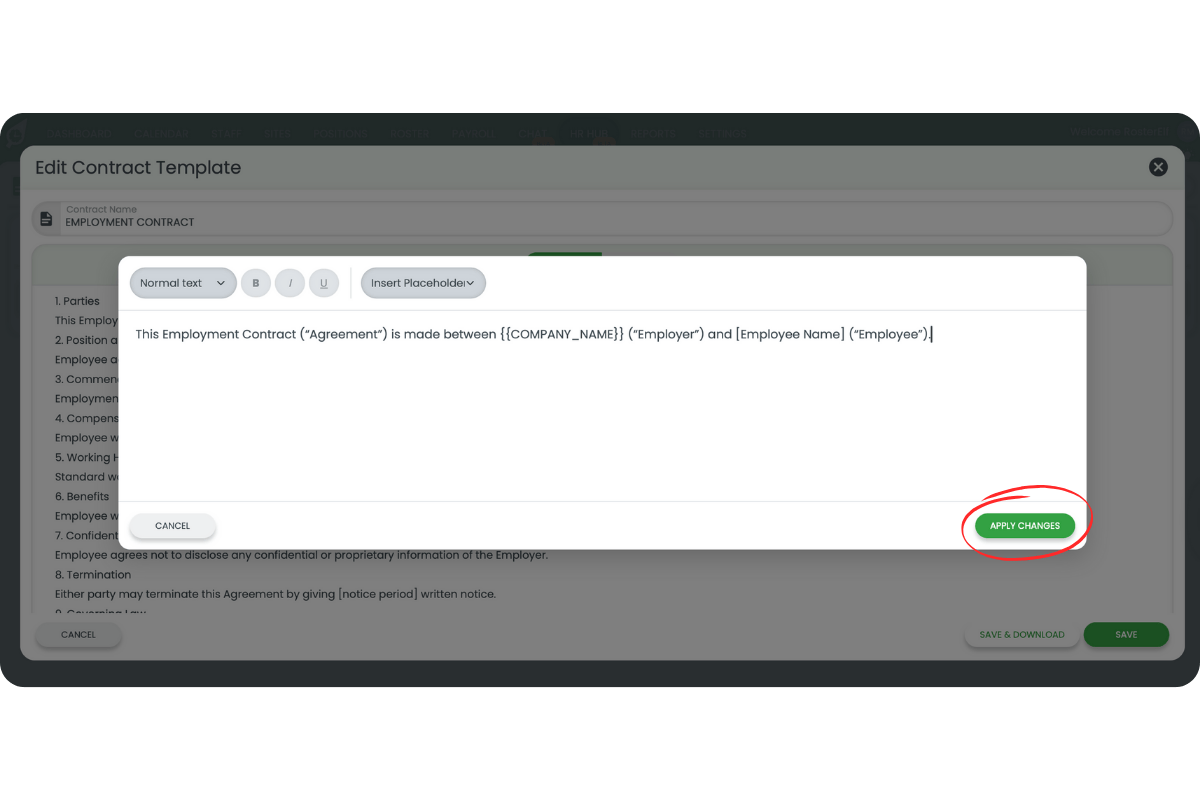
3.2.2 To insert one, delete the placeholder text and click Insert Placeholder.
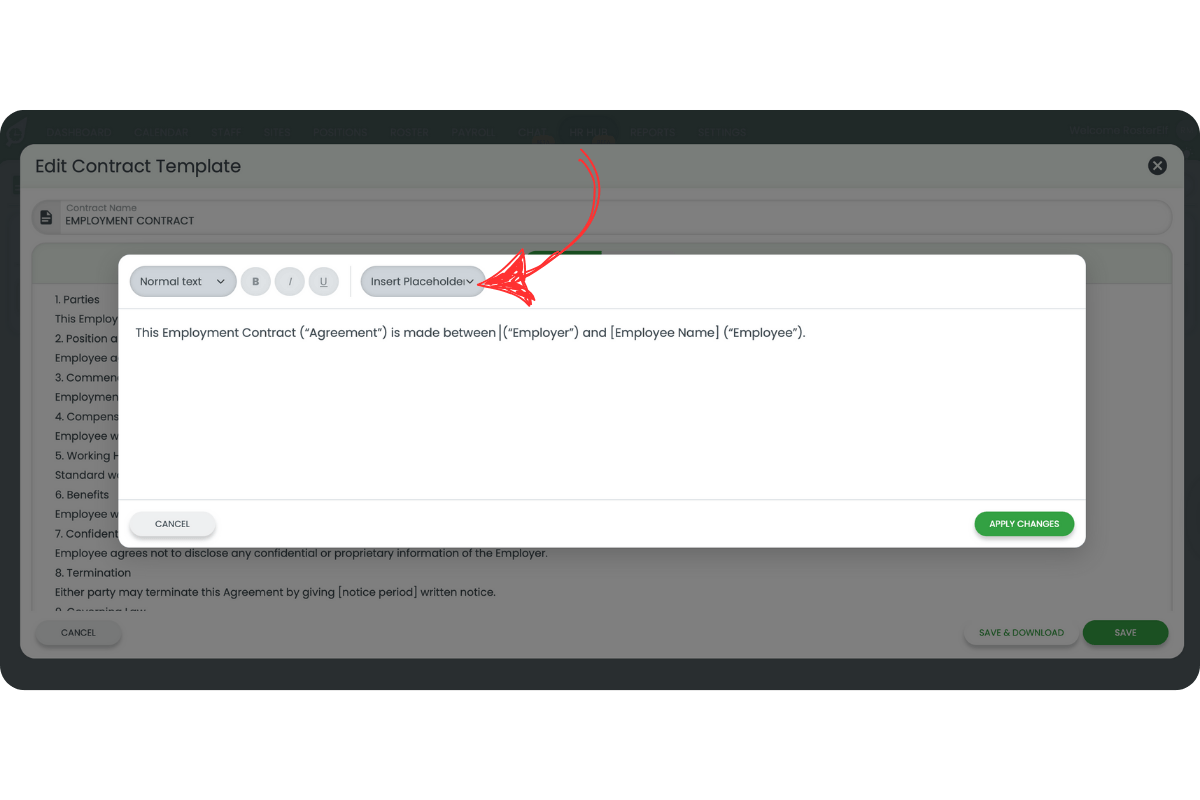
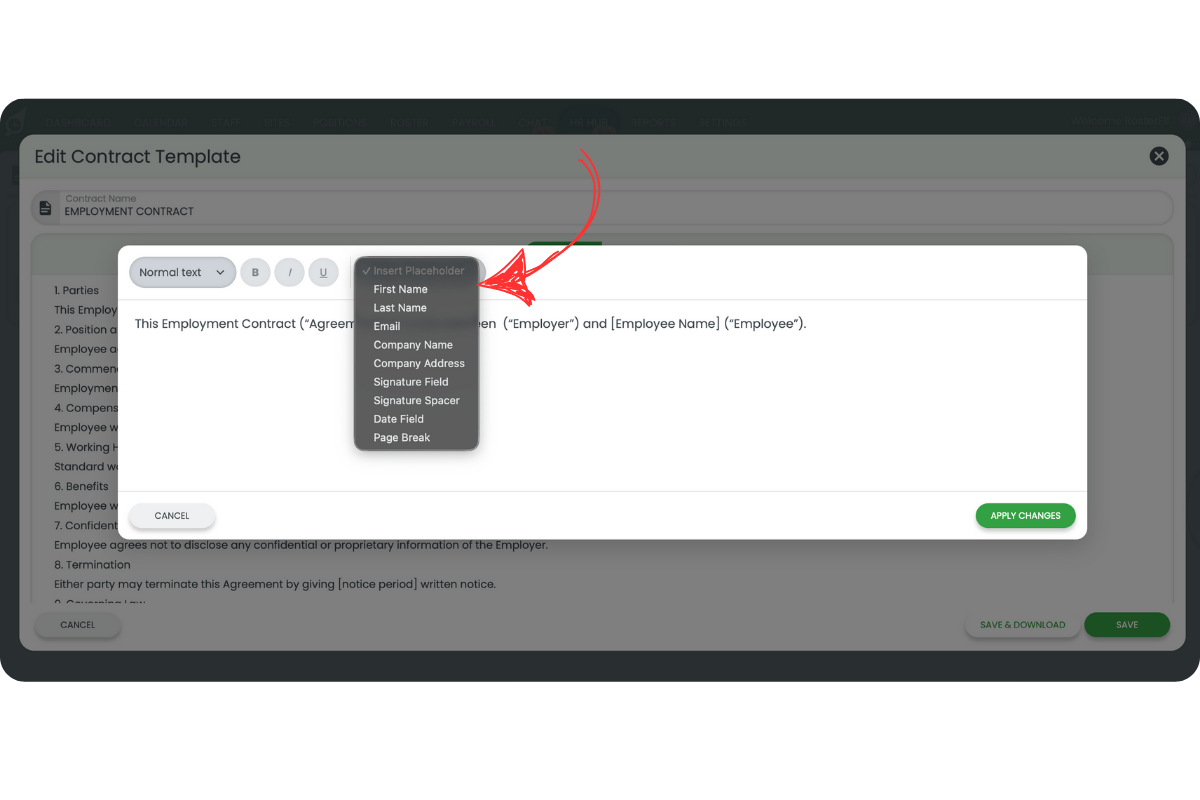
3.2.3 Select the placeholder you need, such as Company Name.
3.2.4 Your text will appear like this: This Employment Contract is made between {{COMPANY_NAME}} (Employer) and [Employee Name] (Employee).
3.2.5 Click Apply Changes when done.
3.3 Using advanced mode
3.3.1 Click Advanced in the top menu.
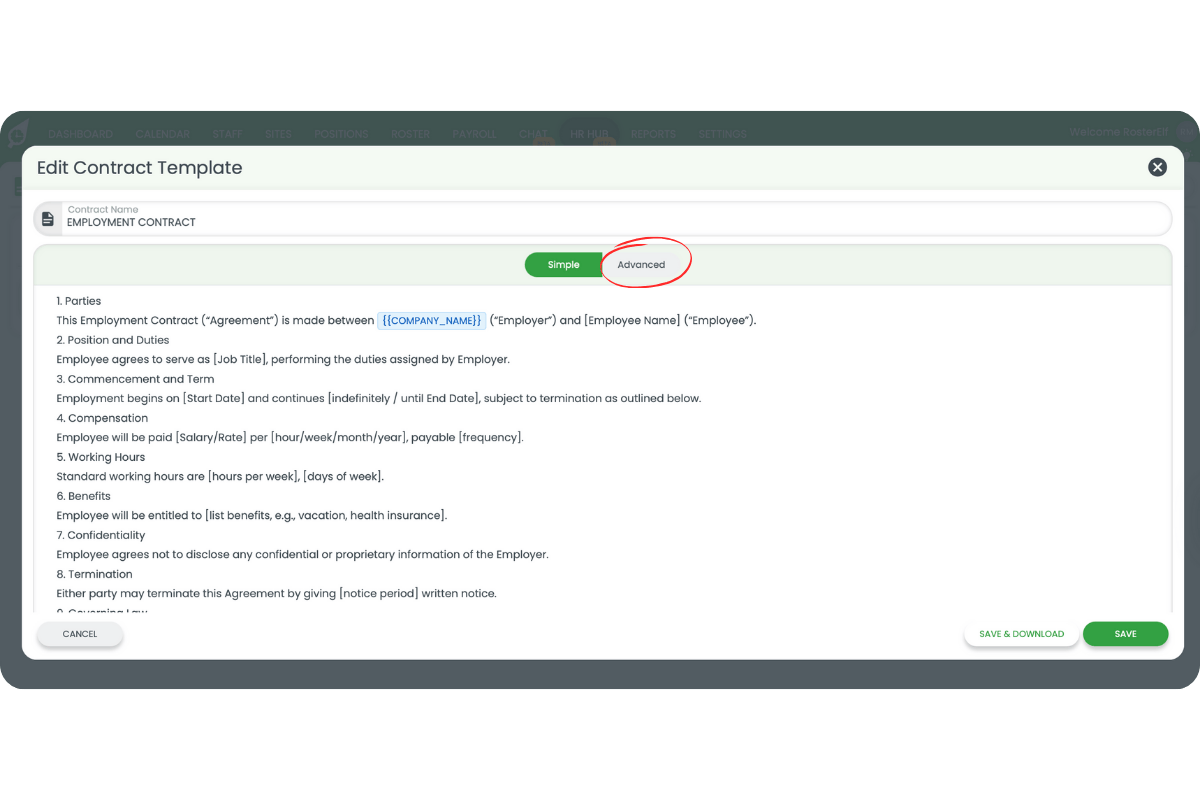
3.3.2 Use simple markup for text formatting:
- # for heading 1
- ## for heading 2
- ### for heading 3
3.3.3 Bold is **text**, italic is *text*, underline is _text_.
3.3.4 Add placeholders manually like this: {{PLACEHOLDER_TEXT}}.
3.3.5 Click Save or Save and Download. If download fails, check your browser pop-up settings.
4. Managing contract templates and views
4.1 Active view
4.1.1 Displays template name, last editor, and last updated date.
4.1.2 Icons on the right let you send, download, duplicate, edit, or deactivate a contract.
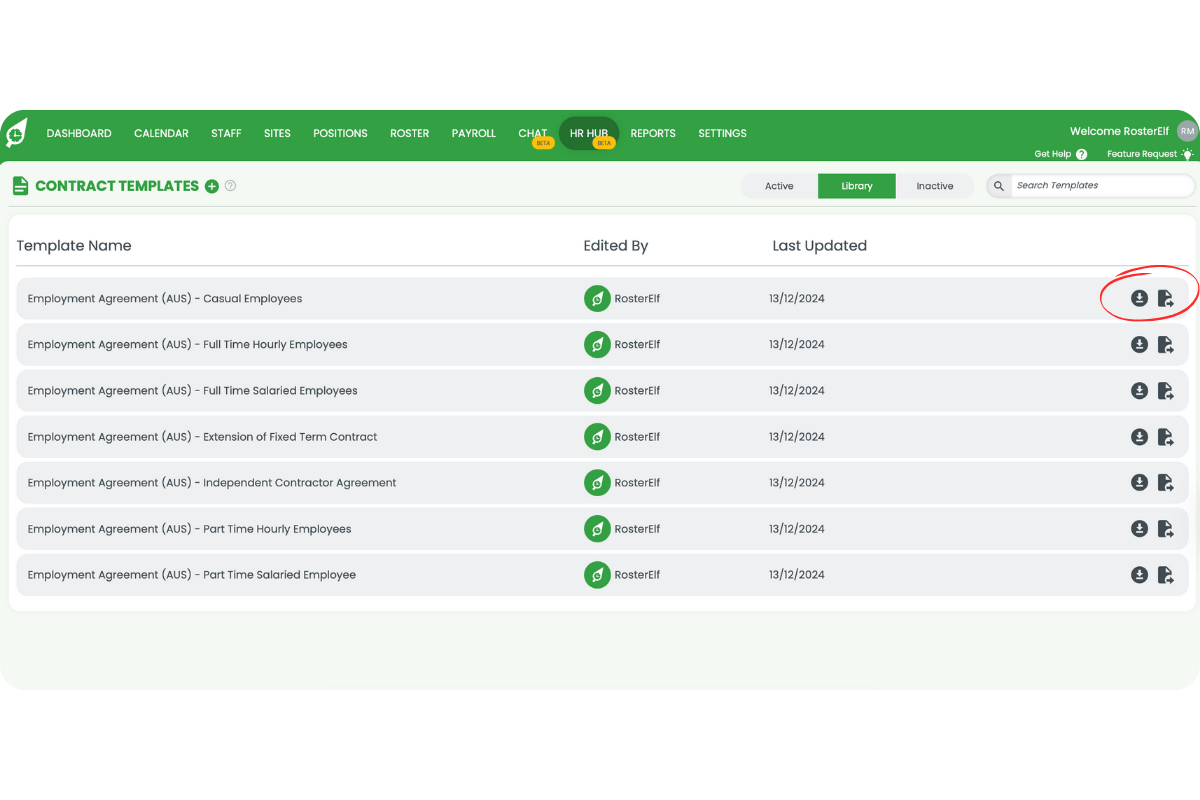
4.2 Library view
4.2.1 Contains draft contract templates, such as Casual, Full-Time Salaried, and Independent Contractor agreements.
4.2.2 Use icons to download or enable templates. Enabling moves a template to the Active tab.
4.3 Inactive view
4.3.1 Shows contracts that are not currently in use. Icons allow you to download, duplicate, edit, or reactivate a contract.
5. How to send an employment contract to staff
5.1 How to send a contract to an employee
5.1.1 In the Active tab, click the Send Contract icon.
5.1.2 Select the employee in the modal.
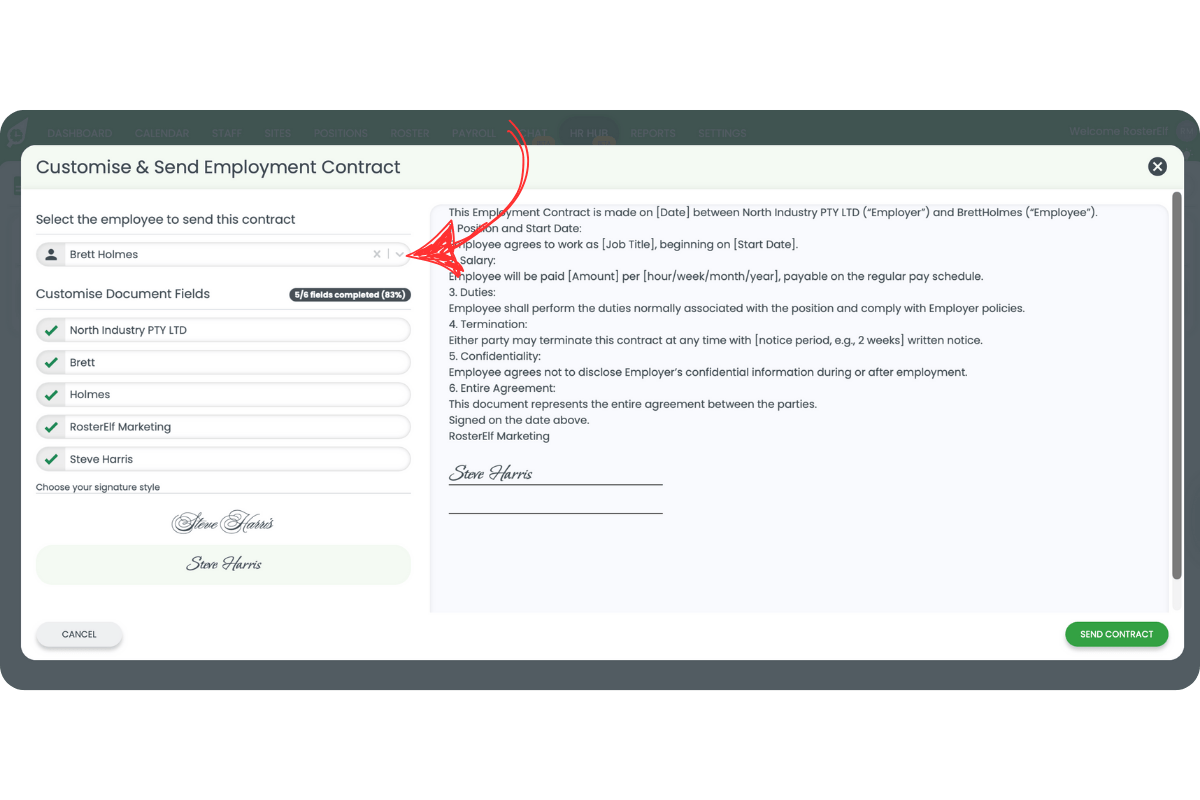
5.1.3 Under Customise Document Fields, match placeholders with company details.
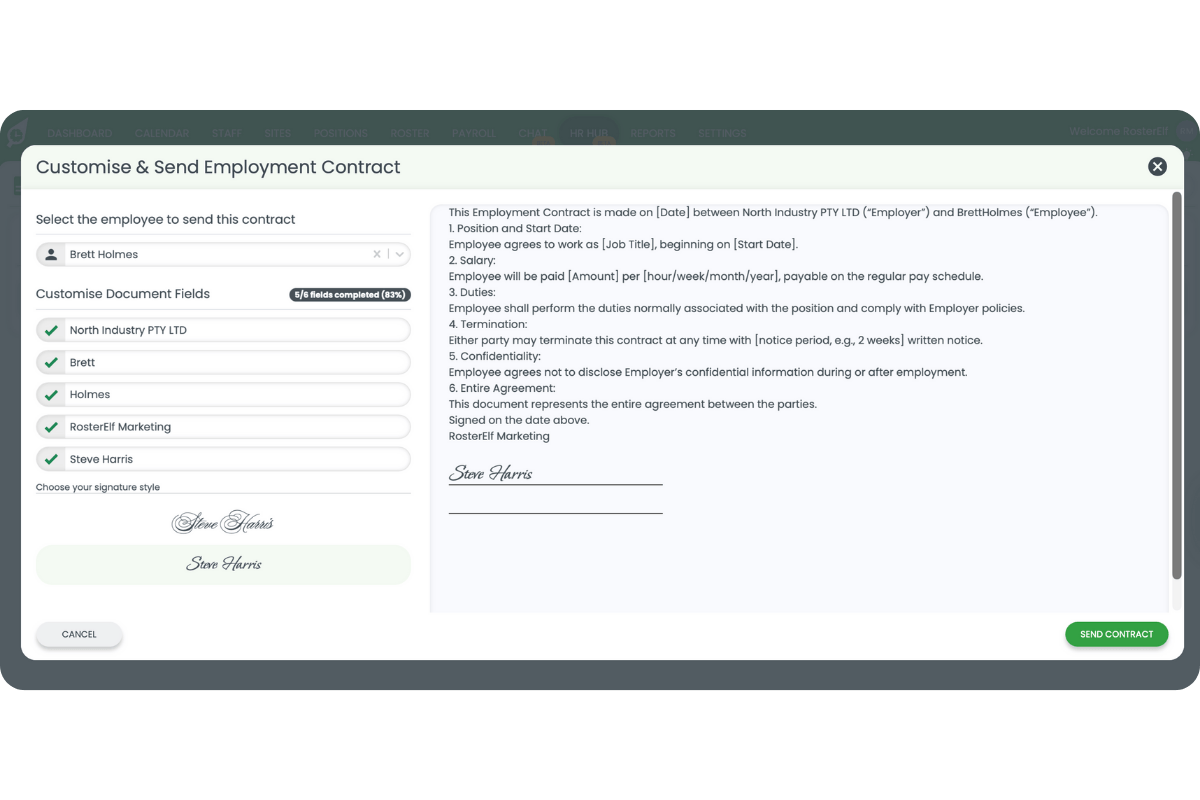
5.1.4 Ensure you include the following required fields: Employer Name, Signature, and Employee Signature.
5.1.5 Click Send Contract, then confirm the disclaimer.
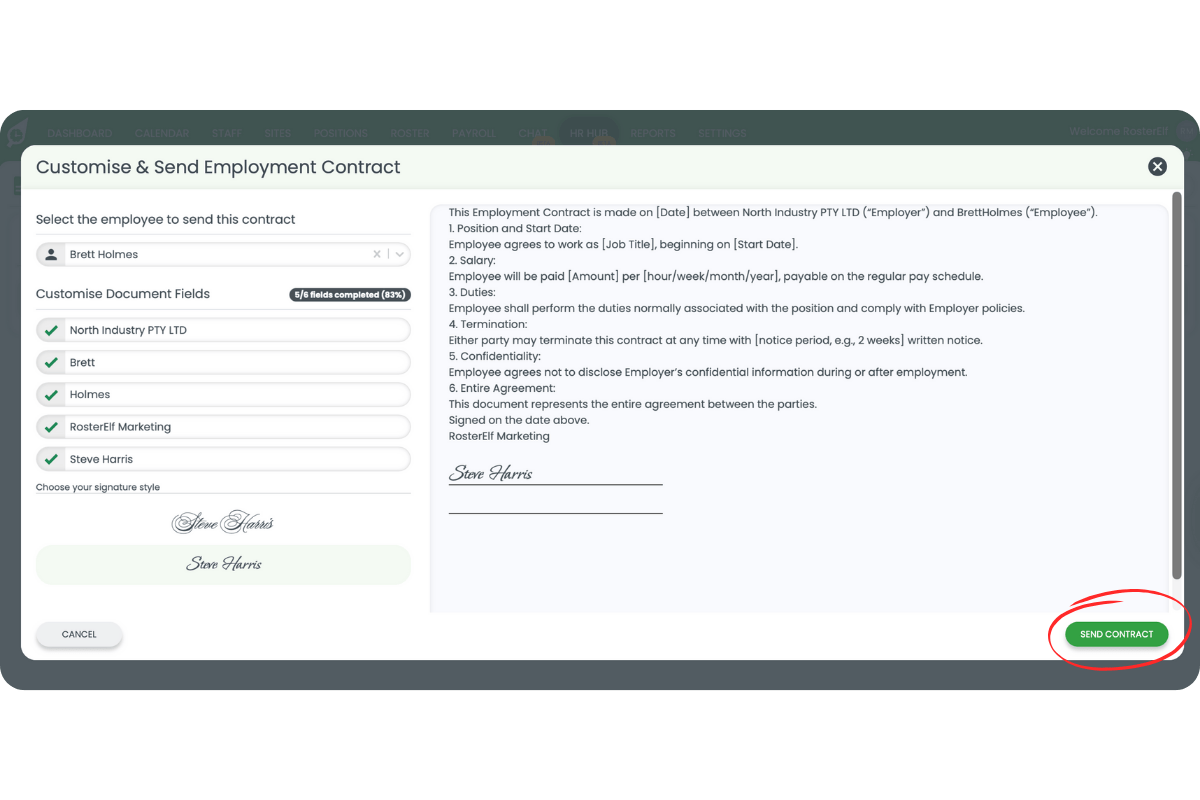
5.1.6 Both employee and admin receive email notifications.
6. How employees sign employment contracts digitally
6.1 Steps to digitally sign an employment contract
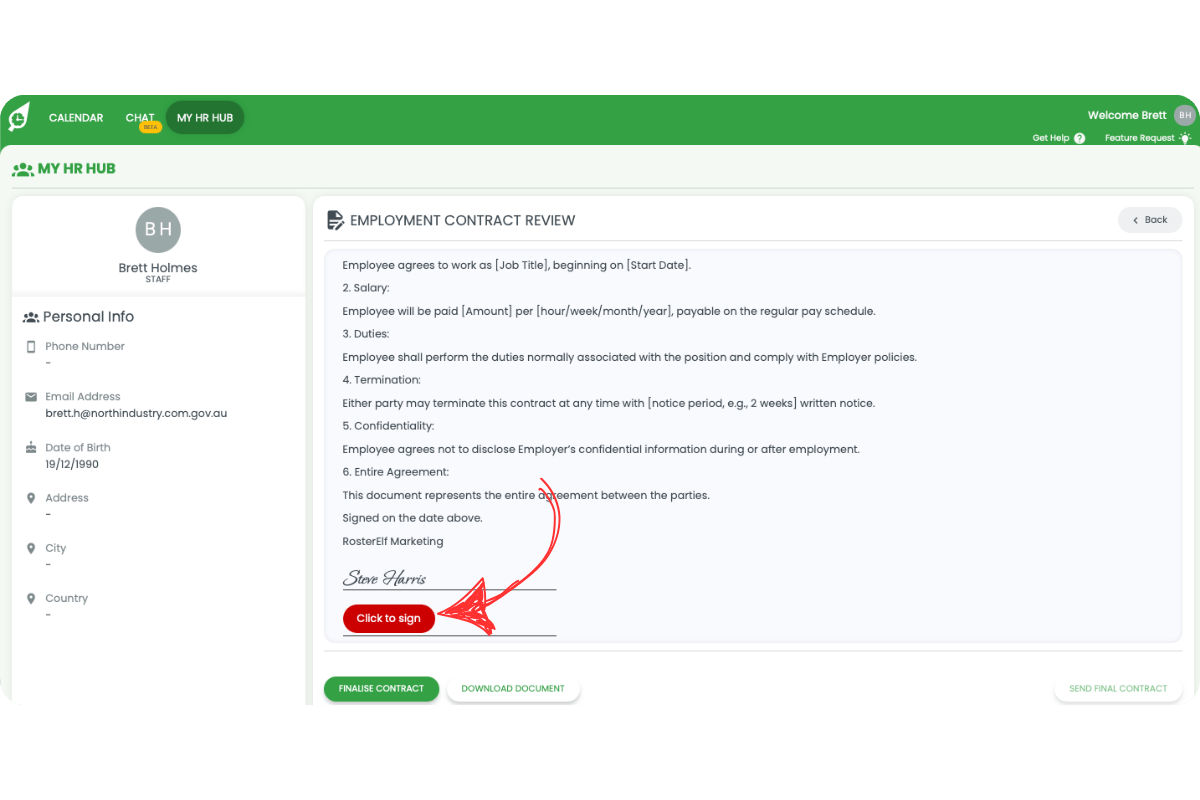
6.1.1 Open the contract email and click the link.
6.1.2 Log in if prompted.
6.1.3 Click Click to Sign.
6.1.4 Type your name, choose a signature style, and click Apply Your Signature.
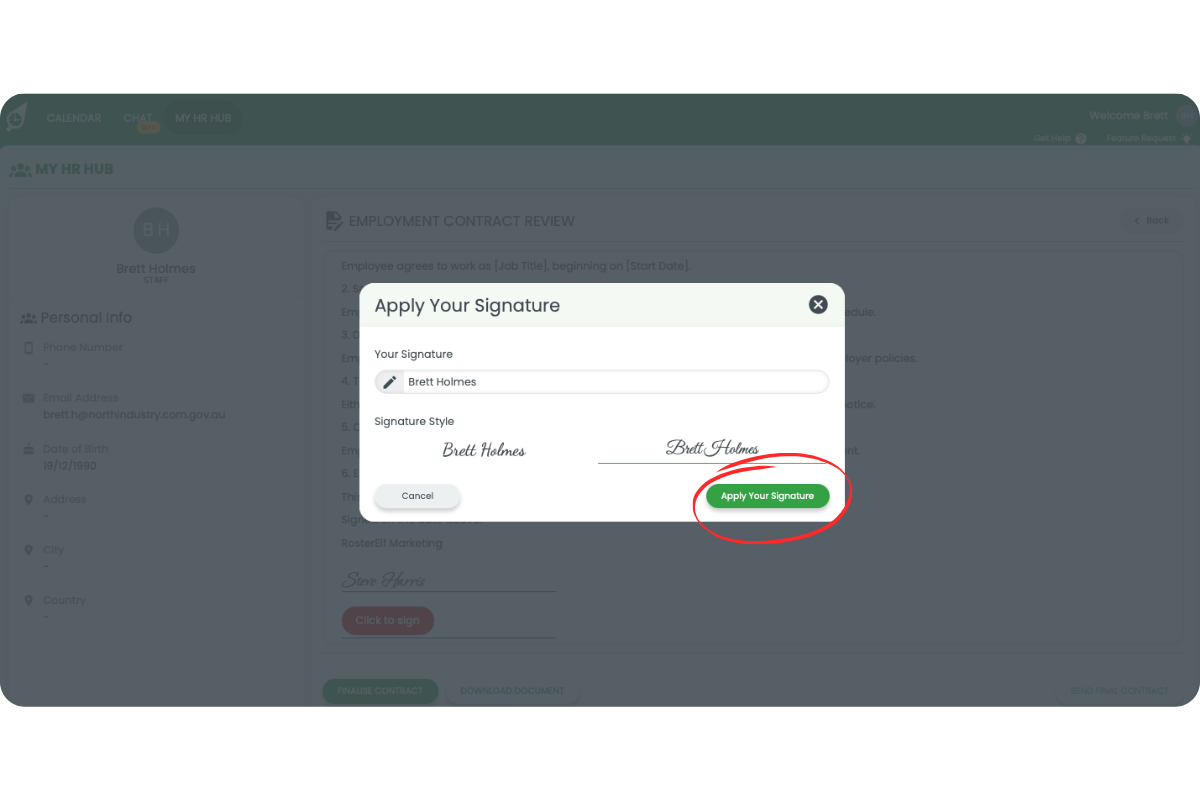
6.1.5 Click Send Final Contract and confirm.
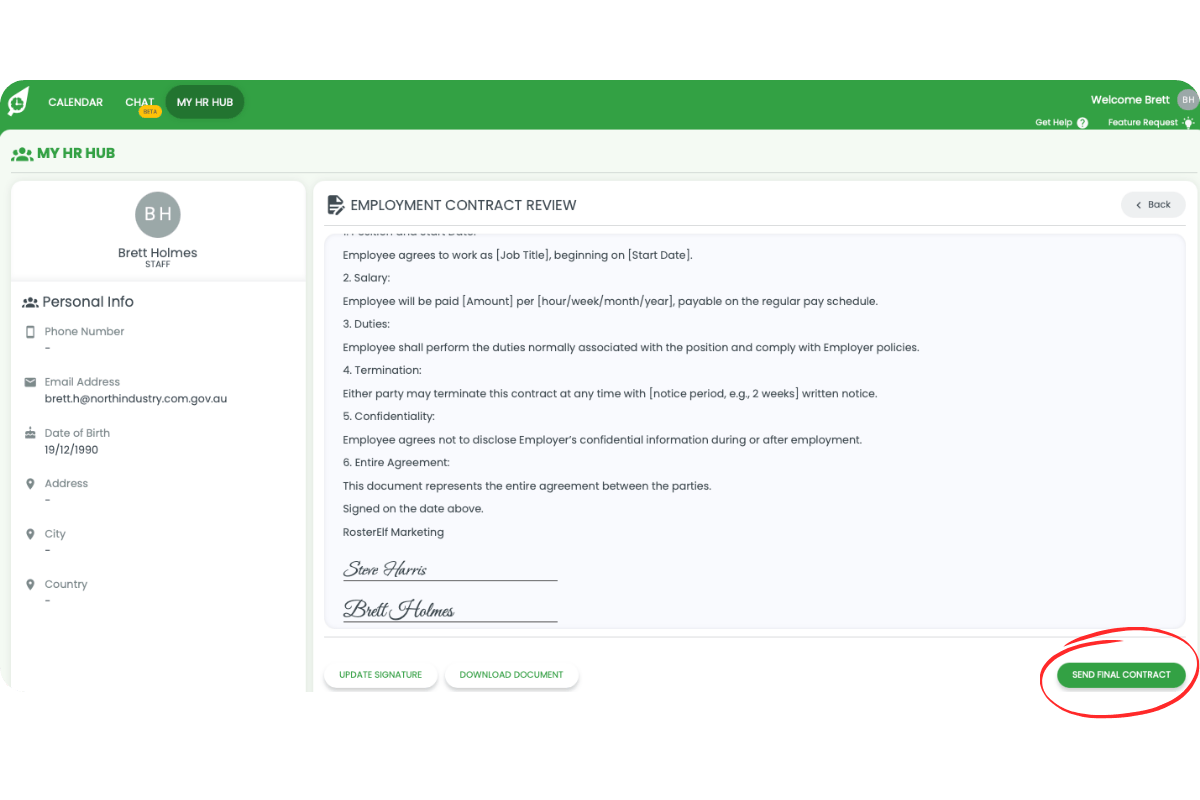
6.1.6 Download the signed document if needed.
6.1.7 Both admin and employee receive a final email notification.
7. Viewing and downloading signed employment contracts
7.1 Admin: view and download signed contracts
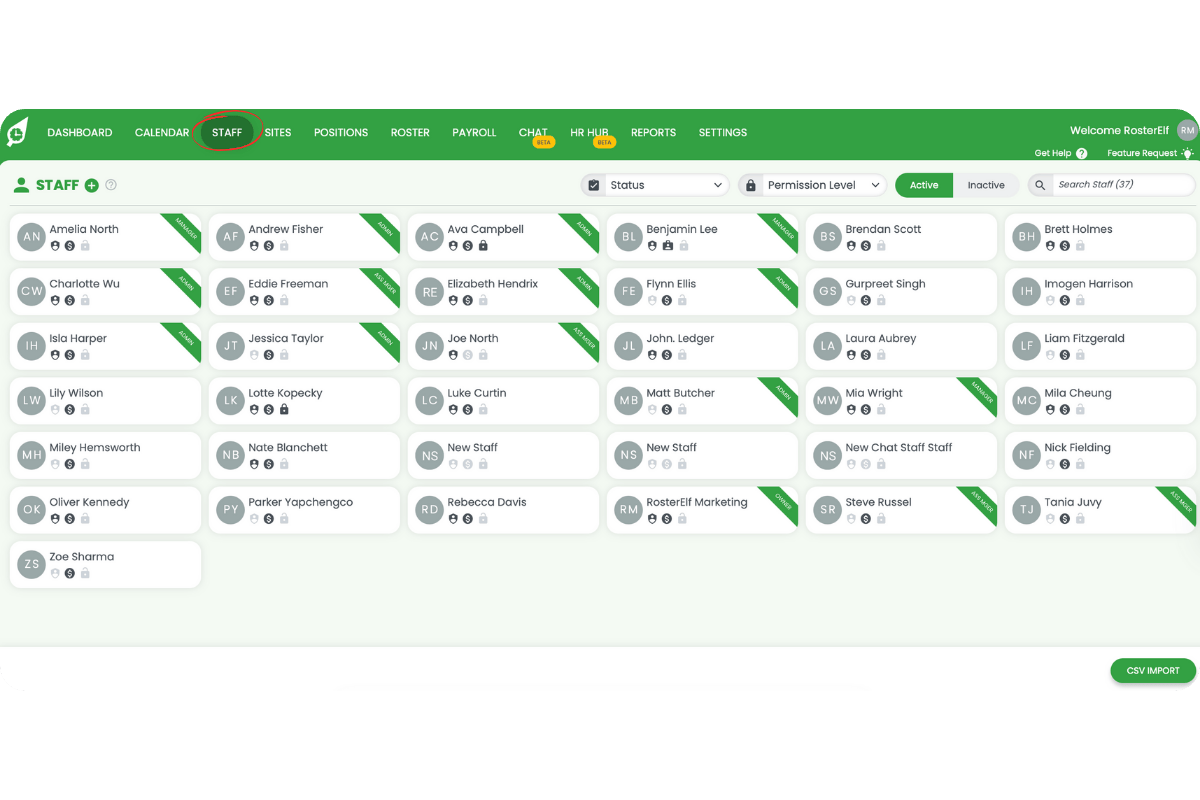
7.1.1 Go to the Staff tab.
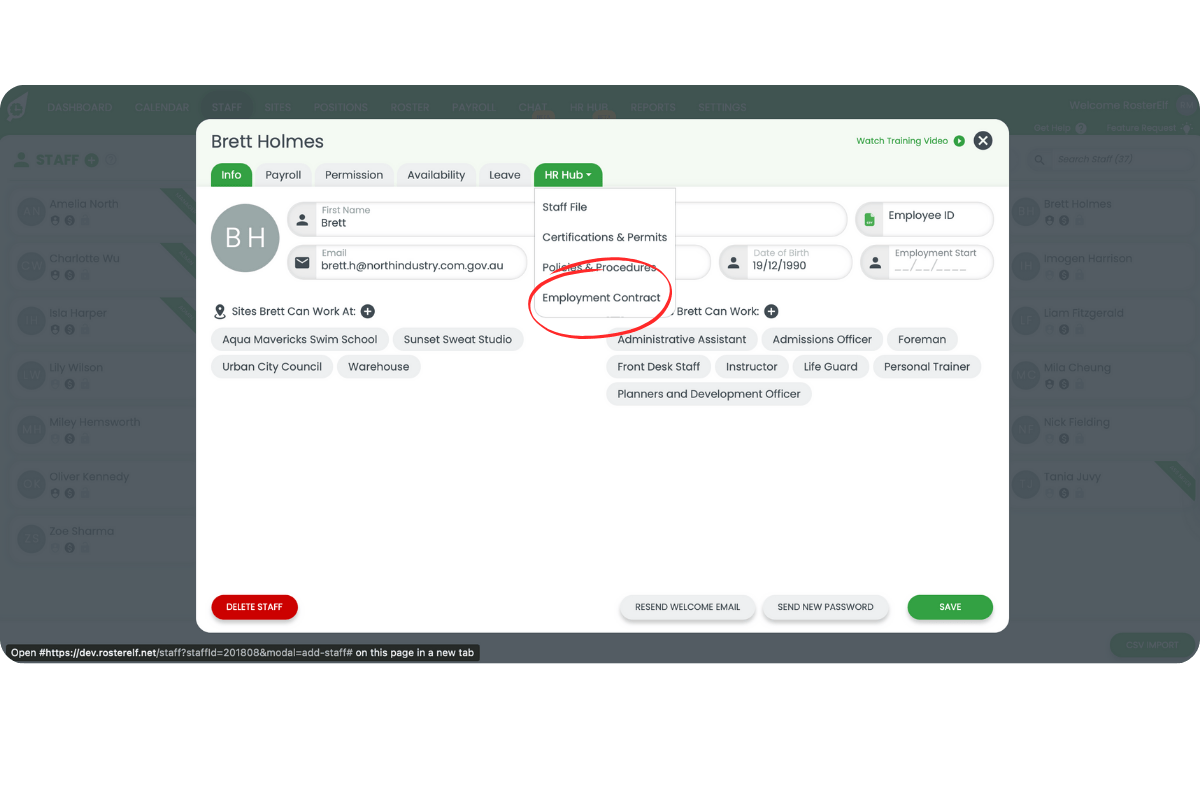
7.1.2 Select a staff member and click HR Hub → Employment Contracts.
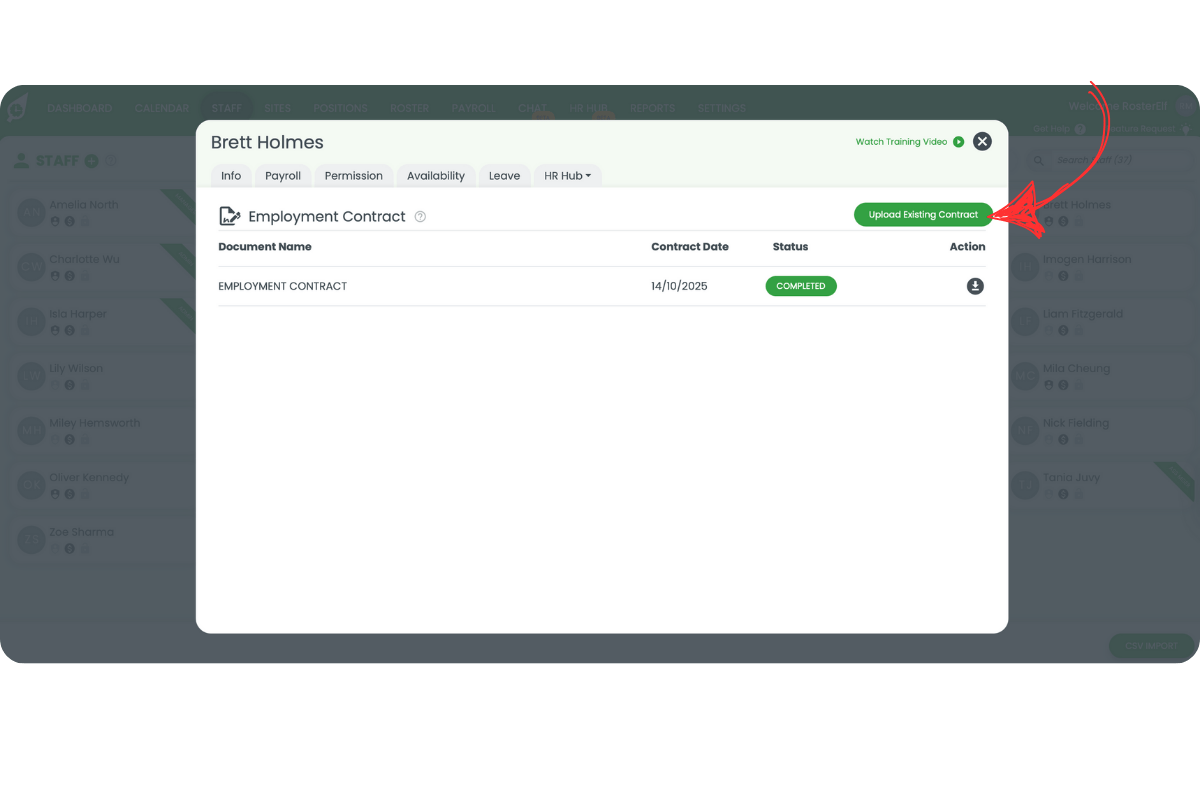
7.1.3 Click the Download icon to get the signed contract.

7.1.4 To upload a file, click Upload Existing Contract, name it, set the signature date, and upload it.
7.2 Staff and managers: access contracts in My HR Hub
7.2.1 Log in to your account.
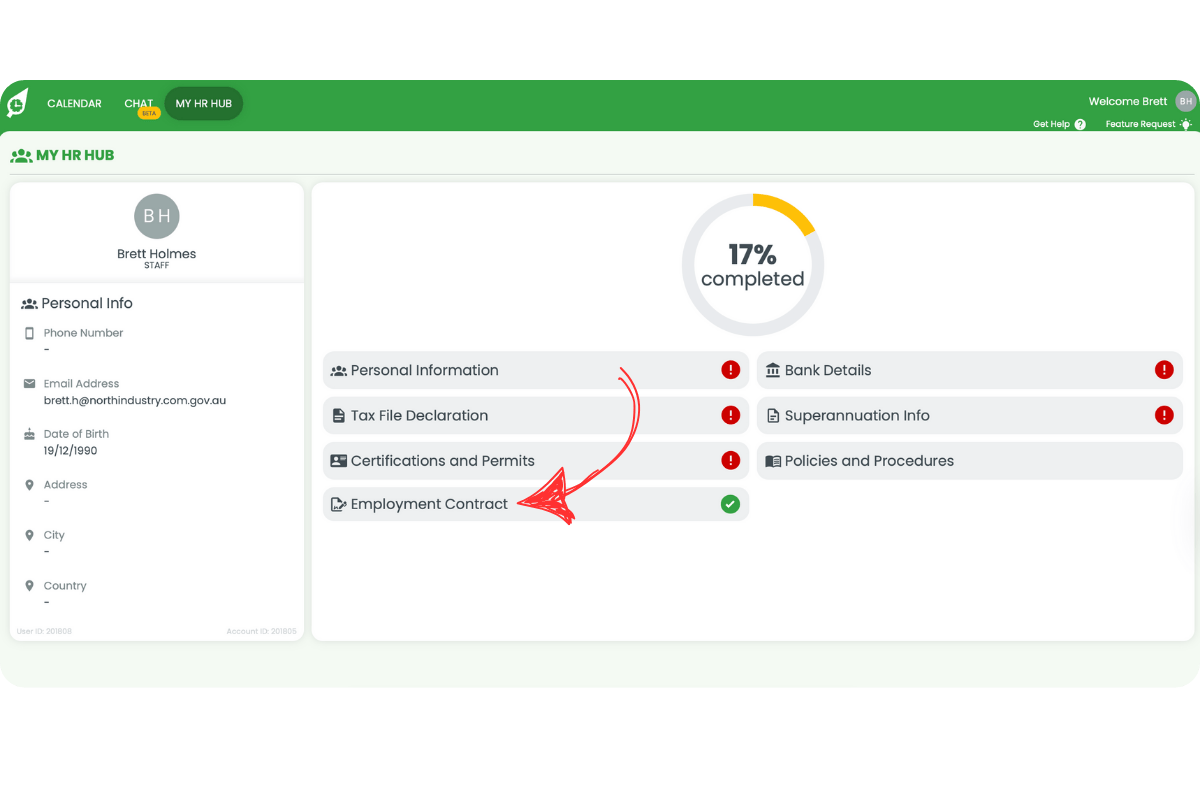
7.2.2 Click My HR Hub from the top menu.
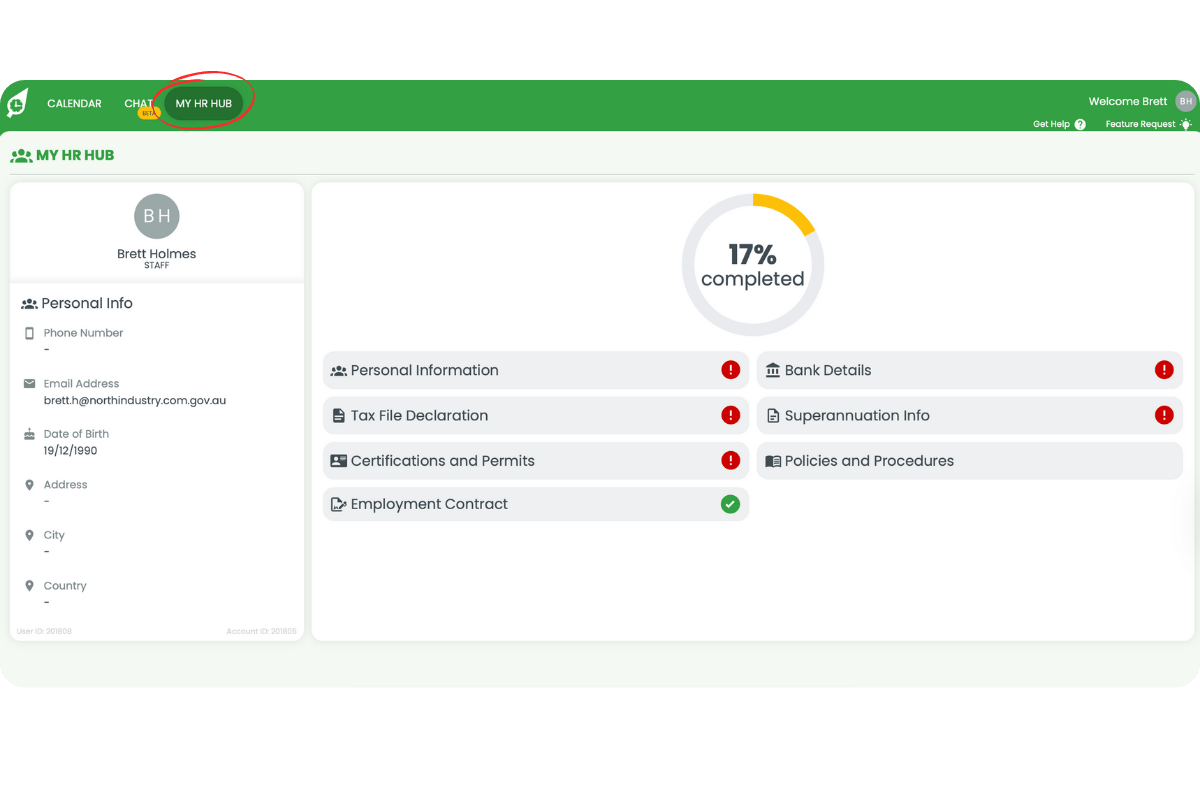
7.2.3 Select Employment Contract to view your signed document.
7.2.4 For admins, the My HR Hub section is within the HR Hub drop-down menu. For help setting up your profile, see Set up your profile in My HR Hub.
8. Duplicating and activating contract templates
8.1 Duplicating a contract
8.1.1 Click the Duplicate Contract icon.
8.1.2 Rename the contract and click Review.
8.1.3 Edit as needed and click Save.
8.2 Activating or deactivating a contract
8.2.1 To deactivate, click the x icon — it moves to the Inactive tab.
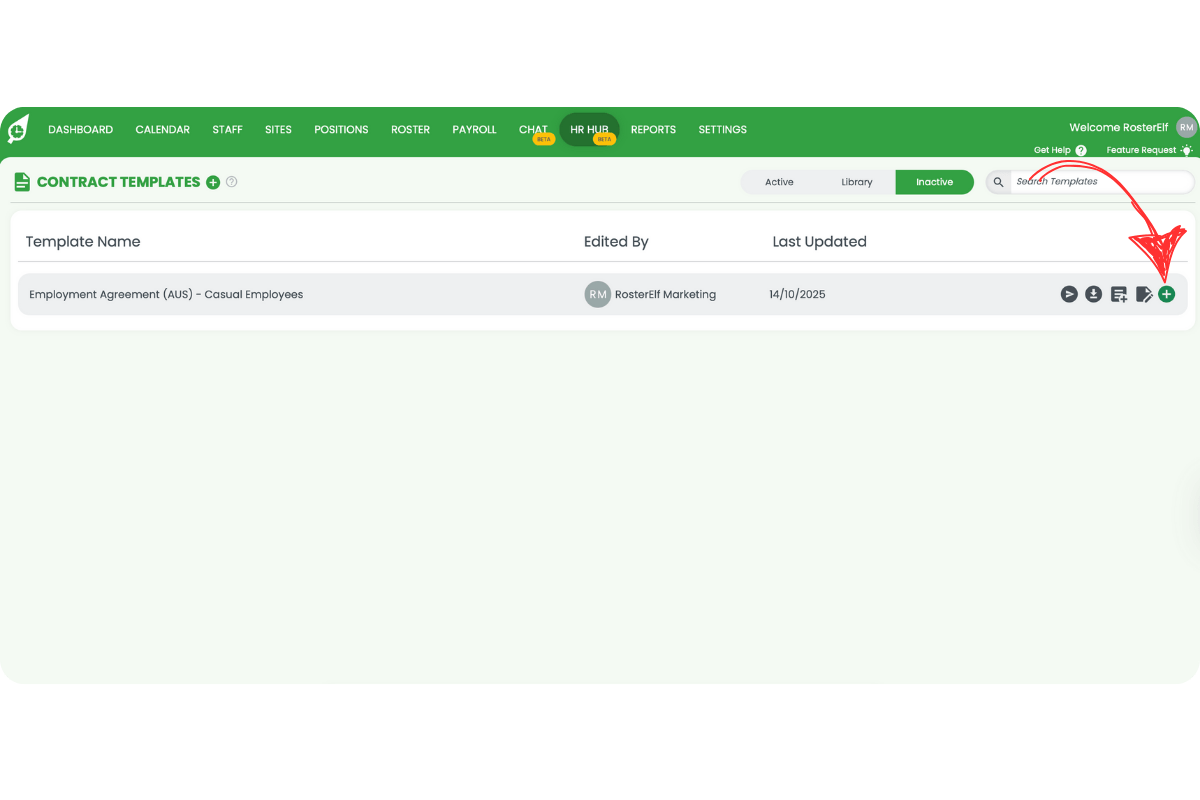
8.2.2 To activate, open Inactive, click +, and confirm Activate.
For more on managing contracts and policies in HR Hub, see Edit contracts and policies in HR Hub and Create and manage policies in HR Hub.
Frequently asked questions
1. How do I add a new contract in HR Hub?
Click the + icon next to Contract Templates, add a name, paste the contract text, and click Review.
2. What's the difference between Simple and Advanced modes?
Simple mode lets you edit contracts visually — hover over paragraphs to add, delete, or edit them. Advanced mode uses markup syntax for detailed text editing, including heading levels and manual placeholder insertion.
3. Which placeholders are required to send a contract?
You must include Employer Name, Signature, and Employee Signature placeholders before sending a contract to a staff member.
4. How do I reactivate an inactive contract?
Go to the Inactive tab, click the + icon next to the contract, and confirm Activate.
5. Can staff access their contracts?
Yes. Staff can log in and go to My HR Hub → Employment Contract to view and download their signed documents. For more on the staff-facing HR Hub experience, see Set up your profile in My HR Hub.
6. Why won't my document save in HR Hub?
If you can only see the Review option, this is expected behaviour in HR Hub. Pressing Review will save your document and move you to the review screen. From there, you can confirm the document details before finalising or sending it.