How to set up Xero payroll for new zealand customers
This guide explains how to set up payroll in Xero for integration with RosterElf, tailored specifically for New Zealand customers. By following these steps, you’ll ensure payroll calendars, pay items, and templates are set up correctly. Important for NZ Customers: Ensure your payroll calendar in Xero is named “rosterelf” in all lowercase to avoid payroll processing errors.
1. Create a new payroll calendar
Creating a payroll calendar in Xero is the first step to aligning employee hours with RosterElf\‘s payroll integration.
1.1 set up the RosterElf payroll calendar in Xero
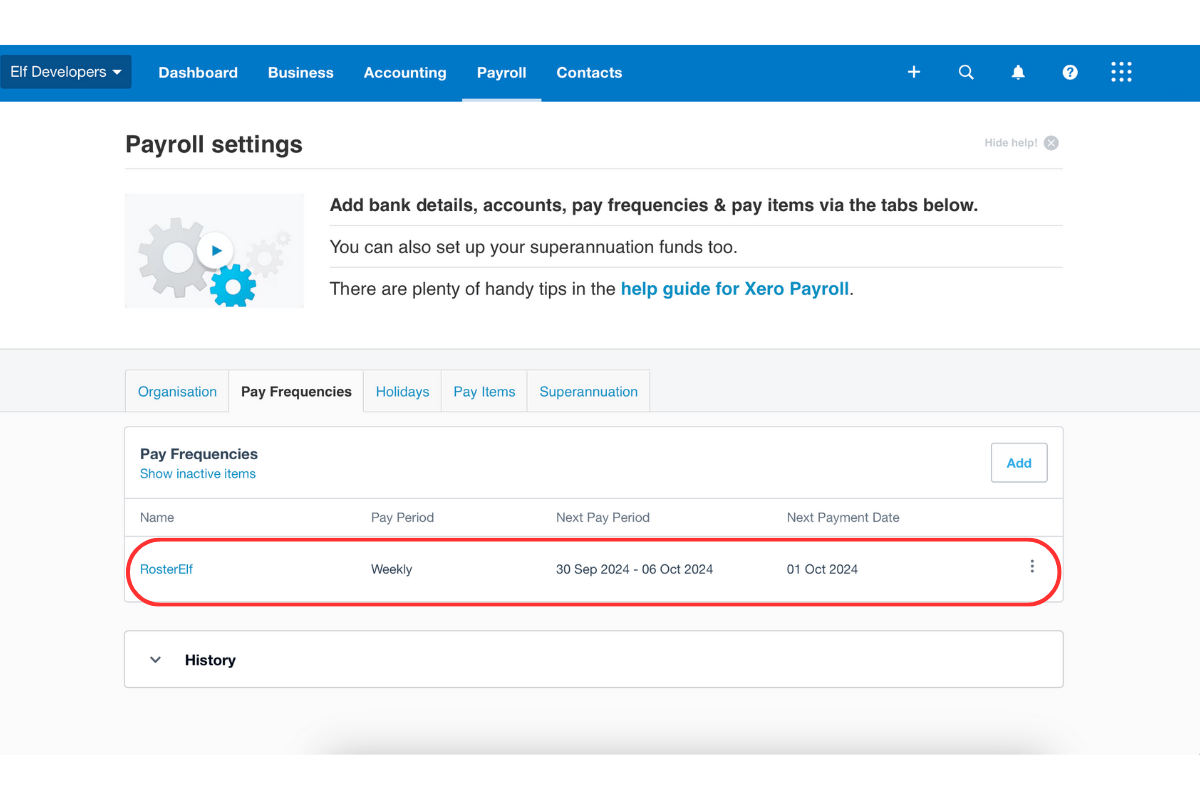
1.1.1 Go to Payroll - Payroll Settings - Pay Frequencies - New Calendar.
1.1.2 Name the new calendar “rosterelf” in all lowercase.
Note: Using any capital letters in the name will cause payroll errors during processing.
1.1.3 Save the calendar.
2. Assign the payroll calendar to employees
After creating the calendar, you must assign it to each employee to ensure accurate payroll processing.
2.1 assign RosterElf calendar to employees
2.1.1 Go to Payroll - Settings - Employees - Employment.
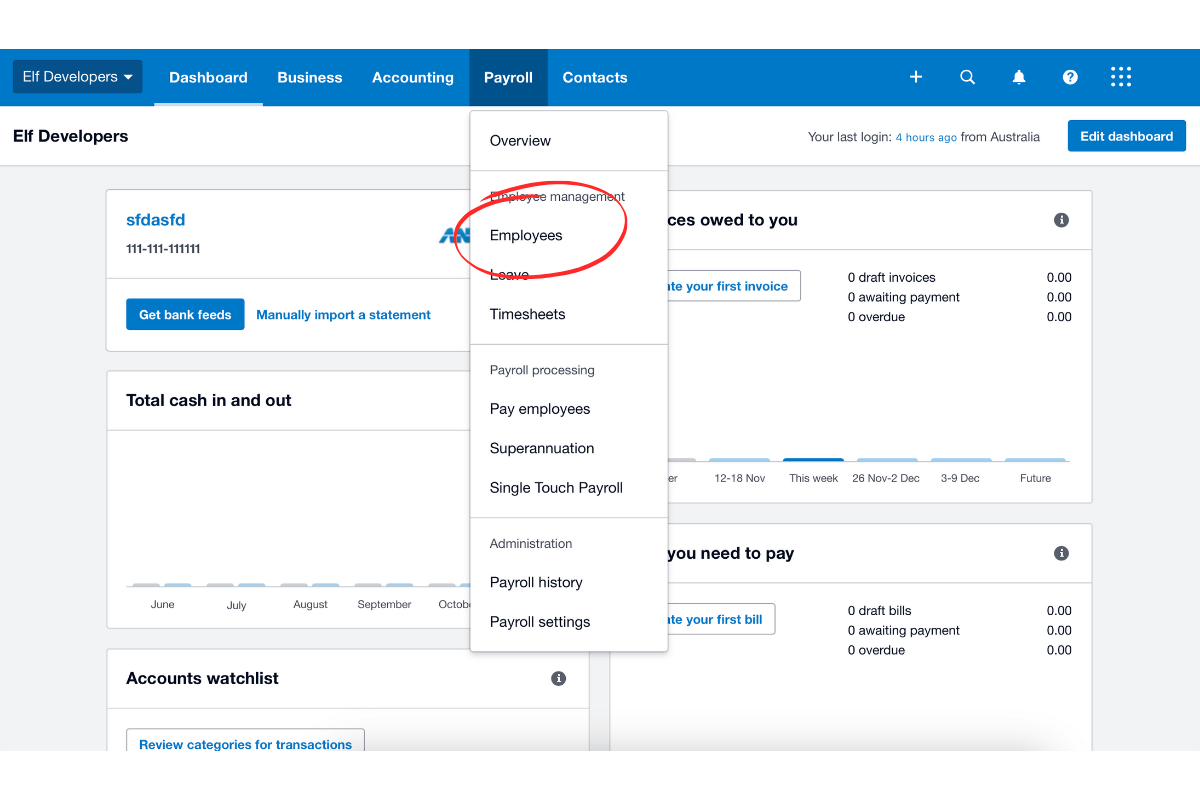
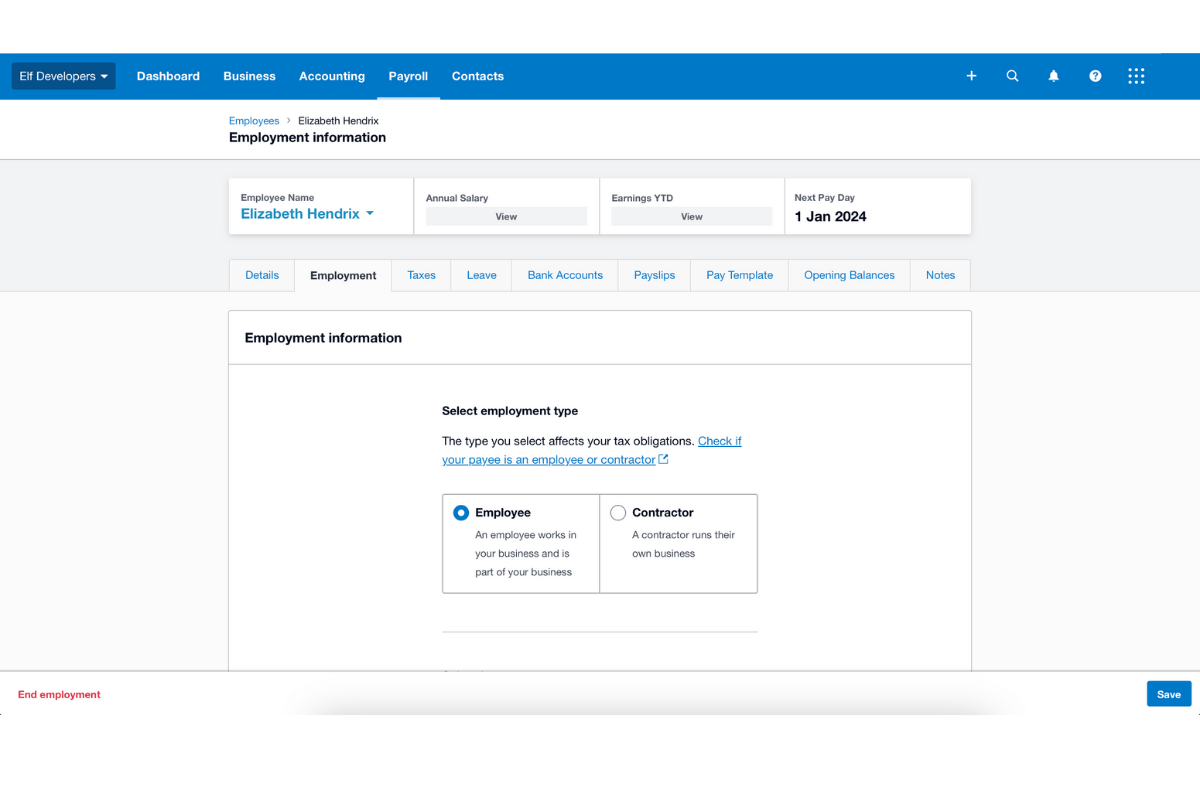
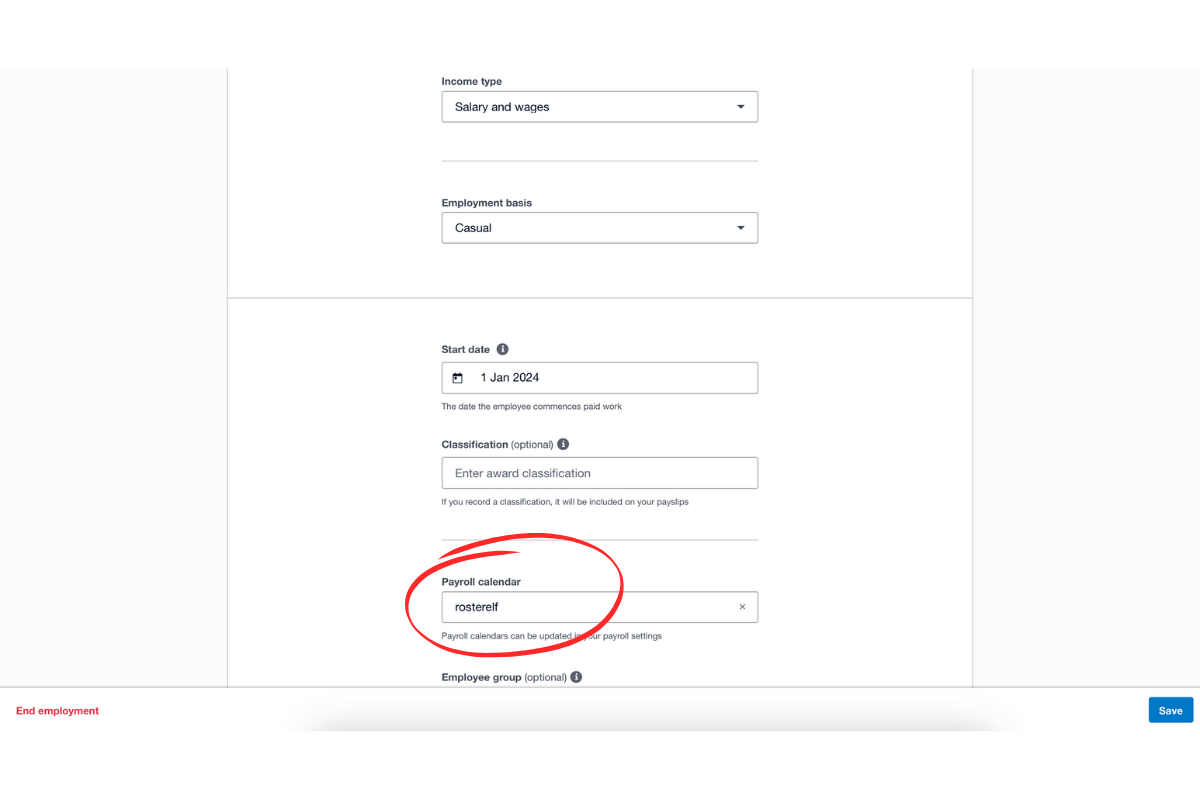
2.1.2 Under each employee\‘s profile, navigate to Payroll Calendar and select “rosterelf” from the options.
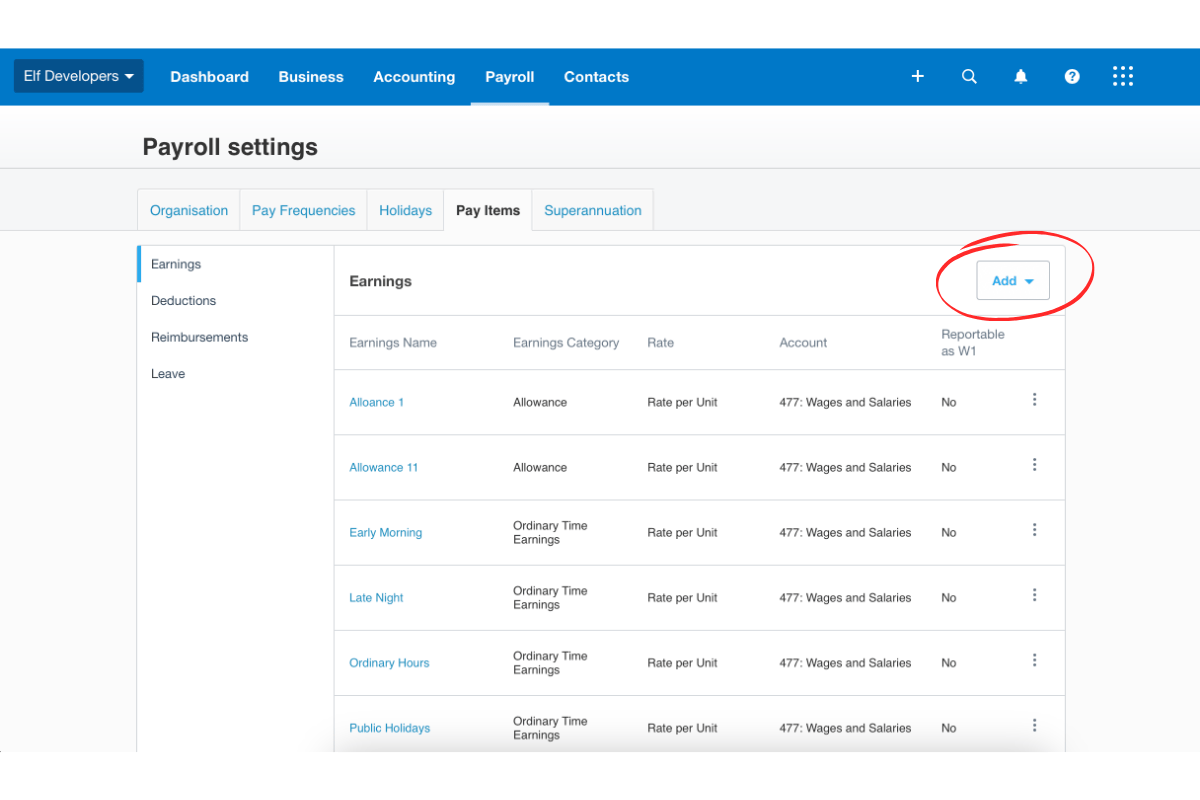
3. Set up pay items for awards
Pay items in Xero determine how employees are paid according to award rules. You can use fixed-rate items or multipliers, with multipliers recommended for automated calculations.
3.1 create pay items based on award rates
3.1.1 Go to Payroll Payroll Settings Pay Items.
3.1.2 Click Add Item and choose either fixed-rate or multiplier options.
4. Connect RosterElf to Xero
Connecting RosterElf to Xero via API allows roster data to flow directly into the payroll system.
4.1 link RosterElf with Xero
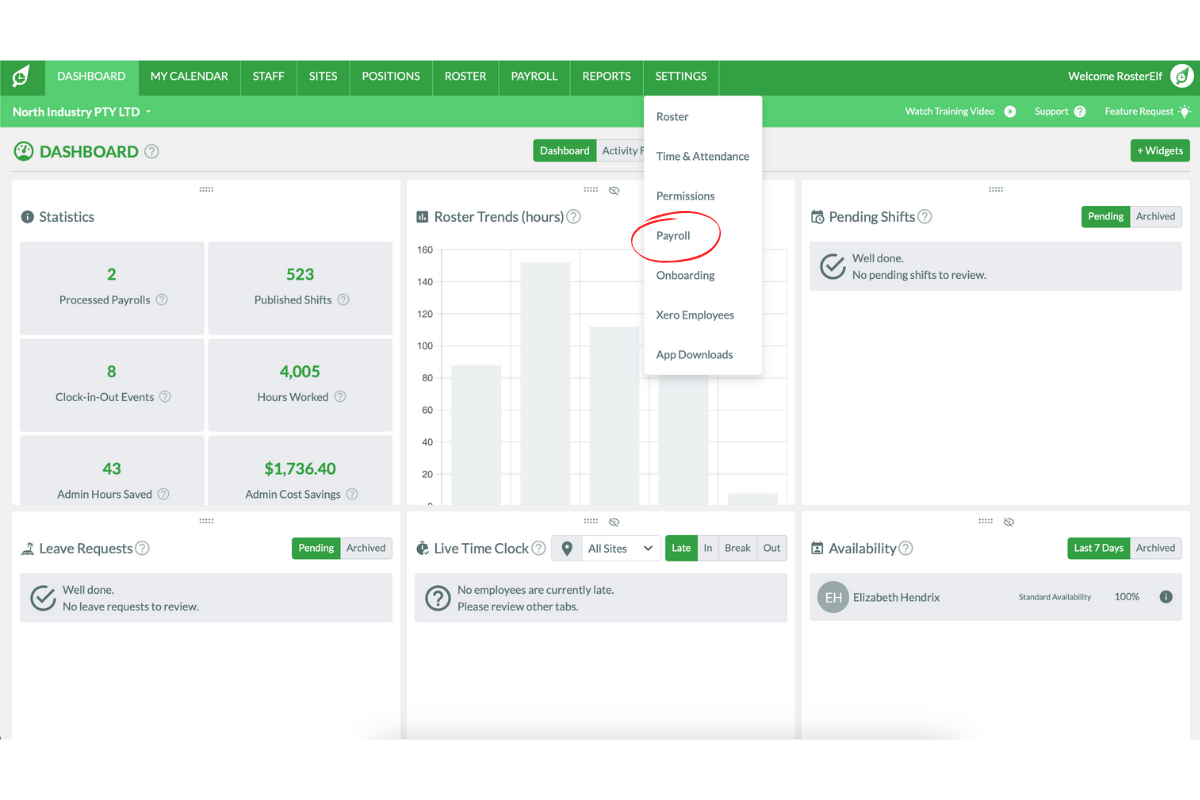
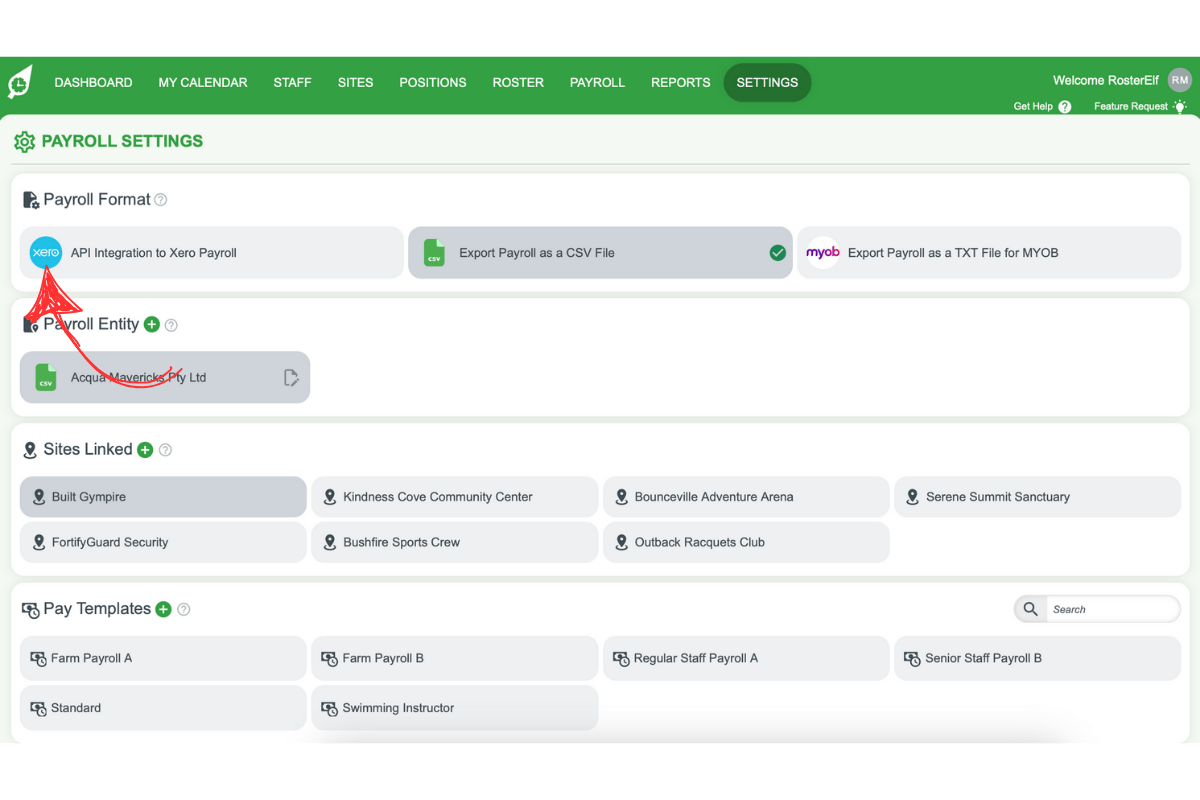
4.1.1 Log in to RosterElf and go to Settings Payroll.
4.1.2 Select API Connection to Xero.
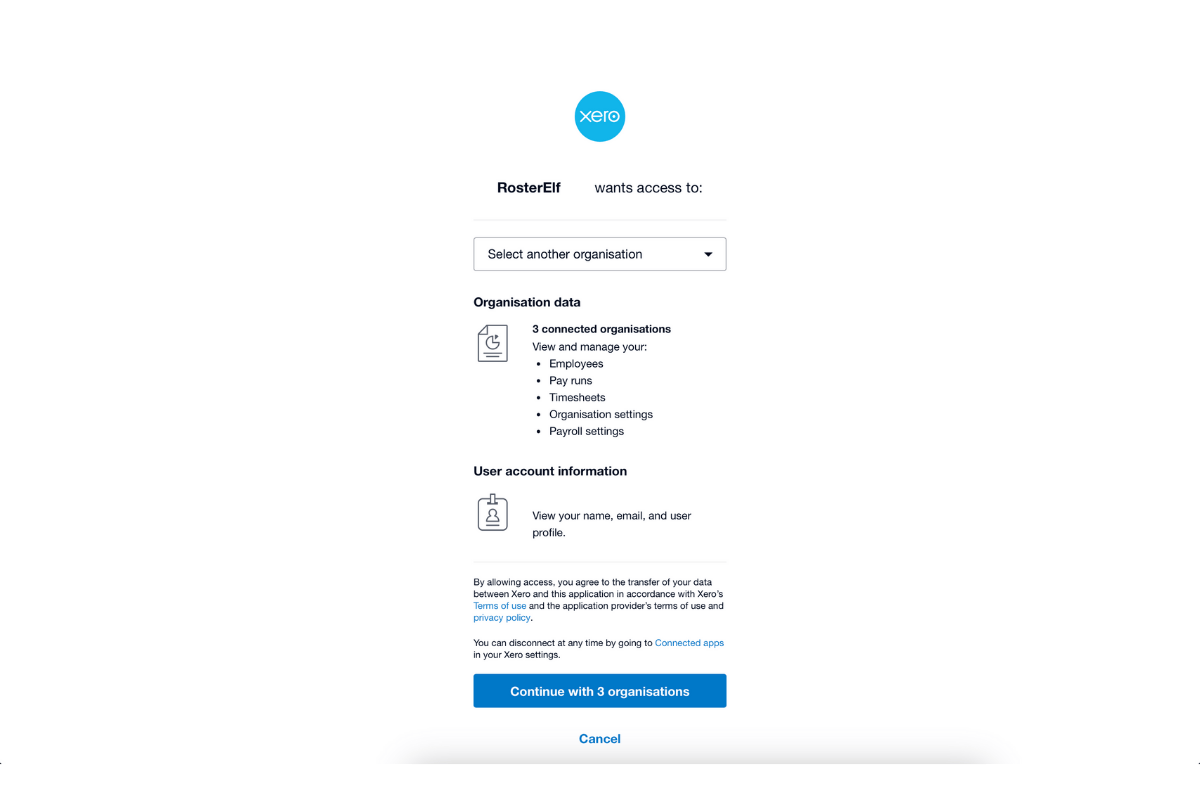
4.1.3 You will be redirected to Xero—log in and select the organisation to connect.
Frequently asked questions
1. 1.1
Go to Payroll - Payroll Settings - Pay Frequencies - New Calendar.
2. Note:
Using any capital letters in the name will cause payroll errors during processing.
3. 1.3
Save the calendar.
4. 1.1
Go to Payroll - Settings - Employees - Employment.
5. 1.1
Go to Payroll Payroll Settings Pay Items.