How to add a shift in the roster menu
This guide explains how to add a shift using the Roster menu in the RosterElf app. Following these steps ensures you can easily create and publish shifts for your employees. By the end of this guide, you’ll know how to set up a shift, assign it to a staff member, and publish it without errors.
1. Access the roster menu
1.1 Tap the Roster menu at the bottom of your screen.

1.2 The roster defaults to today’s date.
1.3 Use the < and > arrows to move to past or future rosters.
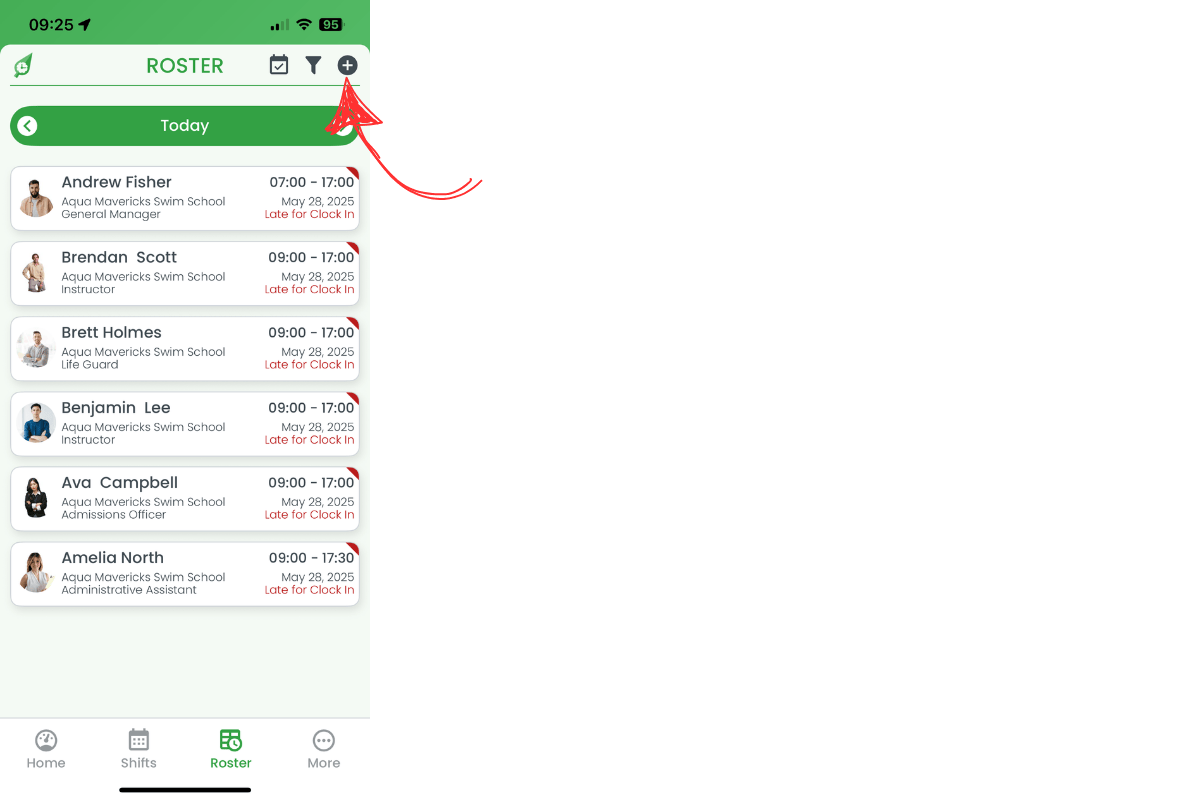
2. Add a shift
2.1 Tap the Plus (+) button in the top-right corner.
2.2 Tap Select Site and choose the work site.
2.3 Tap Select Position and choose the role.
2.4 Set Start Time and Finish Time.

2.5 Tap Select Staff to choose an employee. Perfect matches appear at the top, while unavailable staff appear under Unavailable.

2.6 Toggle Mark as Open Shift if you don’t want to assign a staff member yet.
2.7 Toggle Customise Unpaid Break to add a specific unpaid break.
2.8 Toggle Repeat this Shift to copy the shift across multiple days.
2.9 Enter any Shift Notes the employee should see and choose Email, Push, or SMS under Notify Employee.

3. Publish the shift
3.1 Tap the Publish button at the bottom of the screen.

3.2 A success message confirms the shift is live.

Frequently asked questions
1. How do I open the roster menu to add a shift?
Tap the Roster icon at the bottom of the RosterElf app. The roster opens on today’s date, and you can move to past or future rosters with the < and > arrows.
2. Can I create a shift without assigning a staff member?
Yes. Toggle Mark as Open Shift when you build the shift. The shift appears as open on the roster and any eligible employee can claim it.
3. How do I add unpaid breaks to a shift?
Switch on Customise Unpaid Break to select the exact length of an unpaid break.
4. Will employees receive a notification when I publish a shift?
When you tap Publish, RosterElf immediately sends a push and email alert to the selected employee. You can also tick SMS to send a text message.
5. Can I repeat the same shift across multiple days?
Enable Repeat this Shift to copy the shift to additional days. Choose the days you want, then publish once to save time and keep rosters consistent.