Complete your onboarding in My HR Hub
This guide shows staff, managers, and admins how to complete onboarding tasks in My HR Hub. You will add personal details, bank and tax information, superannuation, upload certifications, review policies, and sign your employment contract. Follow the numbered steps to finish quickly and keep your profile up to date.
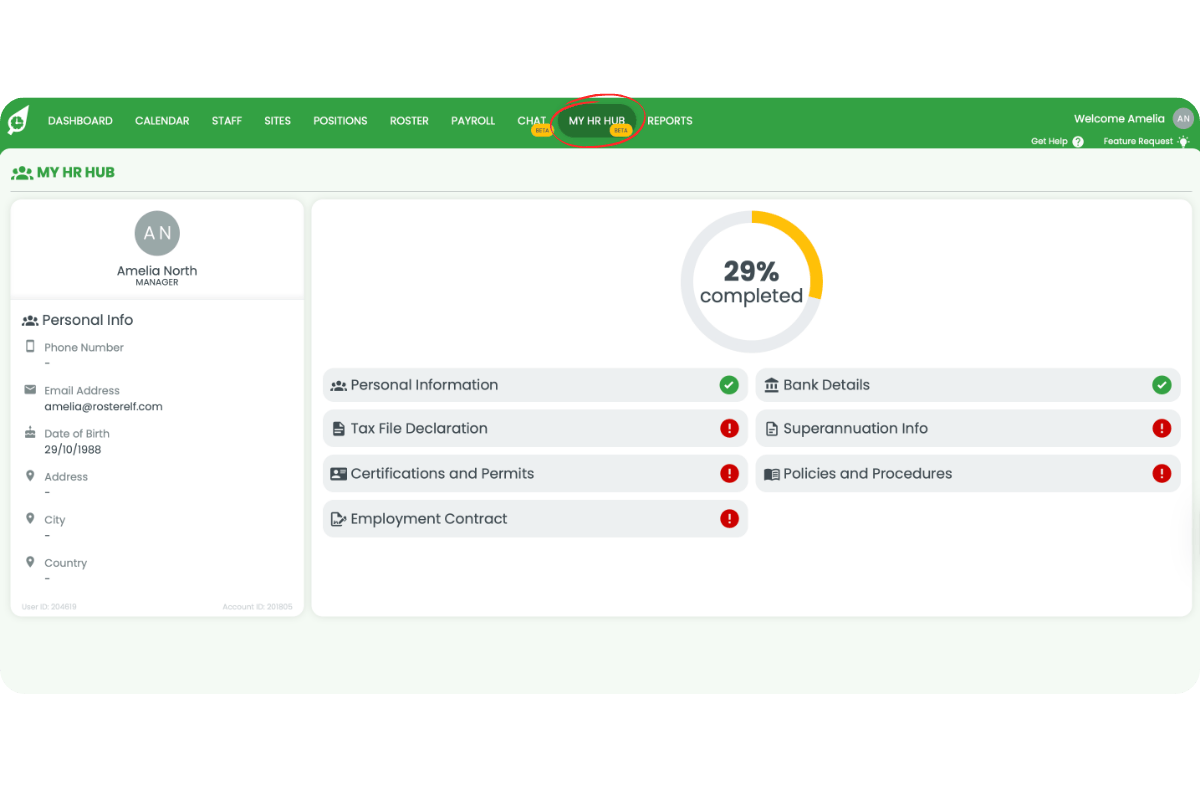
1. Open My HR Hub
1.1 access My HR Hub
1.1.1 Log in to your RosterElf account.
1.1.2 If you are staff or a manager, click My HR Hub in the top menu. If you are an admin, open HR Hub and choose My HR Hub from the dropdown.
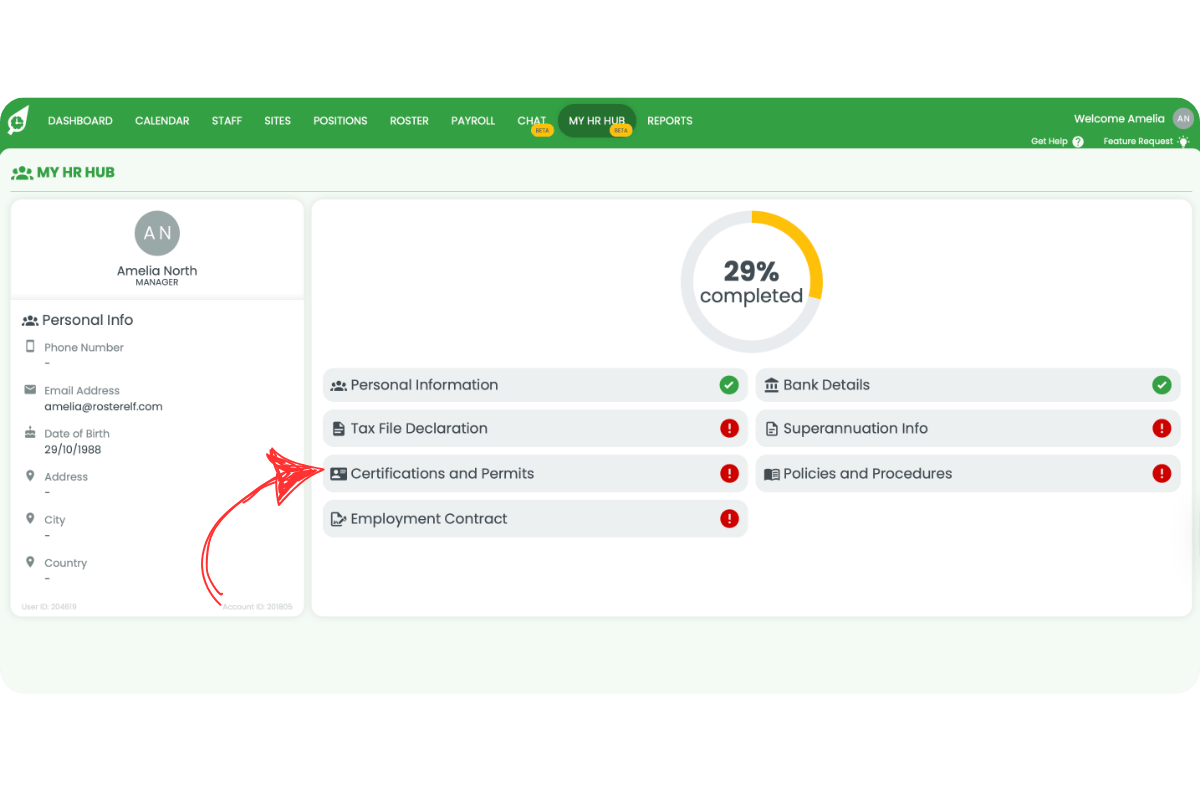
2. Complete personal information
2.1 update your details
2.1.1 Open Personal Information.
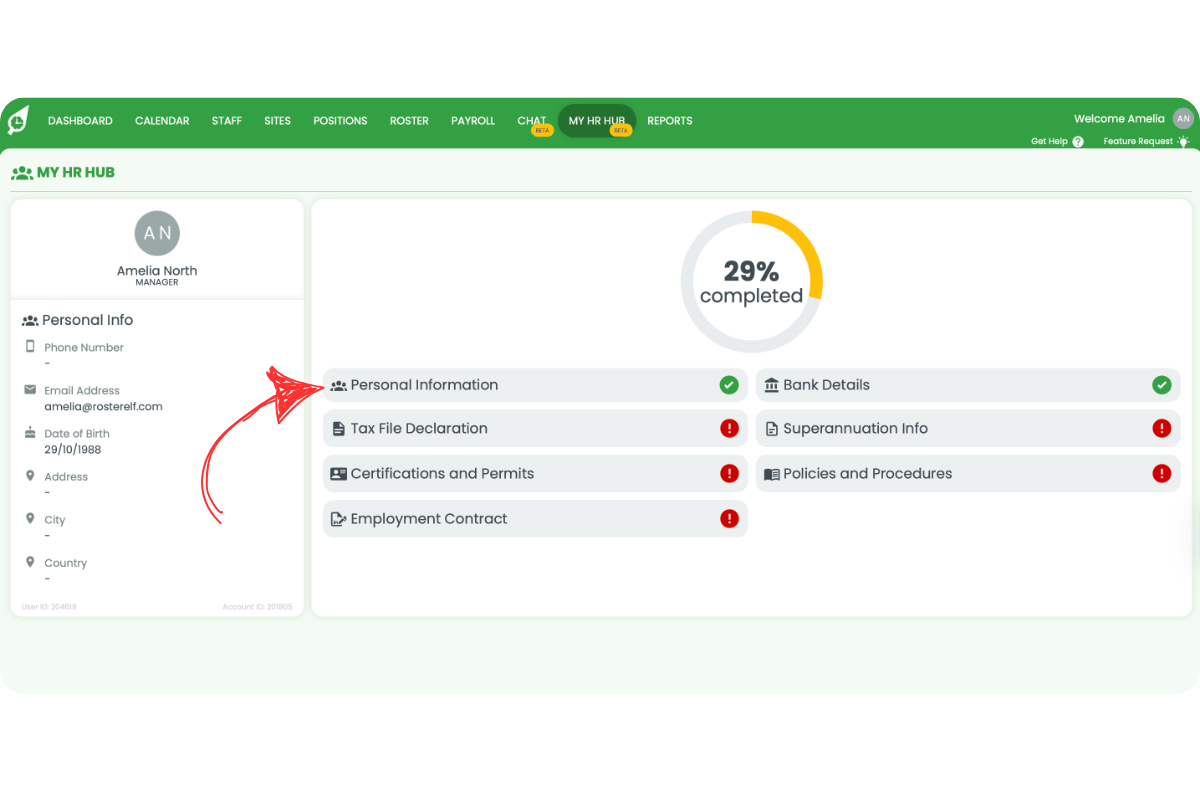
2.1.2 Complete the form: First Name, Last Name, Email, Phone (choose country code), Date of Birth, Address, City, Postal Code, and Country.
2.1.3 Add your Emergency Contact: Name, Relationship, and Phone with country code. Click Save.
3. Add bank details
3.1 enter bank info
3.1.1 Open Bank Details.
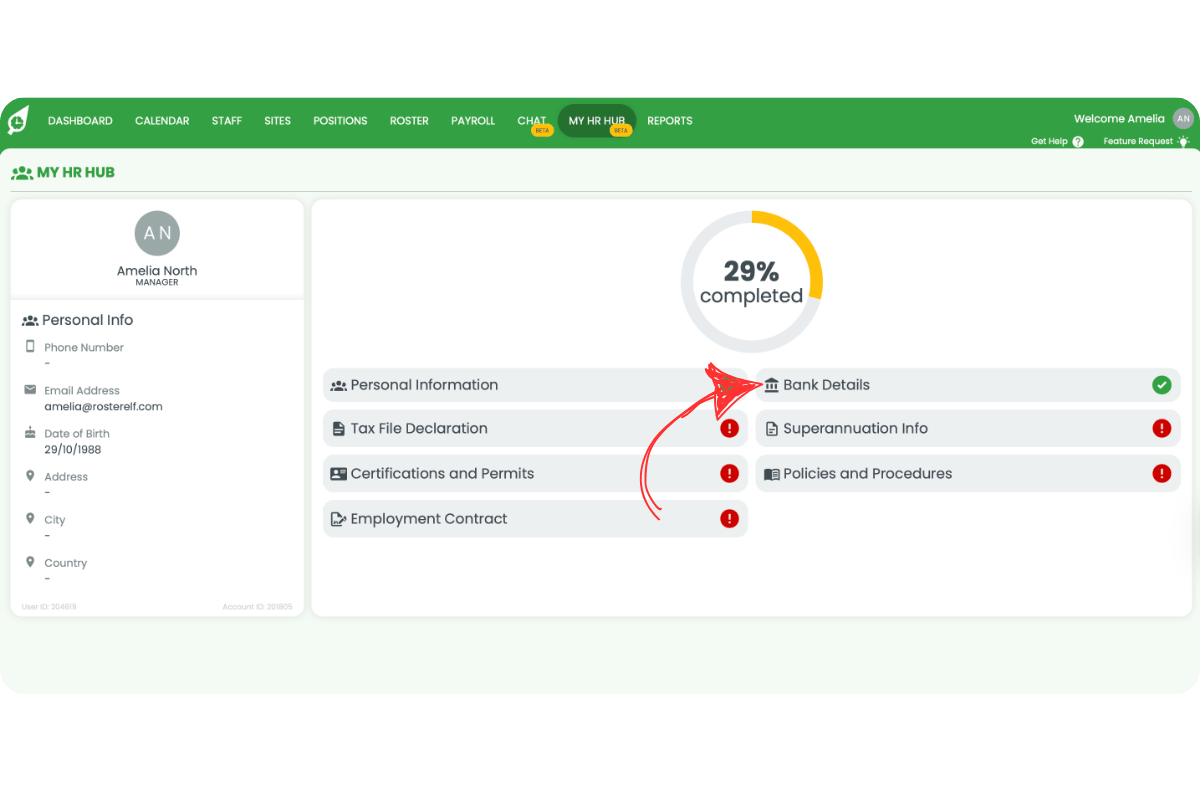
3.1.2 Enter Account Name, BSB, and Account Number, then click Save.
4. Complete tax file declaration
4.1 submit your declaration
4.1.1 Open Tax File Declaration.

4.1.2 Answer Do you have a TFN? Yes or No.
4.1.3 Confirm Title and Name, choose your Pay Basis (Full Time, Part Time, Casual), and select your Tax Residency Status (Australian Resident, Foreign Resident, Working Holiday Maker).
4.1.4 Set Tax Settings: Tax-free Threshold, HELP/SSL/TSL Debt, and Financial Supplement Debt. Tick the Declaration, then submit.
5. Add superannuation info
5.1 choose your destination
5.1.1 Open Superannuation Info and confirm eligibility for superannuation.
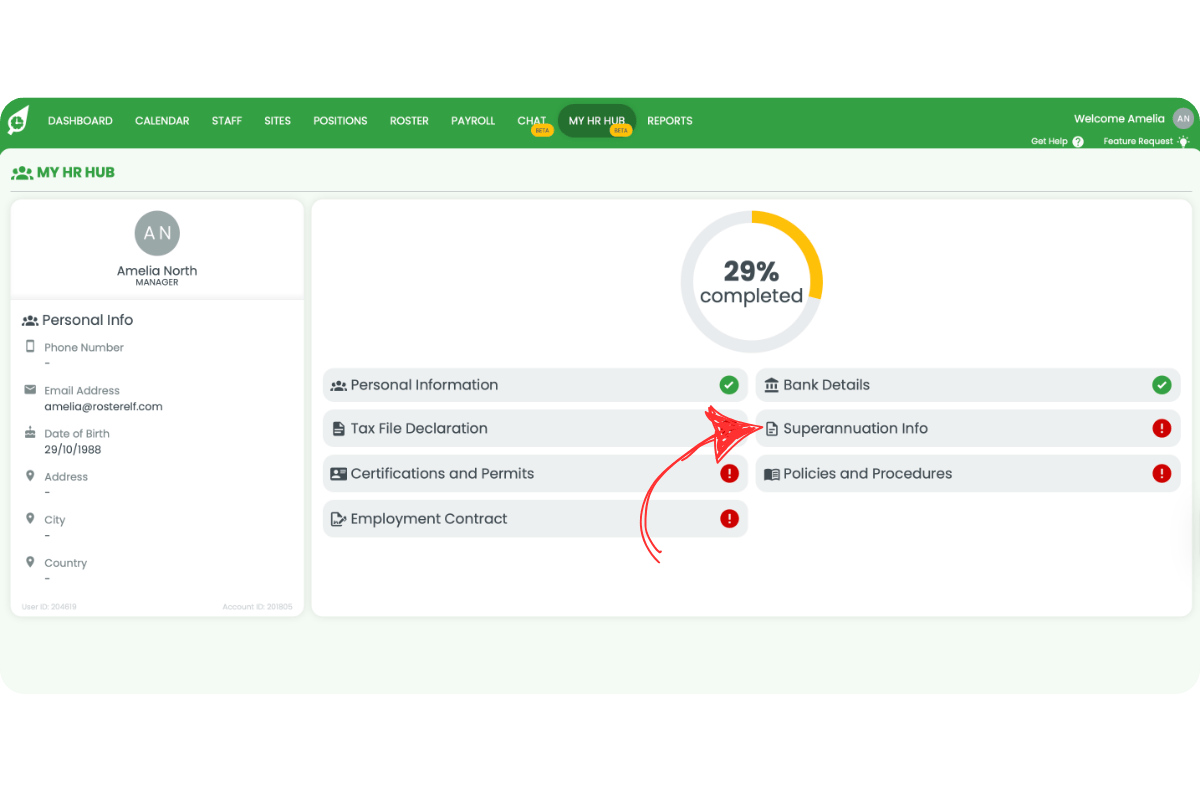
5.1.2 Select a payment destination: Employer nominated fund, fund chosen by me (RSA), or my SMSF. Complete required fields and save.
6. Upload certifications and permits
6.1 submit required documents
6.1.1 Open Certifications and Permits.
6.1.2 Items with a red exclamation mark need attention.

6.1.3 Click the item, then click Add Document to upload your certificate or permit. Check that Status updates from Pending to Approved.

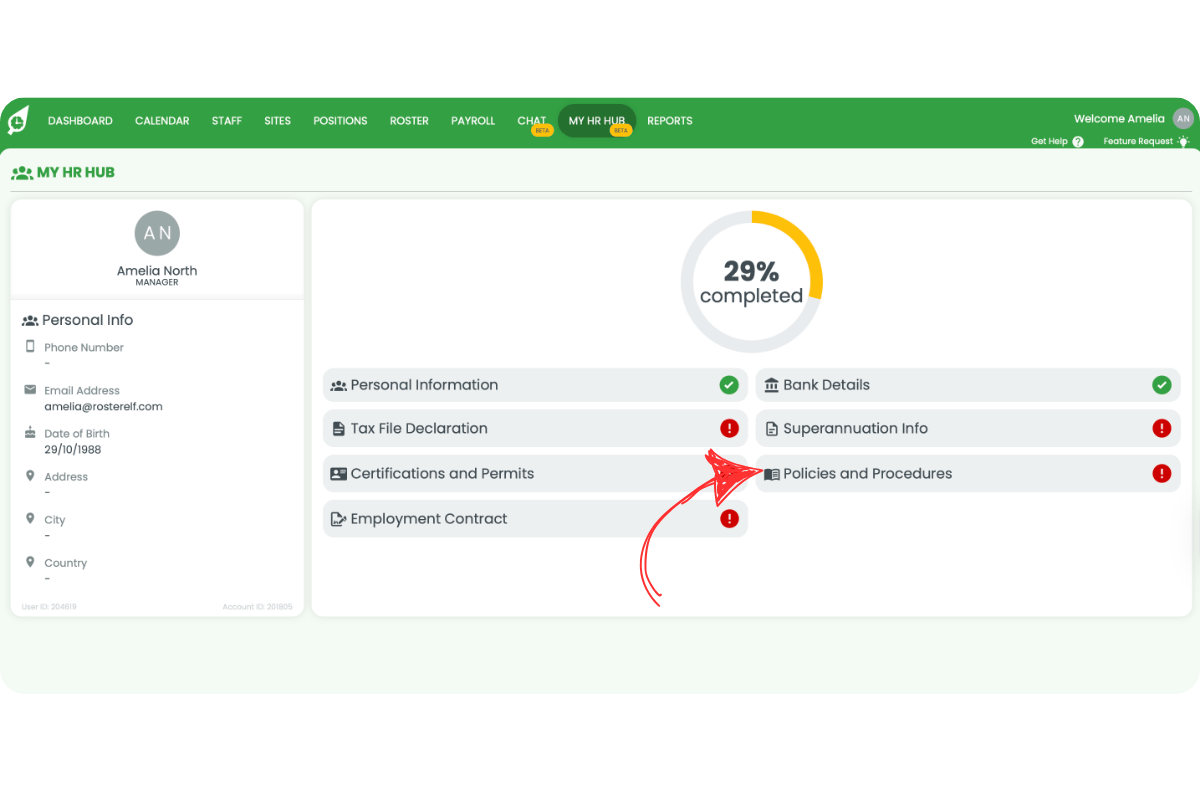
7. Review policies and procedures
7.1 acknowledge policies
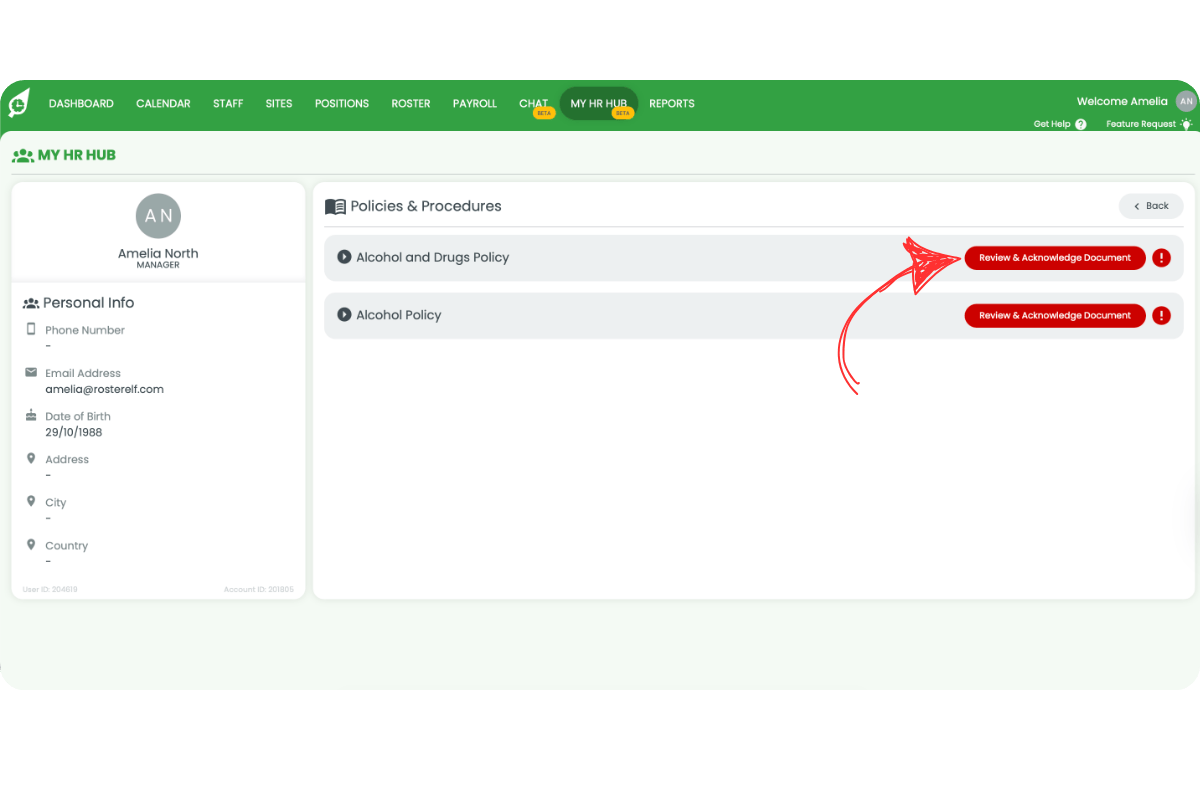
7.1.1 Open Policies and Procedures.
7.1.2 Click Review & Acknowledge Document for each policy.
7.1.3 Read the policy. Click Acknowledge Document when finished, or click Download Document to save a copy.
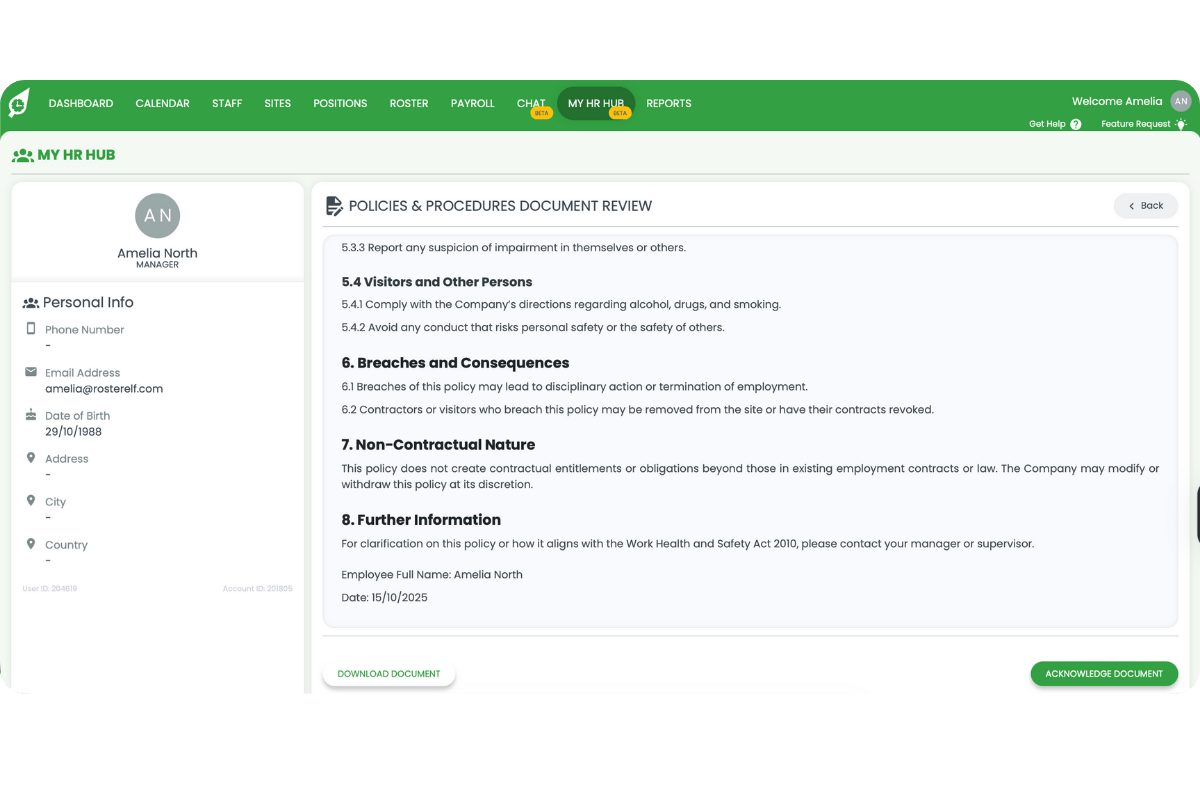
7.1.4 Confirm the disclaimer in the confirmation window to finalise your acknowledgement.
8. Review and sign your Employment contract
8.1 sign the contract
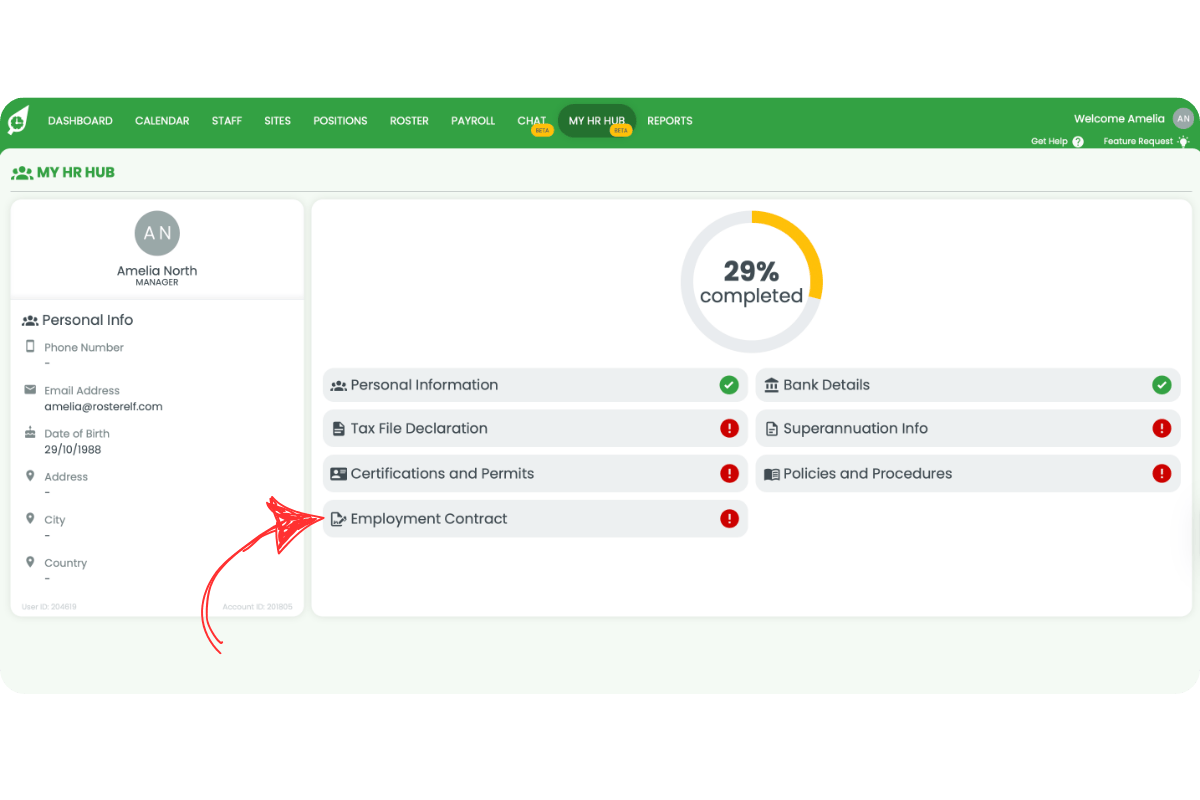
8.1.1 Open Employment Contract.
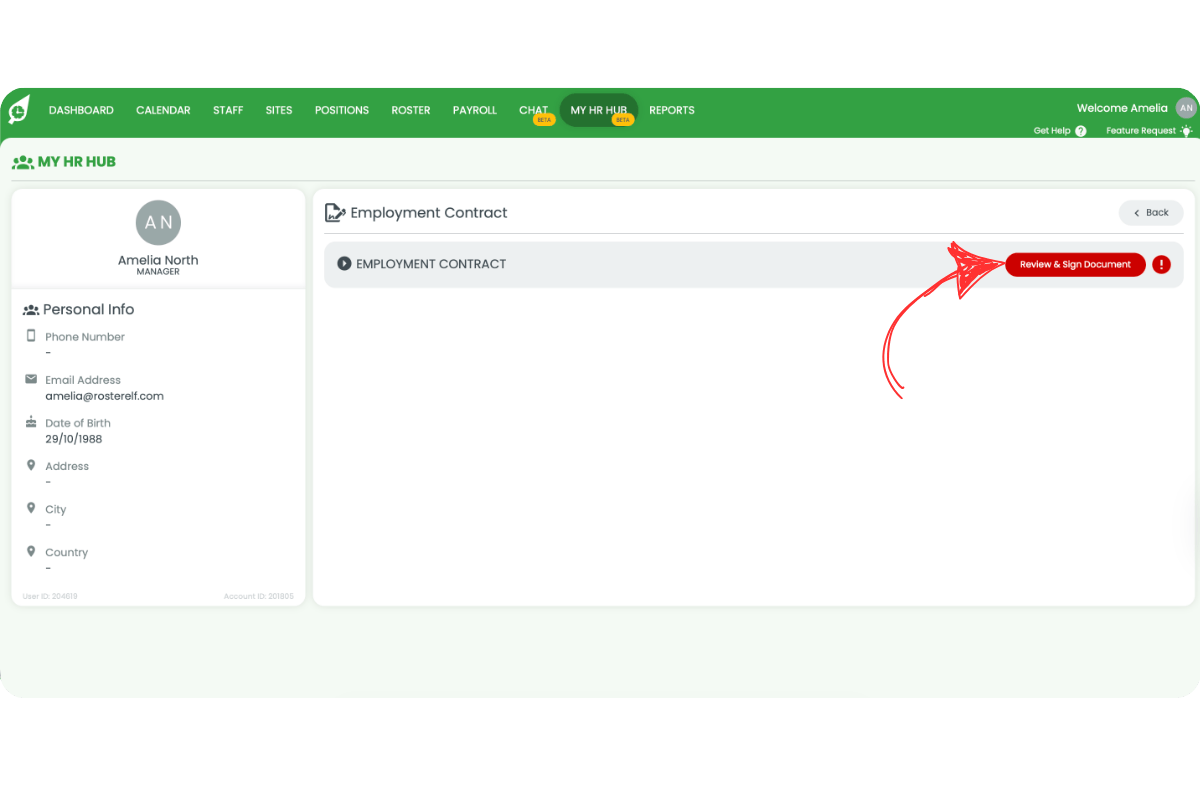
8.1.2 Click Review & Sign Document.
8.1.3 Review the terms. Click Click to Sign.
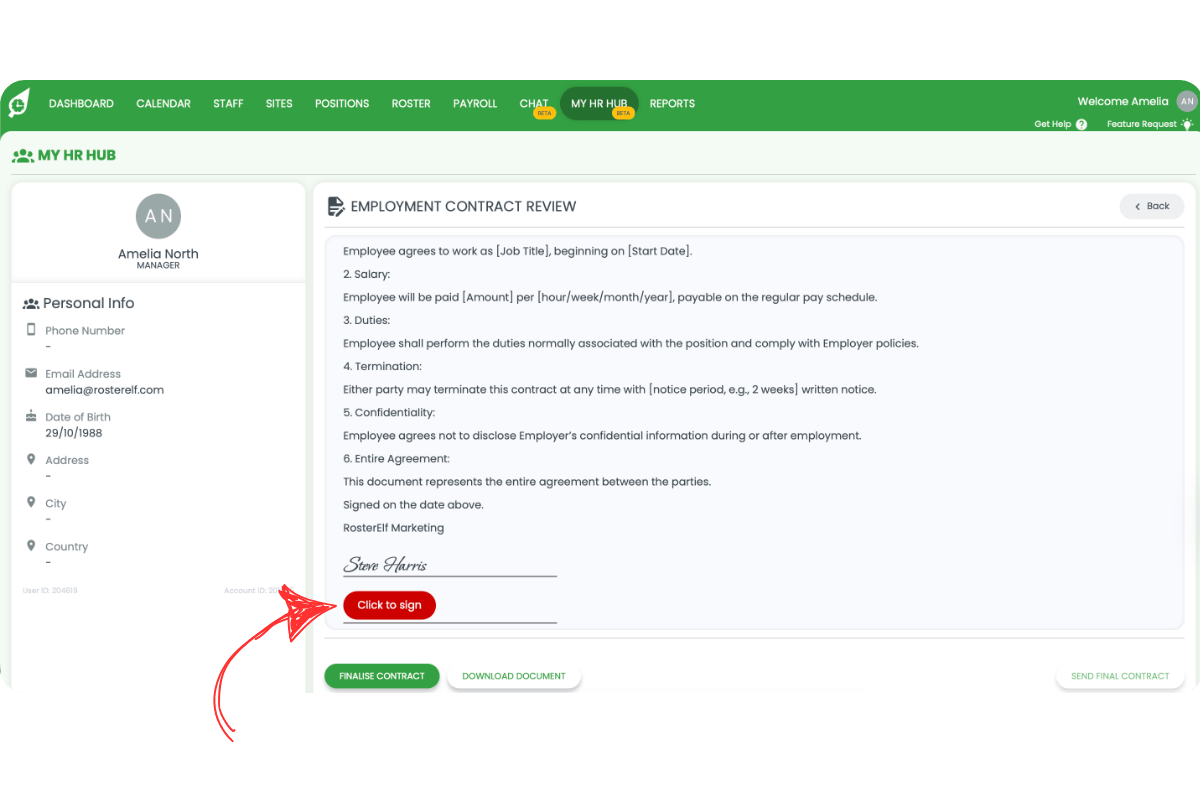
8.1.4 Enter your name, choose a signature style, and click Apply Your Signature. Confirm the disclaimer, then click Send Final Contract or Finalise Contract.
9. Check your progress and submit completion
9.1 confirm completion
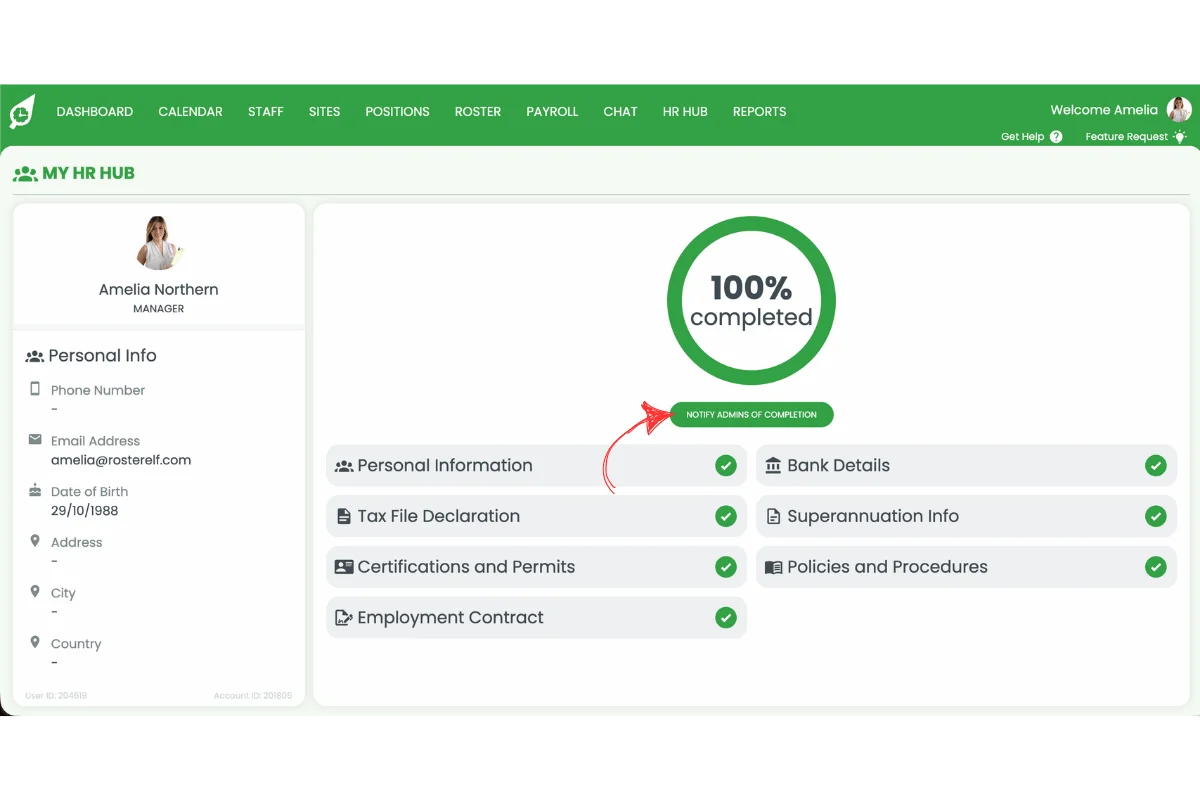
9.1.1 Return to the My HR Hub dashboard. When each item shows a green tick instead of a red exclamation, your onboarding is complete.
9.1.2 Press Notify Admin of Completion.
Frequently asked questions
1. How do I start my onboarding?
Log in to your RosterElf account, click My HR Hub, and follow the task list from Personal Information through to Employment Contract. Complete each section one by one until all show a green tick.
2. What does the red exclamation mark mean?
It indicates the section requires your attention. Click the item, complete the required fields or upload missing documents, and click Save. Once complete, the red icon will change to a green tick.
3. How do I upload a certificate or permit?
Open Certifications and Permits, select the item with a red exclamation mark, and click Add Document. Upload your file and confirm that the status updates from Pending to Approved.
4. Can I update my details later?
Yes. You can return to My HR Hub anytime to update personal details, bank information, or upload new certifications. Your changes save immediately after clicking Save. If bank details are updated in RosterElf, these can now be re-synced via the employee’s staff card to automatically update their Xero profile. Once the details have been successfully synced, you will receive a confirmation email from Xero.
5. How do I know when onboarding is complete?
Once every section in My HR Hub displays a green tick and your progress circle shows 100%, click Notify Admin of Completion to alert your manager. You can return at any time to review or update your information.