Access and manage certificates and permits in HR Hub
This article explains how to access and manage Certificates and Permits in HR Hub. You’ll learn how to add, edit, activate, and inactivate certifications or permits for your employees. Using this module keeps licenses and permits secure, current, and easy to track.
You can decide whether each item requires a number, an expiry date, or a file upload, and attach a sample image to guide staff. Follow the steps below to support your compliance efforts and organized.
1. Accessing certificates & permits
1.1 tabs and navigation
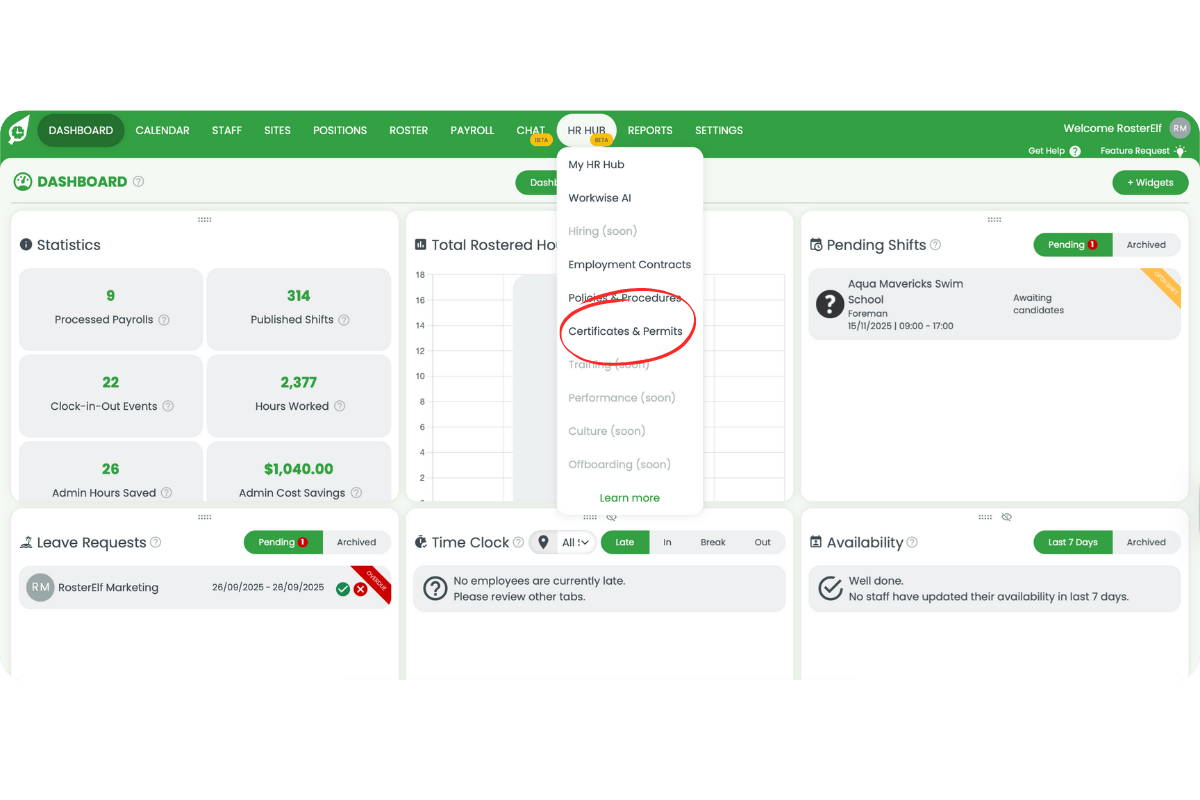
1.1.1 Click HR Hub in the top menu, then select Certificates & Permits from the dropdown.
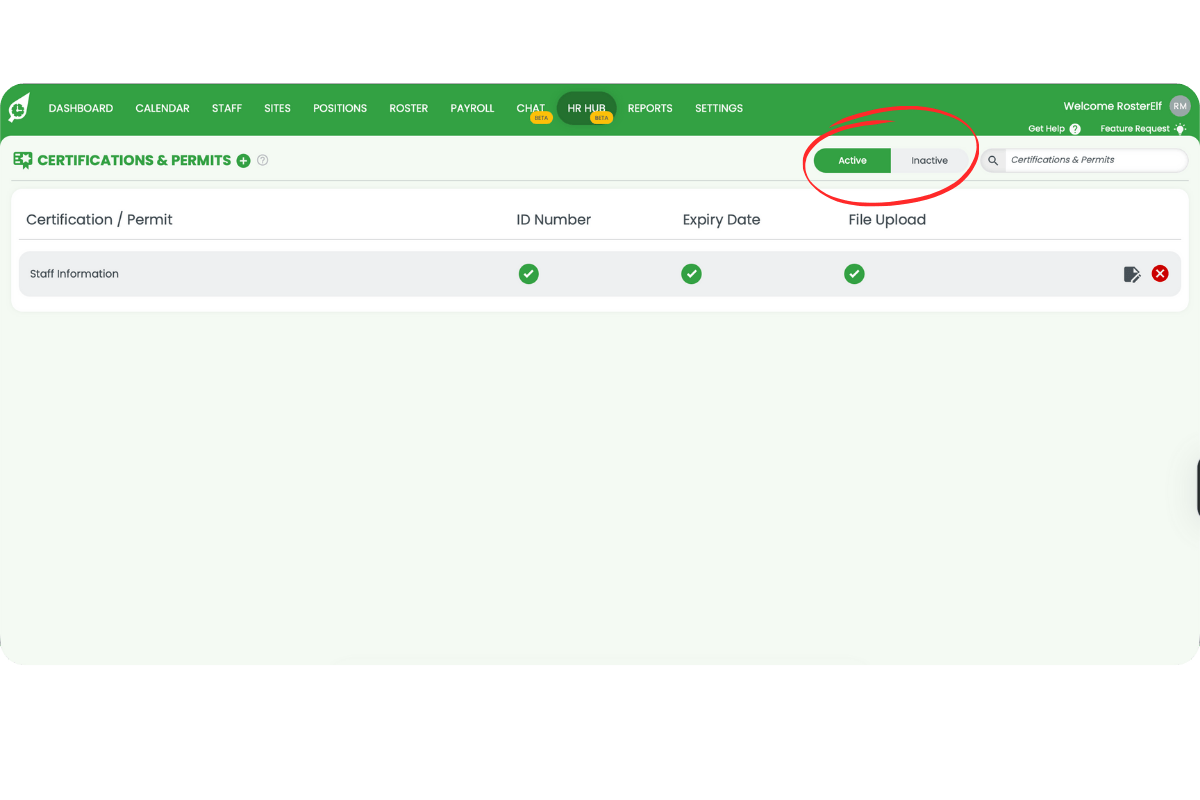
1.1.2 Use the Active / Inactive toggle in the top right to switch views. Use the search field to filter items.
2. Adding a certification or permit
2.1 create new certification
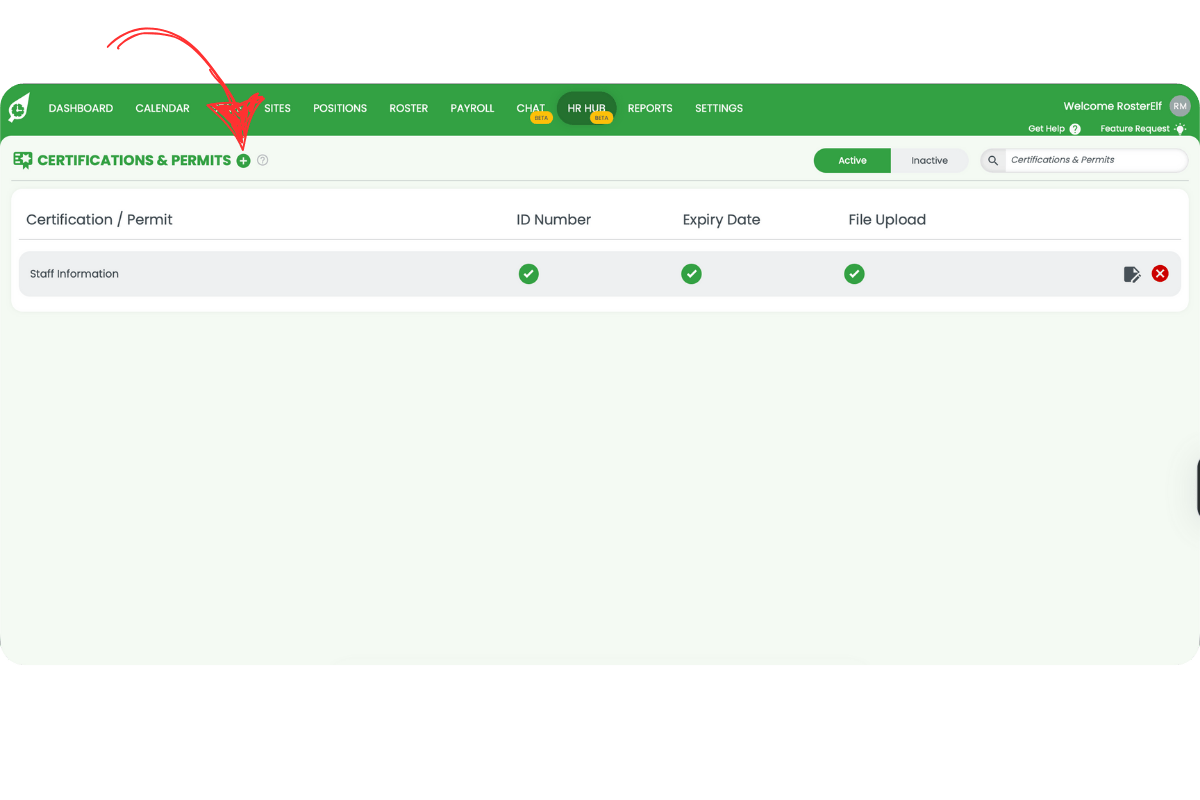
2.1.1 Click the + icon next to the page title CERTIFICATIONS & PERMITS.
2.1.2 Enter the Certification Name and optional Description in the Create New Certification modal.
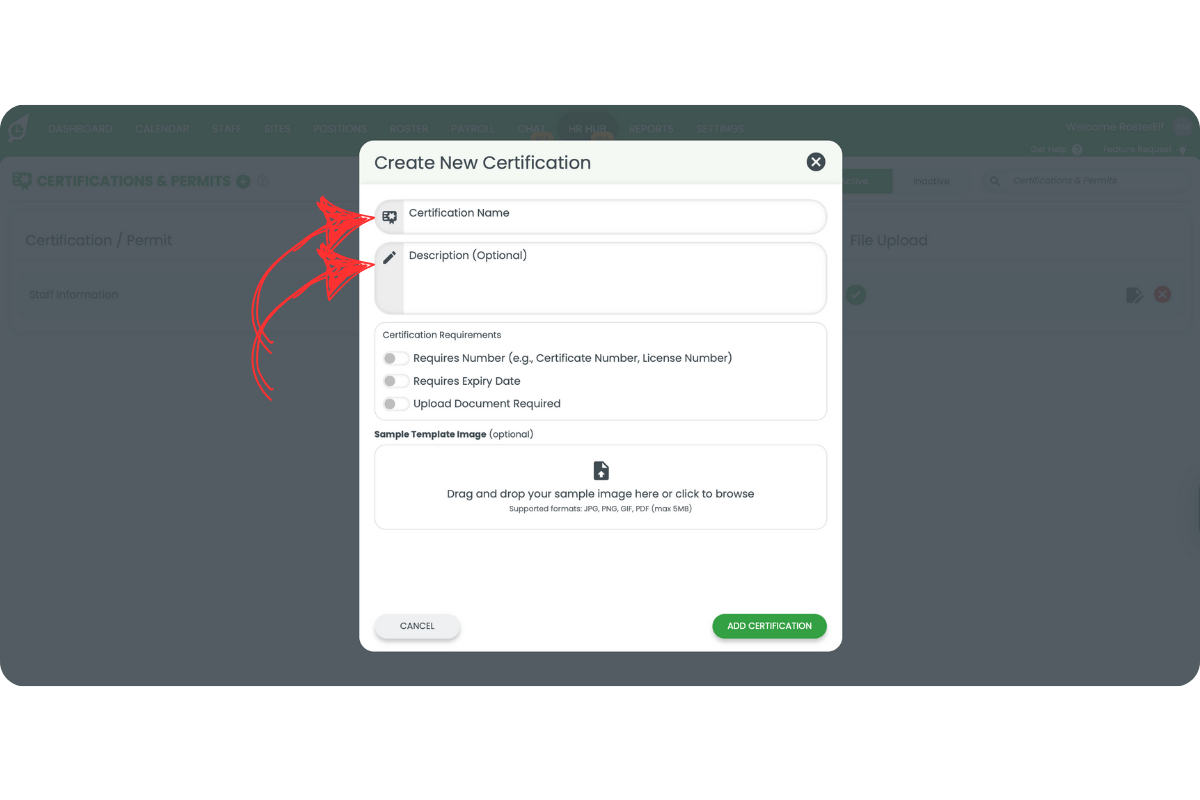
2.1.3 Toggle the requirements you need to green:
- Requires Number (e.g., certificate or license number)
- Requires Expiry Date
- Upload Document Required
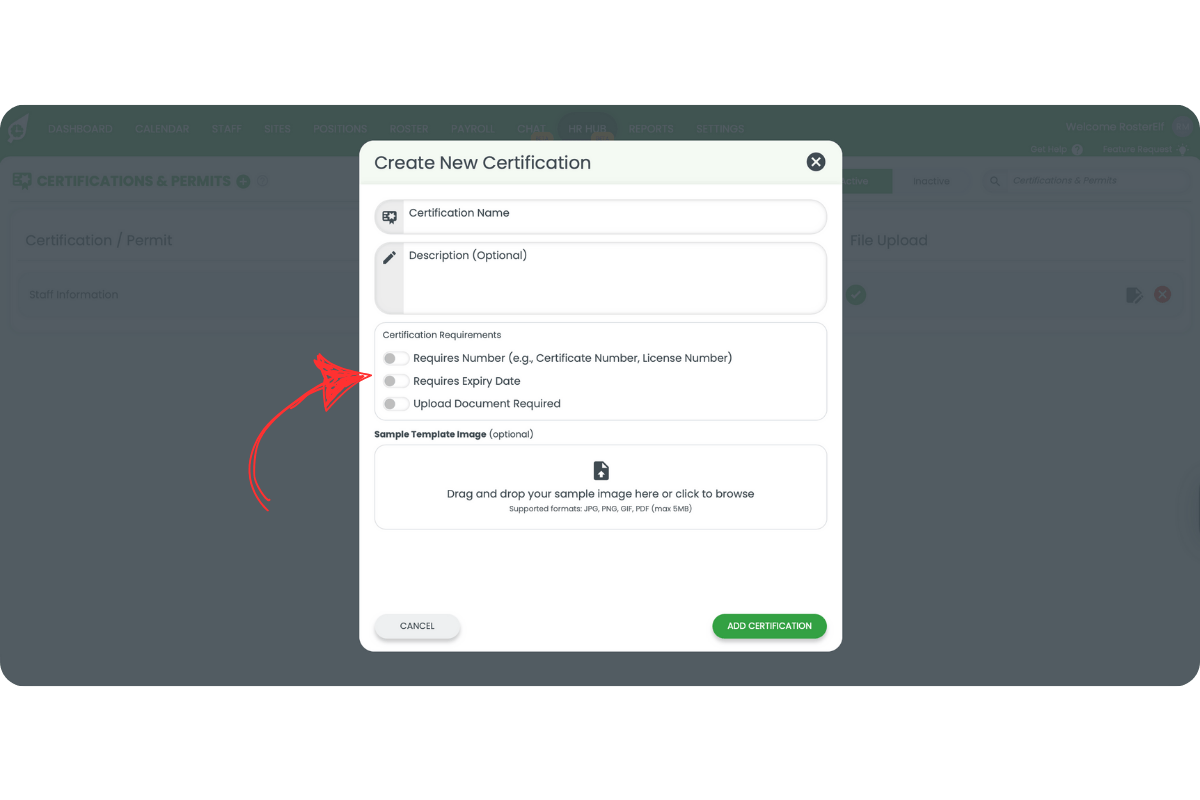
2.1.4 Add a Sample Template Image (optional) by dragging a file into the uploader or clicking to browse.

2.1.5 Click ADD CERTIFICATION. A confirmation appears and the item shows under Active.

3. Editing, deactivating, or activating items
3.1 row actions
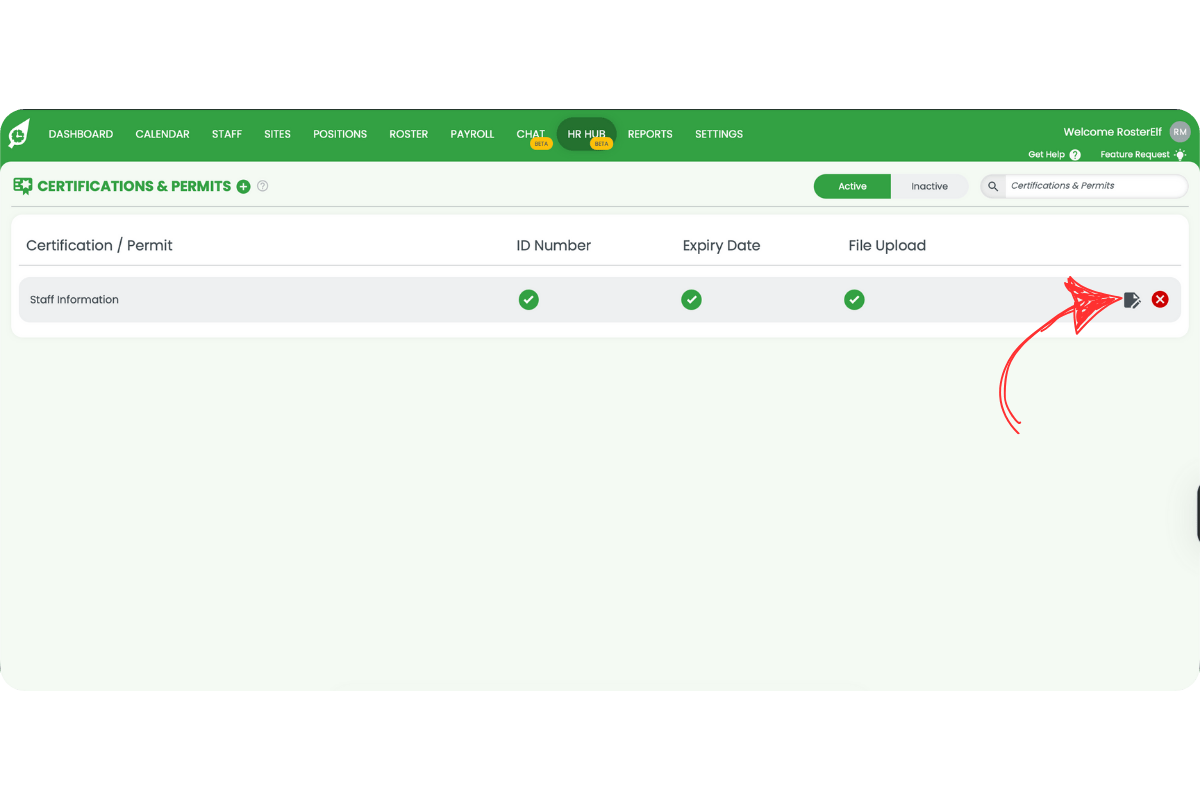
3.1.1 In Active, click the pencil icon to edit an item.
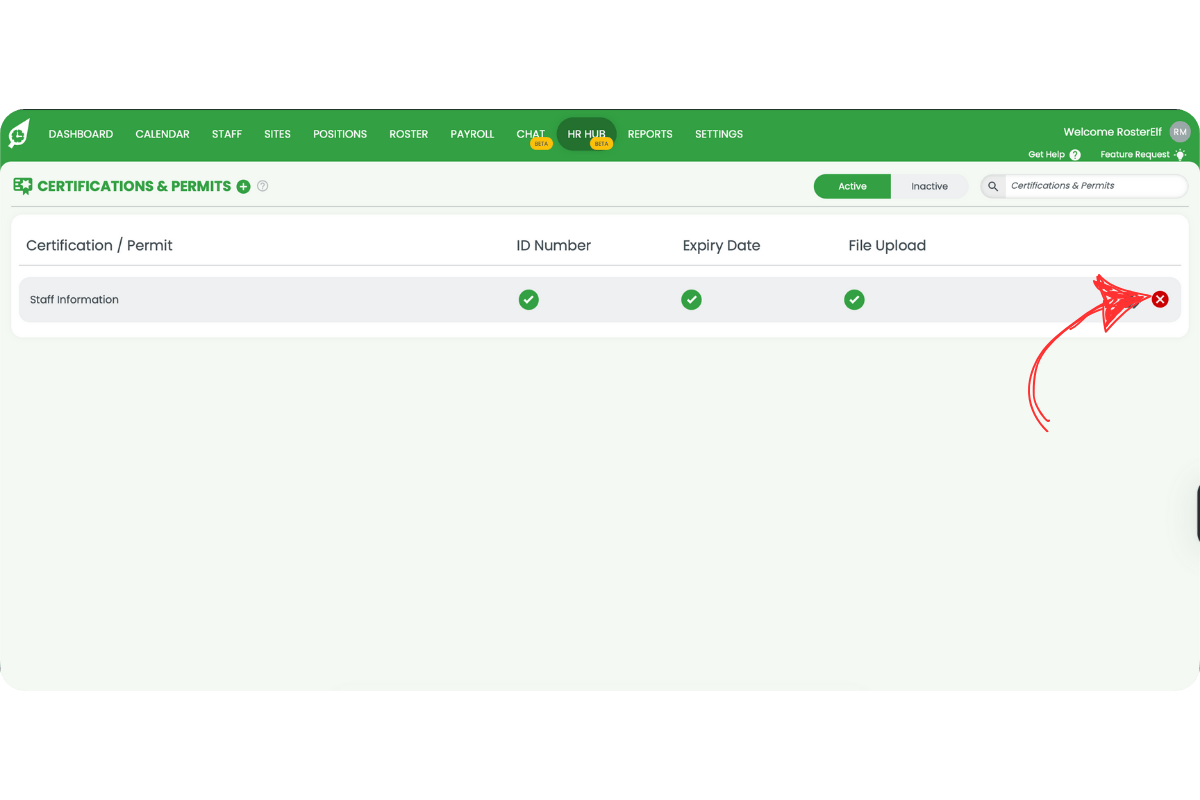
3.1.2 In Active, click the red x to move the item to Inactive.
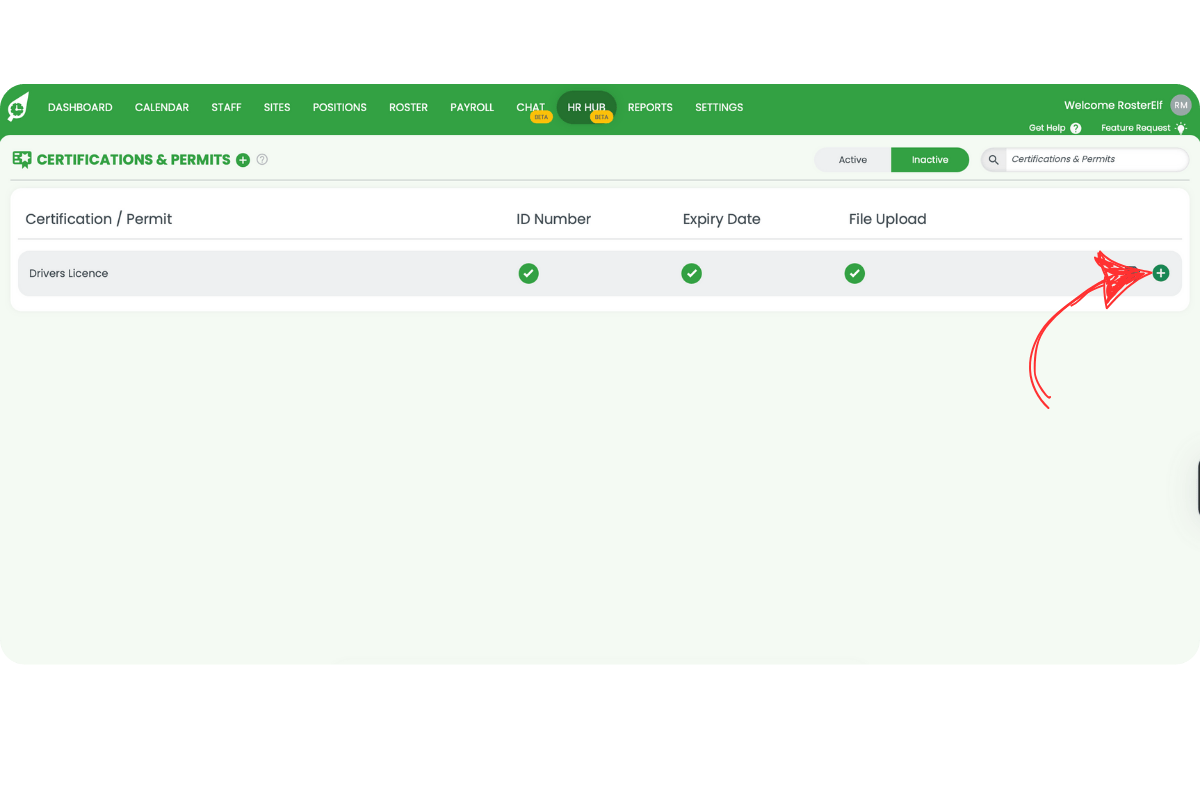
3.1.3 In Inactive, click the green + to activate and return the item to Active.
Frequently asked questions
1. How do I add a new certification?
Click the + beside CERTIFICATIONS & PERMITS, complete the fields, toggle requirements to green, then click ADD CERTIFICATION.
2. Can I require staff to upload a document?
Yes. Turn on Upload Document Required when creating or editing the item.
3. What file types can I upload?
JPG, PNG, GIF, or PDF up to 5MB.
4. How do I activate an inactive item?
Open Inactive, click the green + on the item’s row to move it back to Active.
5. What's the difference between Active and Inactive?
Active items are in use. Inactive items are archived for record-keeping or future use.
6. How can I send the Fair Work Information Statement and Casual Employment Information Statement in RosterElf?
The Fair Work Information Statement and Casual Employment Information Statement are automatically included in all RosterElf welcome messages. When you send a welcome message to a new employee, both documents are attached so staff can review the required employment information during onboarding.