This article explains how to resolve issues when shifts do not appear on the RosterElf Time Clock. You will learn how to check the advanced filter settings and ensure a roster is published so that your team can view and clock in to their scheduled shifts. By following these steps, you will maintain a seamless experience for all staff.
For guidance on adding shifts to your roster, refer to our Adding Shifts on Your Roster guide.
1. Check the advanced filter settings
If shifts are missing, it is often because the advanced filter is set to display only certain sites, positions, or staff. Adjusting these settings ensures you see all relevant shifts.
1.1 adjust the advanced filter
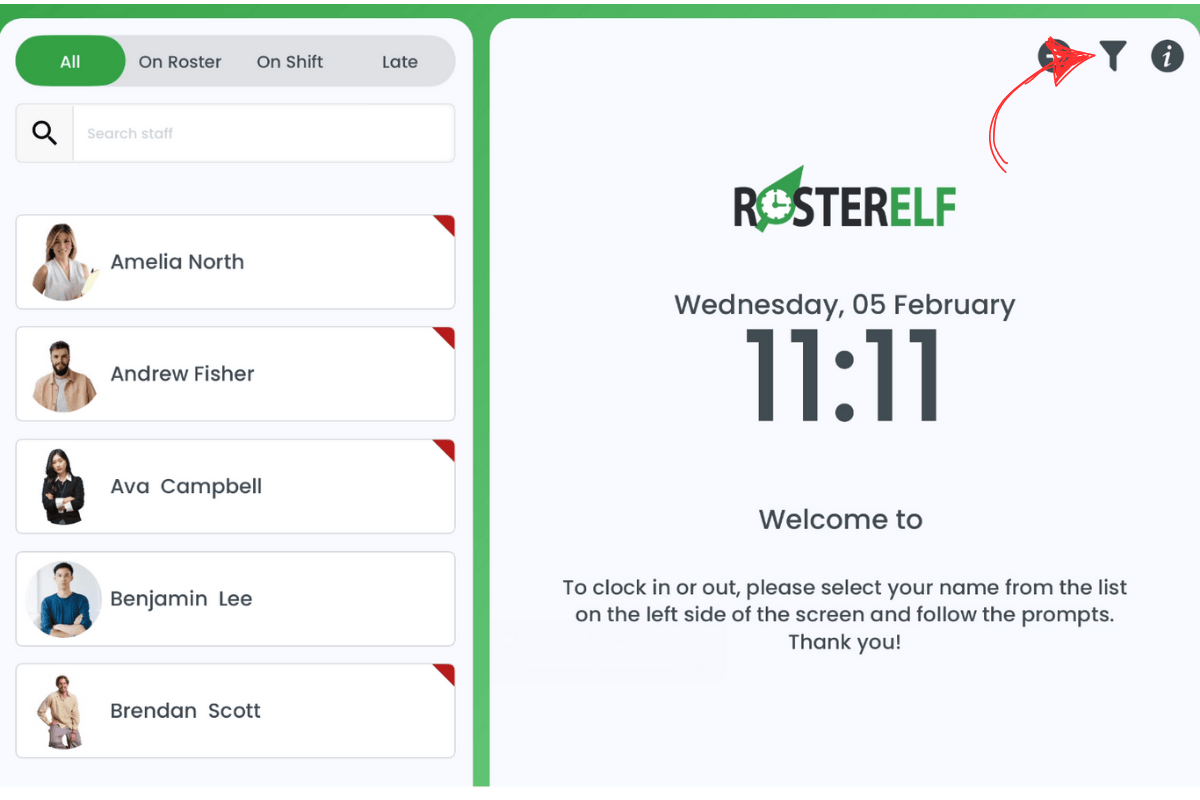
1.1.1 Open the Time Clock on your device.
1.1.2 Tap the filter (hourglass) icon at the top right of the screen to open the advanced filter.
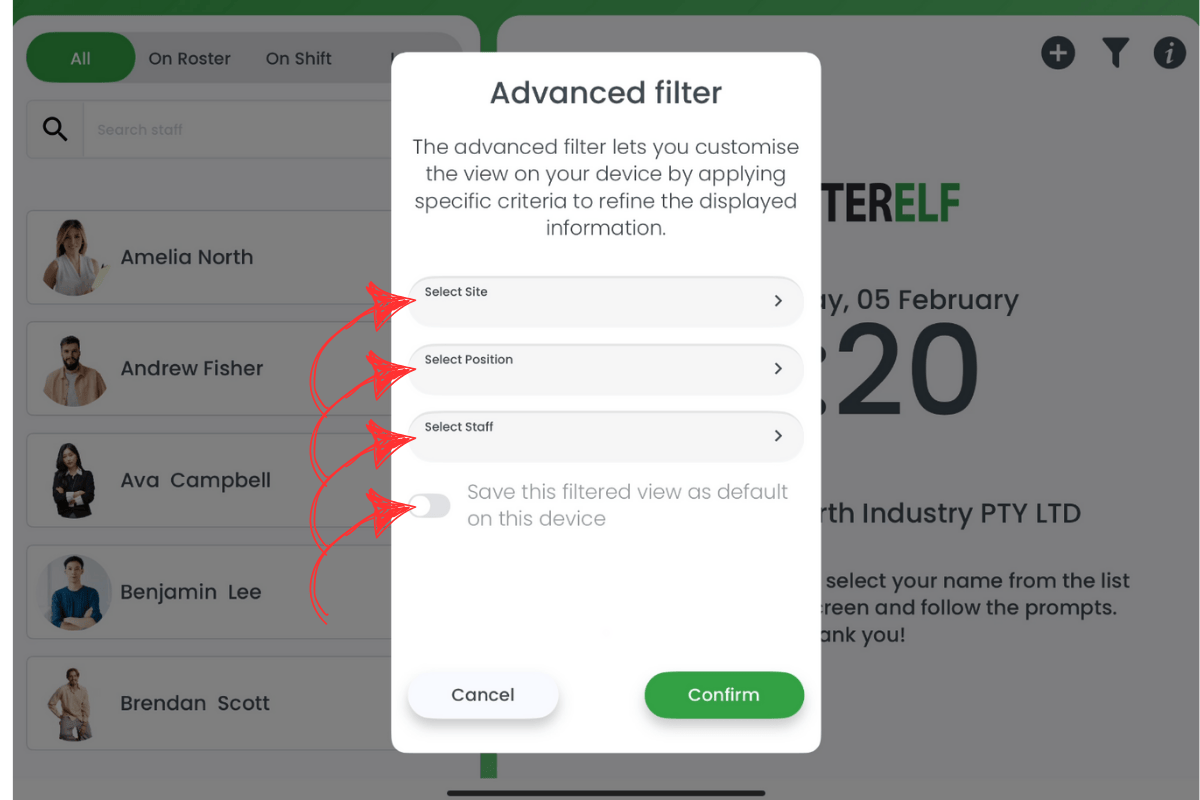
1.1.3 Check the site, position, and staff dropdowns to ensure they are not limiting your view. If you want to see all shifts, clear or reset these filters.
1.1.4 Save or confirm your changes. If needed, you can save this view as a default, so it appears each time you open the app.
1.1.5 Return to the main screen and verify if the missing shifts are now visible.
2. Ensure a roster is published
If you have no published roster for the current day, shifts will not appear on the Time Clock. Publishing a roster ensures staff can see and clock in for their scheduled shifts.
2.1 verify the roster is published
2.1.1 Log in to RosterElf using an admin or manager account.
2.1.2 Navigate to the Roster tab.
2.1.3 Check if a roster is published for the current day.
2.1.4 If there is no published roster, create one and click Publish to make it active.
2.1.5 Return to the Time Clock to confirm that scheduled shifts are now visible.
For step-by-step guidance on adding shifts, see the Adding Shifts on Your Roster guide.
Frequently asked questions
1. Why are shifts not showing on the Time Clock?
Shifts may be missing because of restrictive advanced filter settings or an unpublished roster. Make sure the filters show all sites, positions, and staff, and verify that a roster is published for the current day.
2. How do I adjust the advanced filter on the Time Clock?
Tap the hourglass icon at the top right to open the advanced filter. Check the site, position, and staff dropdowns, then save or reset them if you want to see all shifts.
3. What happens if no roster is published in RosterElf?
If no roster is published for the day, the Time Clock will not display any shifts. Create and publish a roster to resolve the issue.
4. How do I publish a roster in RosterElf?
Log in as an admin or manager, go to the Roster tab, create or select a roster for the current day, and click Publish to make it visible.
5. Where can I find help with adding shifts to a roster?
For detailed steps on adding shifts, see the Adding Shifts on Your Roster guide in the RosterElf Help Centre.