This article explains how to create multiple shifts for staff on the same position, site and time. Whether you’re rostering for one person or many, this guide will walk you through each step. You’ll learn how to select a site and position, enter shift times, assign multiple staff, and finalise your shift as a draft or publish it live.
By following these instructions, you’ll save time, avoid errors, and ensure your team knows when and where they’re working. The process is quick and simple, and once you’re familiar with it, rostering becomes a routine part of your daily or weekly workflow.
This article is perfect for managers, assistant managers or business owners responsible for scheduling staff. We’ll keep the steps short and clear so you can get the job done faster and more confidently.
1. Add a new roster shift
This section shows you how to start a new shift from the Roster tab. You’ll be able to pick your location, role and times, and choose which staff should be assigned. This is the first step in making sure your roster is accurate and complete.
1.1 Open the Roster tab
1.1.1 Go to the top menu and click on the Roster tab.
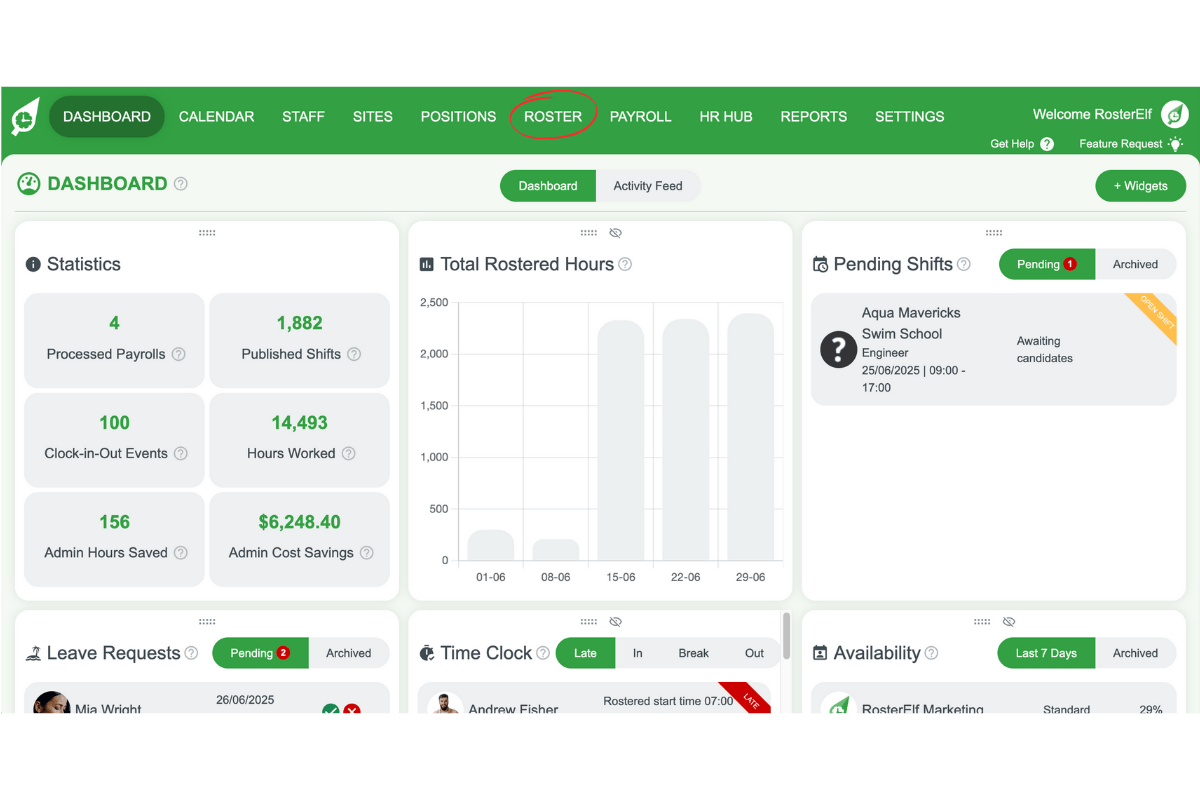
1.1.2 Wait for the roster calendar to load.
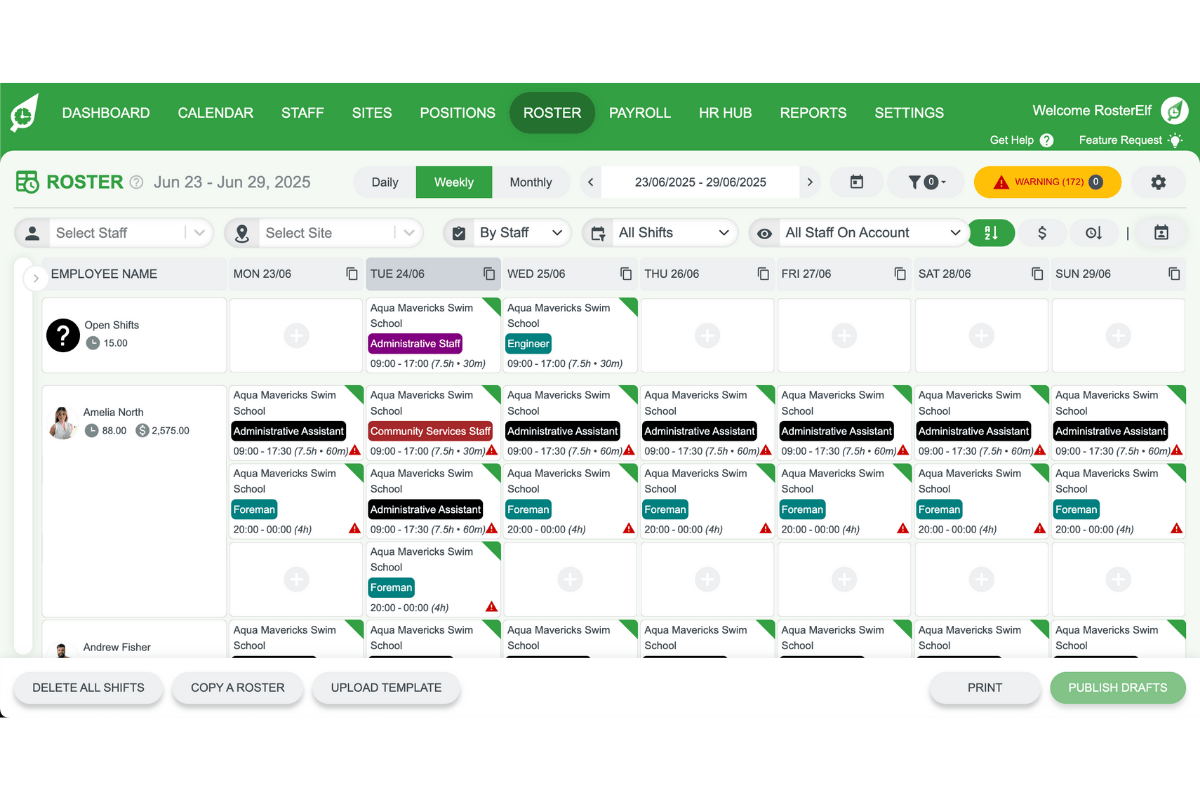
1.2 Start creating a shift
1.2.1 Press the plus (+) symbol on the day you want to add a shift.
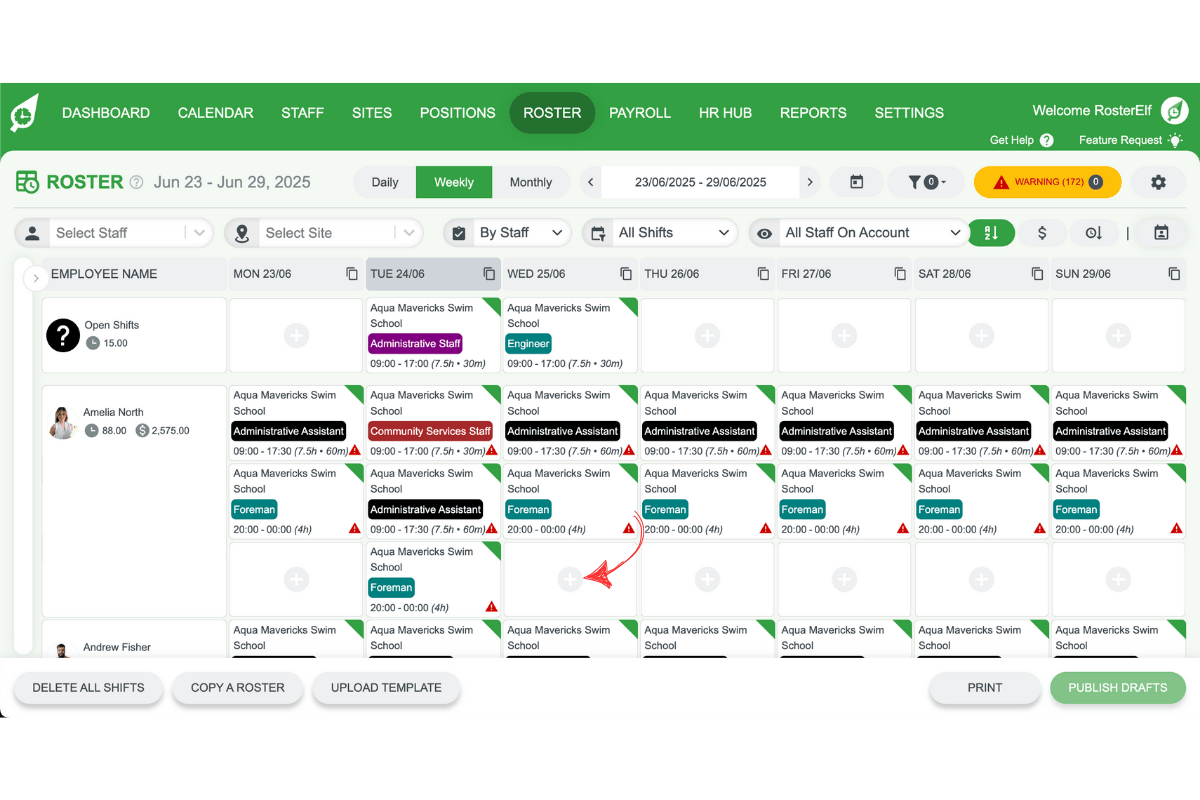
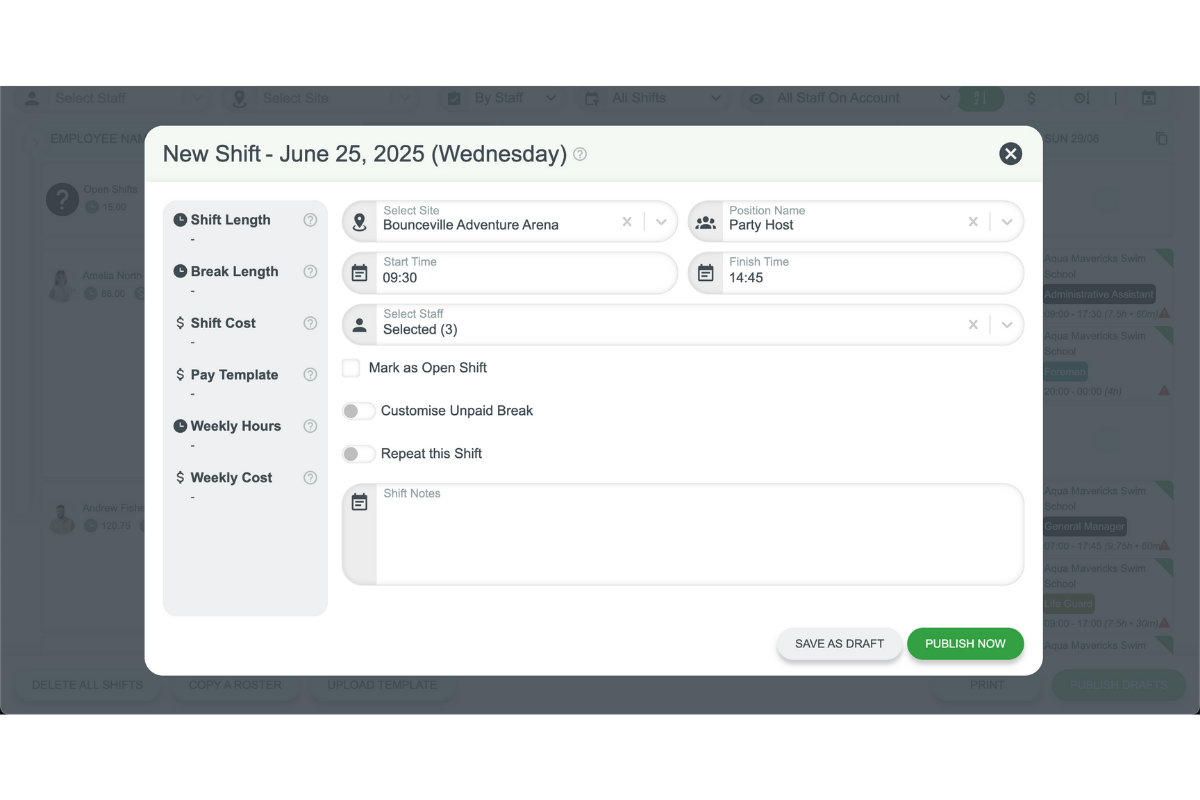
1.2.2 A new shift window will appear.
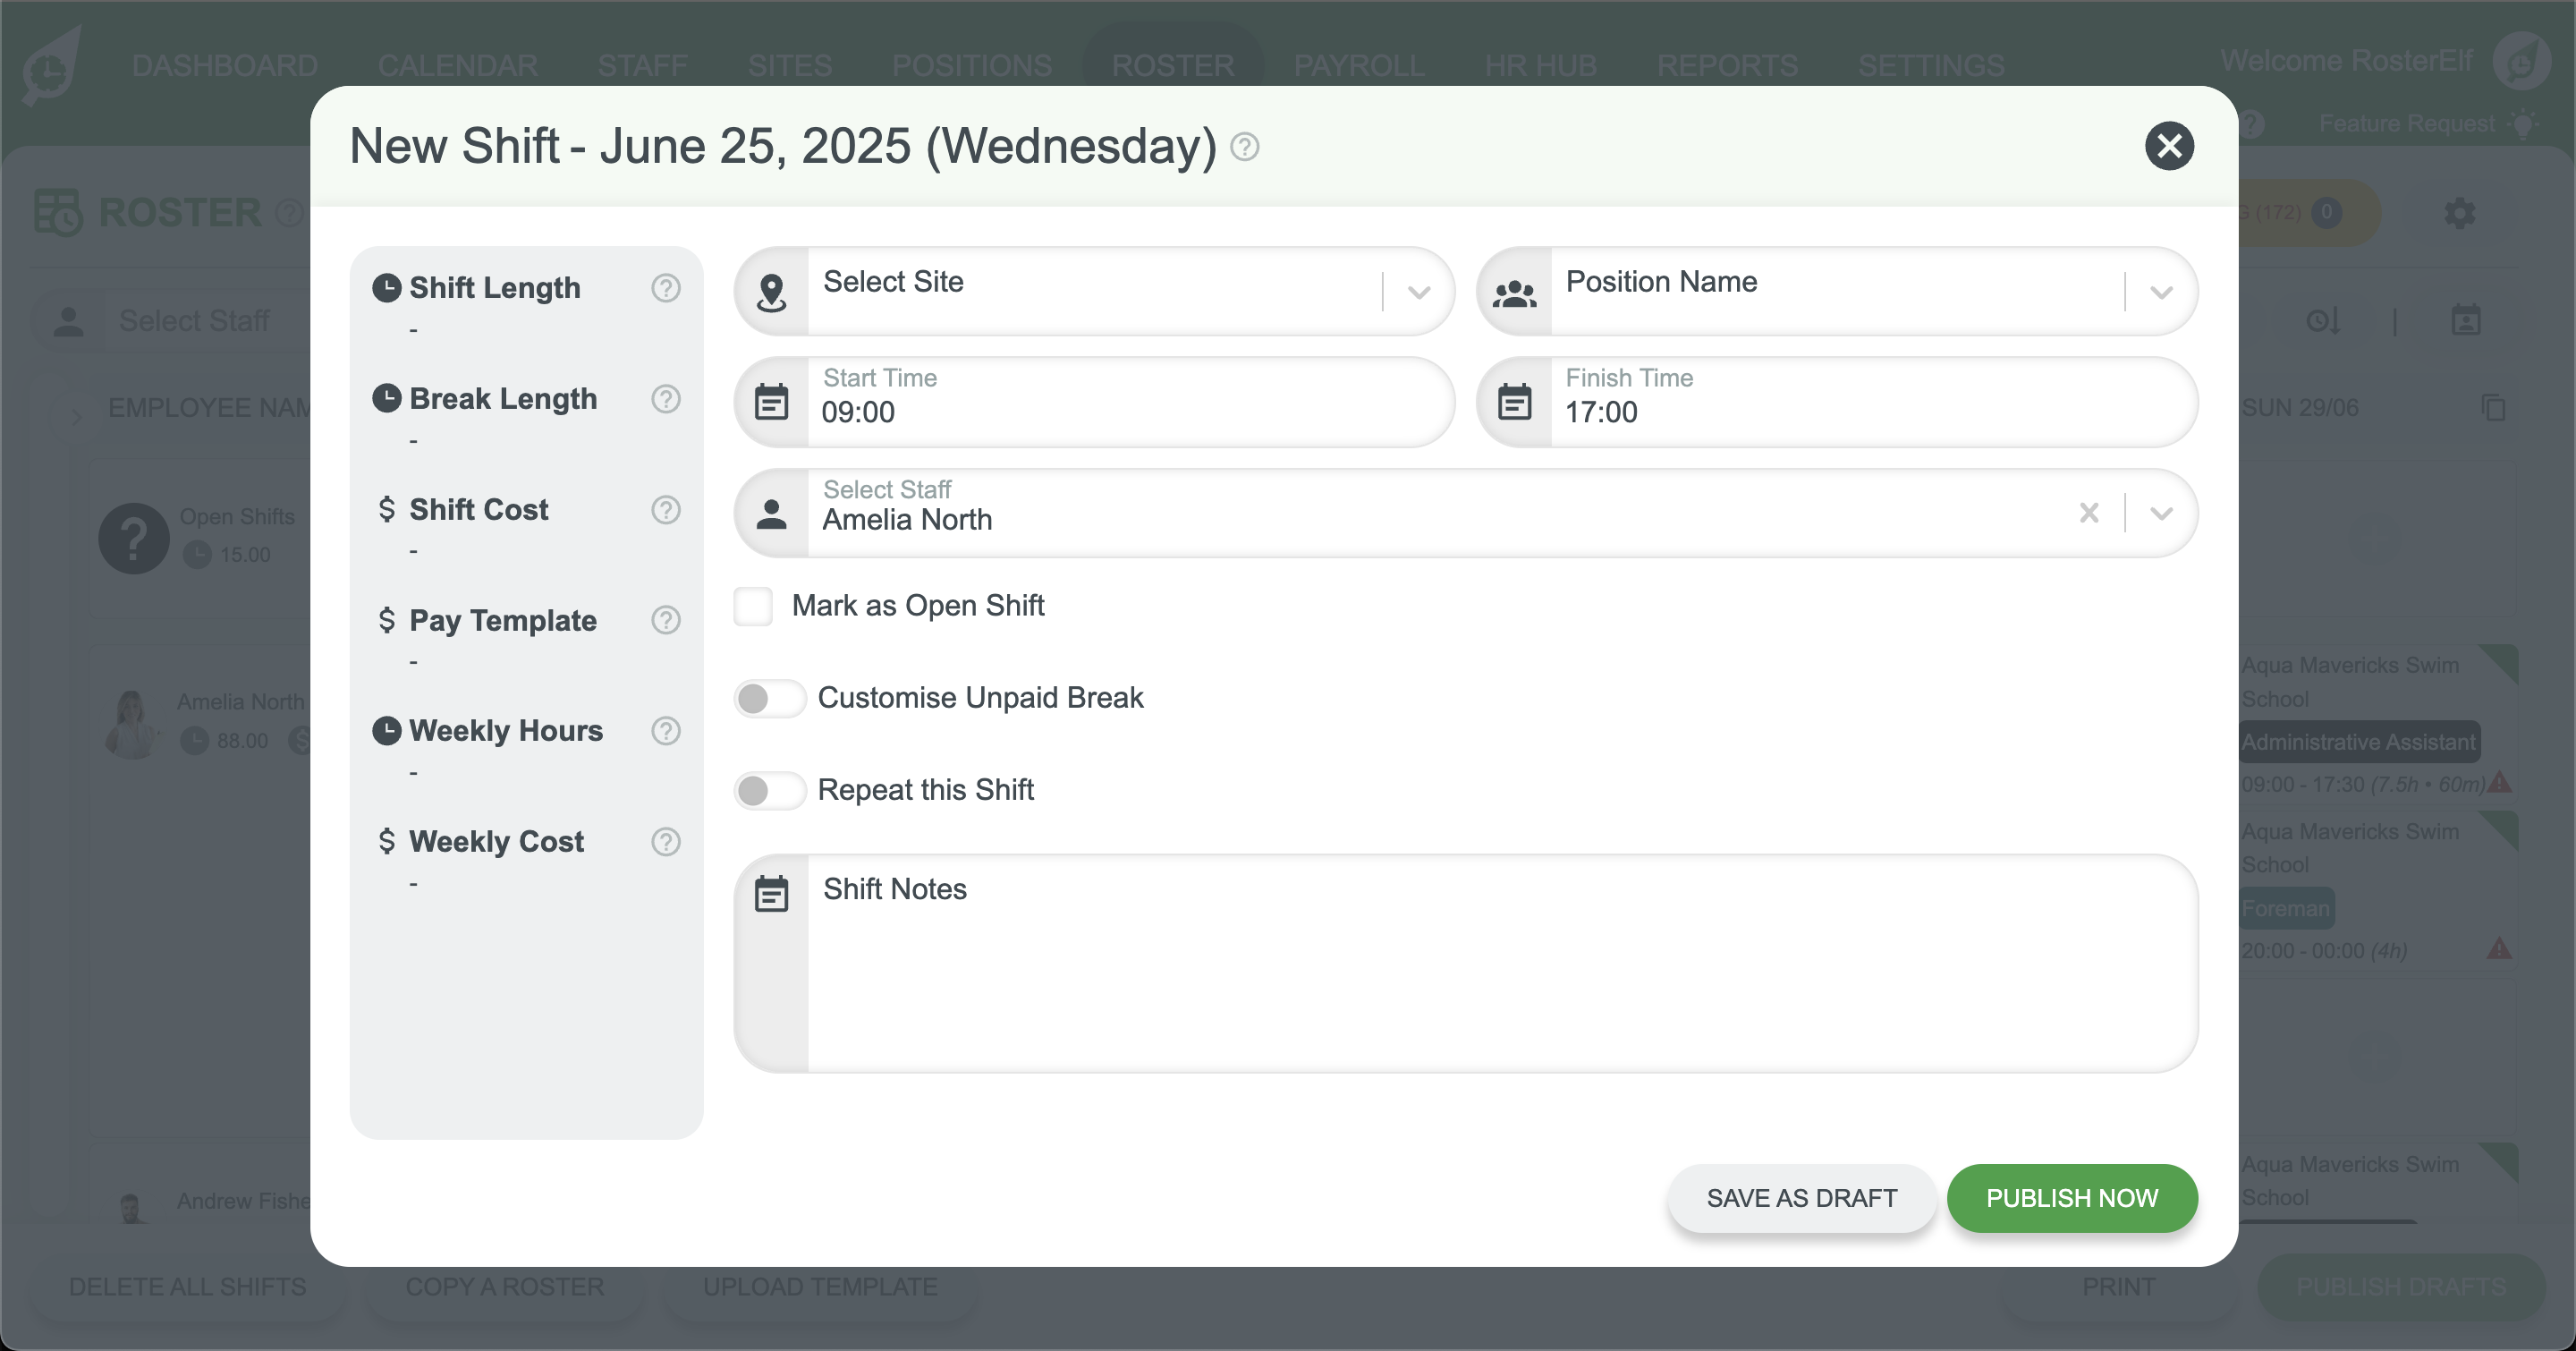
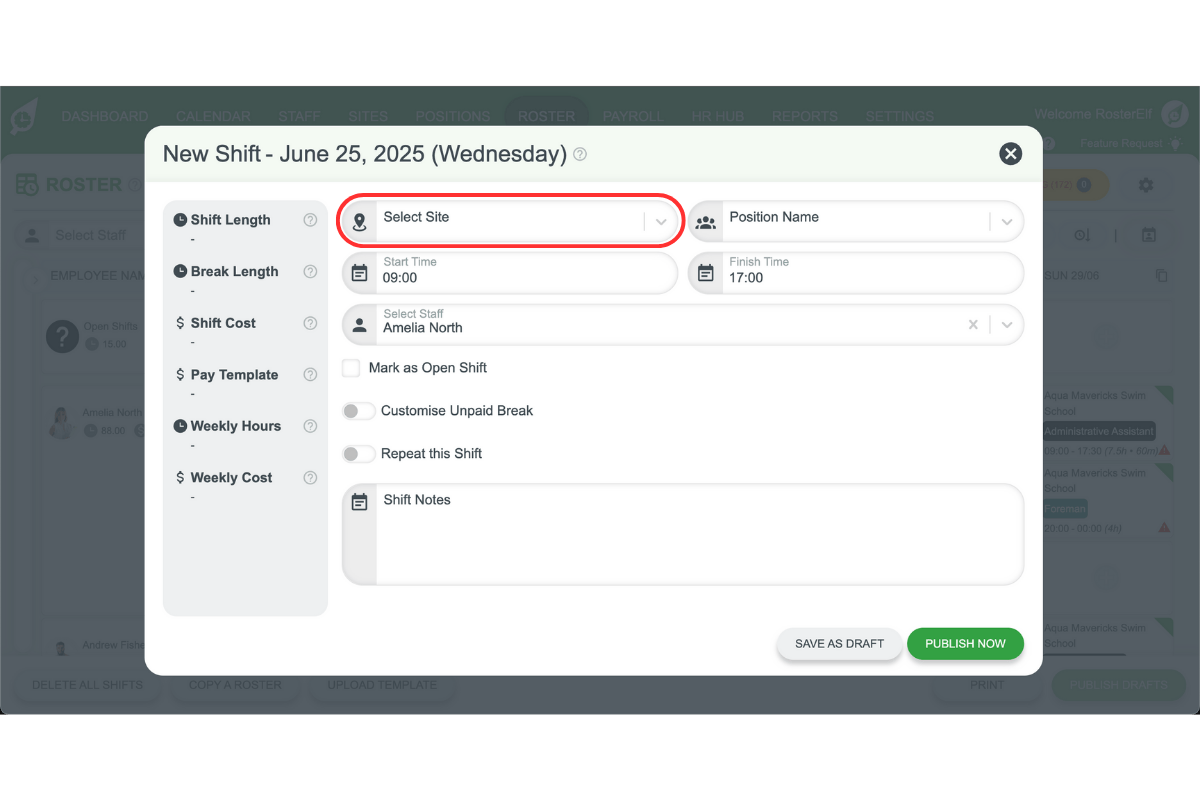
1.3 Set shift details
1.3.1 Select the correct site from the dropdown menu.
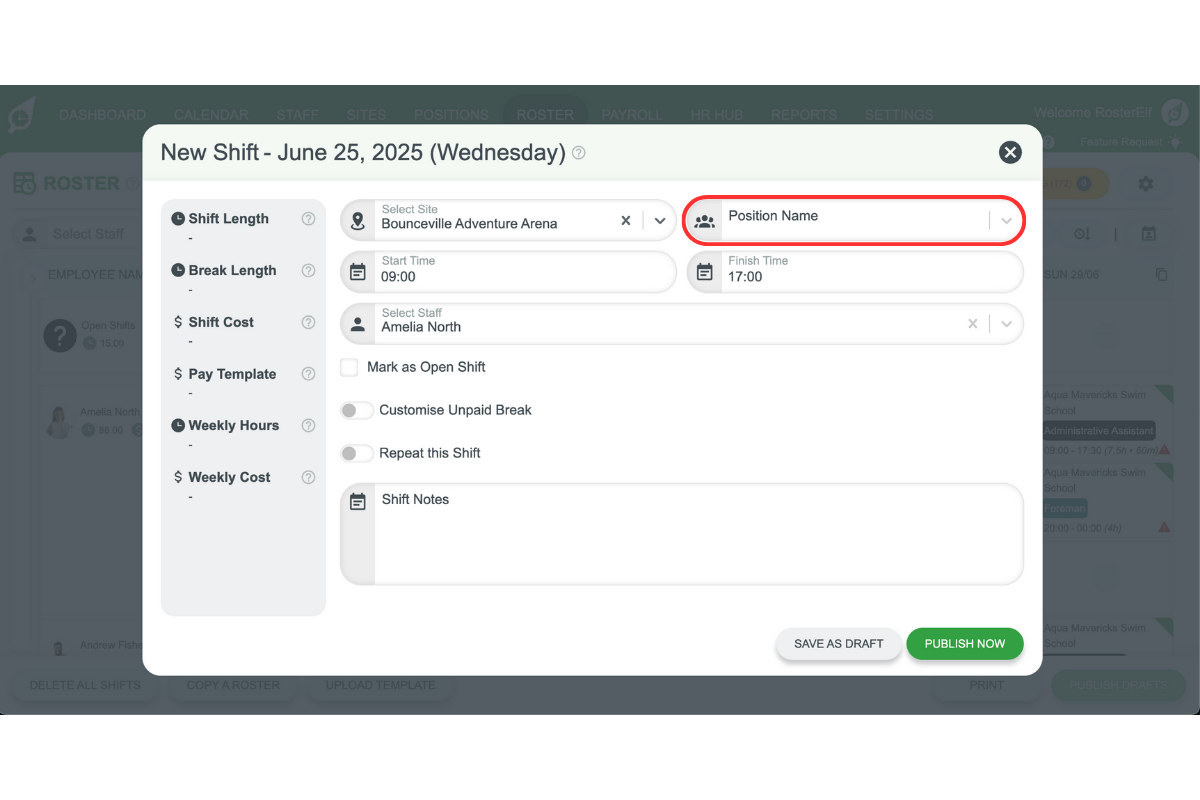
1.3.2 Choose the position that needs to be filled
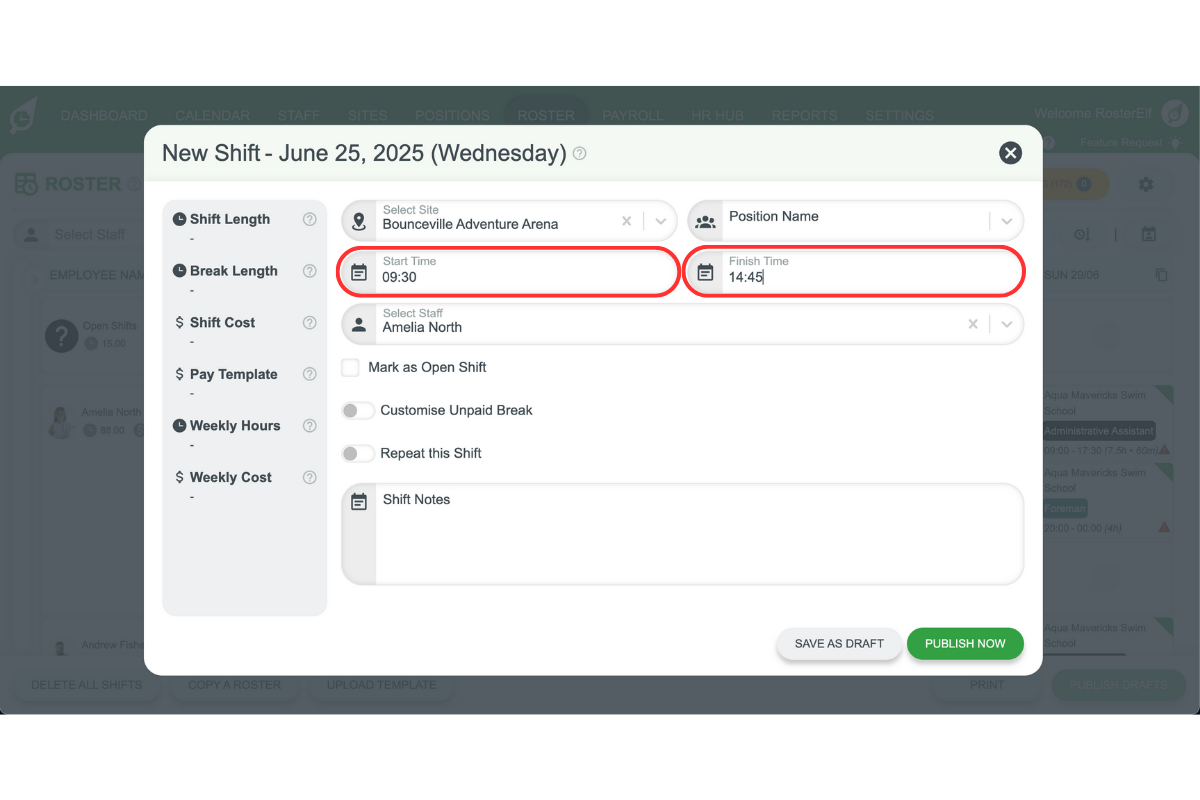
1.3.3 Set the start and end times for the shift.
1.4 Assign staff to the shift
1.4.1 Click the square icon next to each staff members you want to assign.
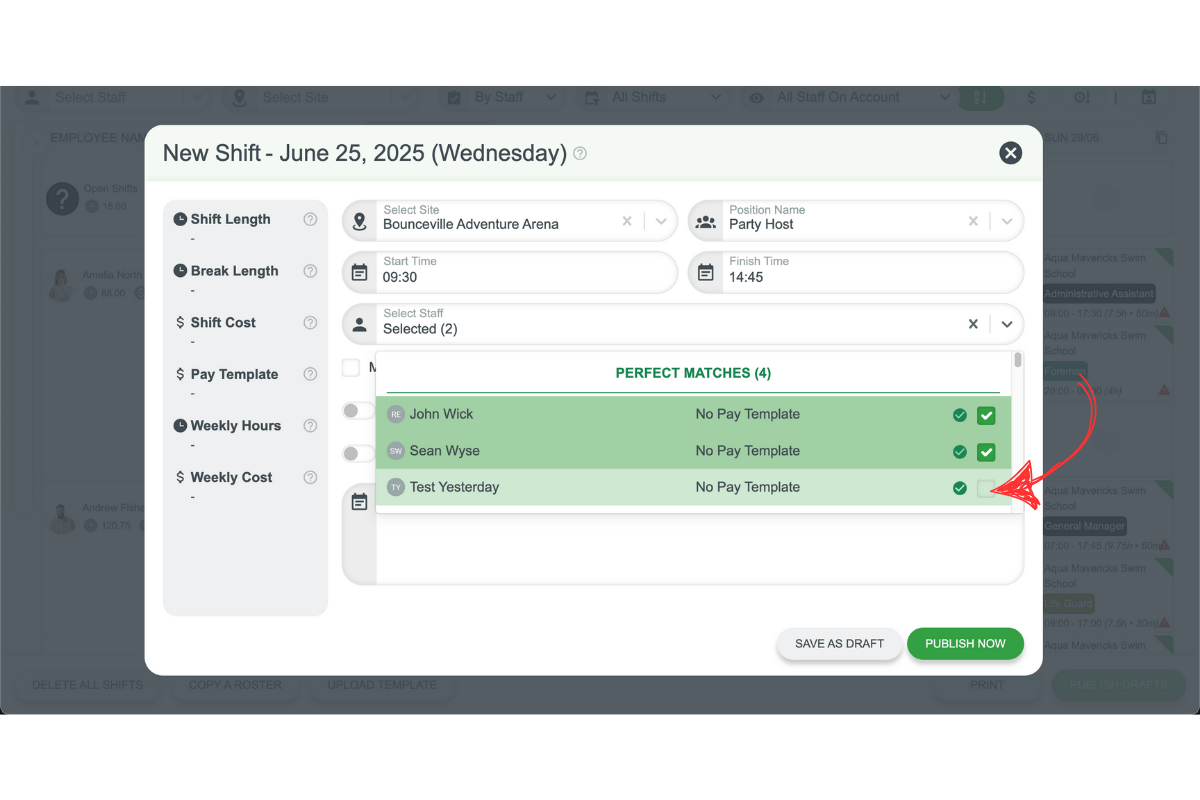
1.4.2 Review your selections to make sure all staff are correct.
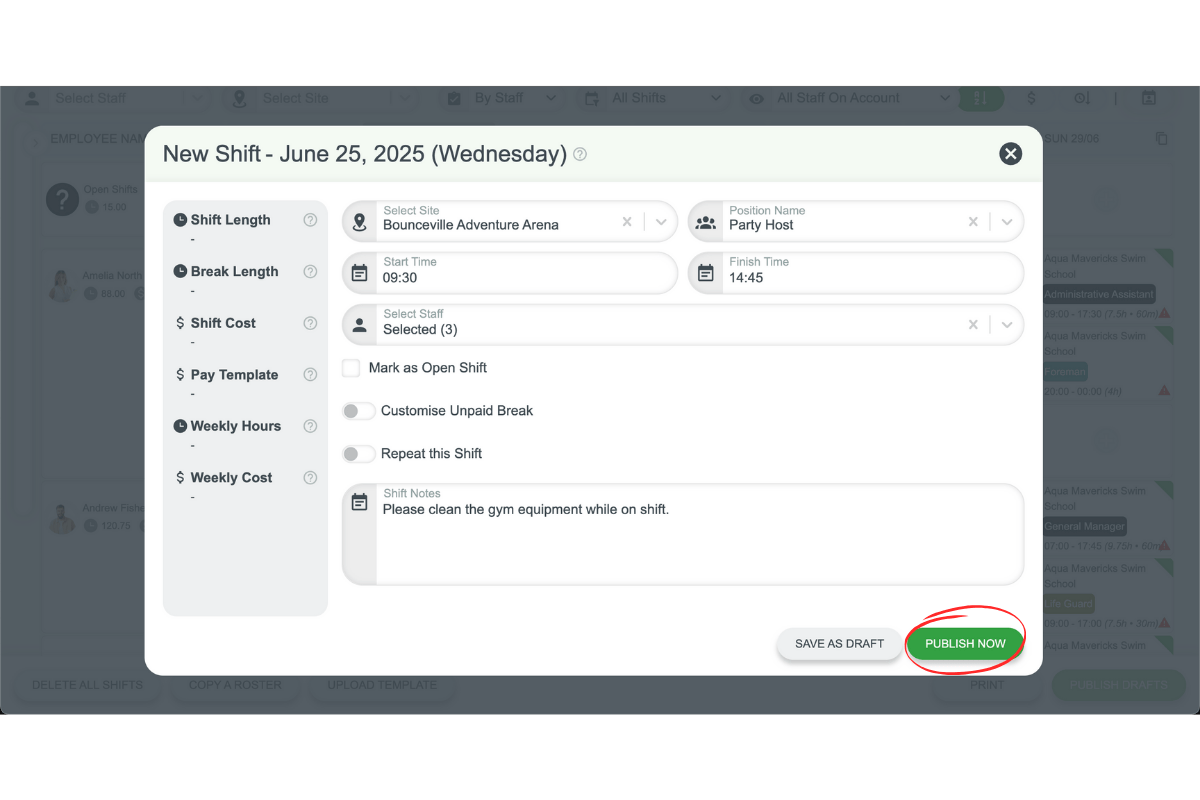
1.5 Finalise the shift
1.5.1 Add any further details or notes as needed.

1.5.2 Choose to either Save as Draft or Publish the shift.
1. How do I create a roster shift in RosterElf?
To create a roster shift, go to the Roster tab, click the plus (+) symbol on the desired day, select your site and position, set the shift times, and assign staff. You can then save the shift as a draft or publish it live.
2. Can I assign multiple staff to the same shift in RosterElf?
Yes, RosterElf lets you assign multiple staff to one shift if they share the same site, position and timeslot. Simply click the square icon beside each staff member’s name to include them.
3. What’s the difference between saving a shift as a draft and publishing it?
Saving a shift as a draft means the shift won’t be visible to staff yet. Publishing a shift makes it live and notifies assigned staff immediately, so they know when and where to work.
4. Can I edit a roster shift after it’s published in RosterElf?
Yes, you can update the details of a published shift at any time. Just click on the shift in the Roster tab, make your changes, and re-save or republish as needed.
5. Why can’t I see the shift I just created?
If you can’t see the shift, check that you saved or published it correctly, selected the correct date and site, and that the roster view is filtered to show the appropriate staff and positions.
Frequently asked questions
1. How do I create and publish multiple shifts at once in RosterElf?
Navigate to the Roster, create shifts by selecting the date, staff, position, and time details. Use the Save as Draft option for multiple shifts, then publish them all at once using the Publish Drafts button.
2. Can I duplicate shifts in RosterElf?
Yes. Open the shift you want to duplicate, choose the Repeat option, and set how you want the shift to repeat (daily, weekly, or custom dates).
3. What is the difference between publishing shifts immediately and saving as drafts?
Publishing shifts immediately sends notifications to staff right away. Saving as drafts allows you to review all shifts before publishing them together later.
4. How can I filter and view only draft shifts?
Use the filter options on the roster page to display only draft shifts. This helps you review unpublished shifts before sending them to your team.
5. What happens when I publish multiple draft shifts?
When you click Publish Drafts, all visible draft shifts on the roster are published at once, and staff are notified via your chosen communication method (email, push notification, or SMS).