Complete employee onboarding with RosterElf
Starting a new job involves completing essential documents, from banking information to superannuation details and tax forms. RosterElf simplifies this onboarding process by allowing you to submit everything online, whether you’re on a desktop or a mobile device. This guide will walk you through each onboarding step with RosterElf, ensuring a smooth start with your new company.
1. Accessing your RosterElf onboarding invitation
Once your manager or admin adds you to RosterElf, you’ll receive a welcome email with your login credentials. If you don’t see this email, ask your manager to verify that your email or mobile number is correct. Follow these steps to access your onboarding. Alternatively, log into Rosterelf via a web browser.
1.1 Open the welcome email from RosterElf.
1.2 Check for login details and app download links.
1.3 Select the Complete Onboarding button to start.
2. Navigating the onboarding form
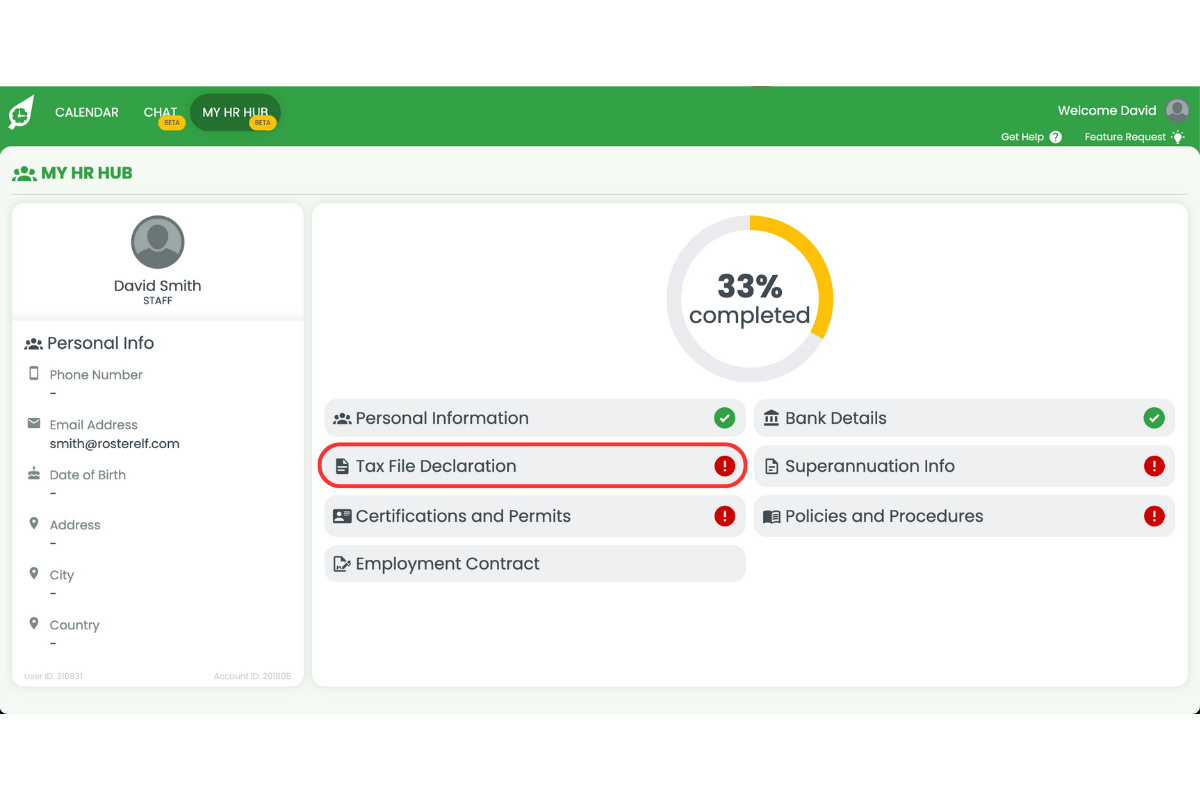
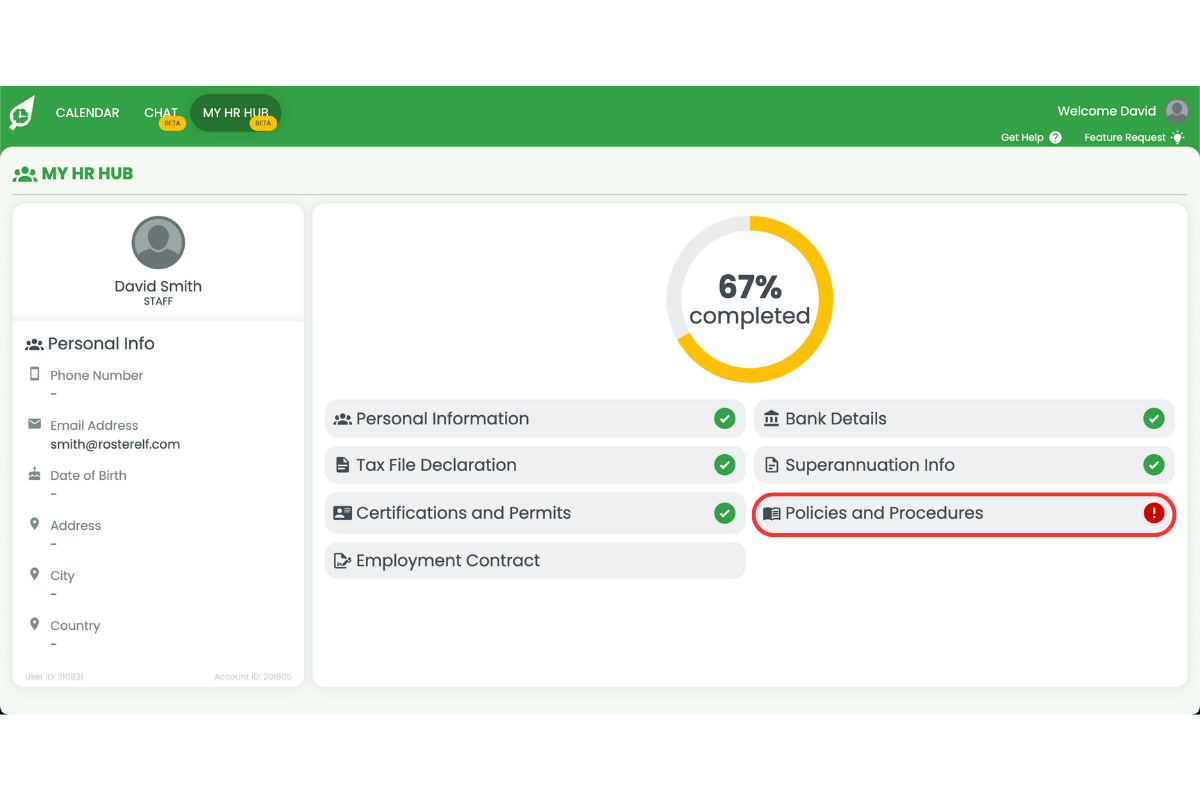
The onboarding form contains various sections that may differ based on your company’s requirements. As you complete each section, it will save your information, and once your manager approves it, you can no longer edit that section.
2.1 If prompted, use your login credentials to access the onboarding form.
2.2 Select My HR Hub to access the onboarding.
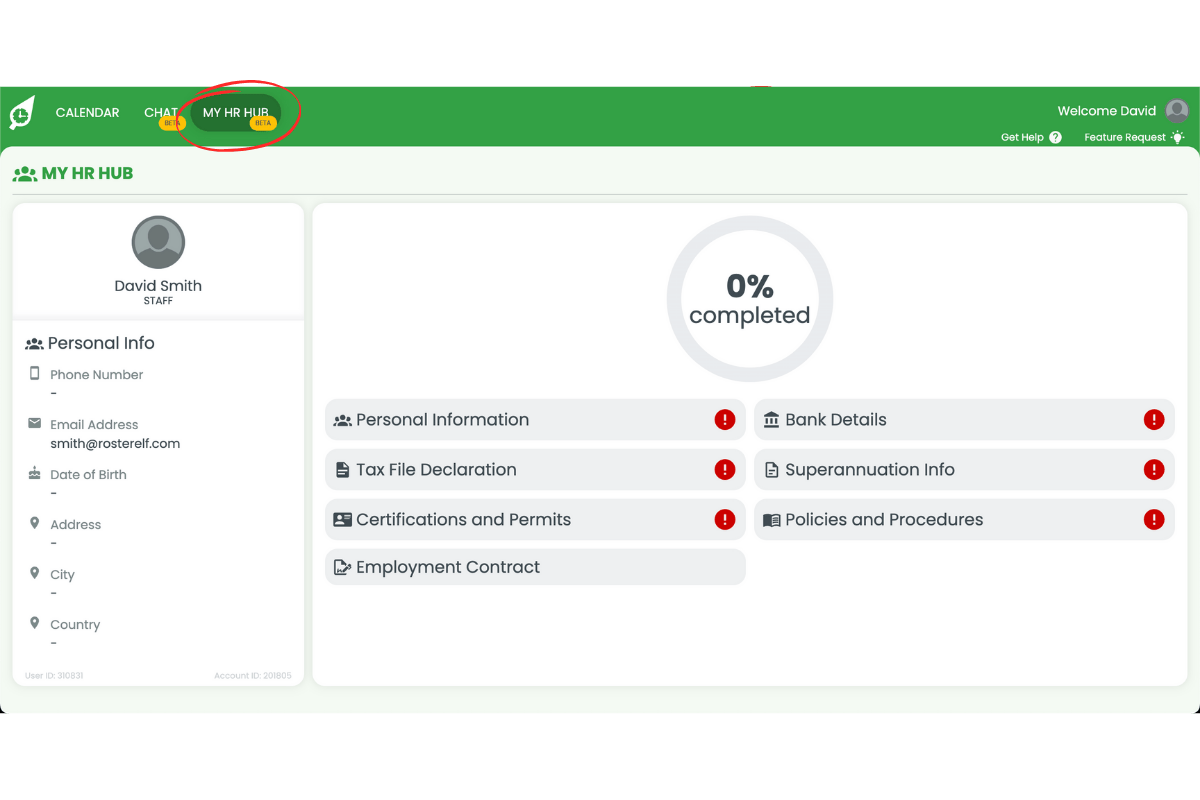
2.3 Note that a saved section is marked as Saved and becomes uneditable once approved.
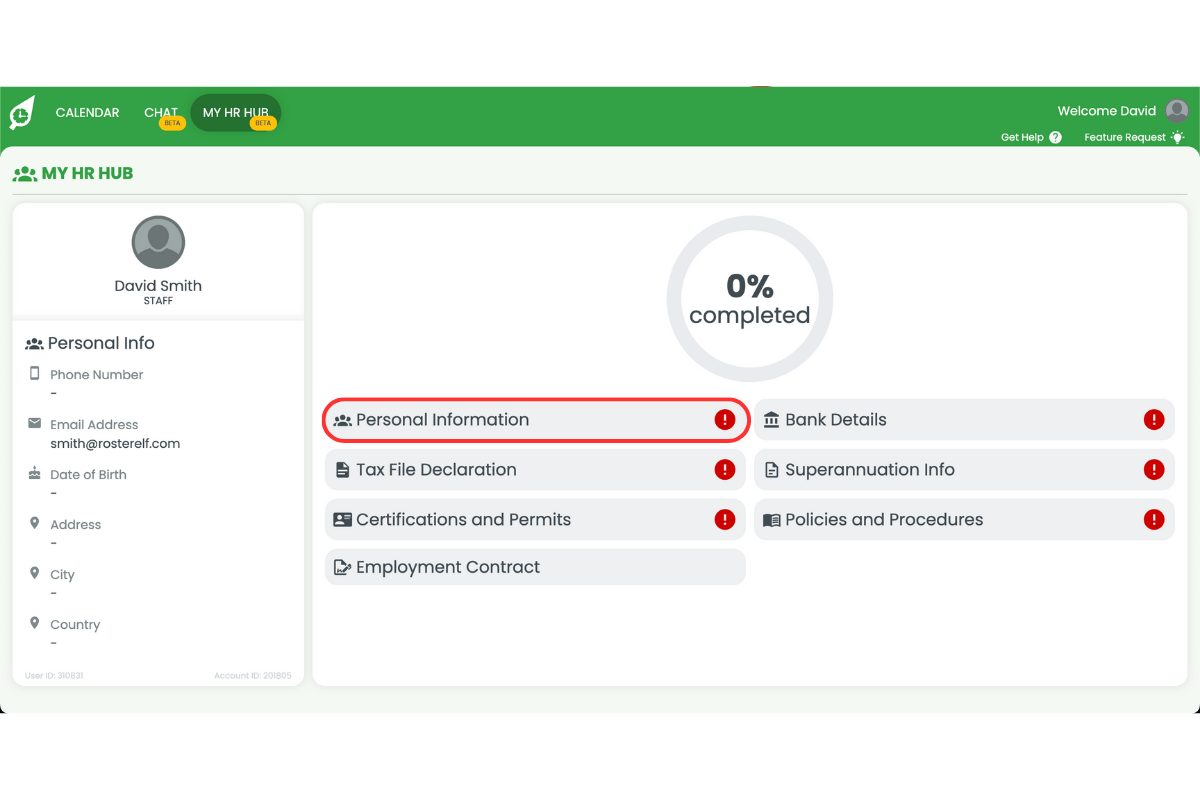
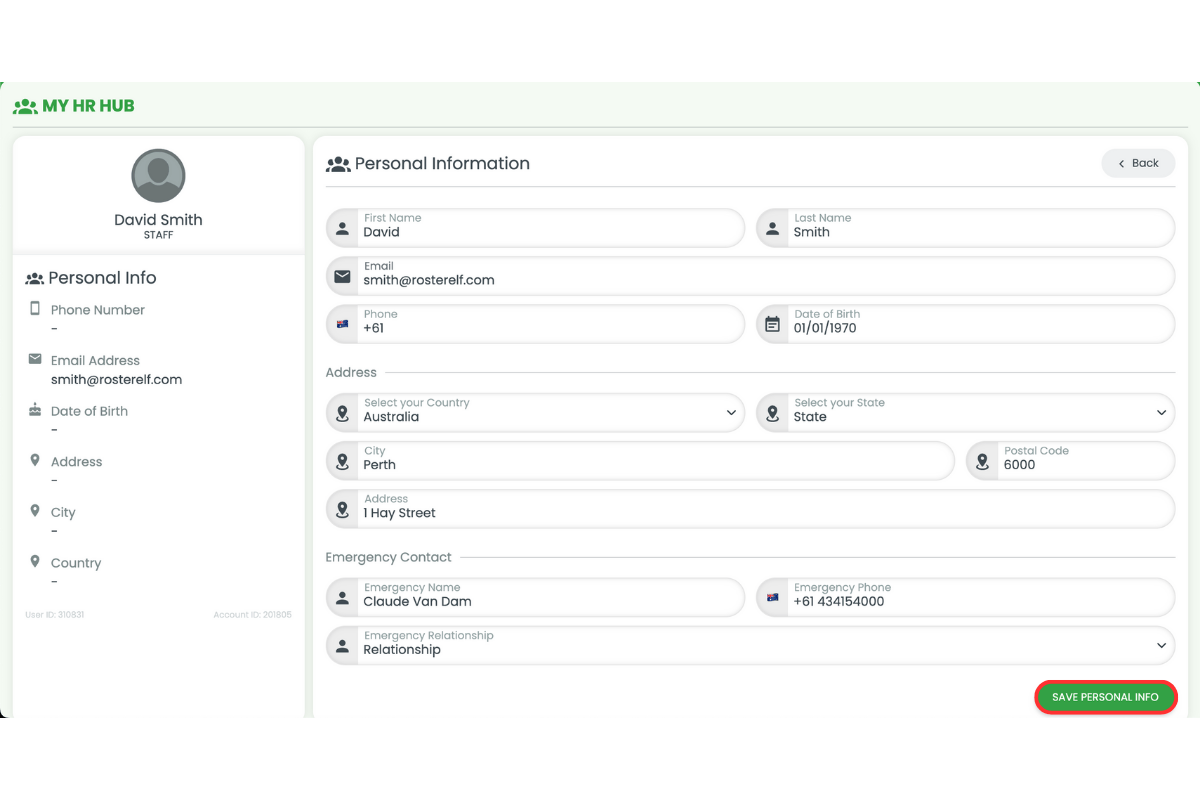
2.1 completing personal information
In this section, you will enter your personal information, including emergency contacts. If your company uses Xero integration, your address details will also be required.
2.1.1 Select Personal Information.
2.1.2 Fill in all the fields.

2.1.3 Press Save Personal Info.
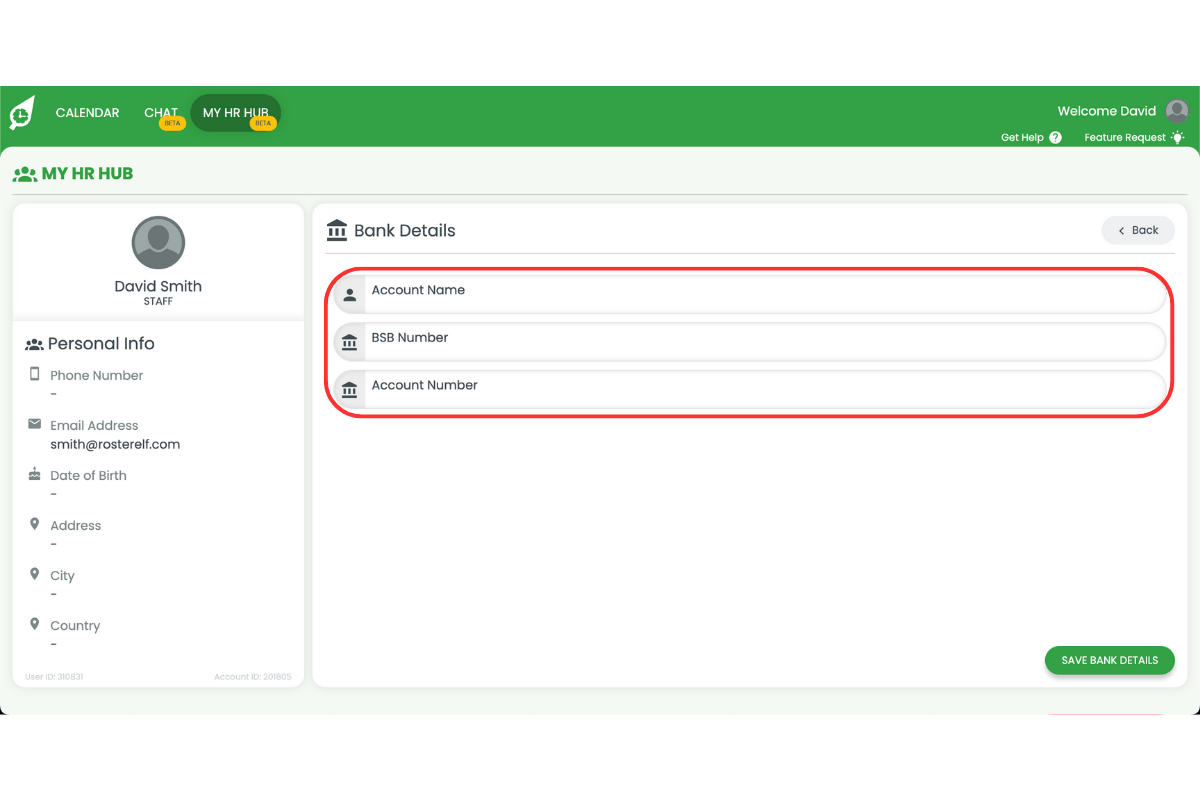
2.2 adding bank details
This section is where you provide your bank account details so your salary or wages can be deposited.
2.2.1 Select Bank Details.
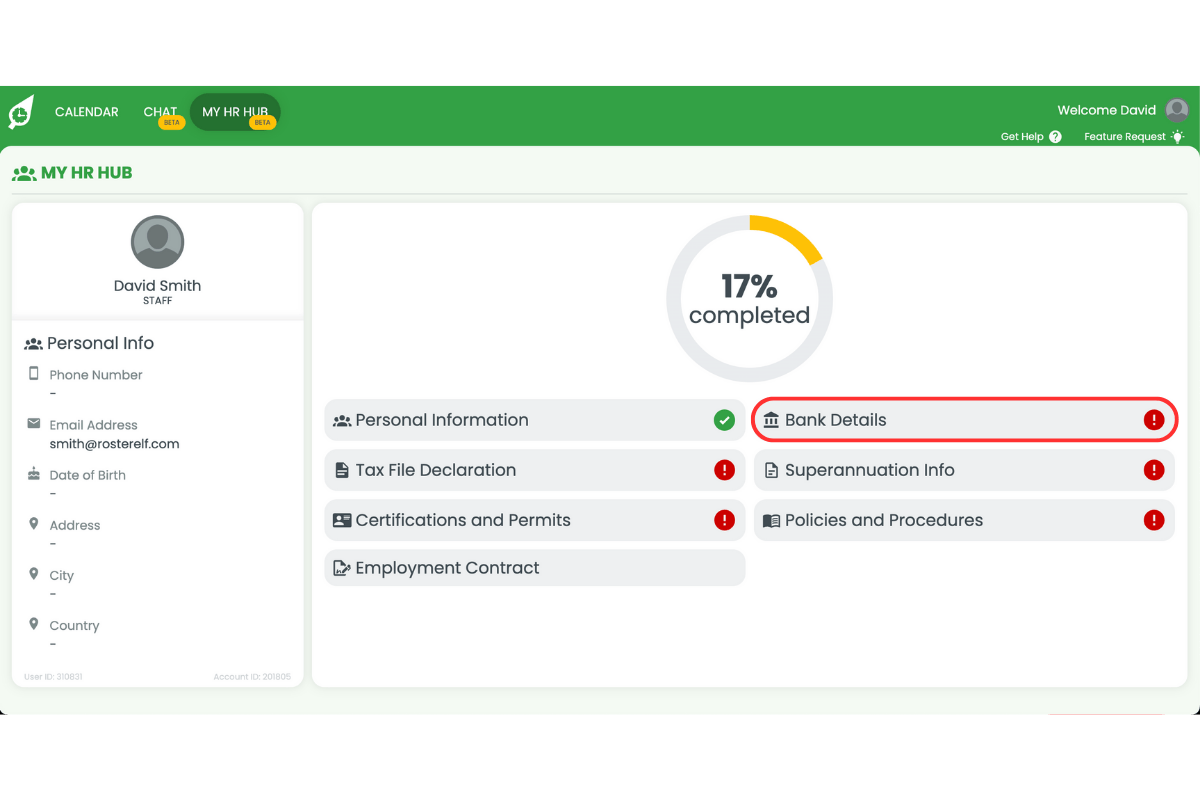
2.2.2 Enter in your Bank Details.
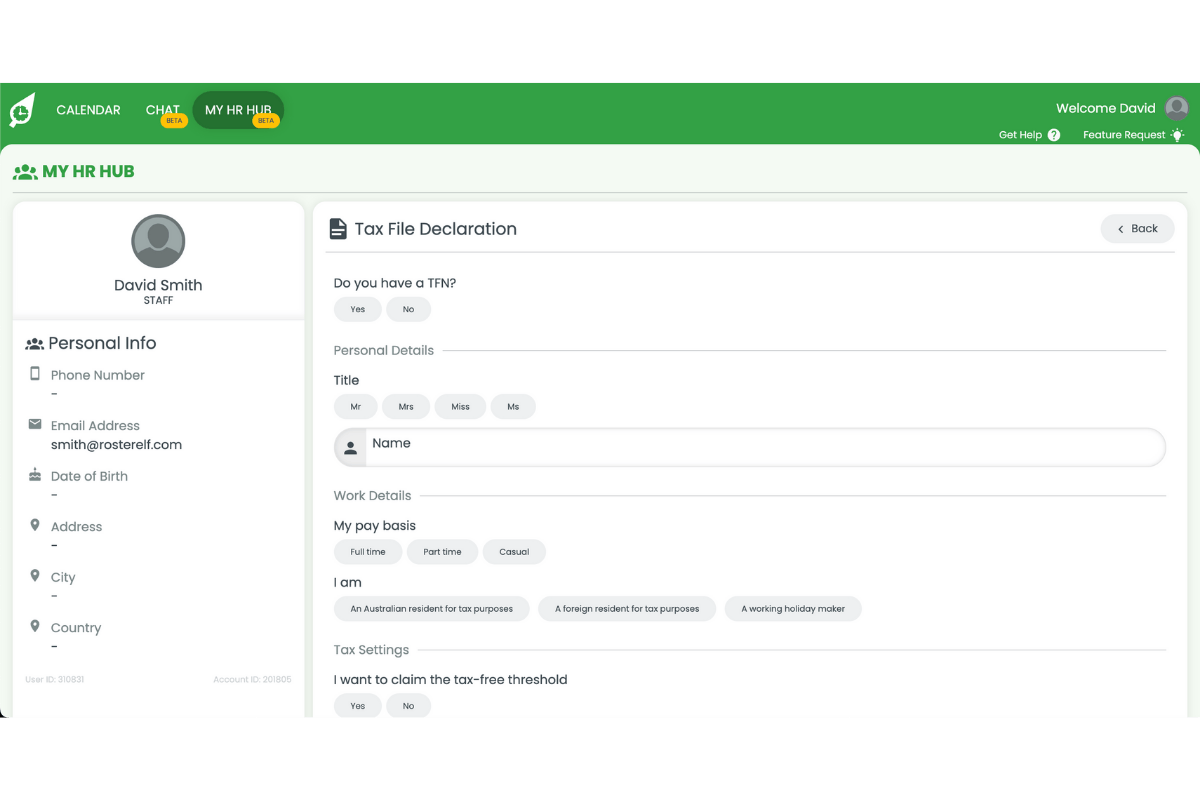
2.3 completing tax file declaration
Fill in this section with your tax file number. Contact your employer or accountant if you need assistance.
2.3.1 Select Tax File Declaration (TFN).
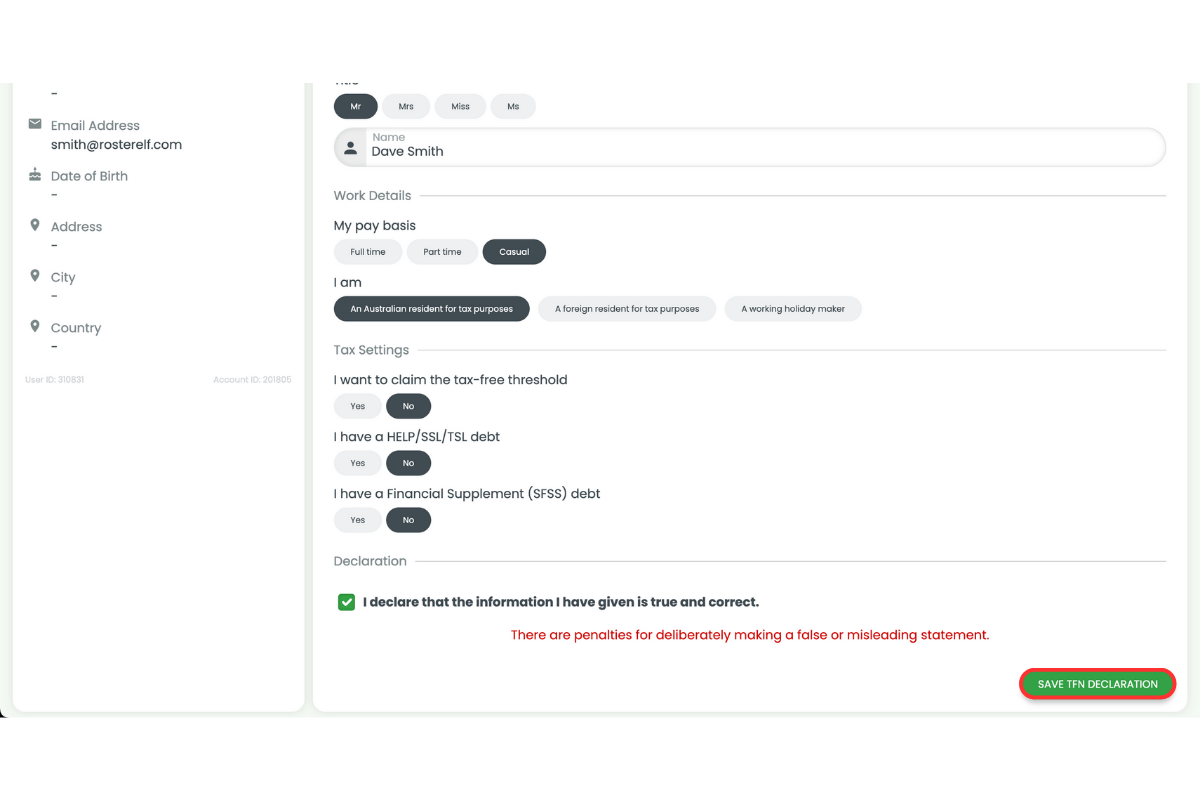
2.3.2 Complete the tax declaration form.
2.3.3 Press Save TFN Declaration.
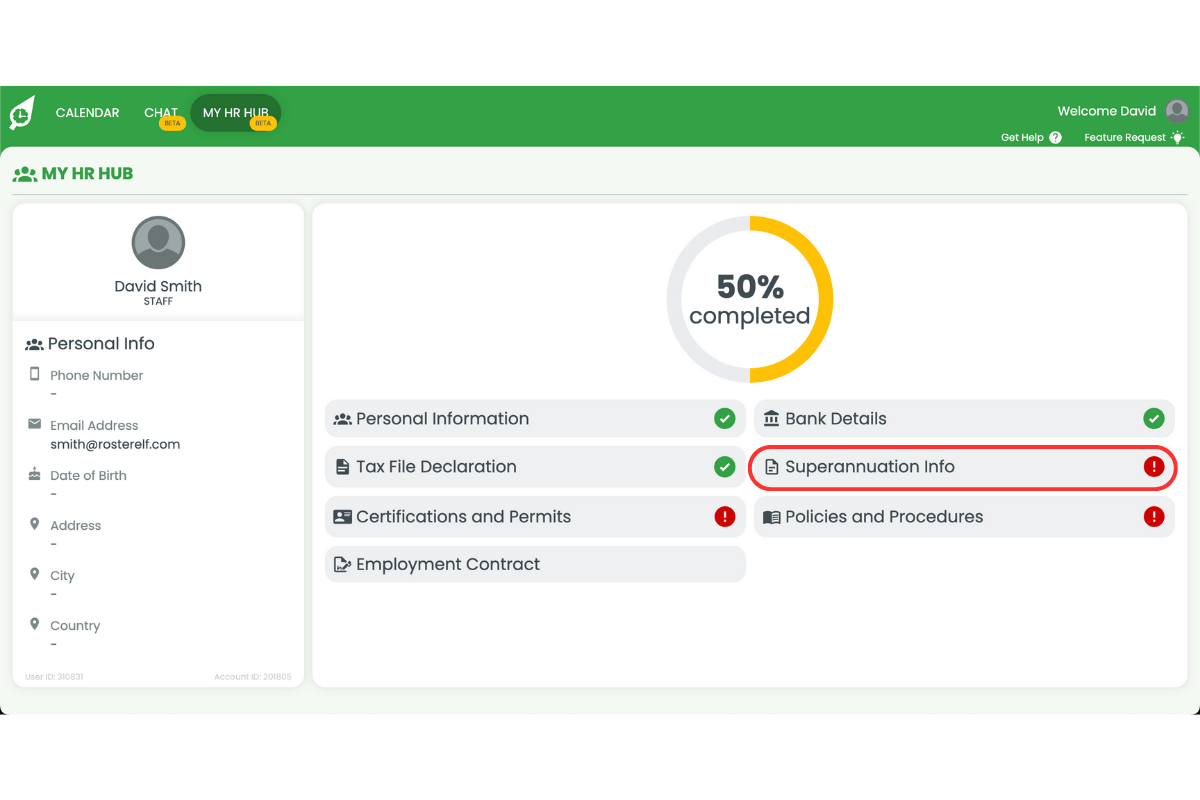
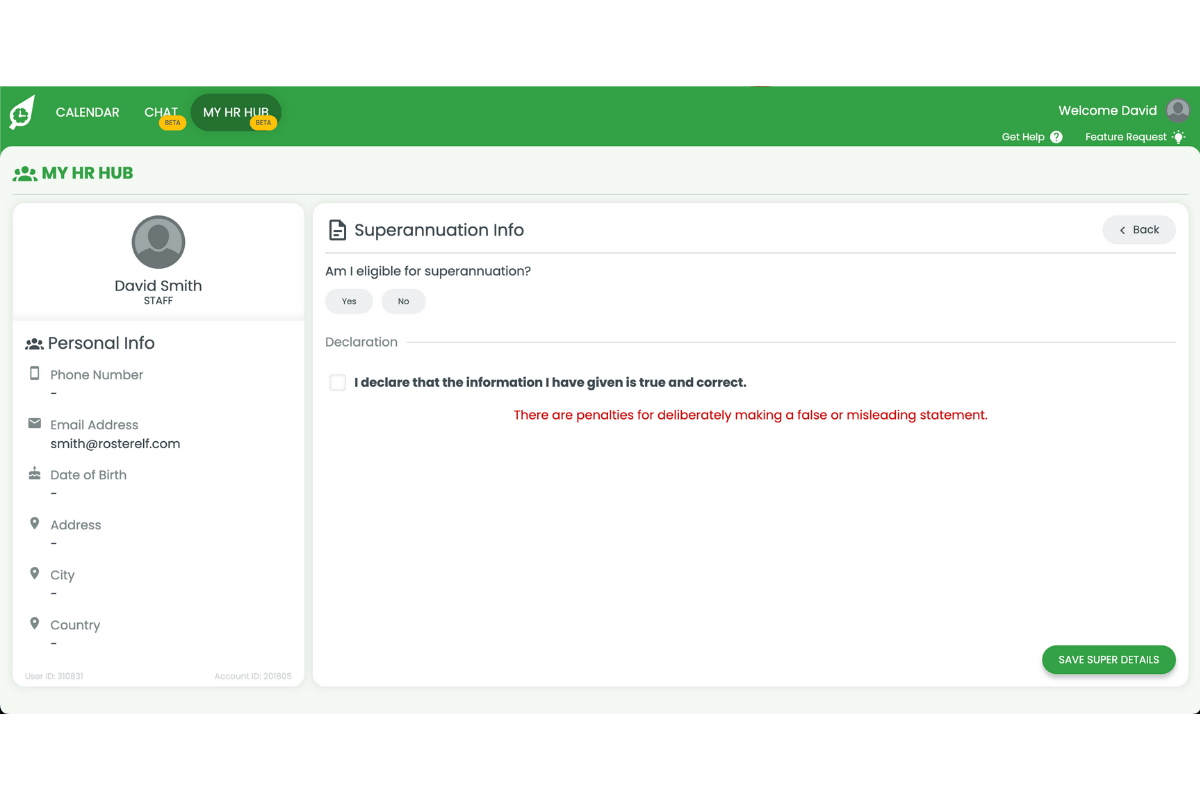
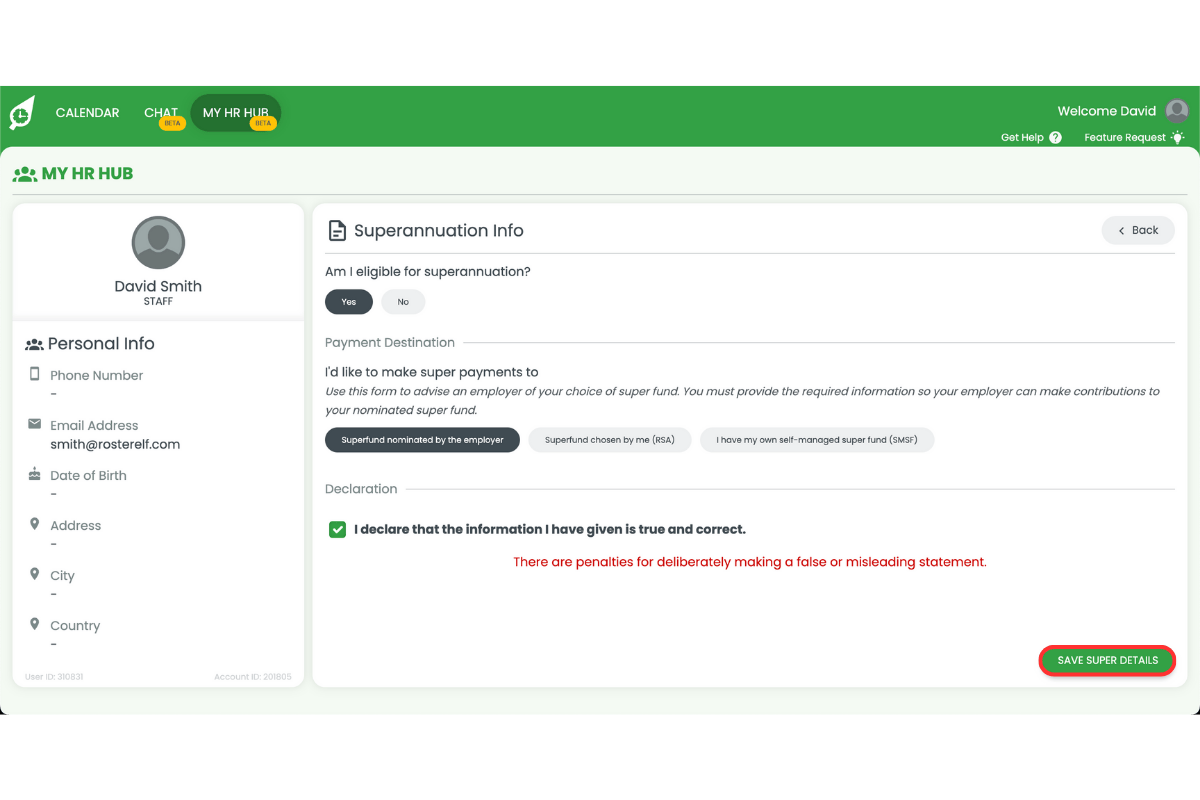
2.4 providing superannuation information
Add your superannuation details here. If you’re uncertain, consult your employer, accountant, or superannuation provider.
2.4.1 Select Superannuation Info.
2.4.2 Complete the superannuation form.
2.4.3 Press Save Super Details.
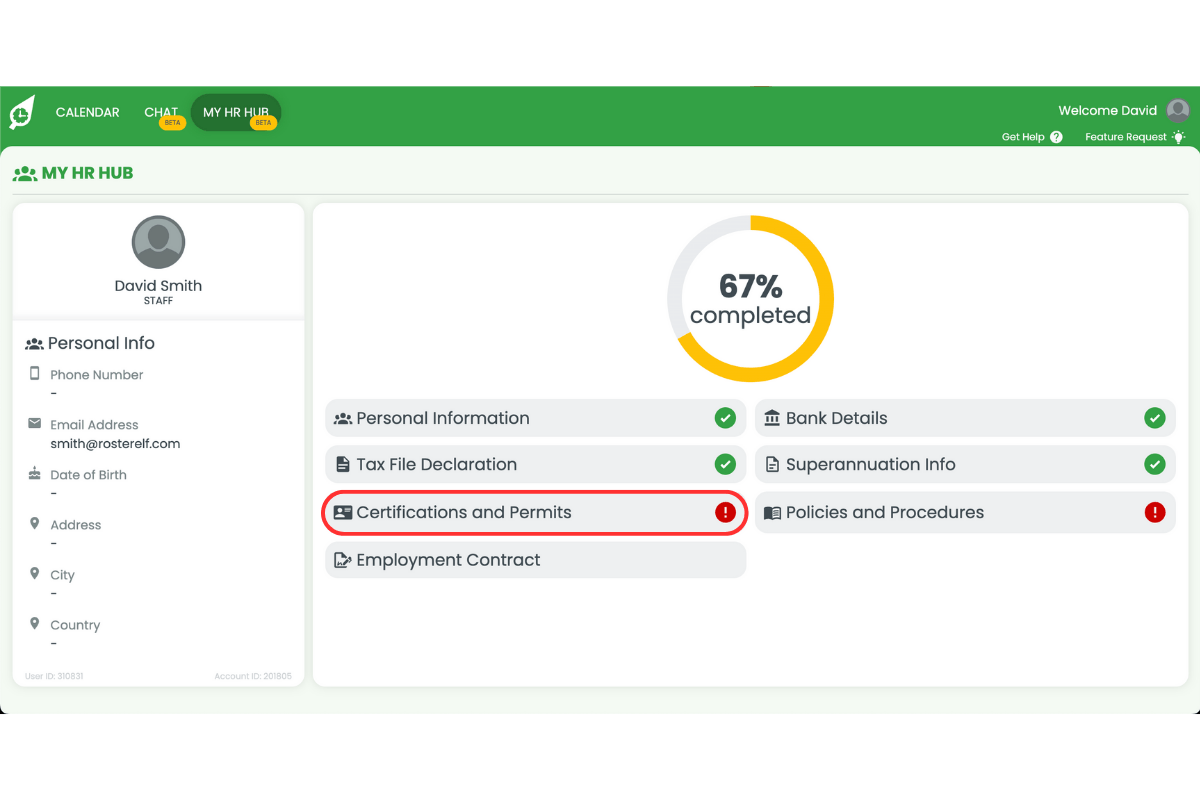
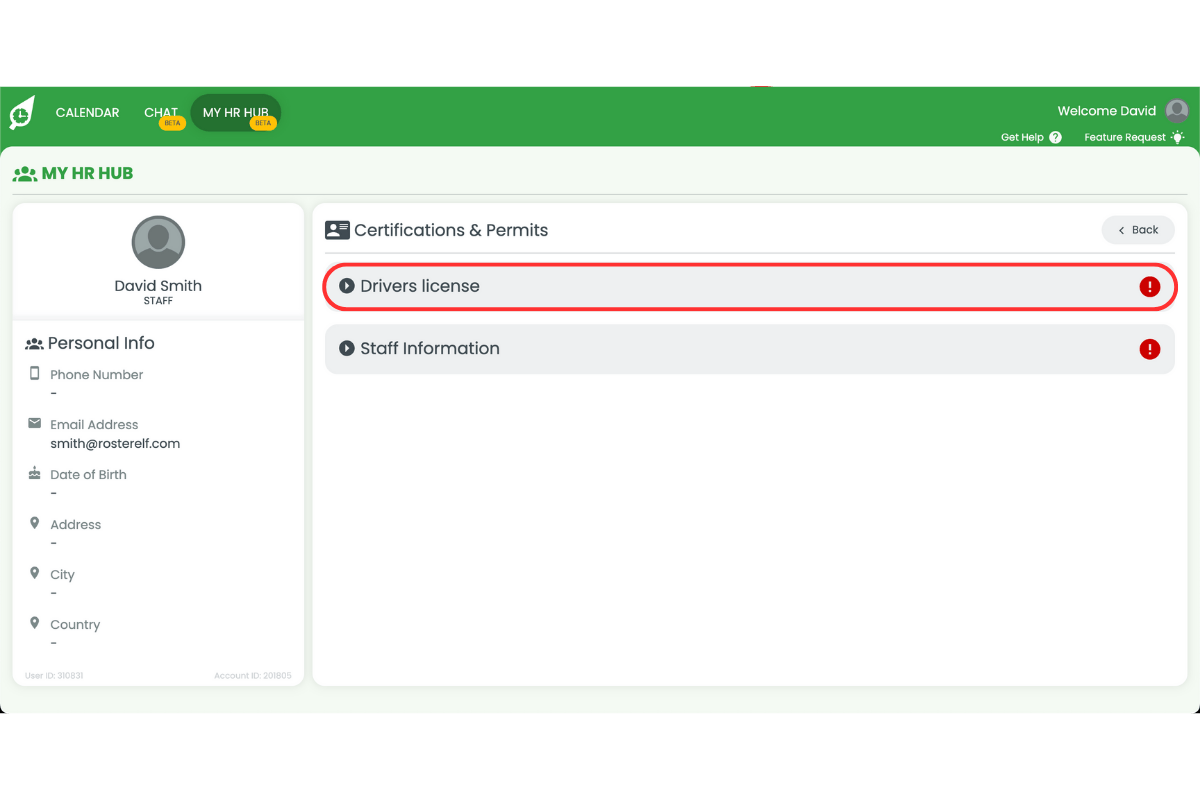
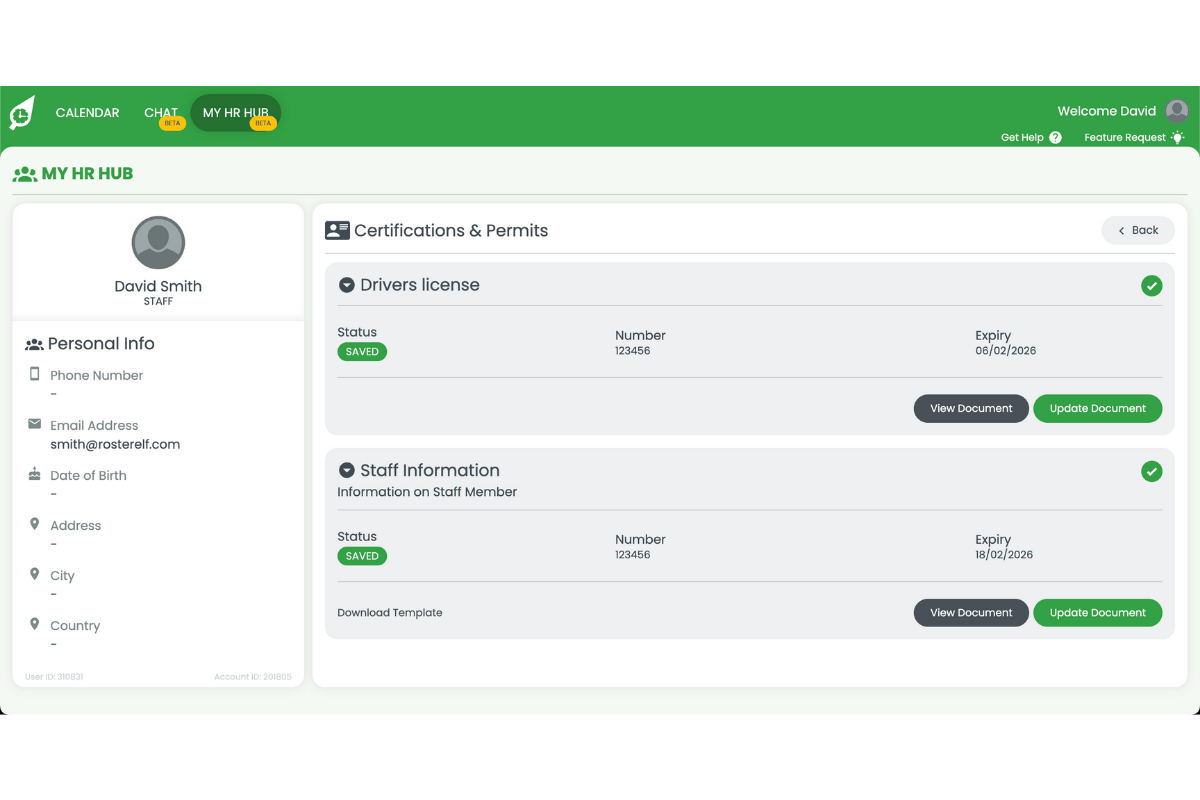
2.5 acknowledge certificates and permits
This section guides you through how to upload your certificates and permits to Rosterelf.
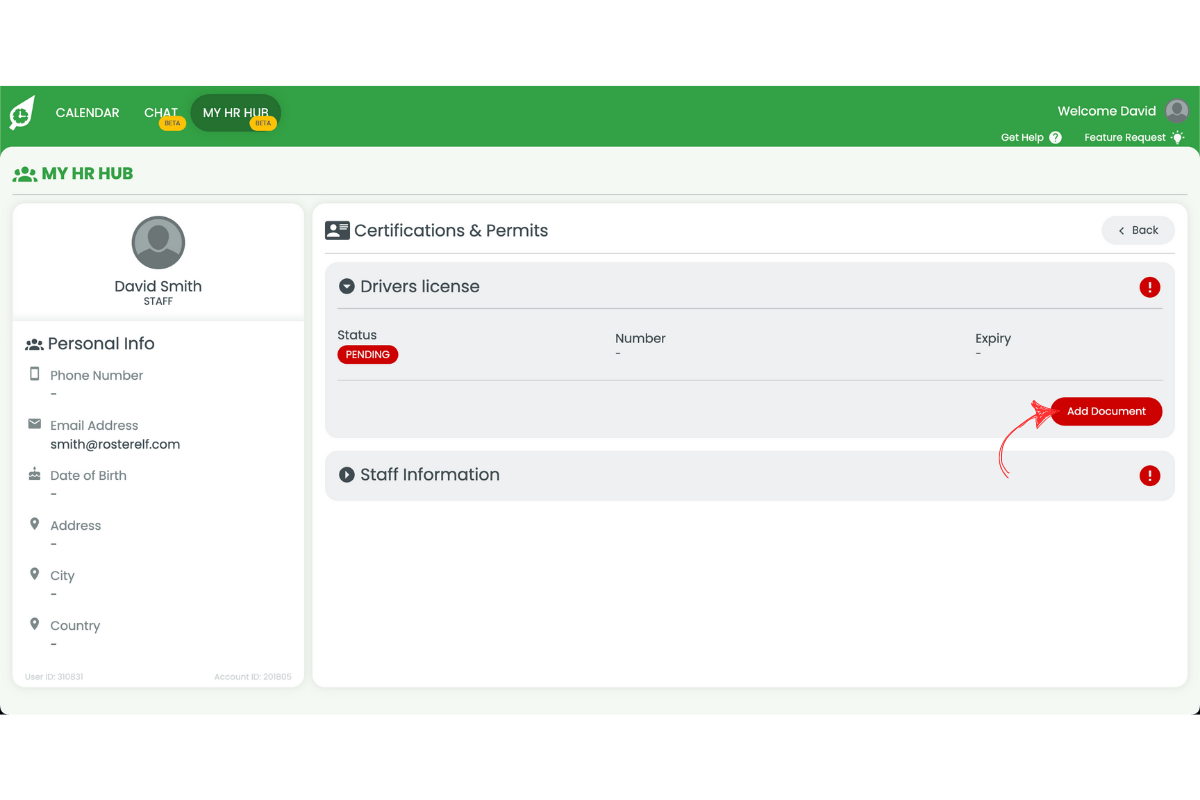
2.5.1 Select the Certificates and Permits section.
2.5.2 Select the Certificate or Permit you want to upload.
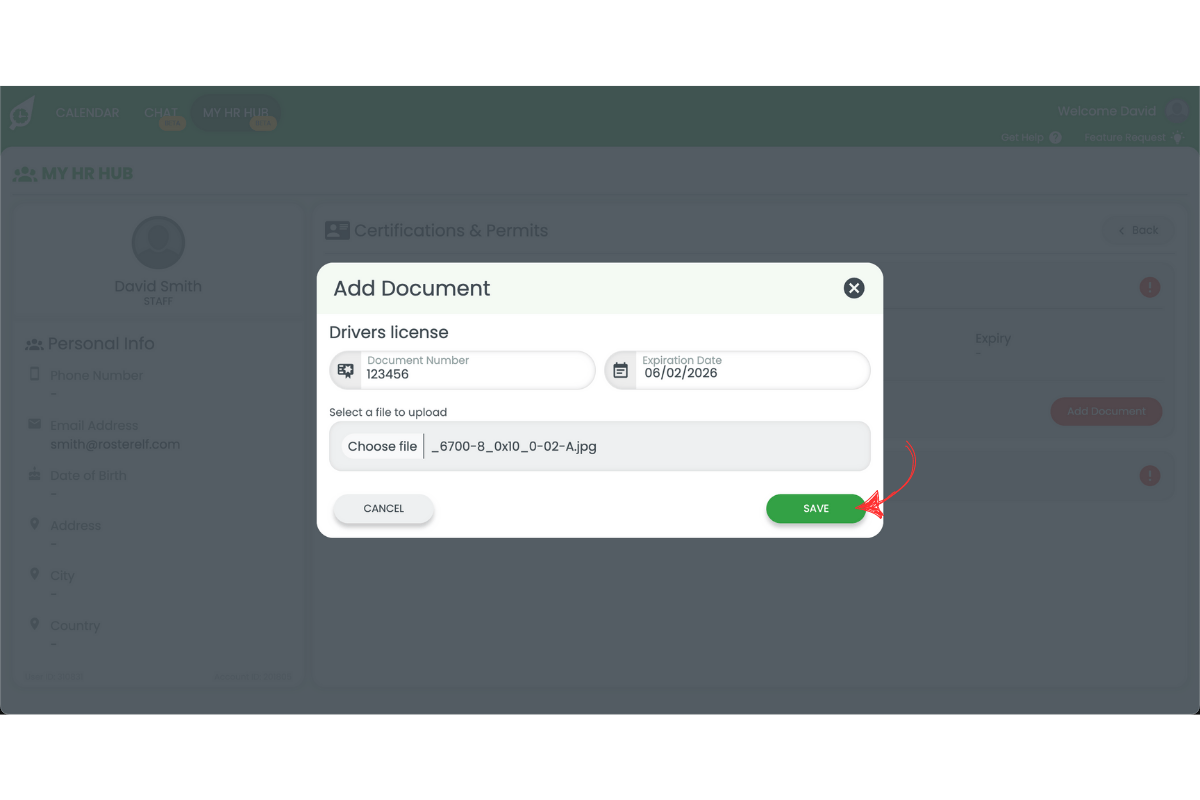
2.5.3 Press Add Document.
2.5.4 Add your Document Number and Expiration Date.
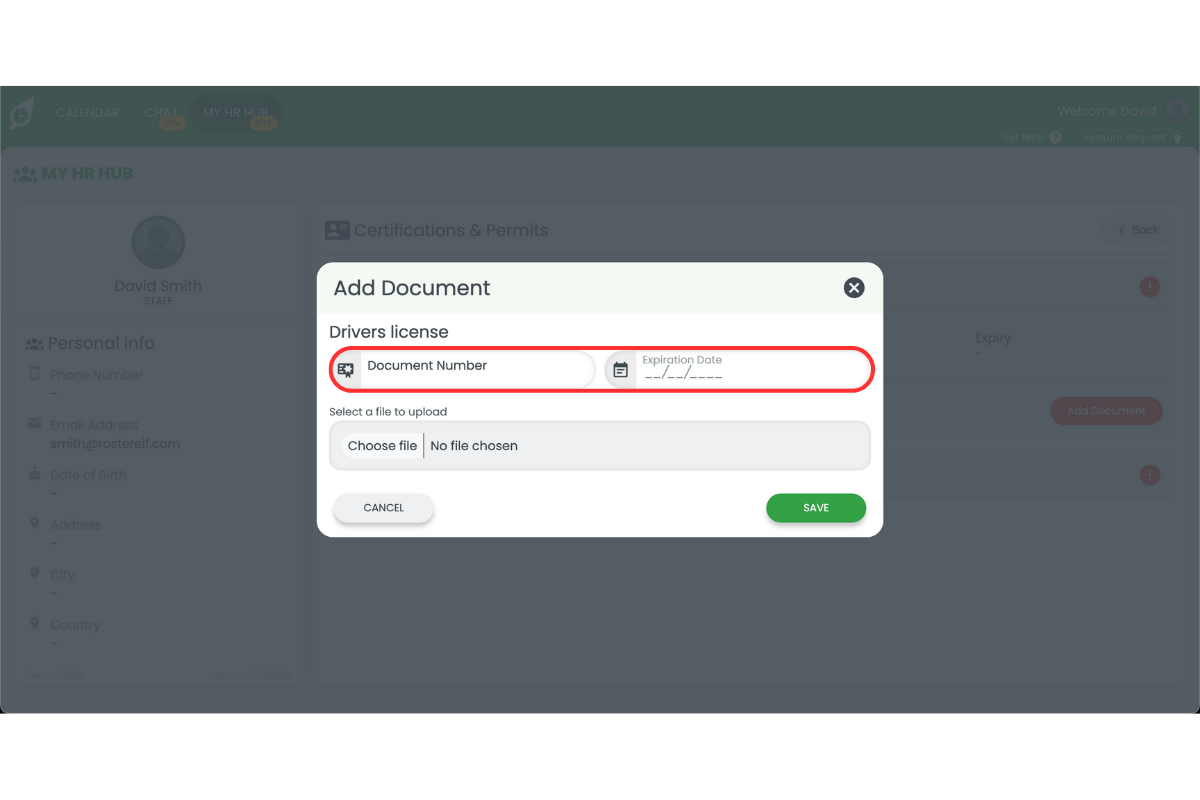
2.5.5 Press Choose File to select your document.
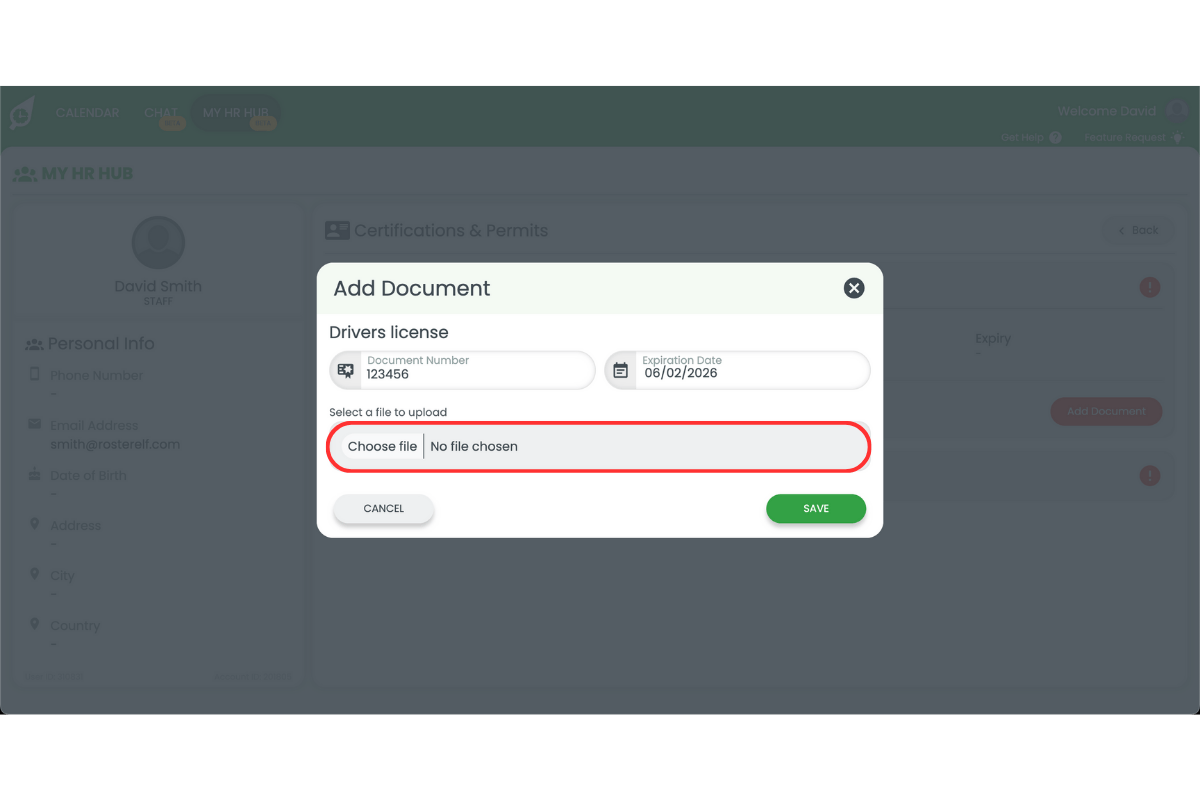
2.5.6 Press Save.
2.5.7 Repeat process for each document required.
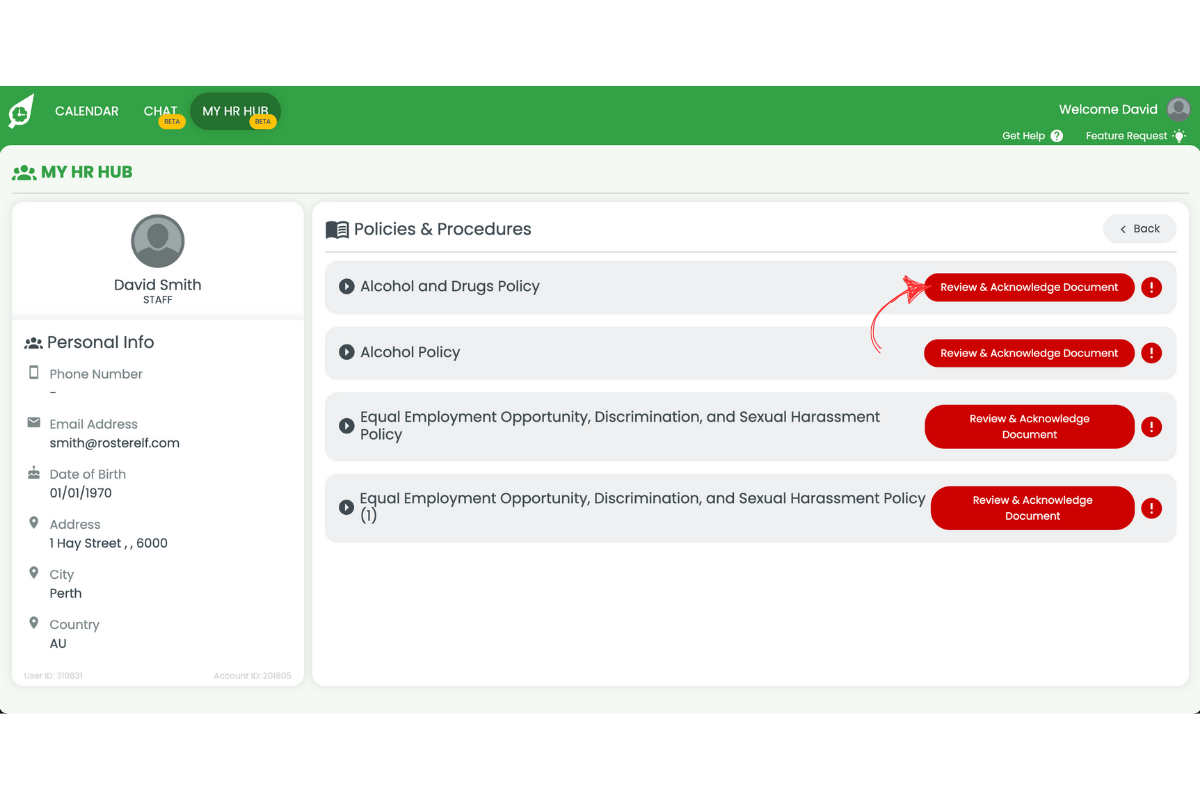
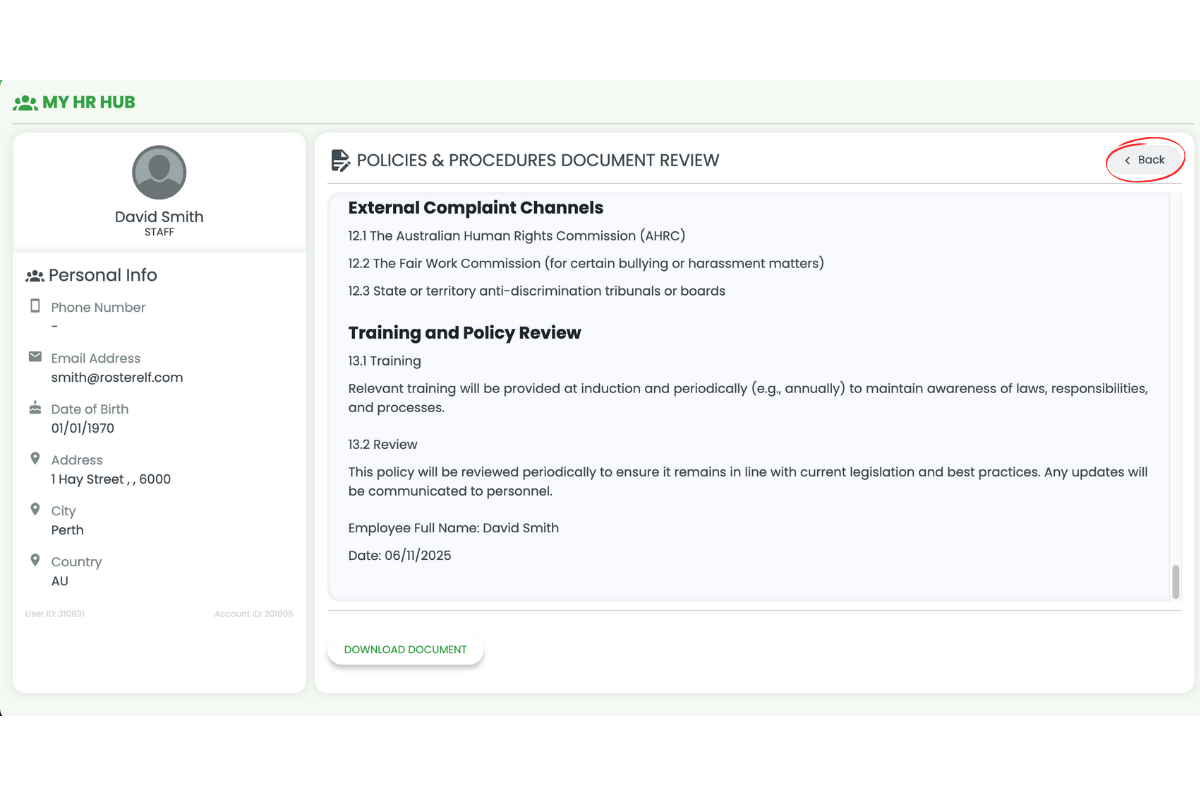
2.6 acknowledge policies and procedures
This section guides you through how to review and acknowledge company policies and procedures.
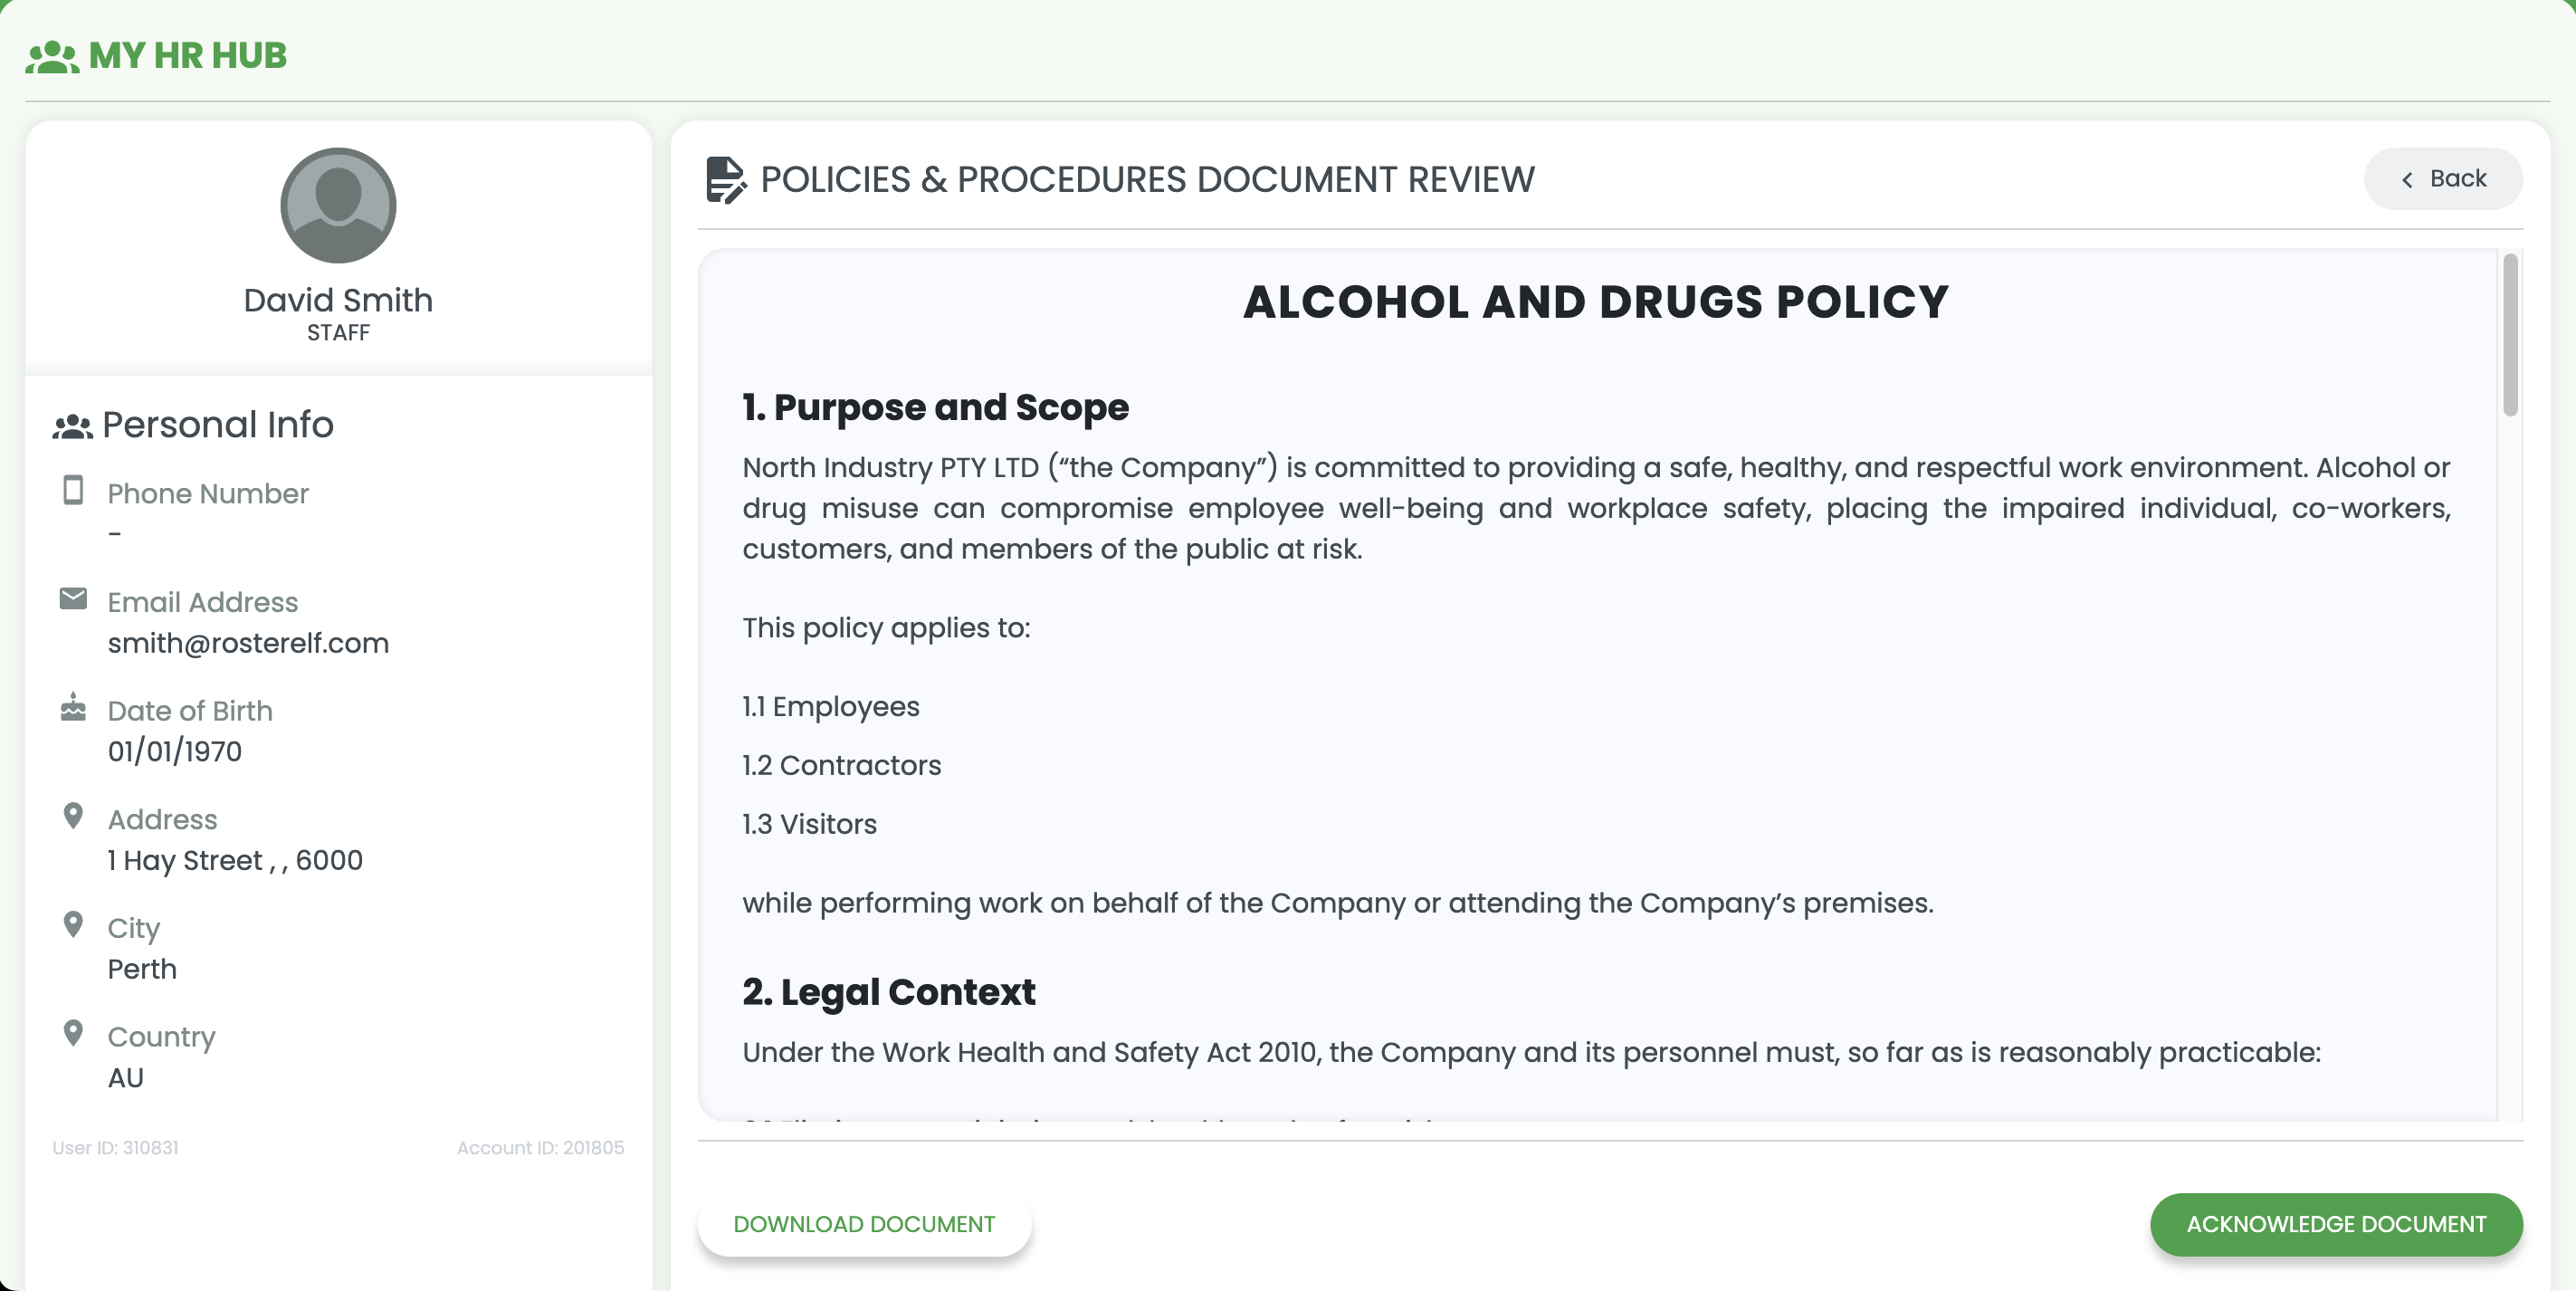
2.6.1 Select Policies and Procedures.
2.6.2 Press Review & Acknowledge.
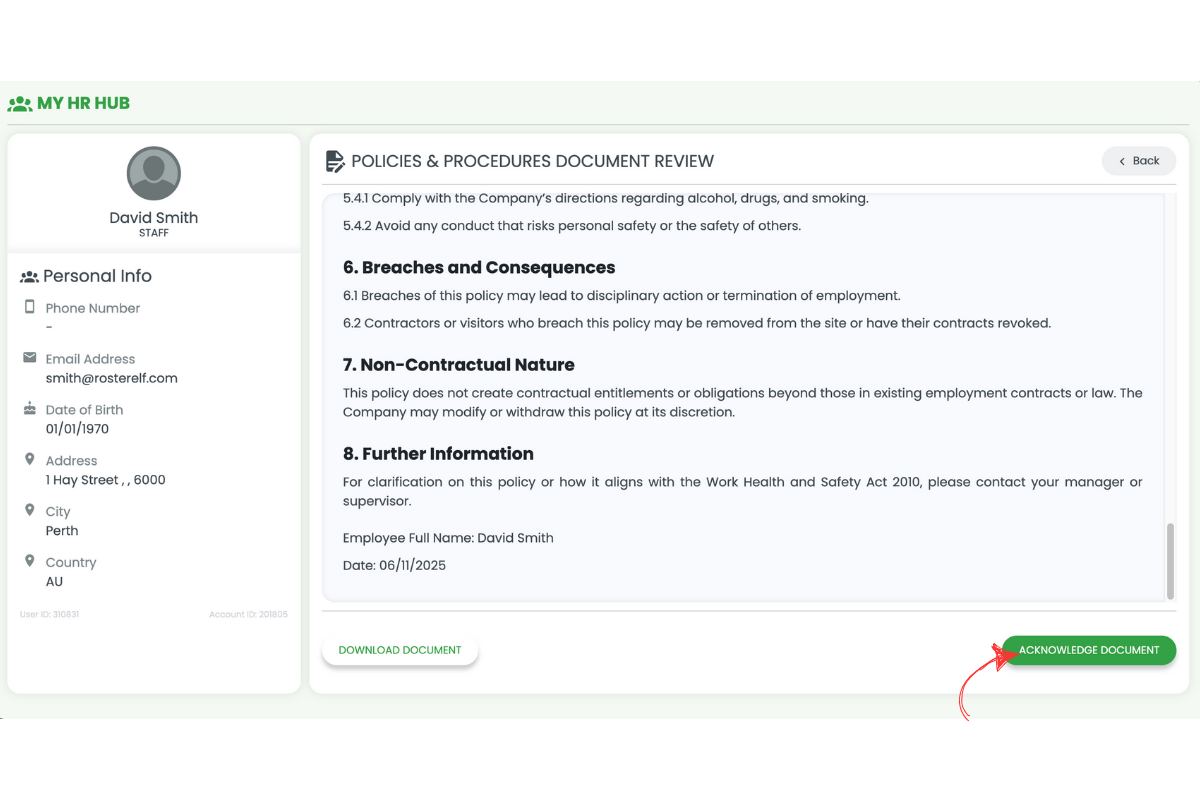
2.6.3 Review the document.
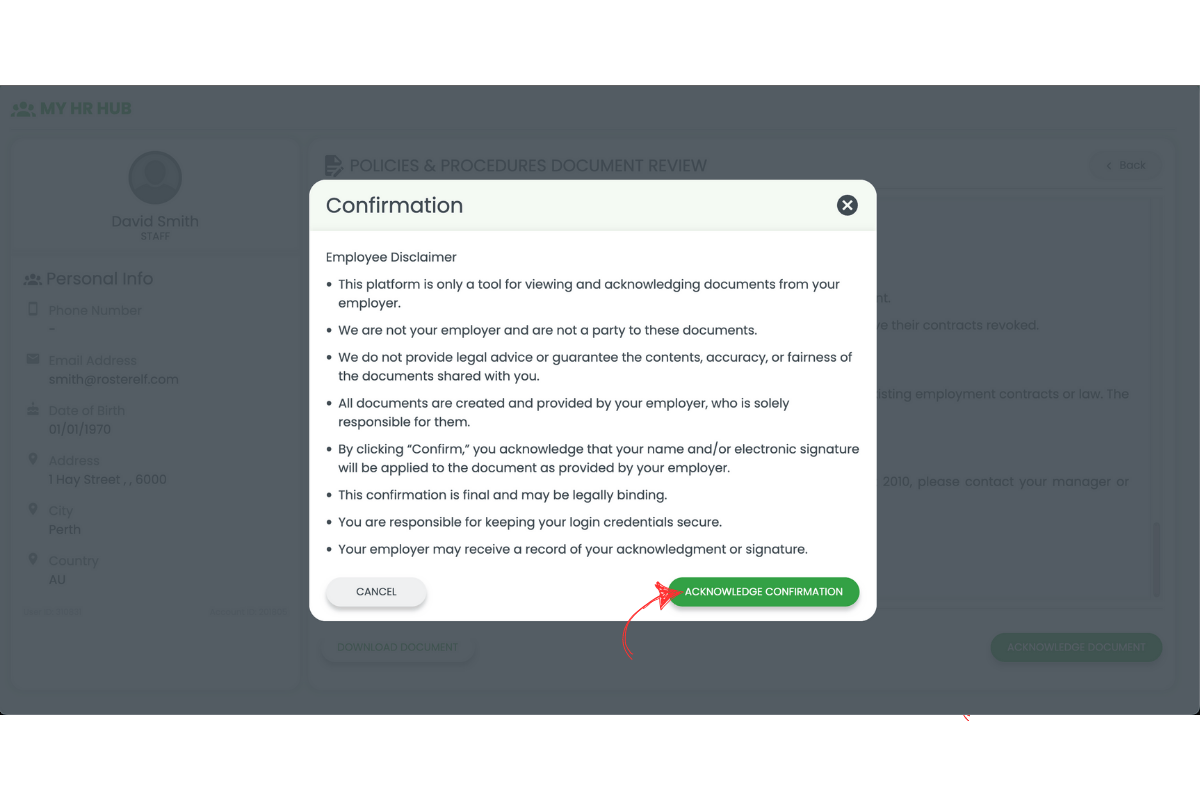
2.6.4 Press I acknowledge.
2.6.5 Press Acknowledge Confirmation.
2.6.6 Press Download Document to download.
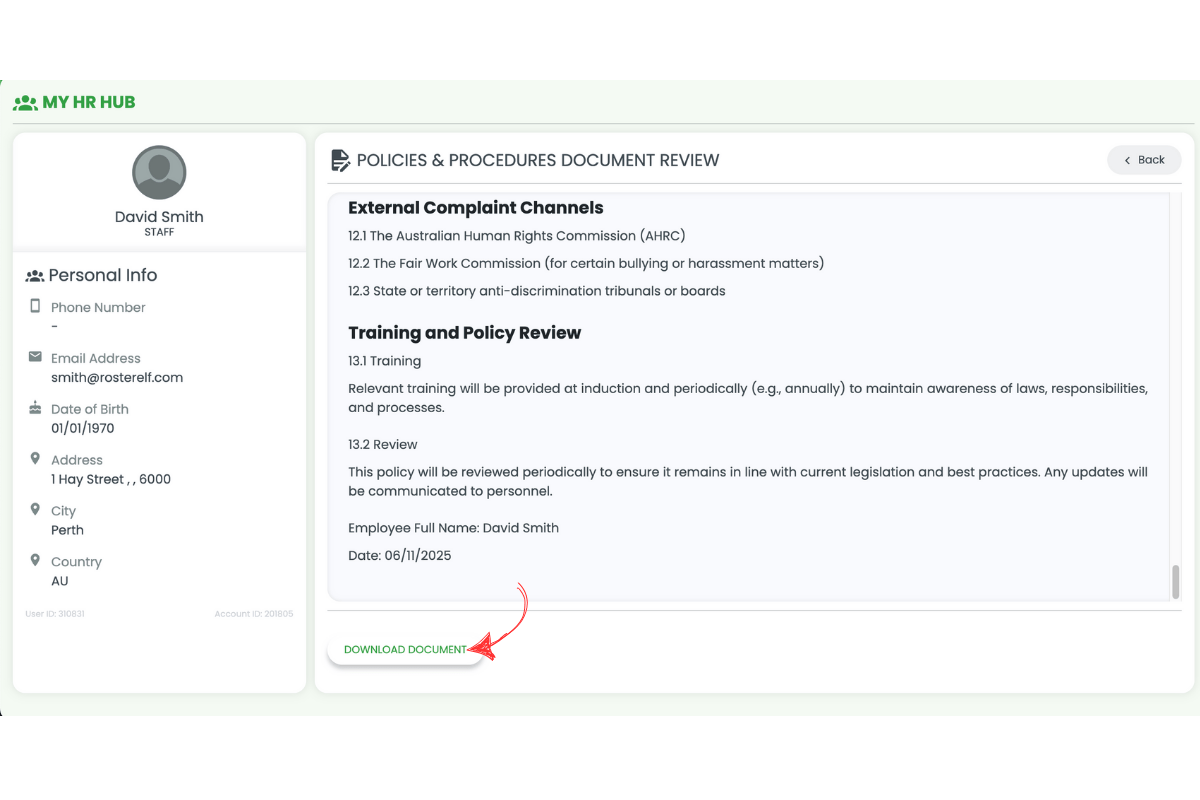
2.6.7 Press Back and repeat for remaining Policies and Procedures.
Note
The HR Hub currently supports Australian employment details only. Ensure all information is accurate as some sections become uneditable once approved.
Frequently asked questions
1. How do I access my RosterElf onboarding invitation?
Once your manager or admin adds you to RosterElf, you’ll receive a welcome email containing login credentials. Check your inbox and spam folder for the email, and if you don’t see it, ask your manager to confirm your contact details.
2. What information do I need to complete in the onboarding form?
The onboarding form includes sections for personal details, bank account information, tax file declaration, superannuation, and document uploads. Complete each section as required, and ensure accuracy since approved sections become uneditable.
3. Can I edit my details in RosterElf after completing onboarding?
Yes, you can always go back to edit and details.
4. Why do I need to enter my superannuation information during onboarding?
Superannuation details are essential for retirement contributions. If you’re unsure about your superannuation information, consult your employer, accountant, or superannuation provider for guidance.
5. What documents may I need to upload in RosterElf onboarding?
Depending on company requirements, you may need to upload qualifications, legal documents, visas, medical certificates, or other employment-related forms. Check with your manager if you’re uncertain about specific documents.