How to import staff from Xero to RosterElf
This article explains how to import staff from your Xero account into RosterElf. By following these steps, you can seamlessly transfer your staff details, ensuring accurate and up-to-date information in RosterElf. Before starting, ensure that your Xero account is connected to RosterElf.
1. Prerequisites for Xero staff import
Before you can import staff from Xero, ensure your Xero account is properly connected to RosterElf. If Xero is not connected, the import button will not be visible.
1.1 verify Xero connection
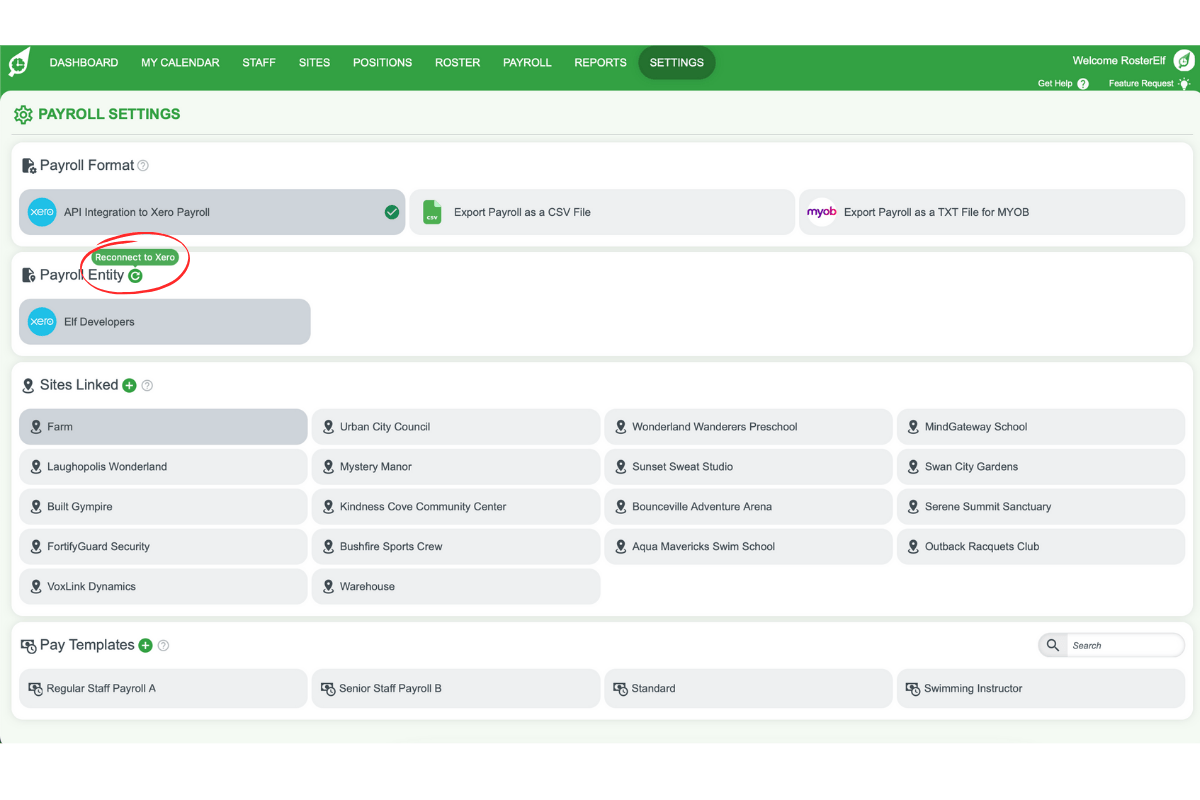
1.1.1 Go to the Settings tab in RosterElf.
1.1.2 Navigate to the Payroll tab.
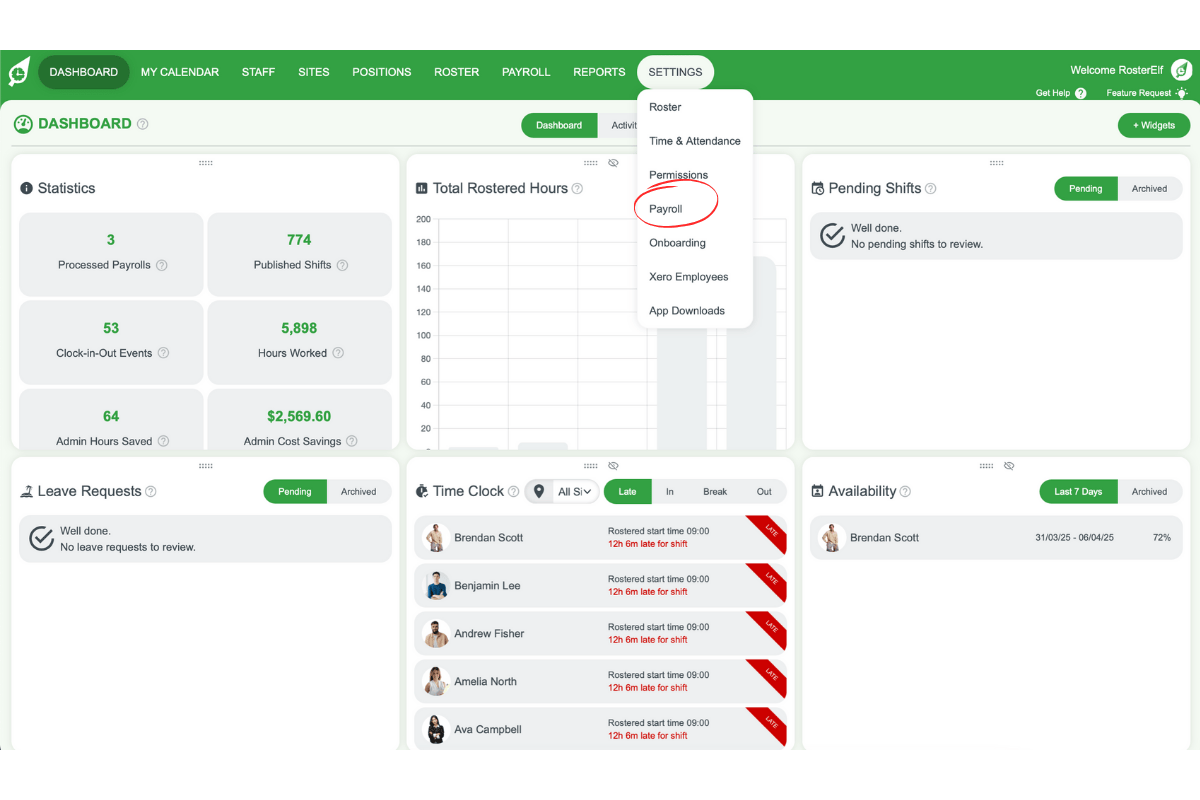
1.1.3 Confirm that Xero is connected. If not, follow the prompts to connect Xero.
2. Importing staff from Xero
Once Xero is connected, you can proceed with importing staff. This process allows you to select which staff to bring into RosterElf.
New Zealand customers
Please ensure that an email address is included for each staff member in Xero before starting the import. Staff without email addresses cannot be linked or imported.
2.1 start the import process
2.1.1 Click on the Staff tab in RosterElf.

2.1.2 Locate the blue Xero Import button in the bottom right corner.
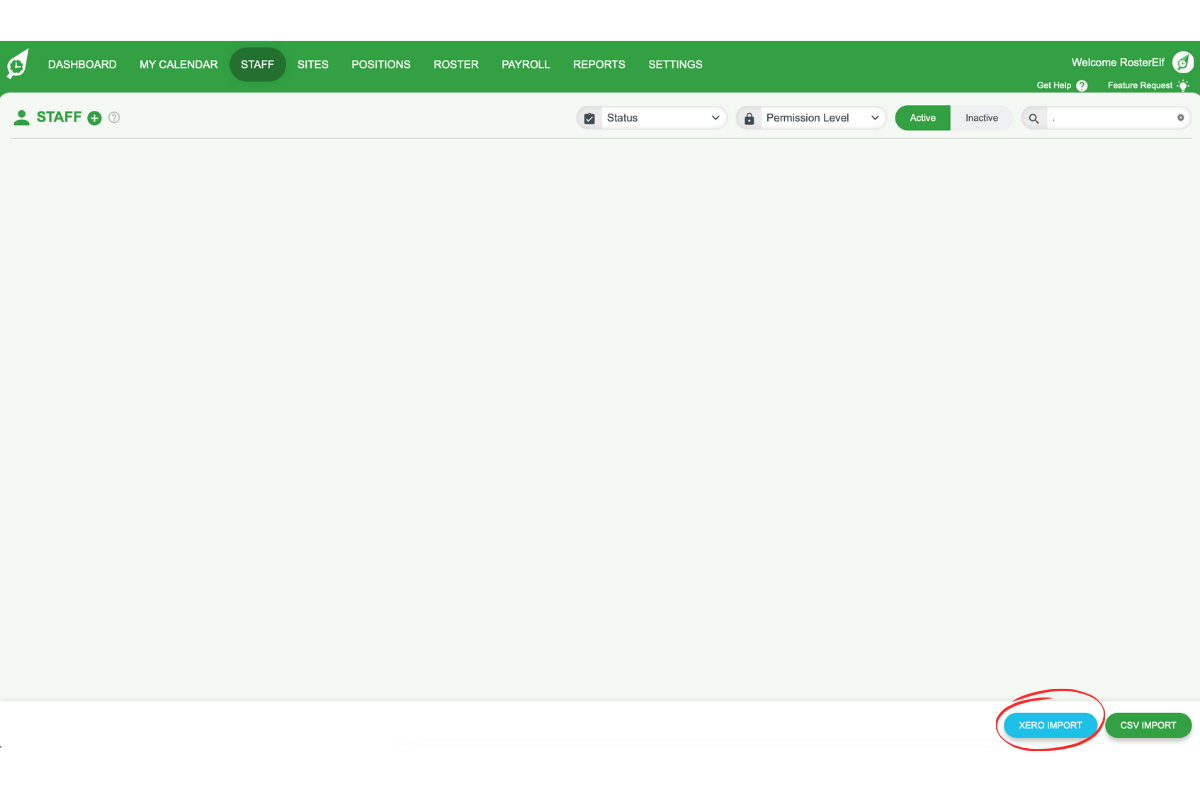
2.1.3 If this button is not visible, double-check that your Xero account is connected from the Payroll tab.
2.2 select staff to import
2.2.1 A popup will display the list of staff from your Xero account.
2.2.2 Uncheck the tick box beside any staff members you do not wish to import.
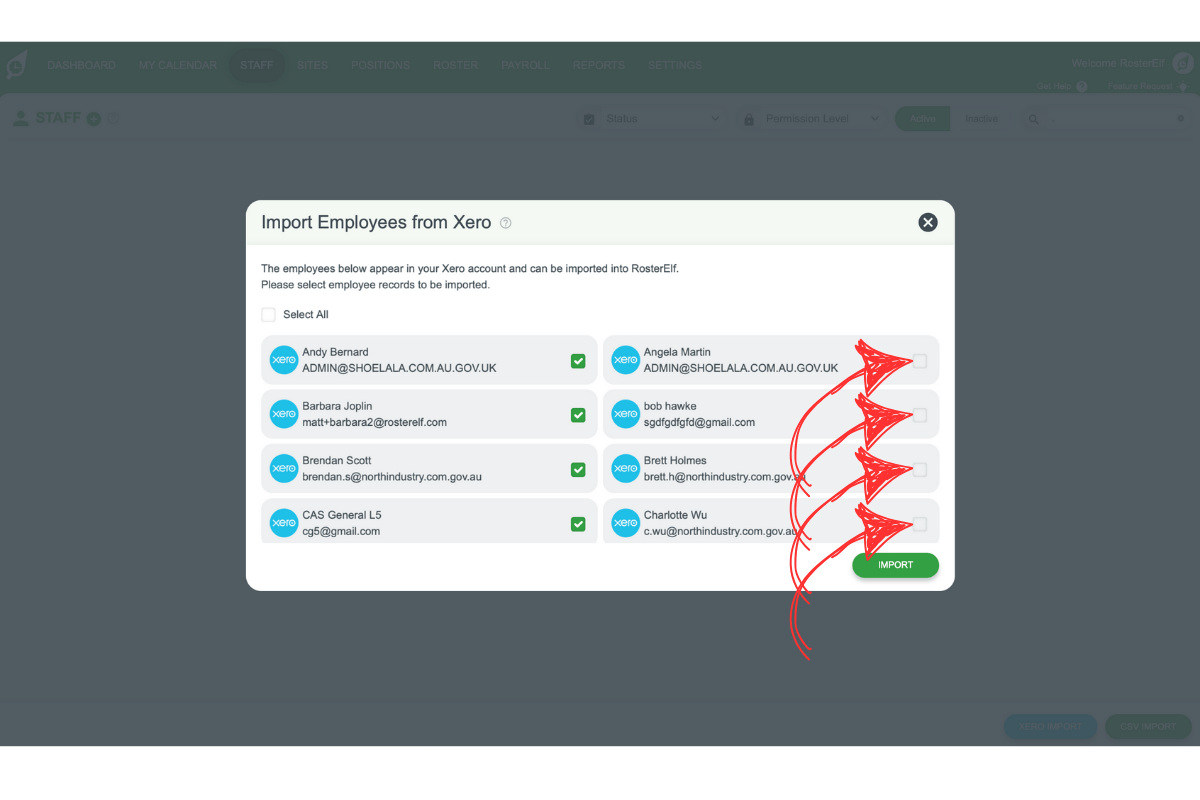
2.2.3 Ensure that each staff member’s email address is listed. If not, add it to their staff card in RosterElf after the import.
2.3 confirm the import
2.3.1 Click Import once you have selected the desired staff.
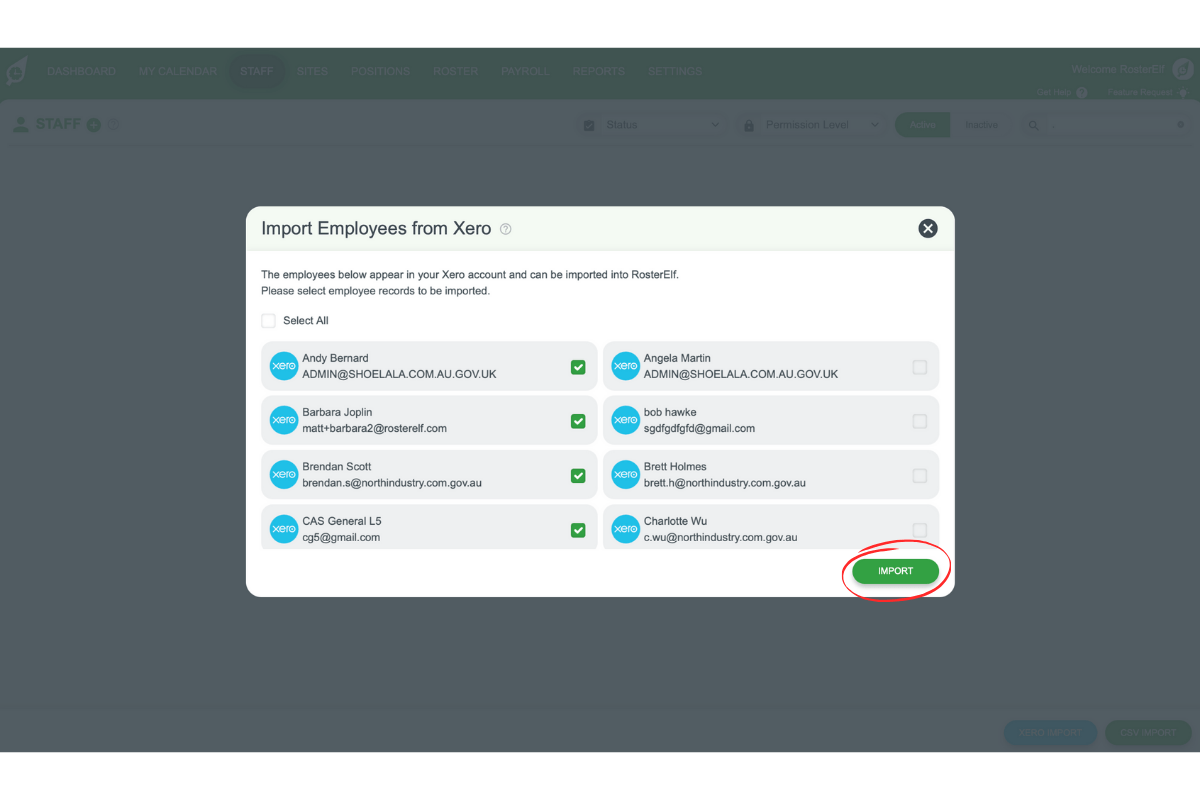
2.3.2 A confirmation message will appear, indicating the successful import of your staff members.
Frequently asked questions
1. How do I connect my Xero account to RosterElf?
Navigate to the Settings tab, then select the Payroll tab. Check if Xero is connected. If not, follow the prompts to complete the connection.
2. Why can't I see the Xero import button in RosterElf?
The Xero import button only appears if your Xero account is connected to RosterElf. Go to Settings > Payroll to verify the connection.
3. What should I do if a staff member doesn't have an email address in Xero?
You can still import them, but you’ll need to add their email address manually to their staff card in RosterElf after the import is complete.
4. How do I select specific staff members to import from Xero?
After clicking the Xero import button in the Staff tab, a popup displays the list of staff from Xero. Untick the box next to any staff you don’t want to import.
5. Why can't I import a New Zealand staff member from Xero?
For New Zealand Xero customers, each staff member must have an email address in their Xero profile. Add the email in Xero before attempting the import.