Introduction to rostering in RosterElf
This article introduces the basic functions of rostering within RosterElf, designed to help you familiarise yourself with its core features. By following this guide, you’ll learn how to view, manage, and edit rosters efficiently. For more specific topics, explore additional articles in our knowledge base or reach out to our team for support.
To follow along, log in to your RosterElf account and navigate to the Roster tab.
1. Roster views
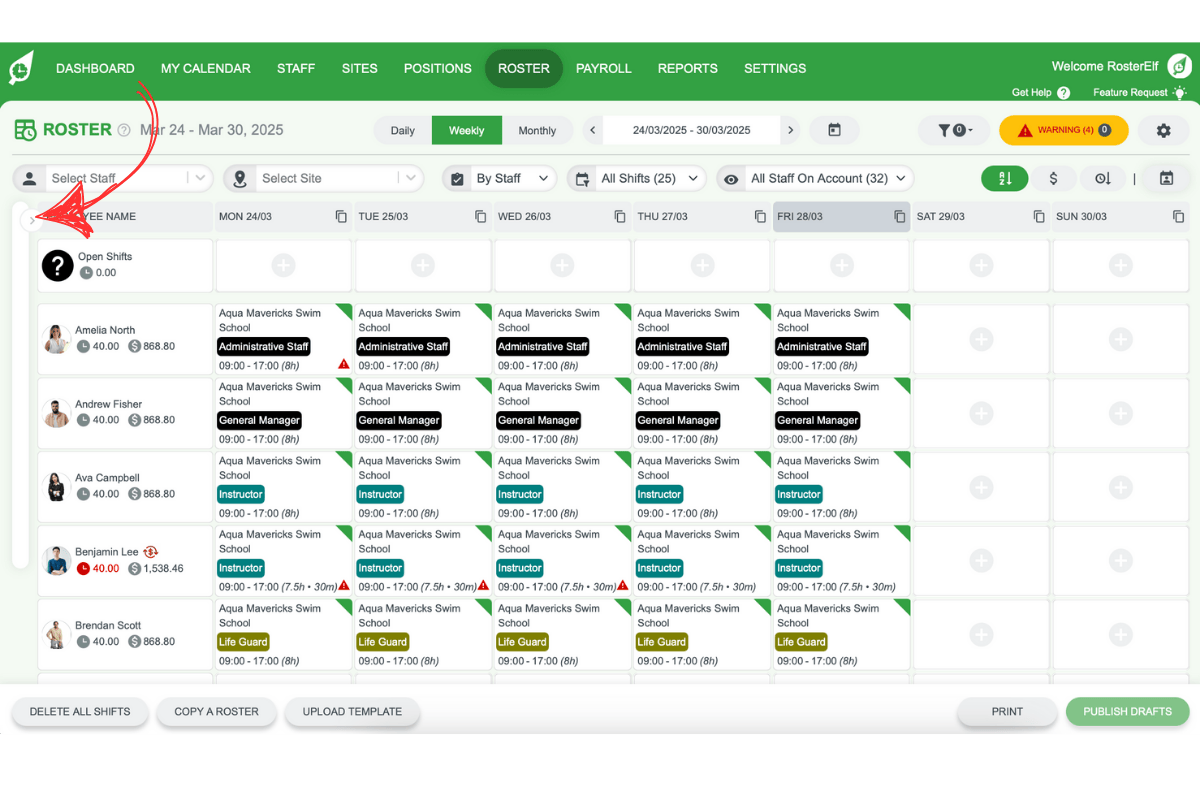
The roster views in RosterElf provide different perspectives to meet your business needs. You can adjust views based on your role or objectives. Access options such as By Staff, By Position, and By Site using the dropdown at the top of your roster.
1.1 By staff view
This view is ideal for small to medium businesses and allows you to roster staff based on familiarity with their roles and positions. It’s especially helpful in balancing hours and minimising overtime costs.
Select By Staff in the dropdown to view rosters by individual employees.
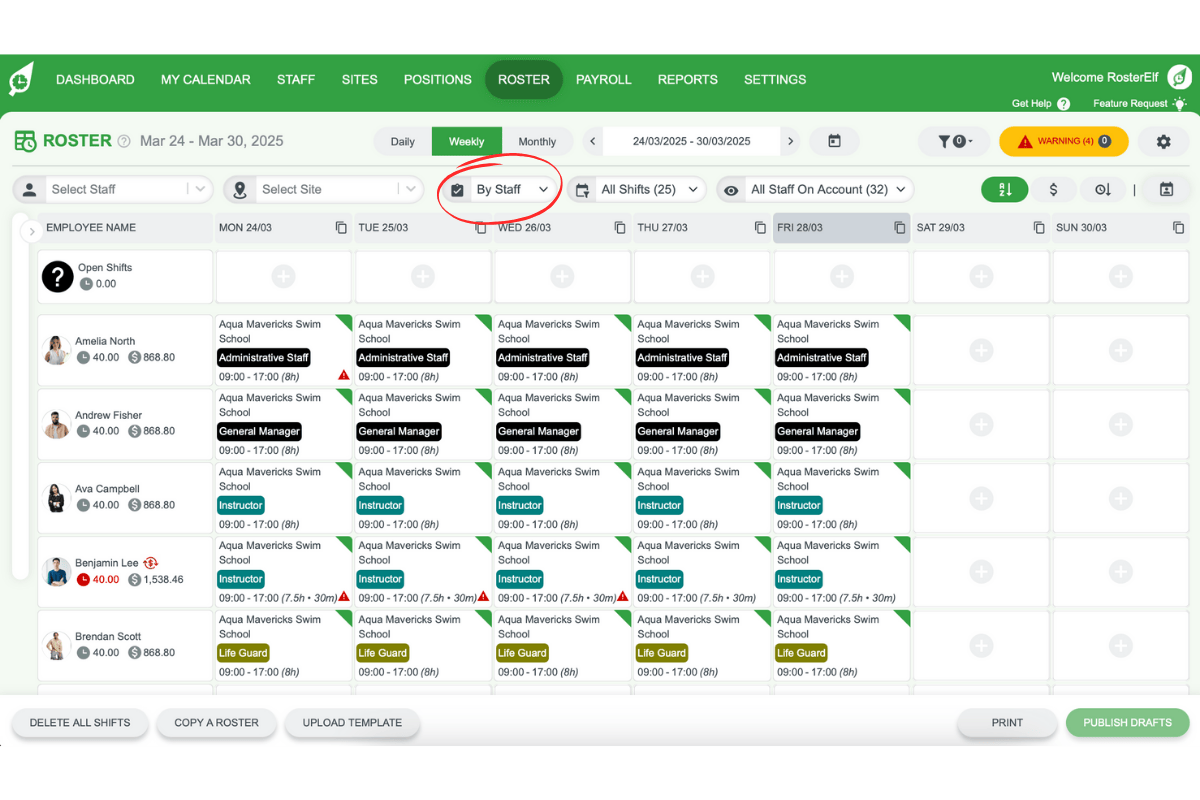
Monitor hours per employee for balanced scheduling.
1.2 By position view
The By Position view is beneficial for larger operations where specific staffing levels per position are essential.
Select By Position to view employees based on their designated roles.
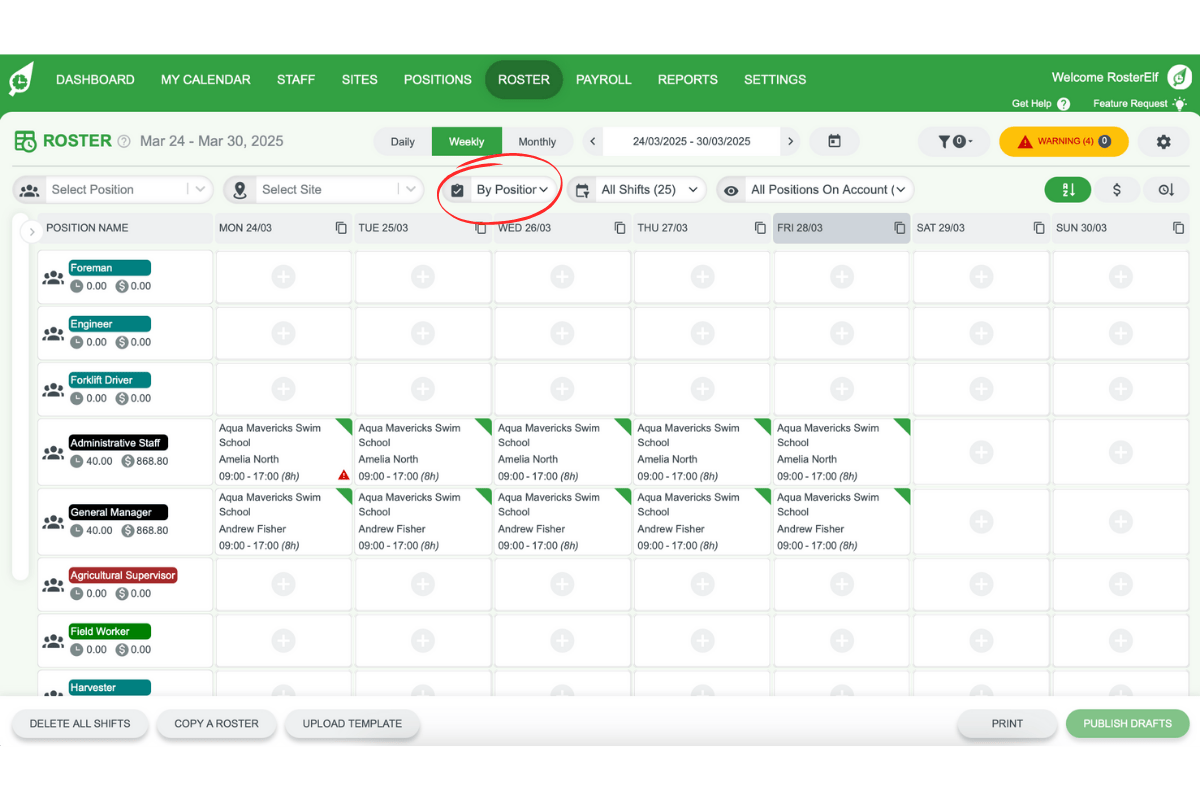
Assess coverage by position to meet your team’s needs.
1.3 By site view
For businesses with multiple locations or departments, the By Site view allows for tracking costs and coverage per site.
Select By Site to view staff coverage across locations or departments.
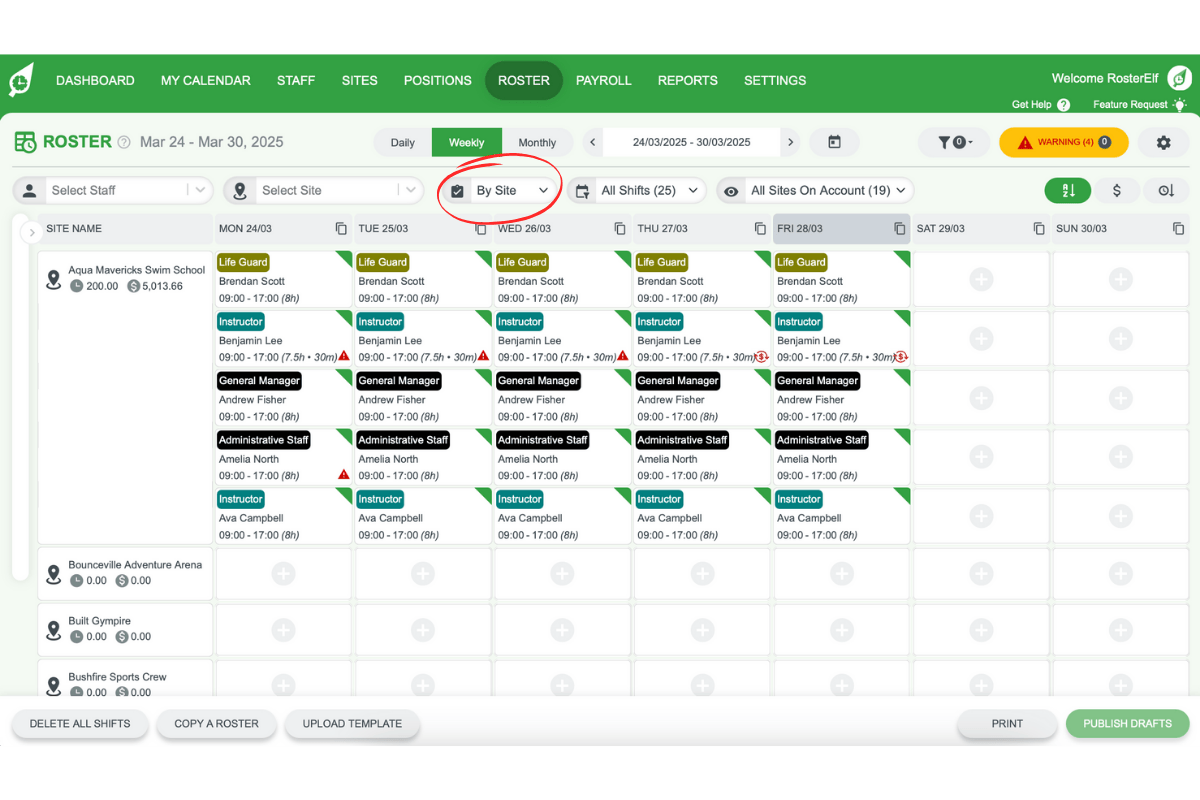
Monitor departmental labour costs to ensure balanced staffing.
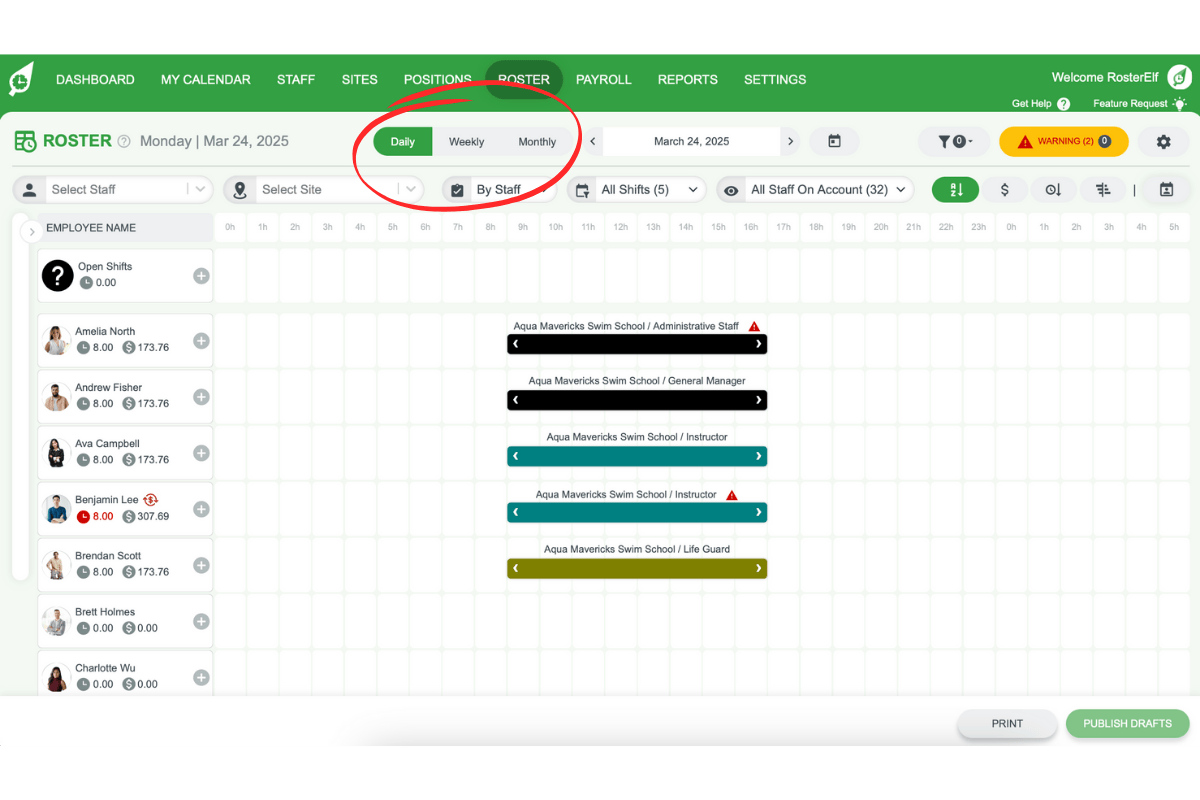
2. Roster periods
Roster periods help you manage schedules across various timelines. Toggle between daily, weekly, and monthly views depending on your roster cycle. Use the calendar icon to reset to the current date.
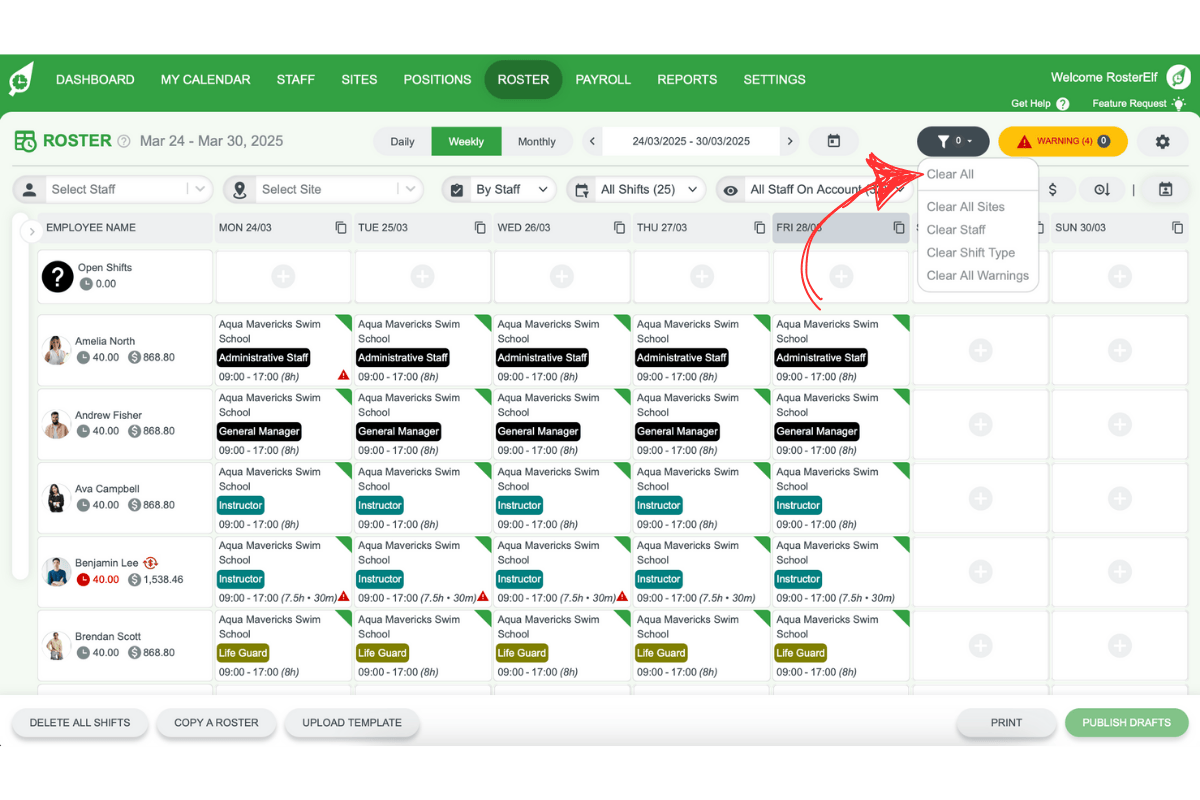
3. Roster filters
Filters help refine your view by focusing on specific staff or shifts. Remember to clear filters as needed to avoid hidden shifts.
3.1 filtering by site
Use the site selector to view one or multiple locations.
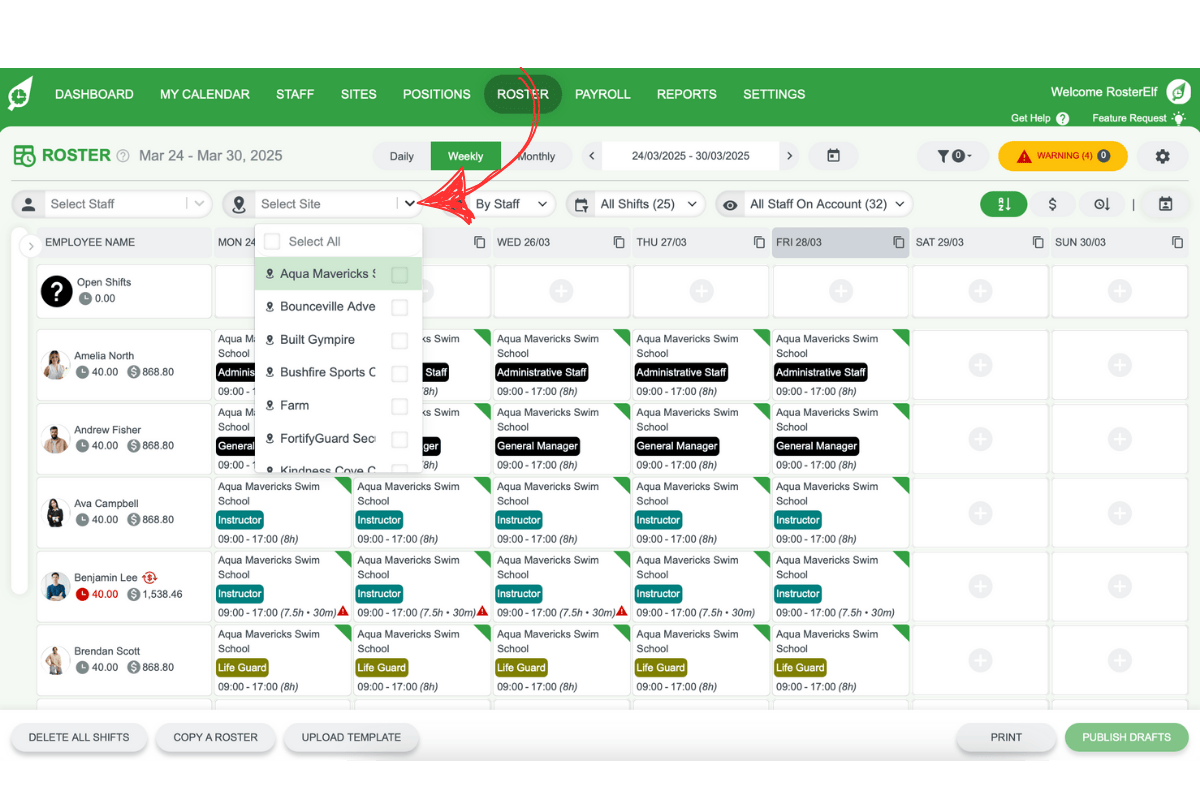
Reset the filter if your roster only covers one location.
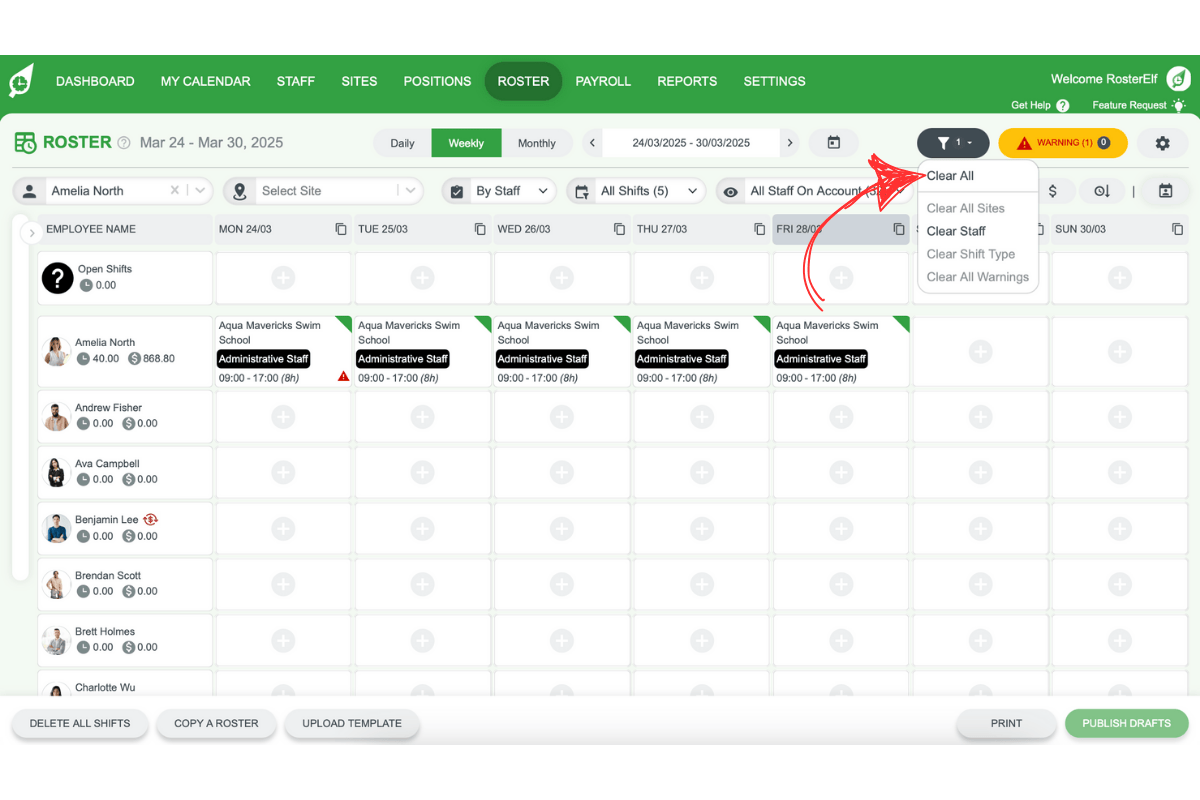
3.2 filtering by staff
Select a staff member to focus on their specific roster.
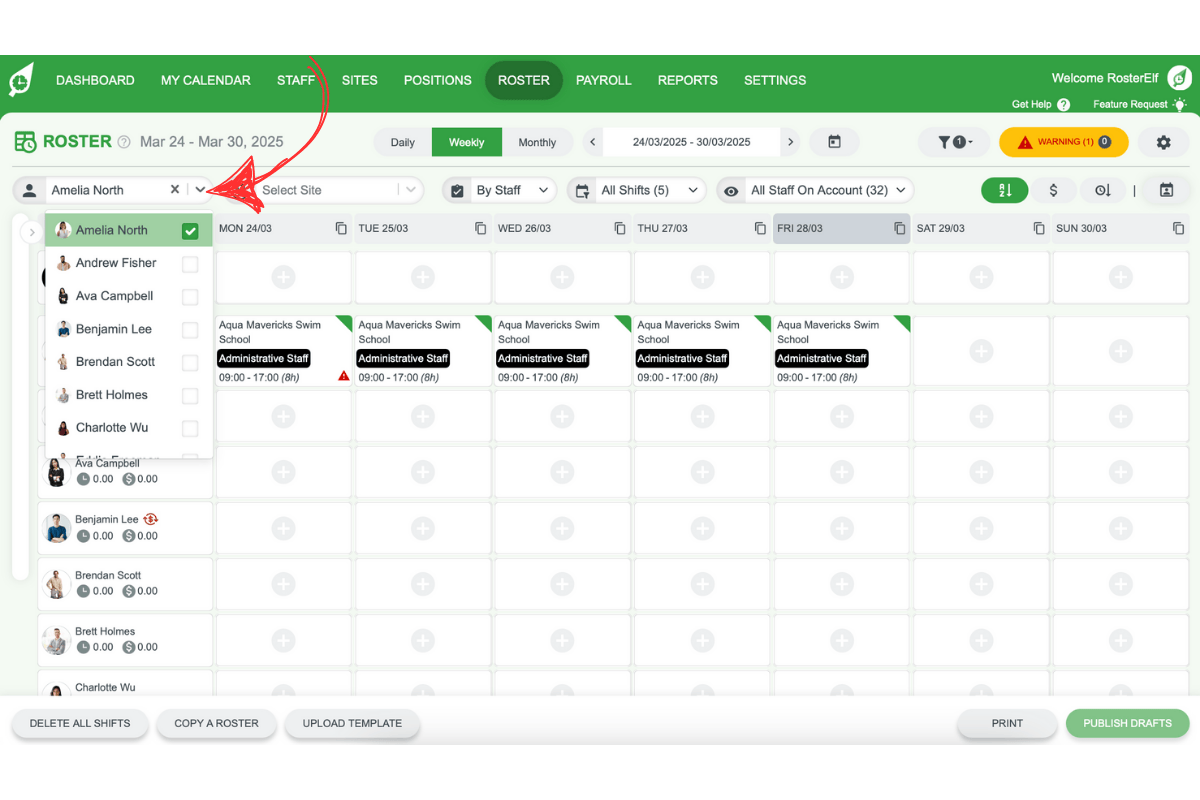
Reset the filter when switching to a general view.
4. Financial summary
Managing labour costs is essential. RosterElf’s Financial Summary offers an overview of your staffing expenses.
4.1 viewing the financial summary
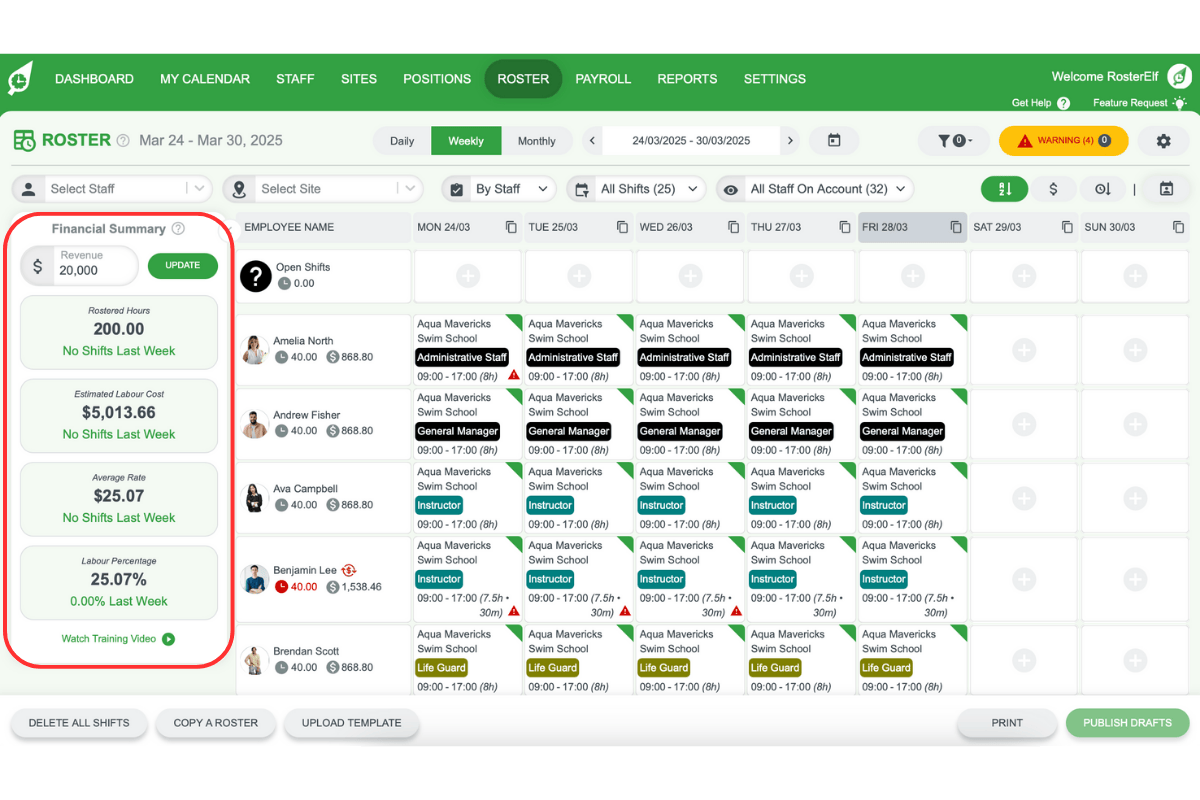
Click the right arrow to expand the summary for a detailed view.
The expanded summary provides information like rostered hours for the period, estimated labour cost, and more.
5. Managing shifts
Adding, copying, or moving shifts is straightforward in RosterElf, allowing you to build and adjust rosters quickly.
5.1 adding a shift
Click the + icon in your roster view to add a new shift.
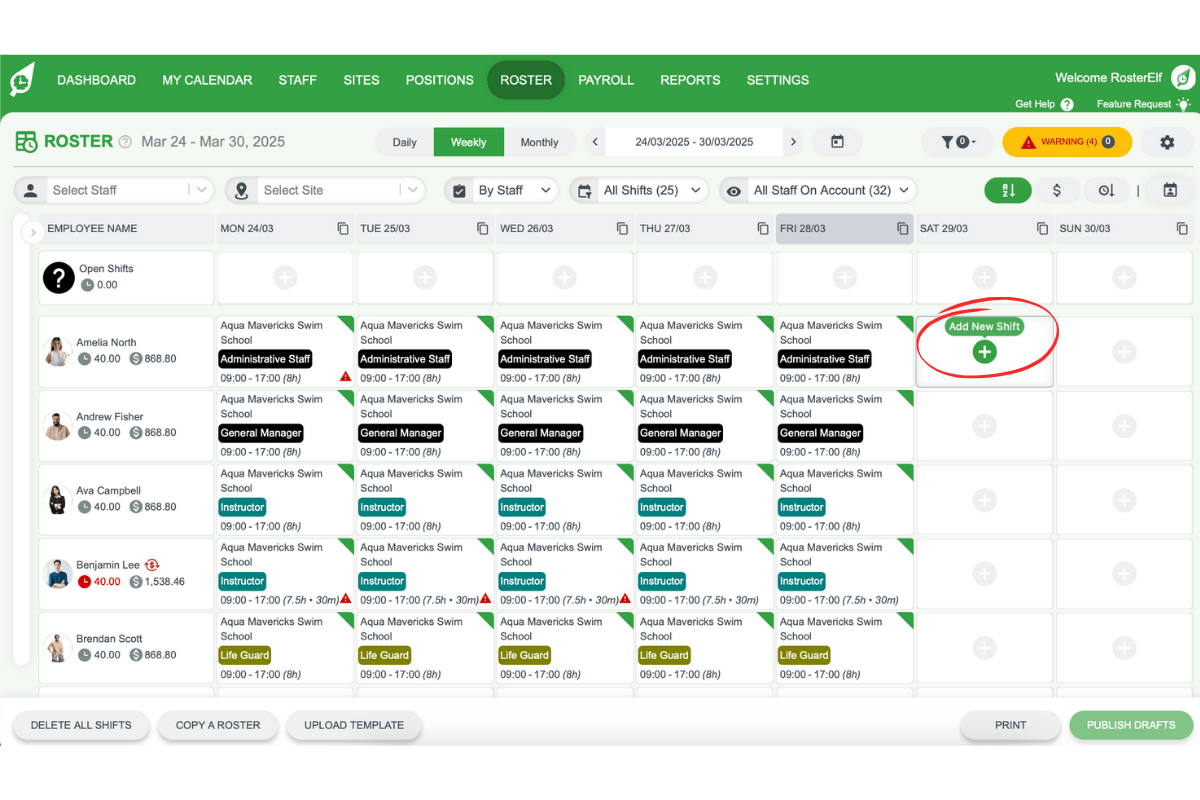
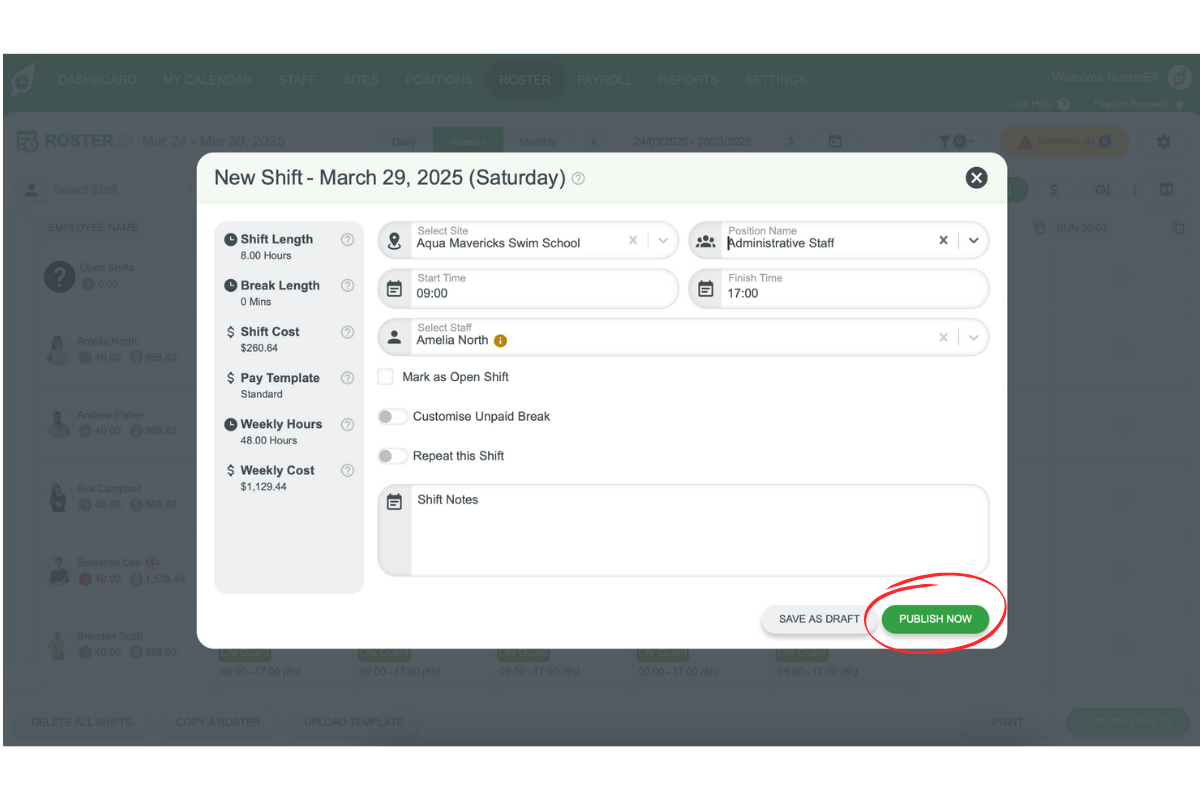
Fill in shift details such as position, time, and assigned staff, then click Publish now.
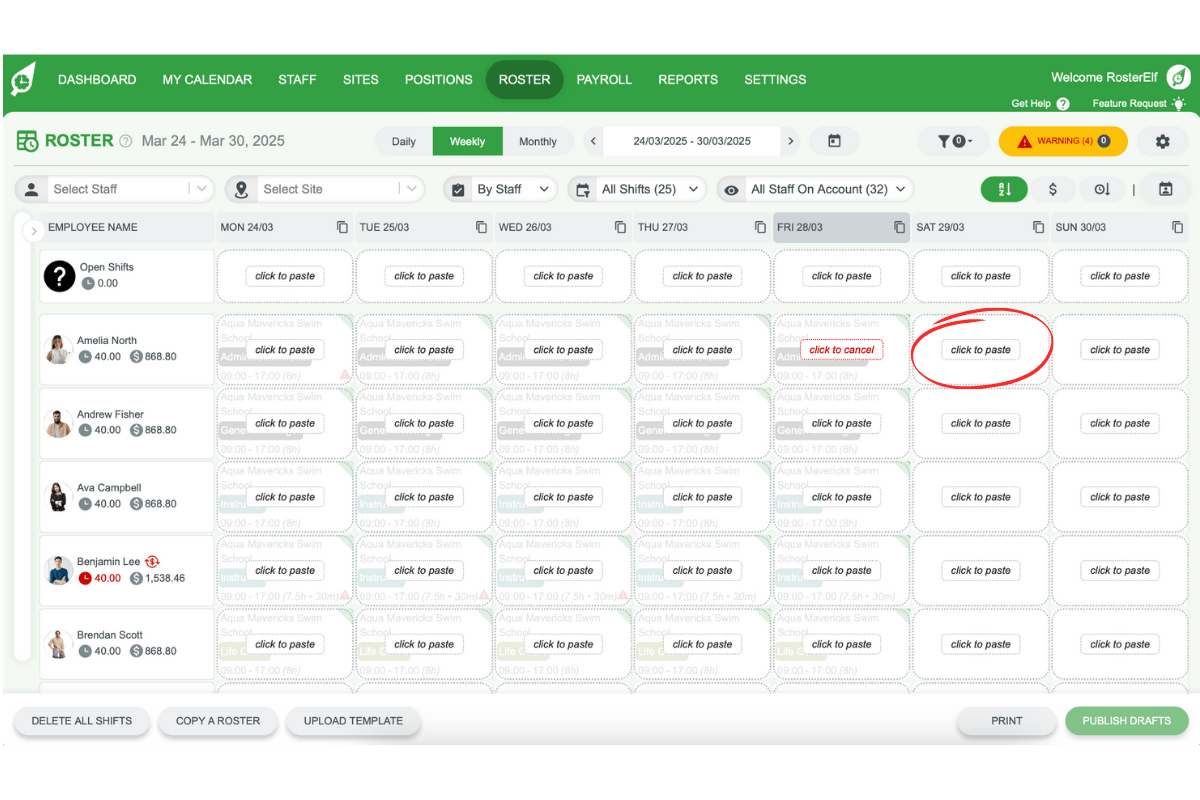
5.2 copying shifts
Hover over a shift and select Copy to duplicate it.
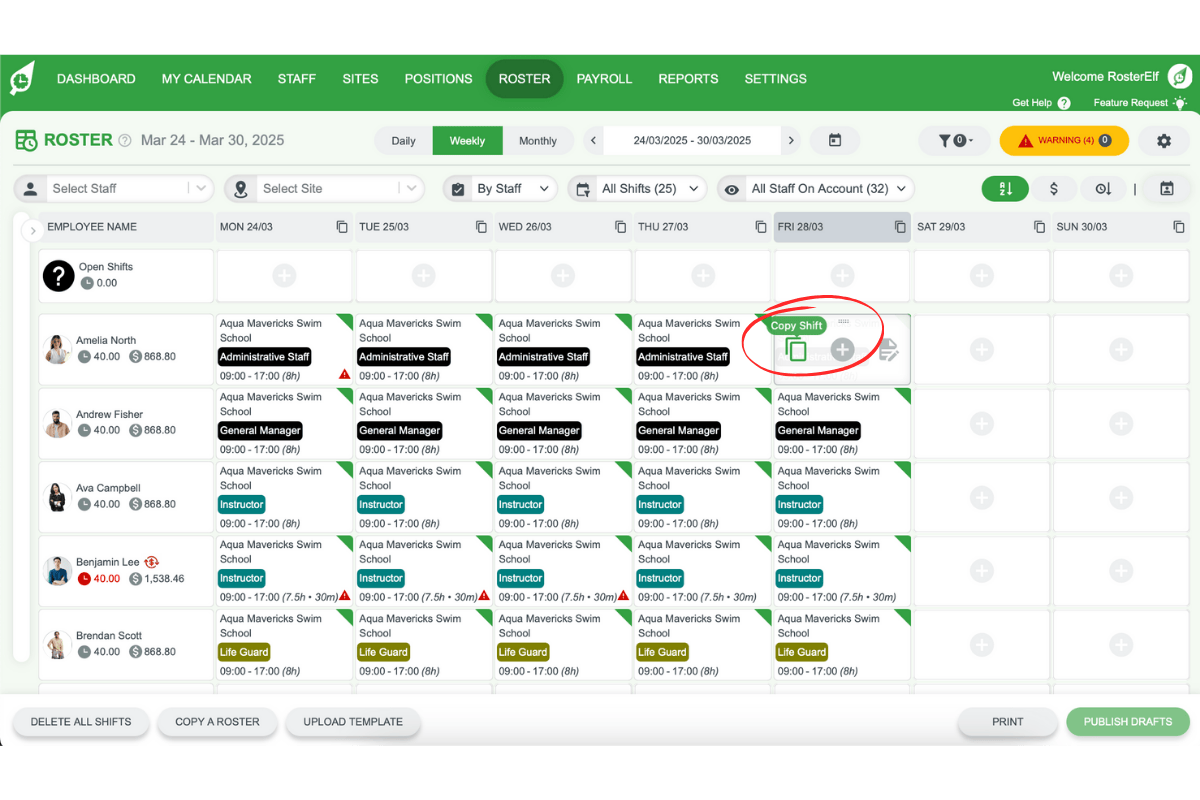
Paste the shift in a new location as needed.
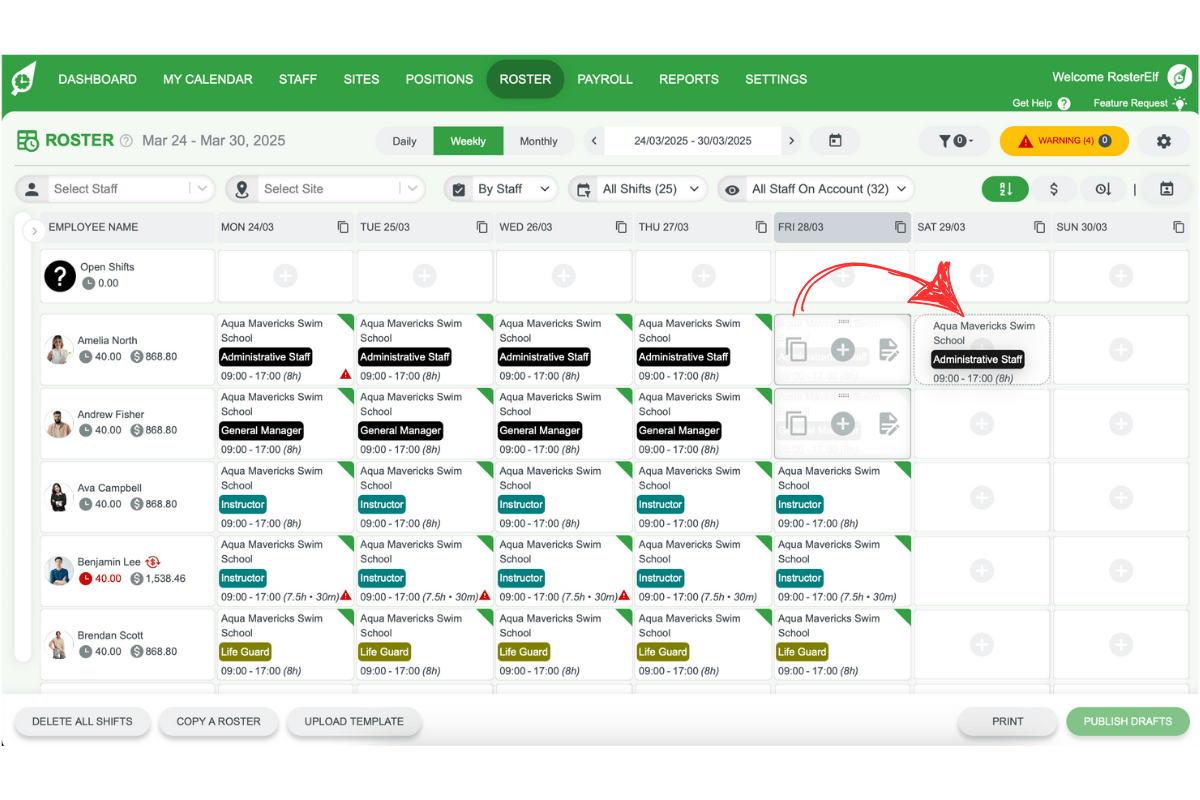
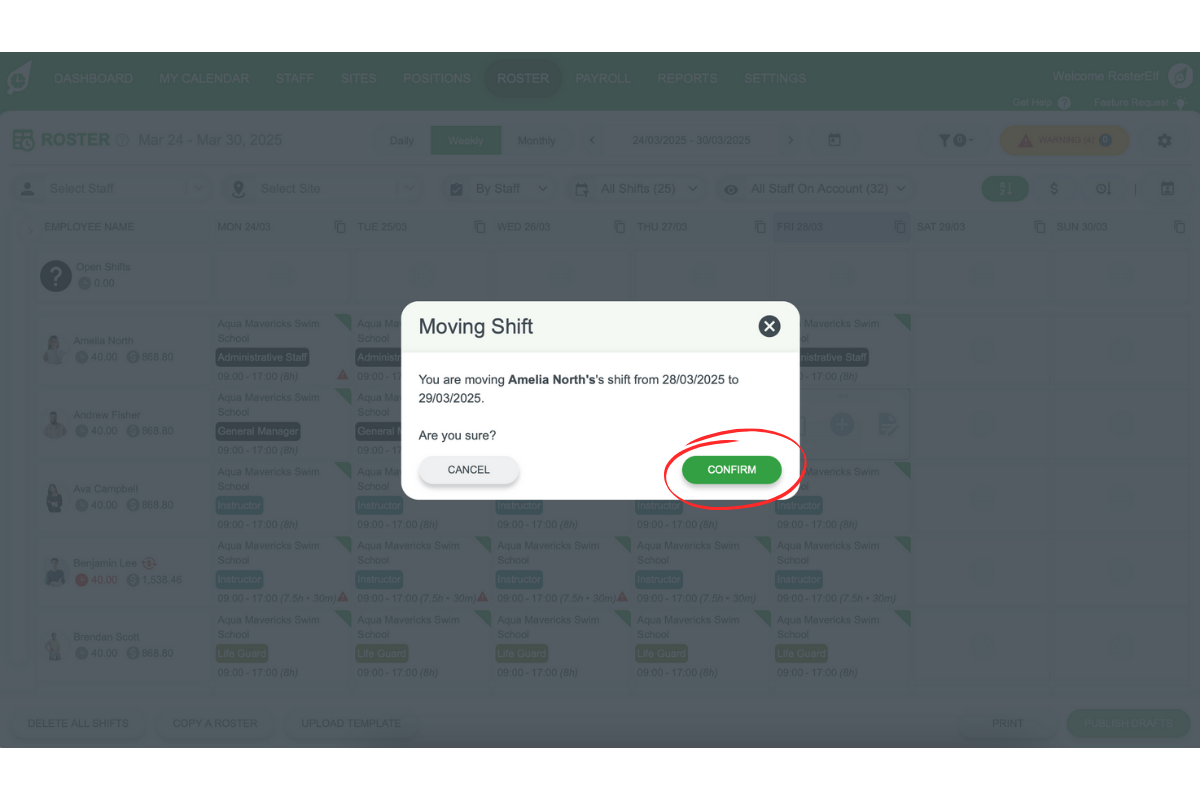
5.3 moving shifts
Use the drag-and-drop handle to reposition shifts as required.
Click Confirm to validate the shift change.
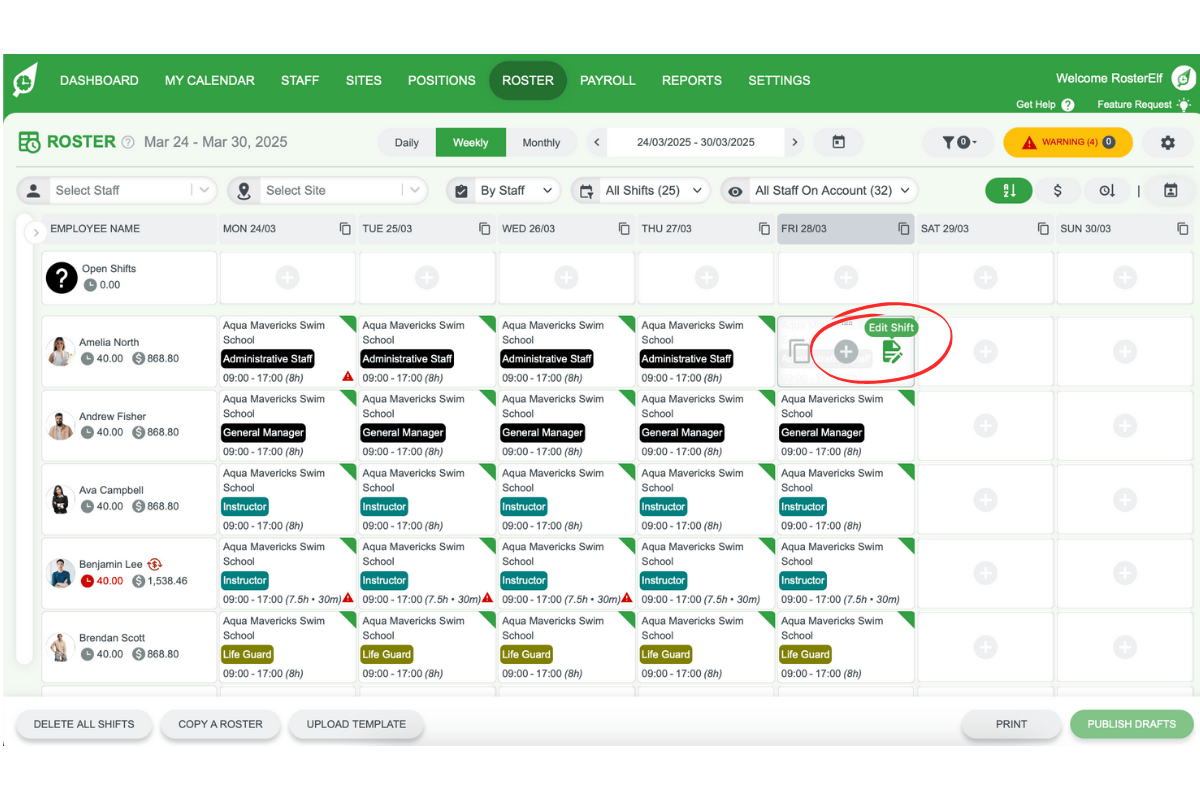
5.4 editing shifts
Click Edit on a shift to adjust multiple details simultaneously.
Frequently asked questions
1. How do I change the roster view in RosterElf?
Use the dropdown menu at the top of the roster tab. You can choose from By Staff, By Position, and By Site views depending on your preferences and business needs.
2. What are the different roster periods available in RosterElf?
RosterElf offers daily, weekly, and monthly roster periods to help you manage shifts over various timelines. You can toggle between these views or reset to today’s date using the calendar icon.
3. How can I filter my roster by specific staff or site?
Use the filter options at the top of the roster. Select a staff member or site to focus your view. Remember to reset the filter when you want to see the full roster again.
4. What is the Financial Summary in RosterElf?
The Financial Summary provides a quick overview of your labour costs including rostered hours, estimated wages, and budget tracking. Click the arrow to expand for detailed cost insights.
5. How do I add or copy shifts in RosterElf?
To add a shift, click the + icon in the roster view and complete the shift details. For copying shifts, hover over a shift, select Copy, and paste it where needed in your roster.