Transfer your data from Deputy to RosterElf
This guide explains how to transfer your key data from Deputy to RosterElf, including your locations, positions, staff, and payroll setup. Following these steps ensures your RosterElf account mirrors your existing Deputy structure for a smooth transition.
You'll learn how to recreate your locations and positions, import your staff via CSV, and connect payroll to Xero. Once completed, your RosterElf setup will be ready for rostering, time tracking, and payroll integration with minimal disruption to your business.
1. Recreate your locations in RosterElf
Locations in RosterElf are called sites. Each site represents a physical location of your business. This section explains how to recreate your existing Deputy locations as RosterElf sites. Setting these up correctly ensures accurate time tracking, shift assignment, and reporting for each location.
Learn more here
For each Deputy location, create a matching site in RosterElf: go to the Sites tab, click the plus (+) symbol, and enter the site's address and details. See the guide above for the full walkthrough with screenshots.
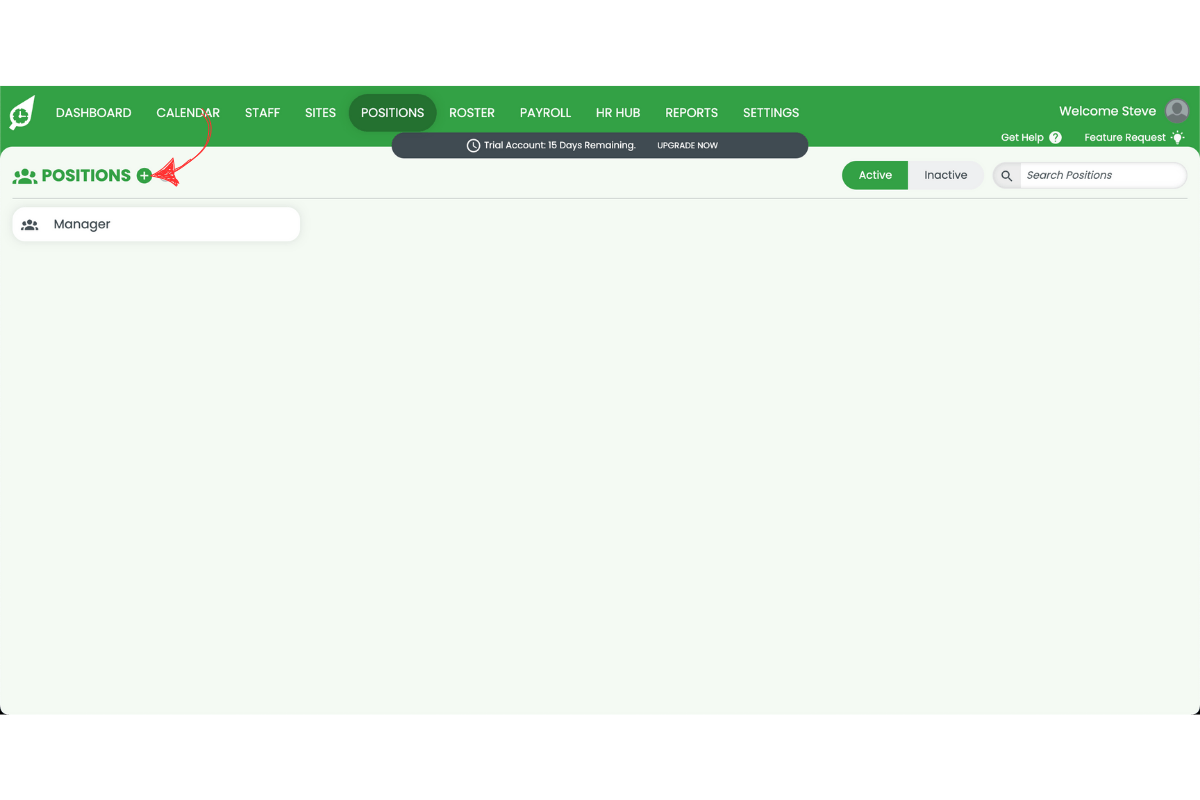
2. Create your positions in RosterElf
In RosterElf, positions are similar to areas in Deputy. However, unlike Deputy, positions are not tied to a specific site and can be assigned across multiple locations. Setting up positions helps you define job roles and responsibilities clearly for scheduling and payroll purposes.
Learn more here: Introduction to positions
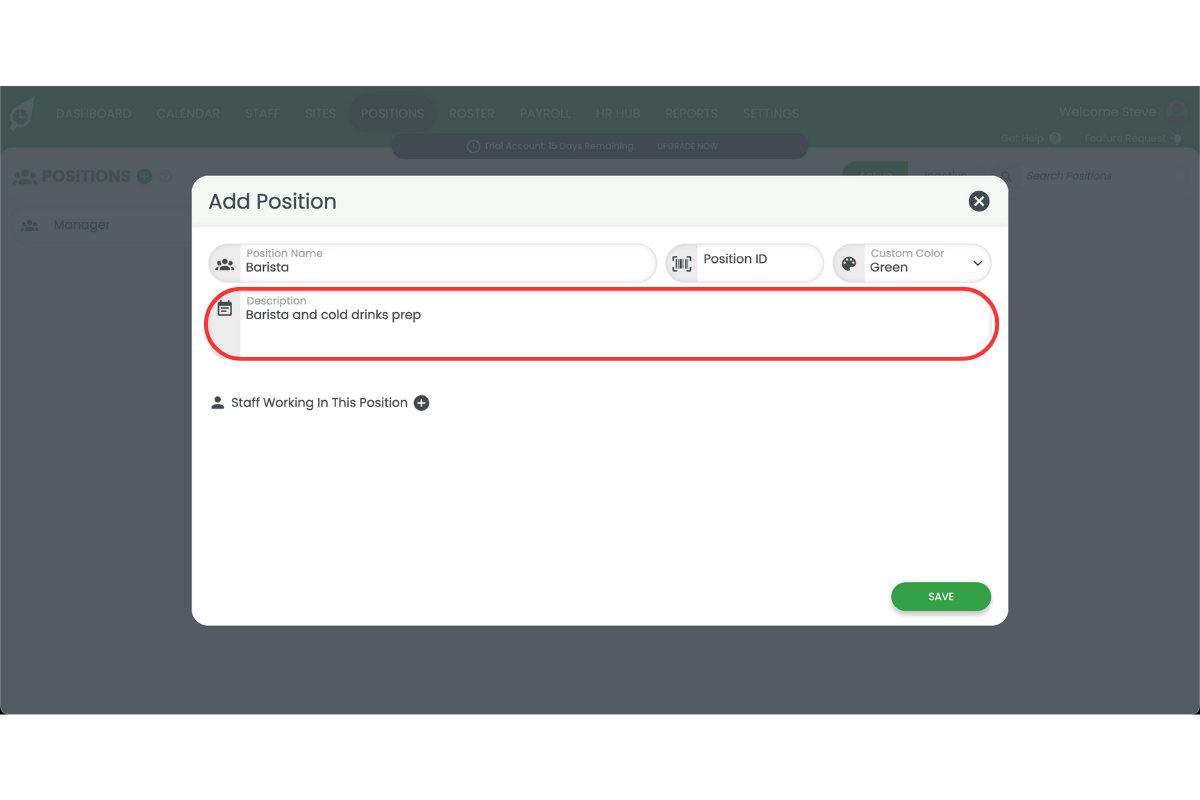
2.1 add your positions
2.1.1 Go to the Positions tab.
2.1.2 Click the plus (+) symbol to add a new position.
2.1.3 Enter the position name.
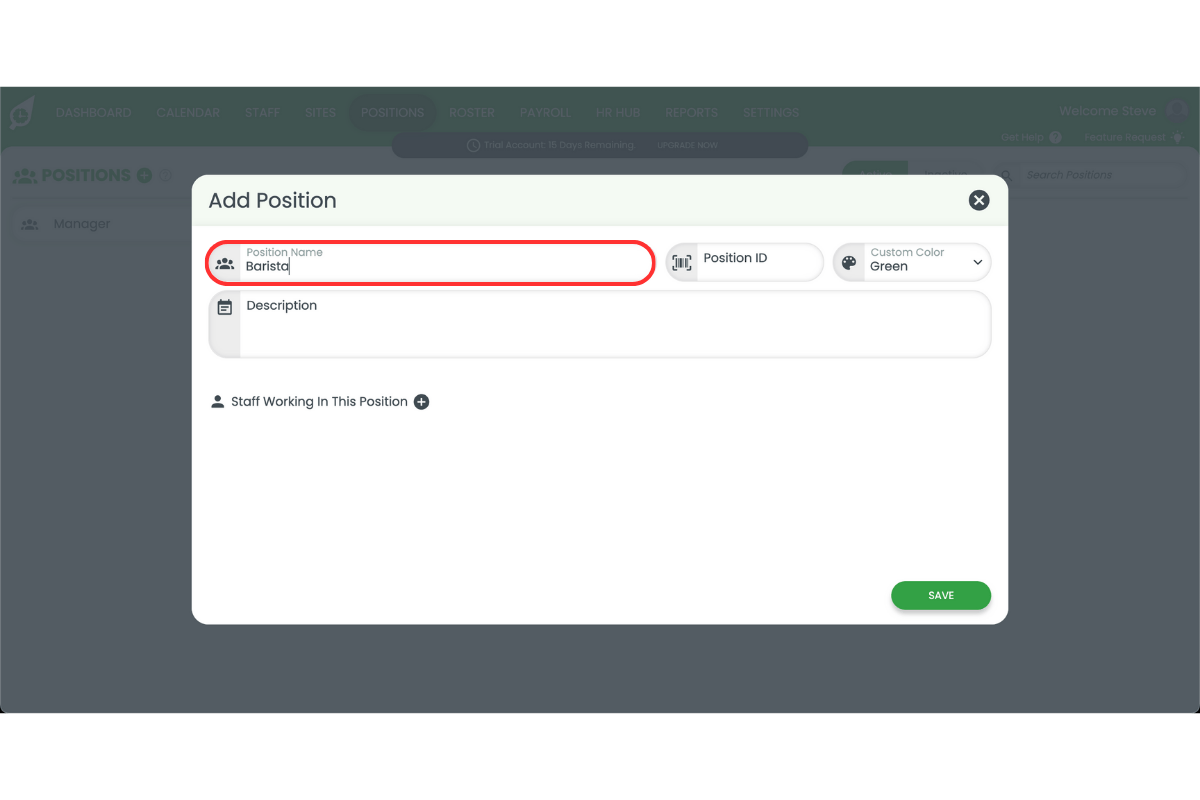
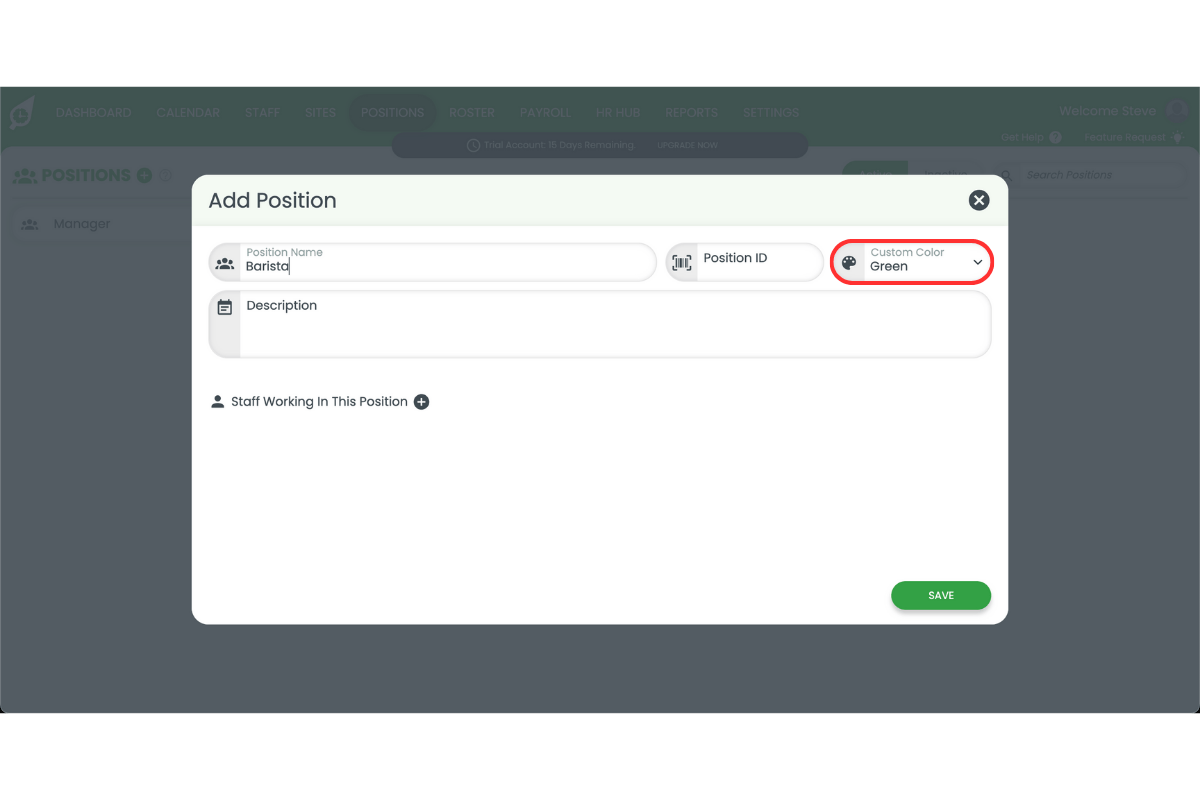
2.1.4 Choose a colour for the position (optional).
2.1.5 Add a description to explain the role and responsibilities to staff.
3. Import your staff from Deputy
You can import your staff list from Deputy into RosterElf using a CSV file or via Xero. Exporting your employee data ensures all active staff details are included and up to date before the import.
Learn more here:
- Importing staff list (CSV file)
- Importing staff list (Xero API)
3.1 export your staff from Deputy
3.1.1 Go to Analytics in Deputy.

3.1.2 Click View all reports.

3.1.3 Find and open the Team members details report.

3.1.4 Set Status to Employed.

3.1.5 Click Export and select Excel format.

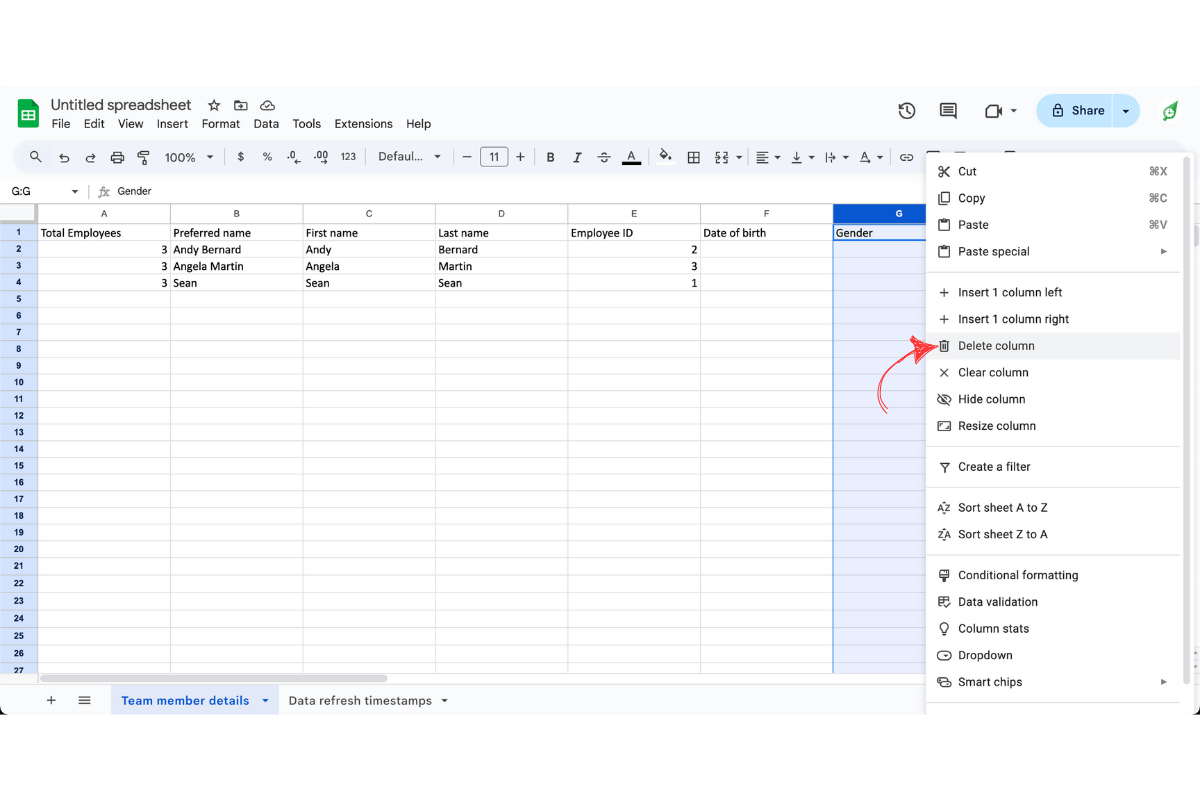
3.1.6 Open the Excel file and remove any unnecessary columns (keep First name, Last name, Email and Mobile number).
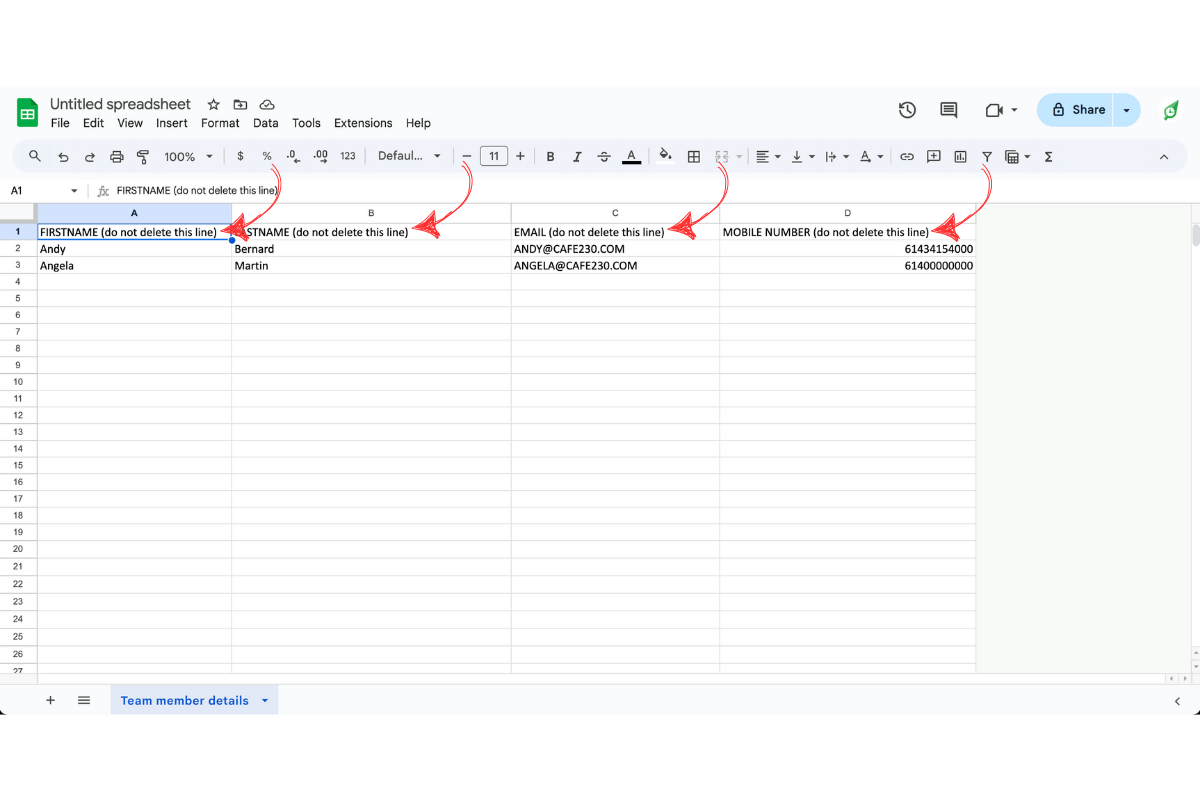
3.1.7 Rename the remaining columns to match RosterElf's import format.
3.1.8 Export the file again as a CSV.

3.2 import your staff into RosterElf
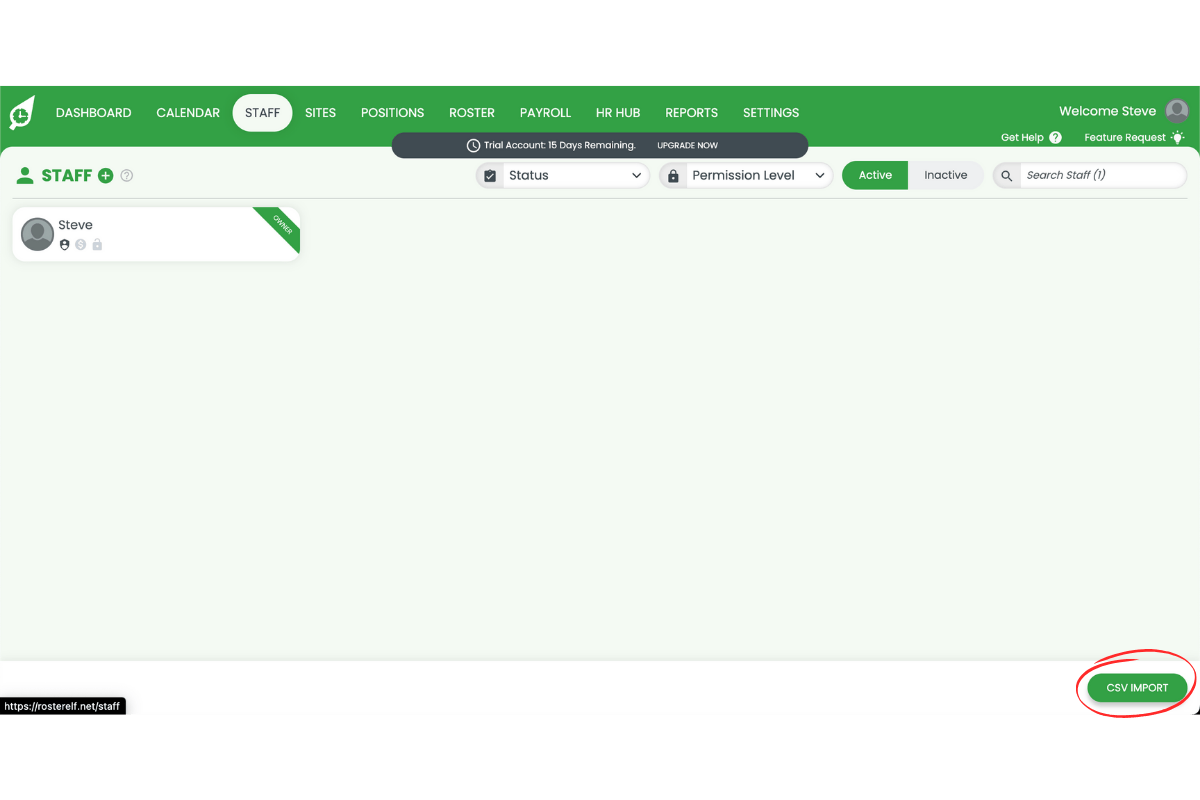
3.2.1 Click the Staff tab in RosterElf.
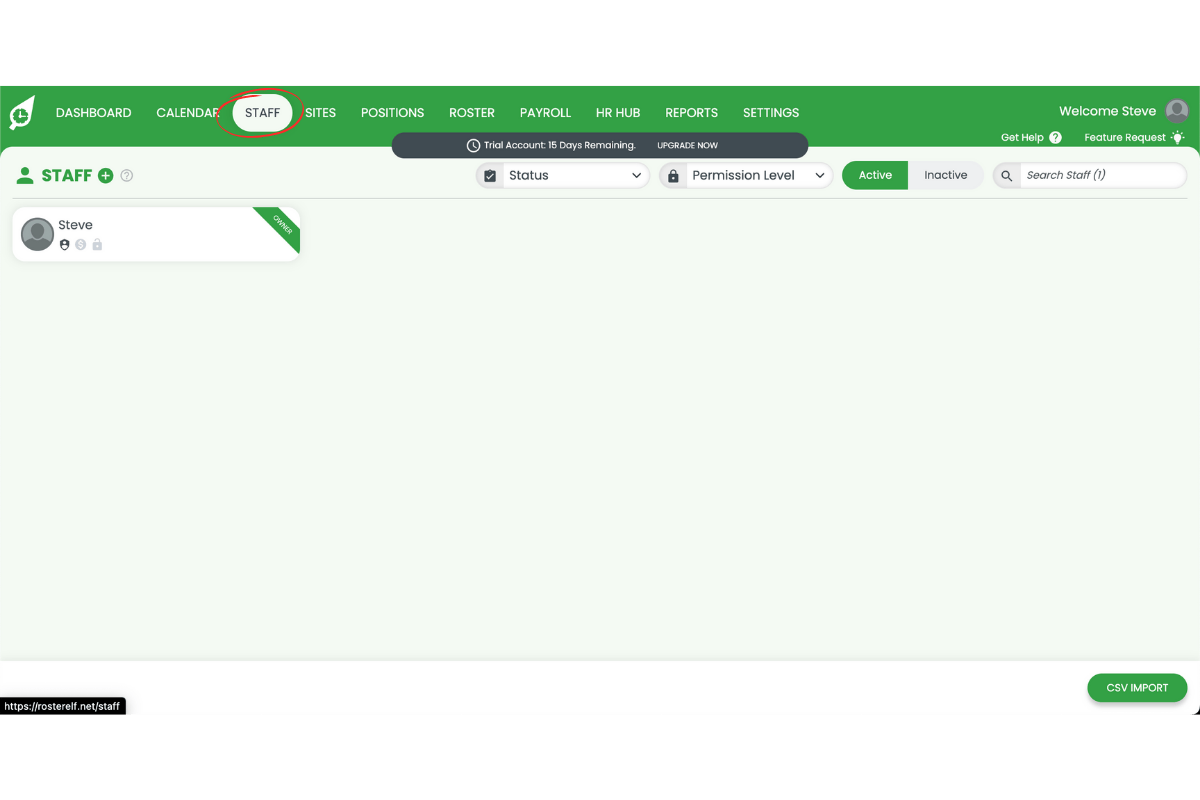
3.2.2 Select CSV import.
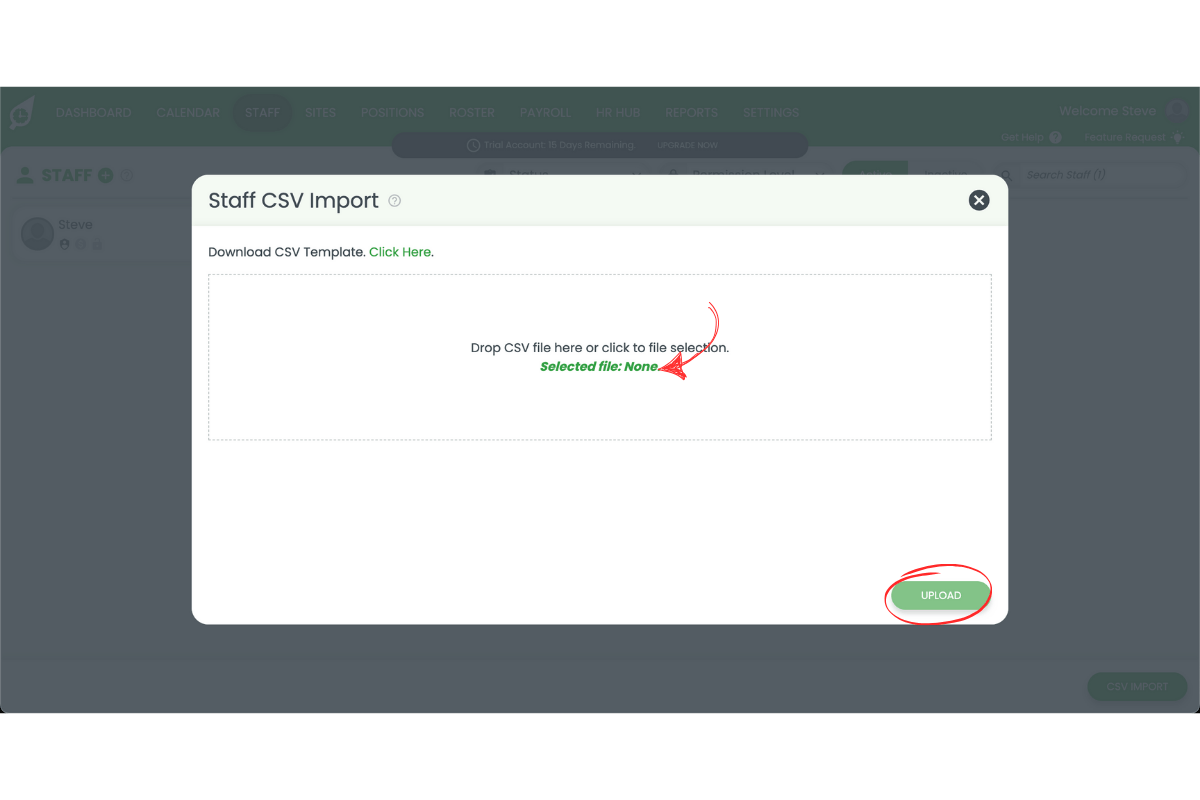
3.2.3 Upload your prepared CSV file and hit Upload.
4. Set up payroll in RosterElf
Once your staff and positions are added, you can connect your RosterElf account to Xero and set up payroll templates. This ensures your employees' timesheets flow directly into your payroll system, saving time and reducing manual entry.
Learn more here:
- How to set up and manage payroll in RosterElf
- Introduction to pay templates
- Comprehensive Xero payroll setup guide
- Creating a pay template for Xero
4.1 connect to Xero and create pay templates
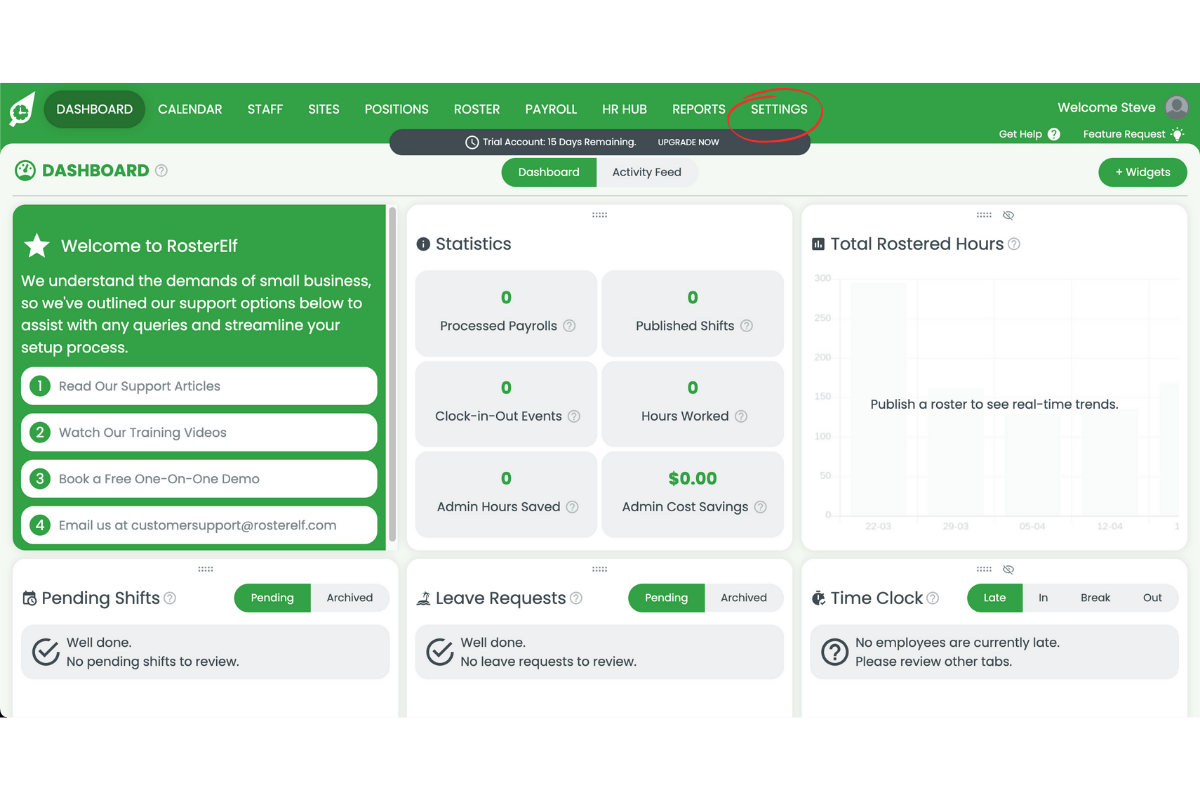
4.1.1 Go to Settings.
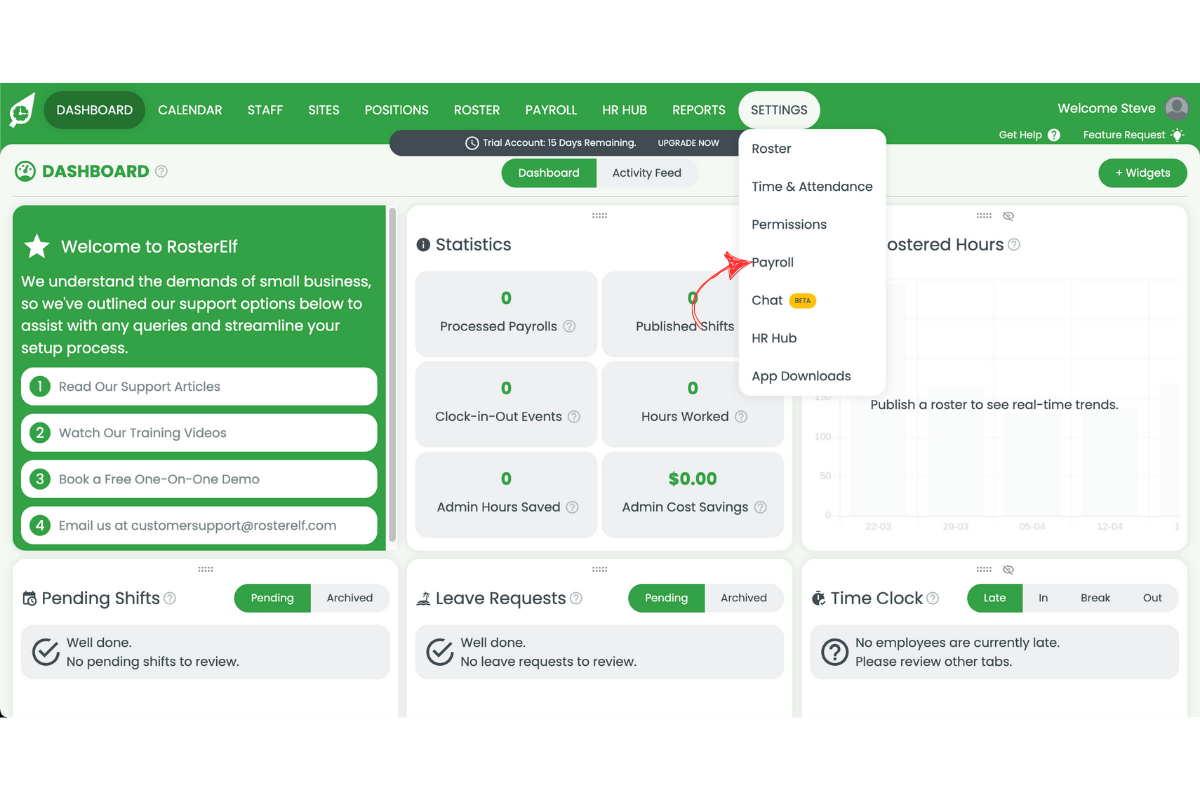
4.1.2 Click Payroll.
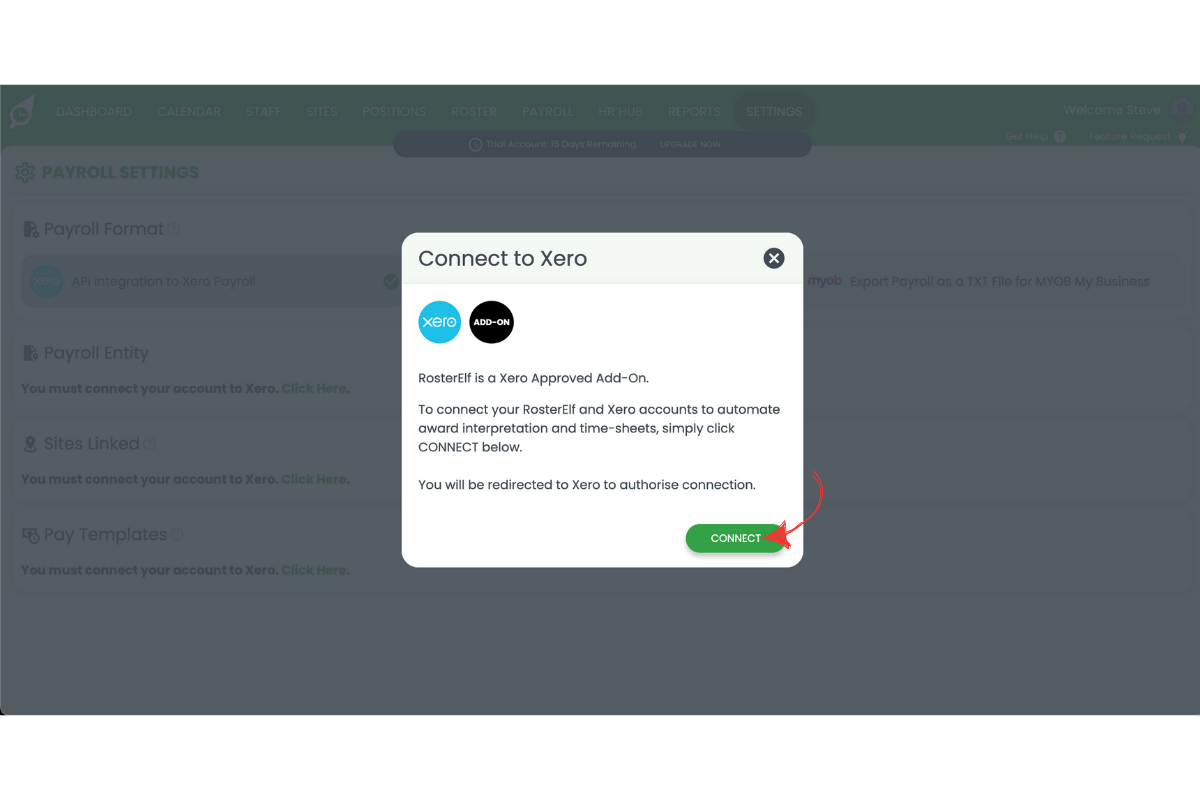
4.1.3 Select API Connection to Xero payroll.
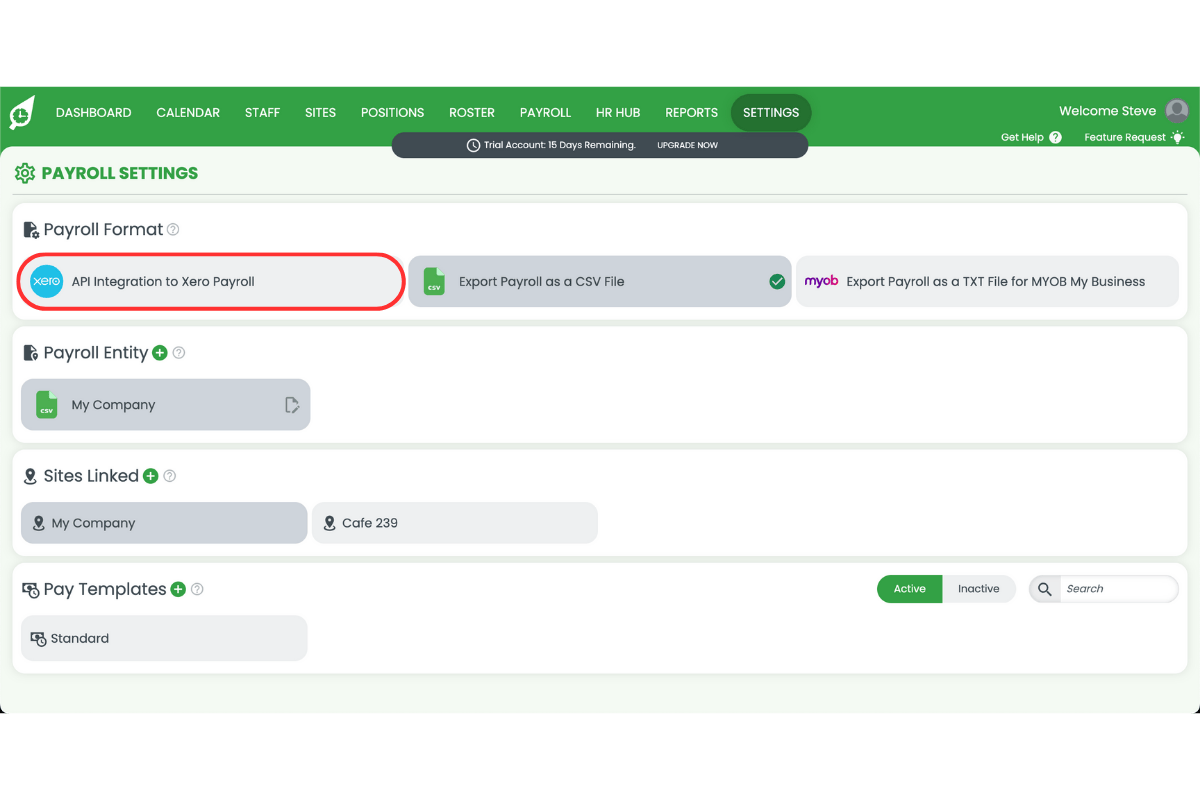
4.1.4 Follow the prompts to connect.
Note:
Following these steps ensures a smooth transition from Deputy to RosterElf with all your essential data intact. Once complete, you can start rostering, tracking time, and managing payroll seamlessly through RosterElf.