


How to export leave from RosterElf to Xero payroll
This article explains how to use RosterElf’s integration with Xero to streamline leave processing for employees. Through this integration, you can manage leave directly within RosterElf, syncing data seamlessly with Xero to ensure accurate payroll records. This guide walks you through each step, from accessing payroll settings to finalising leave processing in Xero, saving time on payroll tasks and simplifying leave tracking.
1. Access the payroll section
In this section, you will learn how to access the payroll area in RosterElf, which is essential for processing employee leave. Setting up payroll correctly ensures accurate leave management and smooth integration with Xero.
1.1 access payroll in RosterElf
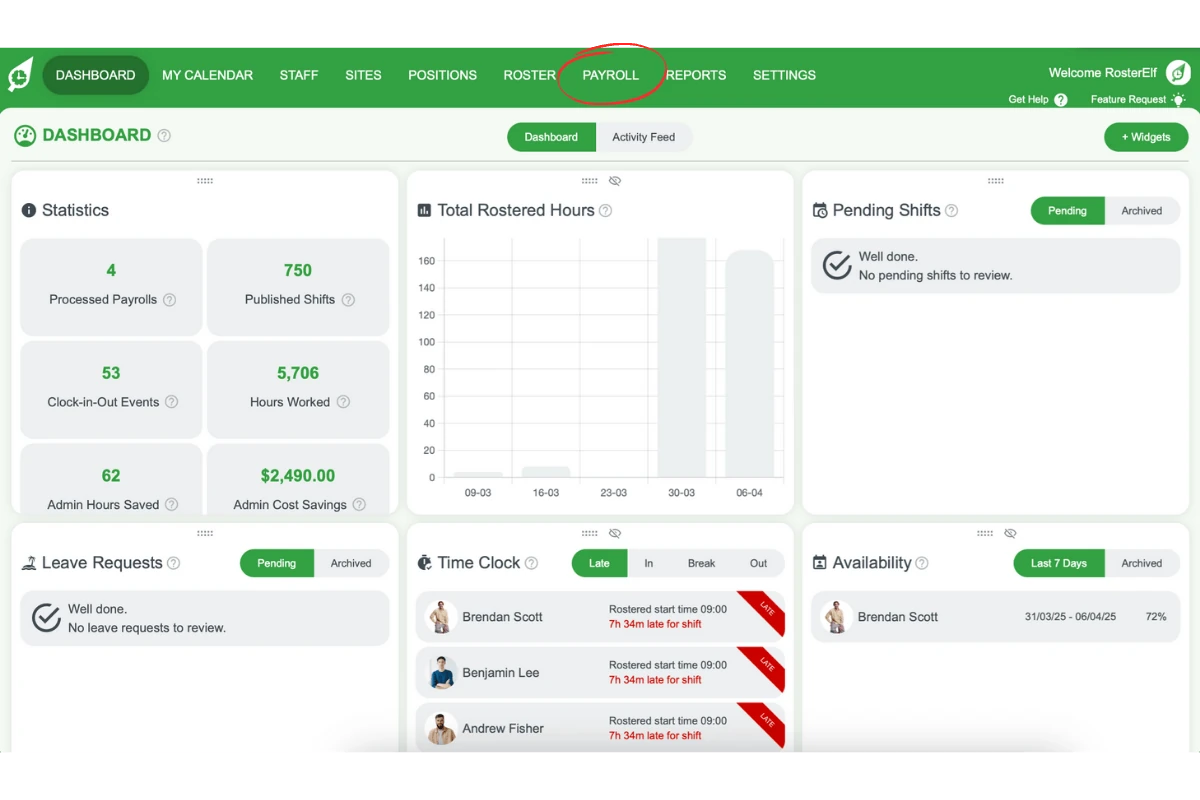
1.1.1 Click on Payroll from the top menu in RosterElf to open the payroll dashboard.
1.1.2 Look for a warning in the bottom right corner indicating an employee is on leave.
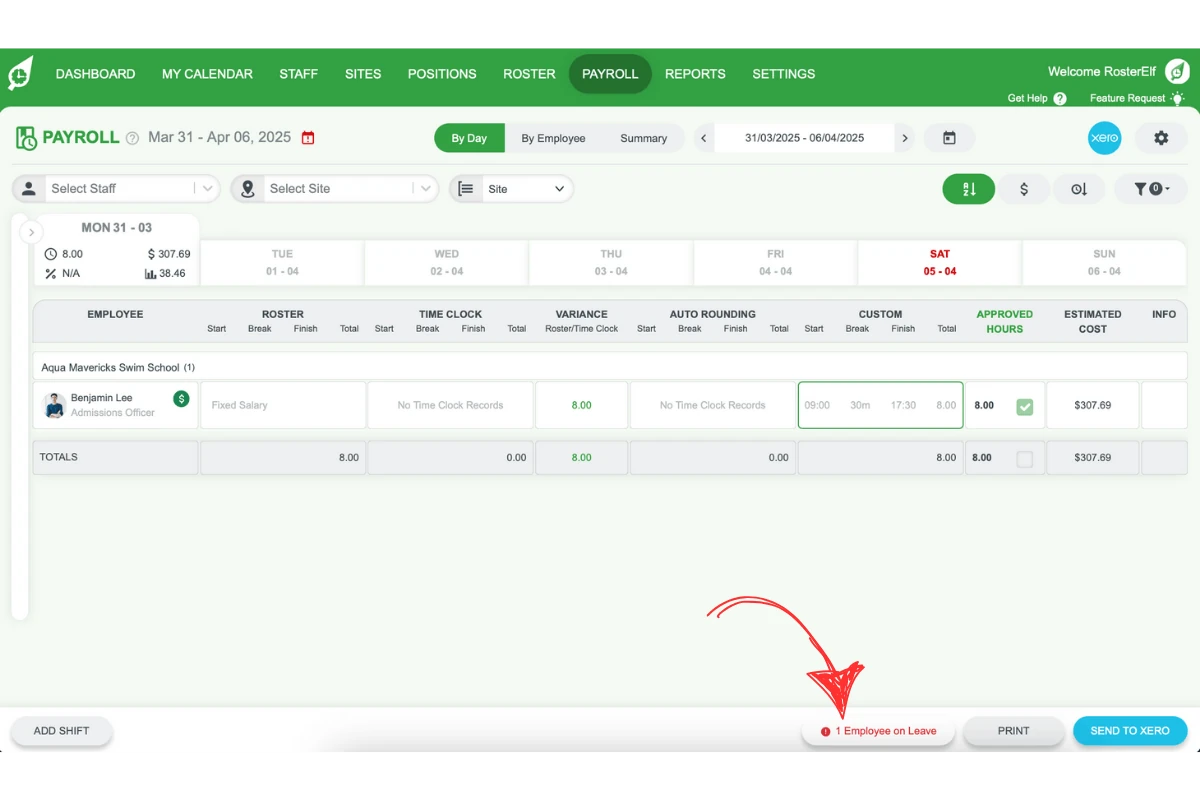
1.1.3 Click the warning to review leave details and proceed with processing.
2. Select leave type and enter details
Here, you’ll select the type of leave and input specific details, such as duration and units. Proper entry ensures correct processing of leave for each employee.
2.1 specify leave type and duration
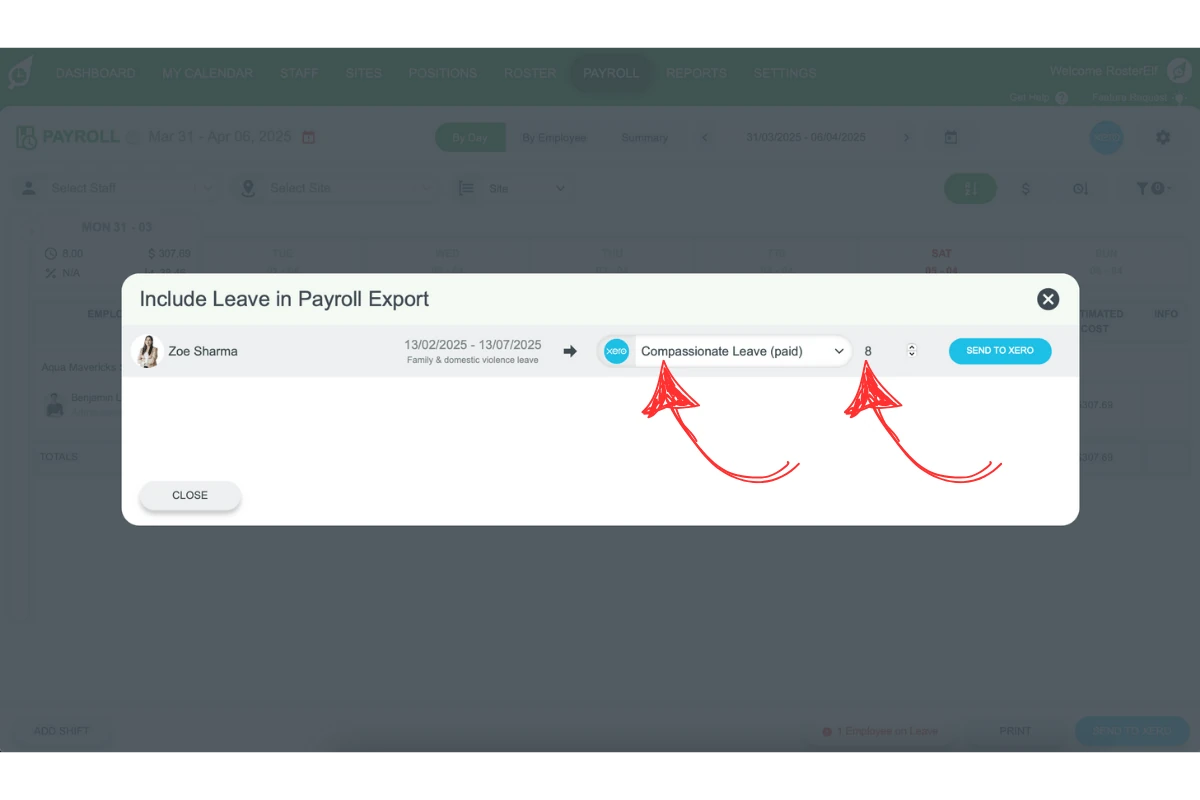
2.1.1 Choose the leave type (e.g., annual leave, sick leave).
2.1.2 Enter the units (hours) for the leave period.
3. Send leave details to Xero
This section guides you through finalising leave processing by sending leave details to Xero. This ensures accurate payroll records reflect employee leave.
3.1 send leave to Xero
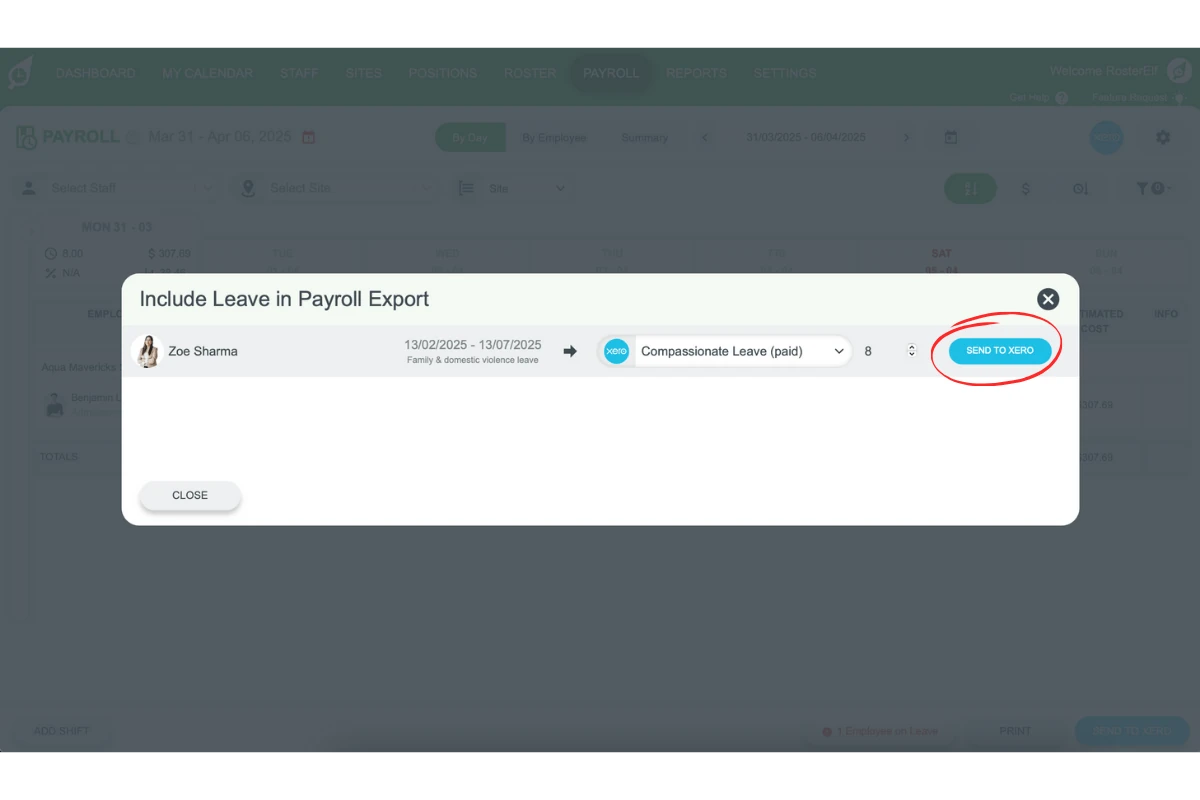
3.1.1 Click on Send to Xero to sync the leave entry with your Xero payroll records for accurate processing.
4. Alternative method for approving and sending leave to Xero
This section provides an alternative method to approve and send leave details to Xero from the main RosterElf dashboard.
4.1 approve leave from dashboard
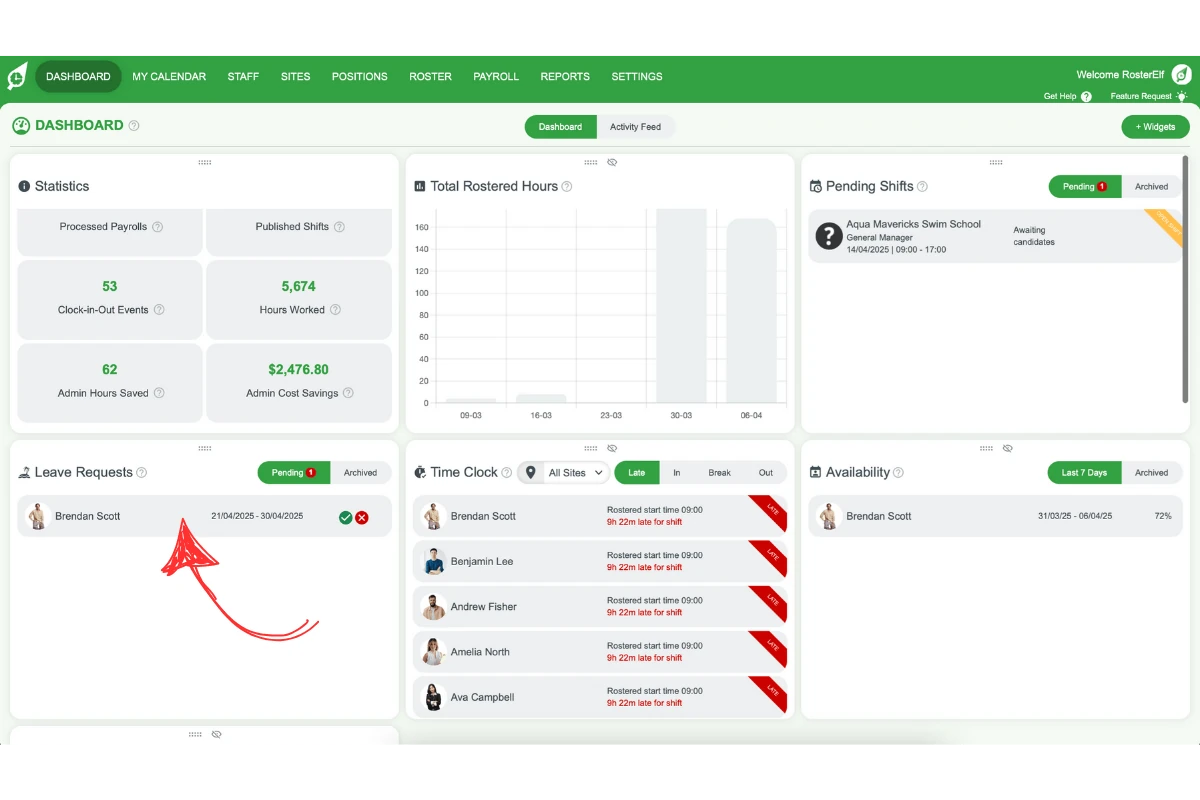
4.1.1 Go to the main screen of RosterElf (dashboard).
4.1.2 In the Leave Request Widget, select the leave to approve.
4.1.3 At the bottom right of the pop-up, click Approve. Ensure the type of leave is correct, and amend if necessary.
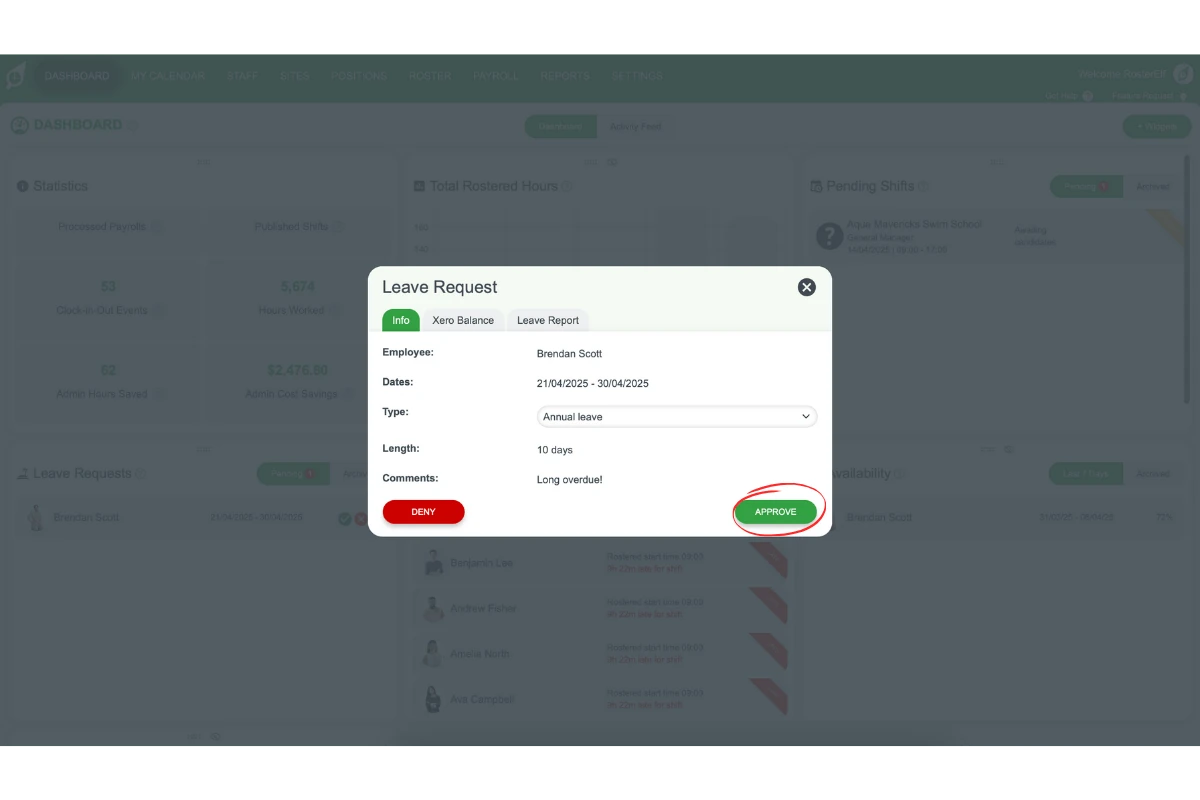
4.1.4 Follow the prompts to complete approval.
4.2 push approved leave to Xero
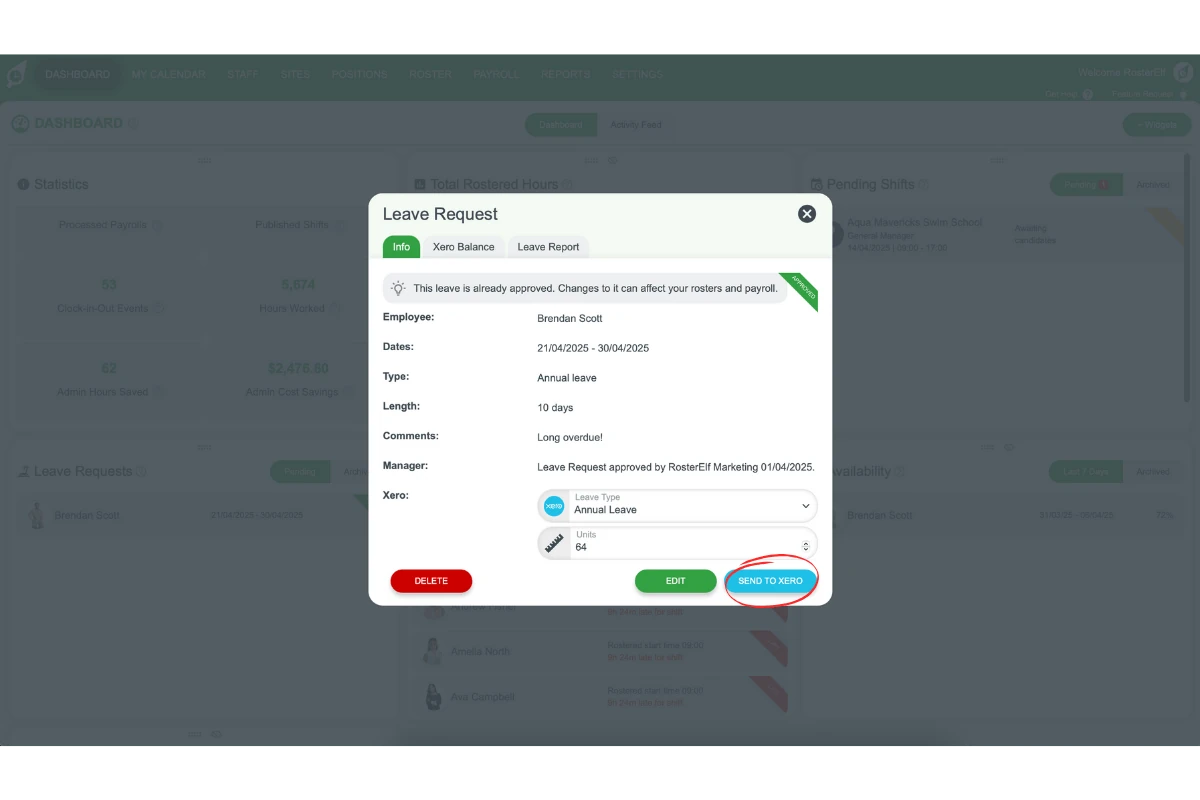
4.2.1 Select Leave Type for Xero and the number of units (e.g., hours).
4.2.2 Click on Send to Xero to finalise the process.
4.3 send archived leave to Xero
4.3.1 In the Leave Request Widget, select Archived.
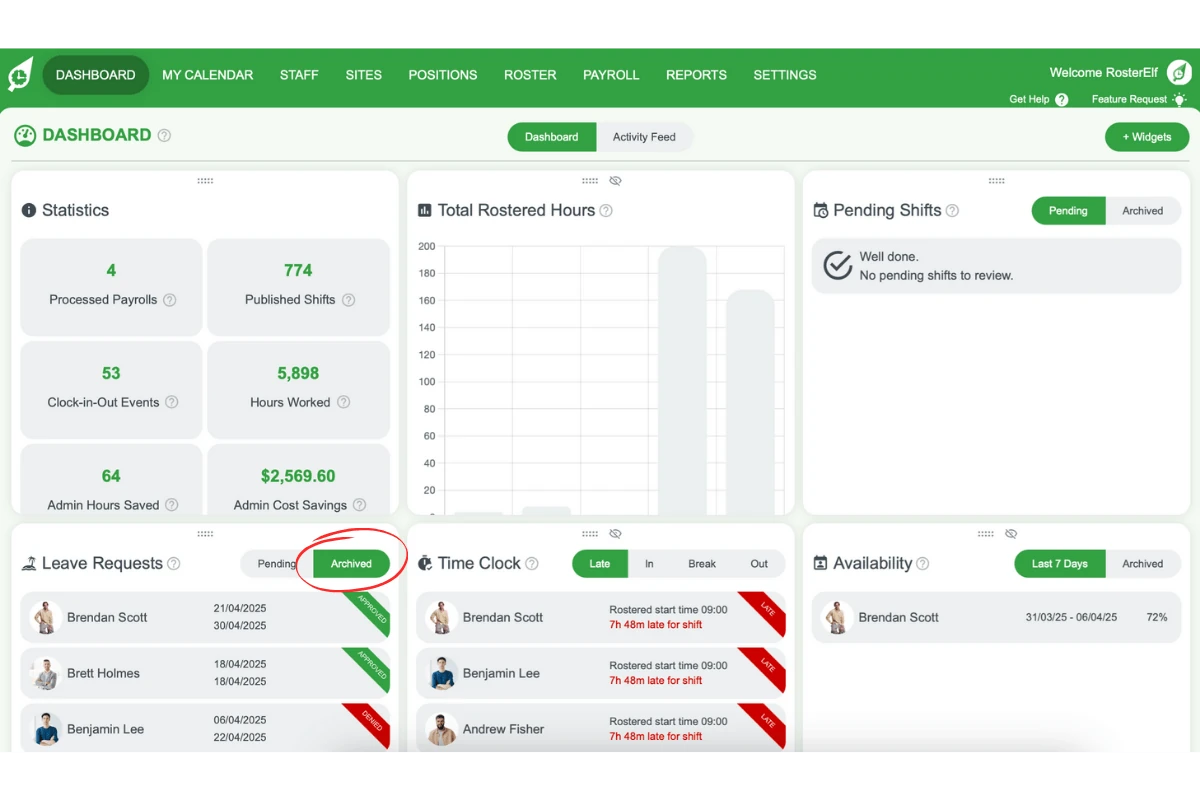
4.3.2 Choose the leave you want to send to Xero.
4.3.3 Select Leave Type for Xero and units (e.g., hours).
4.3.4 Click on Send to Xero to sync the archived leave entry.
5. Tips for accurate leave processing
This section offers best practices for enhancing accuracy when processing leave. Following these tips will help minimise errors and ensure reliable payroll records.
5.1 tips for leave entry
5.1.1 Verify all leave types and units to avoid payroll discrepancies.
5.1.2 Regularly check notifications to stay updated on staff leave statuses.
Frequently asked questions
1. What does a 'unit' mean when sending leave to Xero?
A unit is always an hour, not a day. When entering or reviewing leave duration for Xero, the number of units is the number of hours of leave being sent.
2. How do I send an employee's leave to Xero?
Open Payroll in RosterElf, choose the leave type and enter the units (hours), then click Send to Xero to sync the leave entry with your Xero payroll records. Learn more about Xero payroll integration.
3. Can I approve and send leave to Xero from the RosterElf dashboard?
Yes. On the main RosterElf dashboard, use the Leave Request Widget to select and approve a pending leave request, then select the Leave Type for Xero and the number of units (hours) before clicking Send to Xero.
4. How do I send an already-approved (archived) leave request to Xero?
In the Leave Request Widget, select Archived, choose the leave entry you want to send, select the Leave Type for Xero and units (hours), then click Send to Xero.
5. Why didn't my leave export to Xero correctly?
If you get an error when sending leave to Xero, see common Xero errors and solutions for the most frequent causes and fixes.