


Get started with the RosterElf Advisor Centre
This guide explains how to navigate the RosterElf Advisor Centre — the single login accredited RosterElf partners use to manage every client business from one dashboard. You’ll learn how to read your dashboard widgets, add and manage clients, view employees across accounts, run pay-runs, track your reward tier, grab marketing resources, get support, and set your practice details.
The Advisor Centre is available to accountants, bookkeepers and payroll bureaus accredited through the RosterElf partner program. If you’re not yet a partner, see our accountant resources or apply to join the partner program.
Note
The Advisor Centre is a separate, multi-client login for accredited RosterElf partners — it’s different from giving one accountant admin-level view access to a single business’s own RosterElf account. If that’s what you’re after, see Add accountant or bookkeeper access to RosterElf.
1. Dashboard
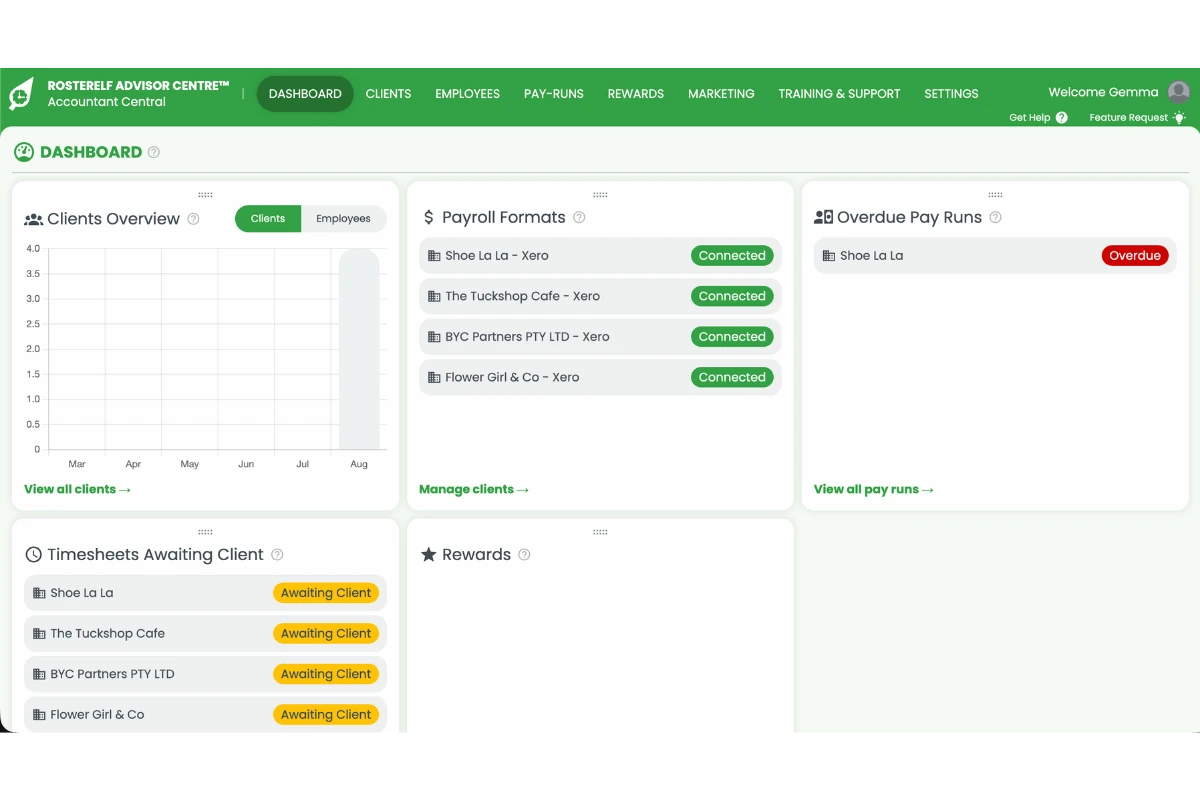
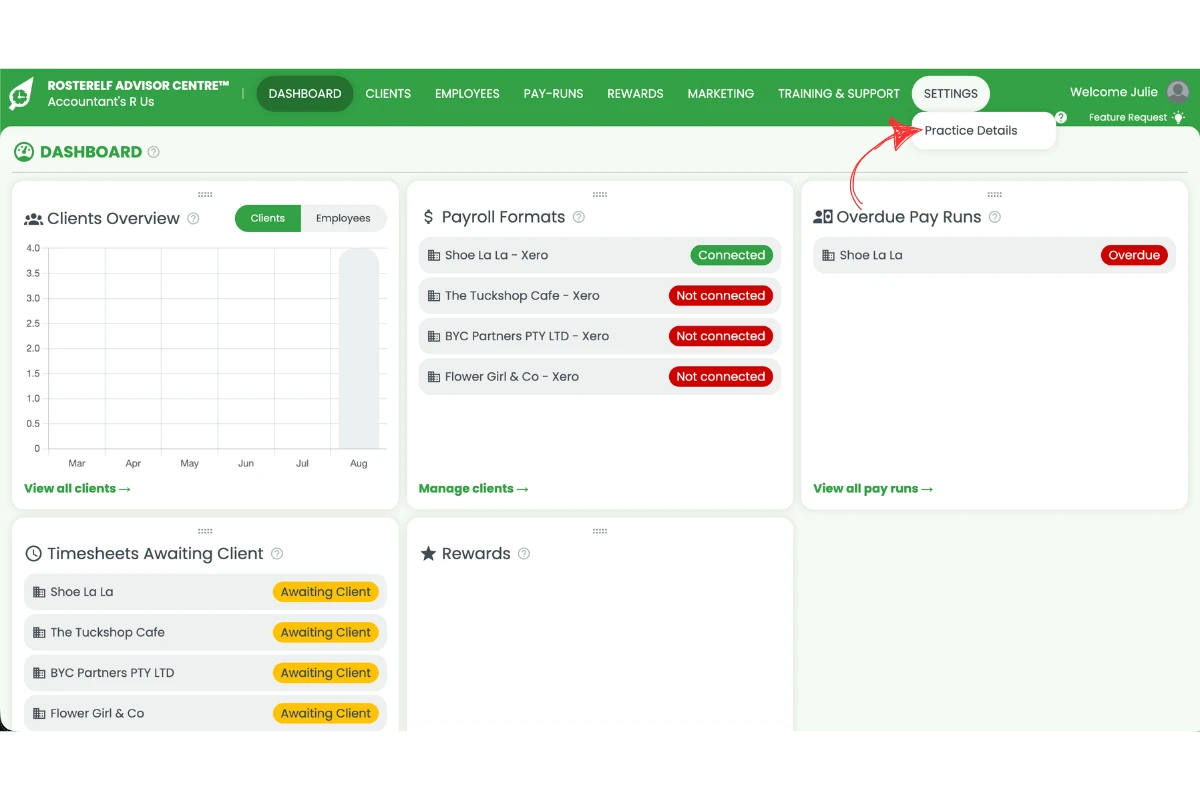
The Dashboard is the first screen you see when you log in to the Advisor Centre. It brings together a snapshot of every client you manage — RosterElf and Xero connection status, overdue pay runs, timesheets awaiting client approval, and your current reward tier — so you can see what needs attention without opening each client individually.
1.1 Moving dashboard widgets
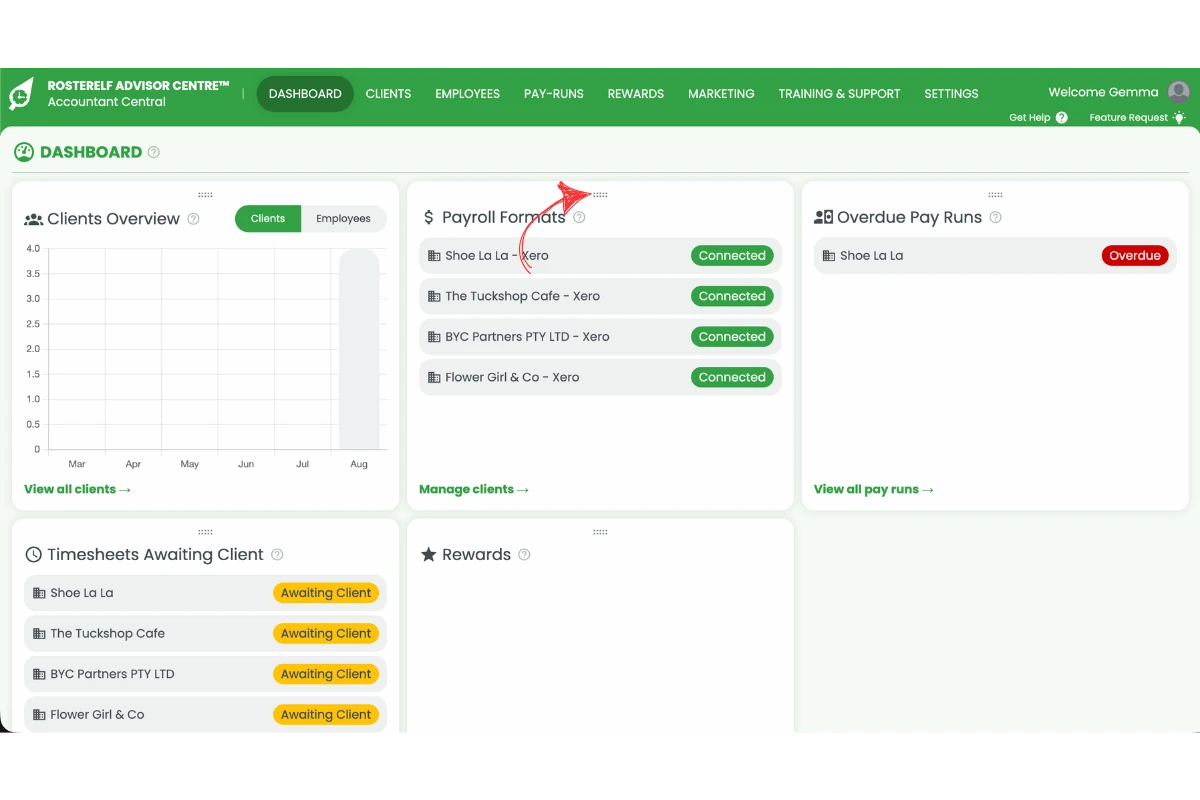
1.1.1 Click and hold the drag handle at the top of any widget, then drop it wherever you’d like it to sit on your dashboard.
1.2 Jumping to a tab from a widget
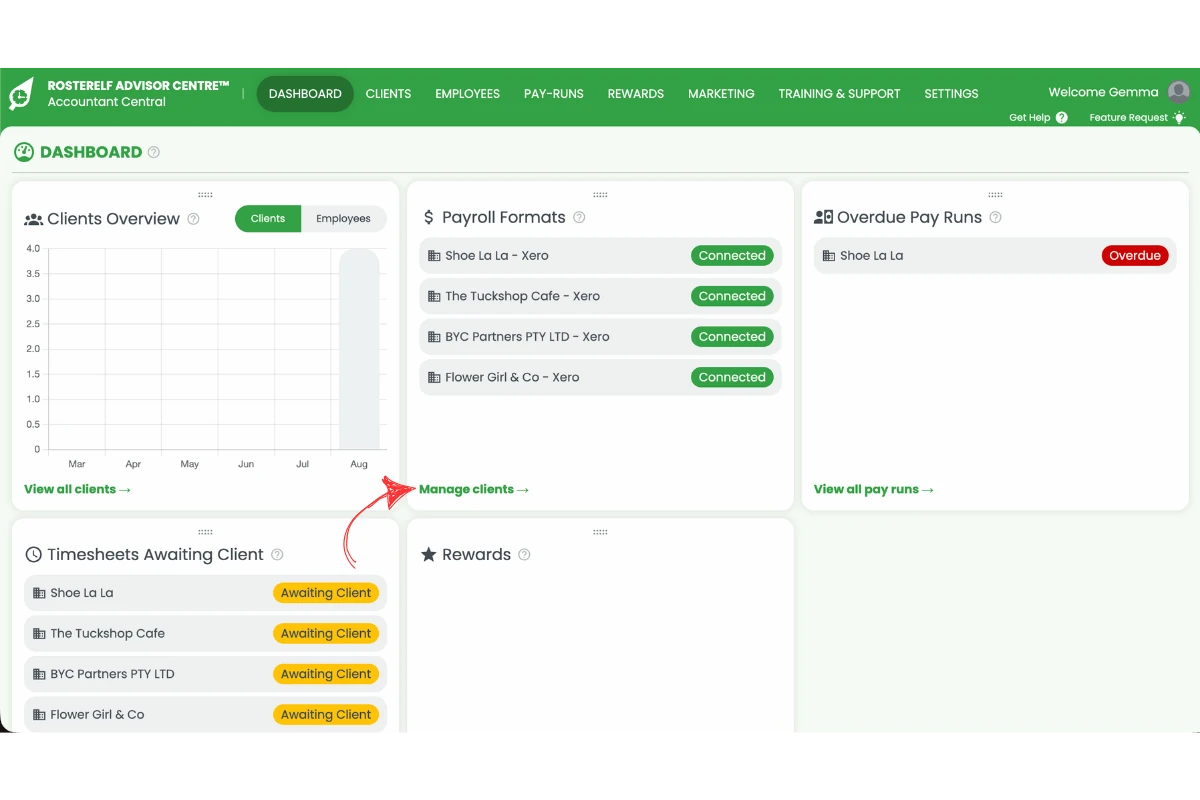
1.2.1 Click a link inside a widget, such as Manage clients, to jump straight to the matching tab.
2. Clients
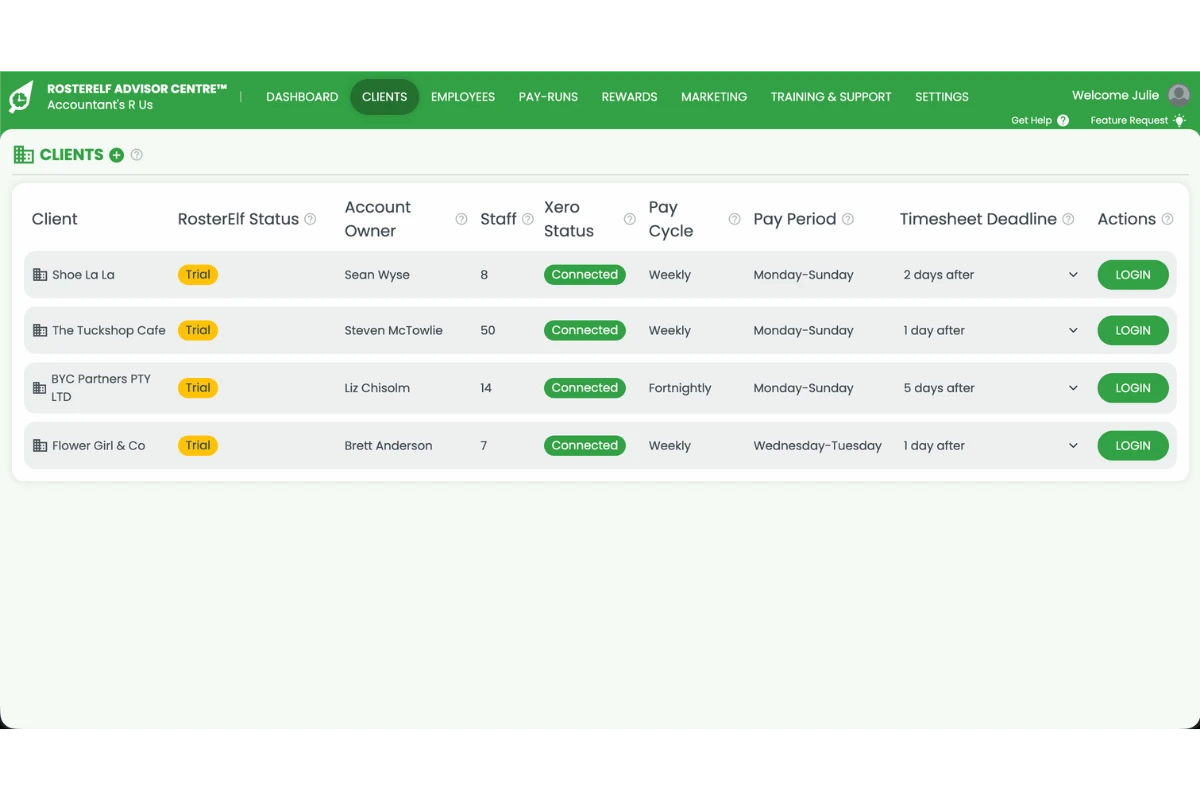
The Clients tab lists every client business connected to your Advisor Centre login, along with their RosterElf status, staff count, pay cycle and timesheet deadline. From here you can invite new clients, set how many days after a pay period their timesheets are due, and log straight into any client’s account.
2.1 Add a client
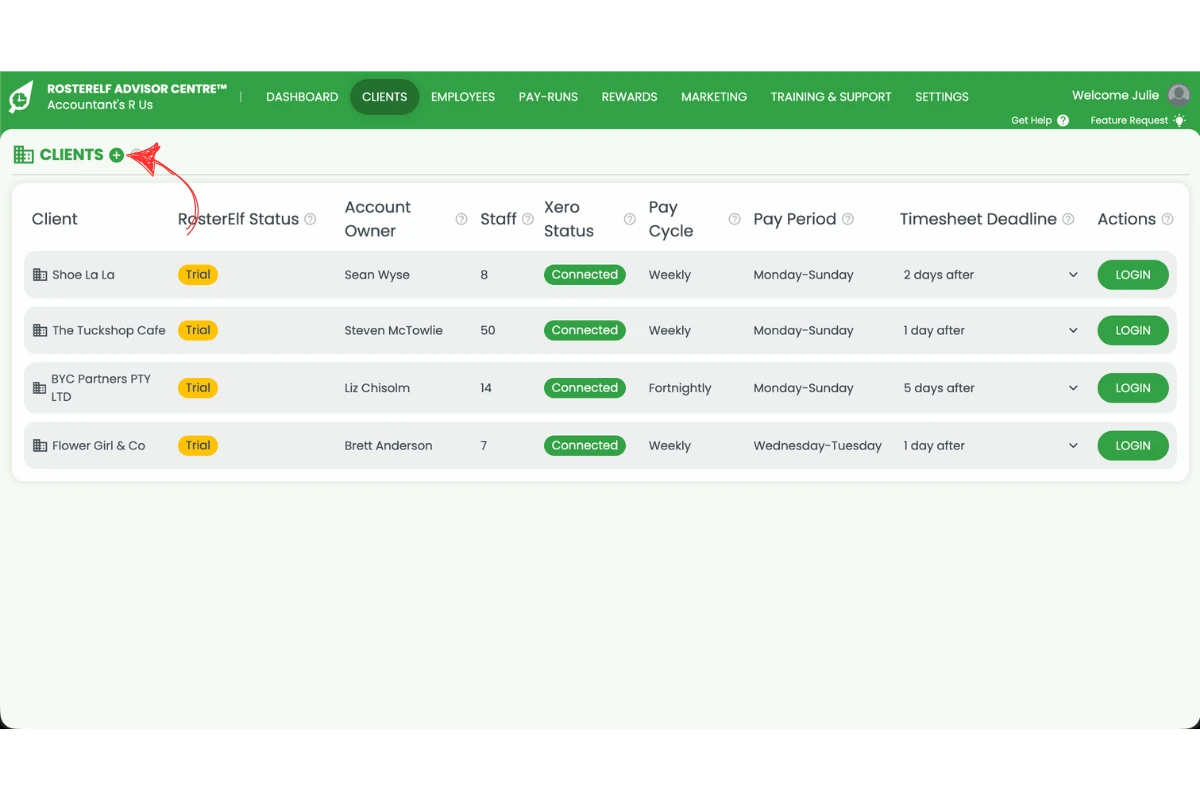
2.1.1 Click the + icon next to Clients.
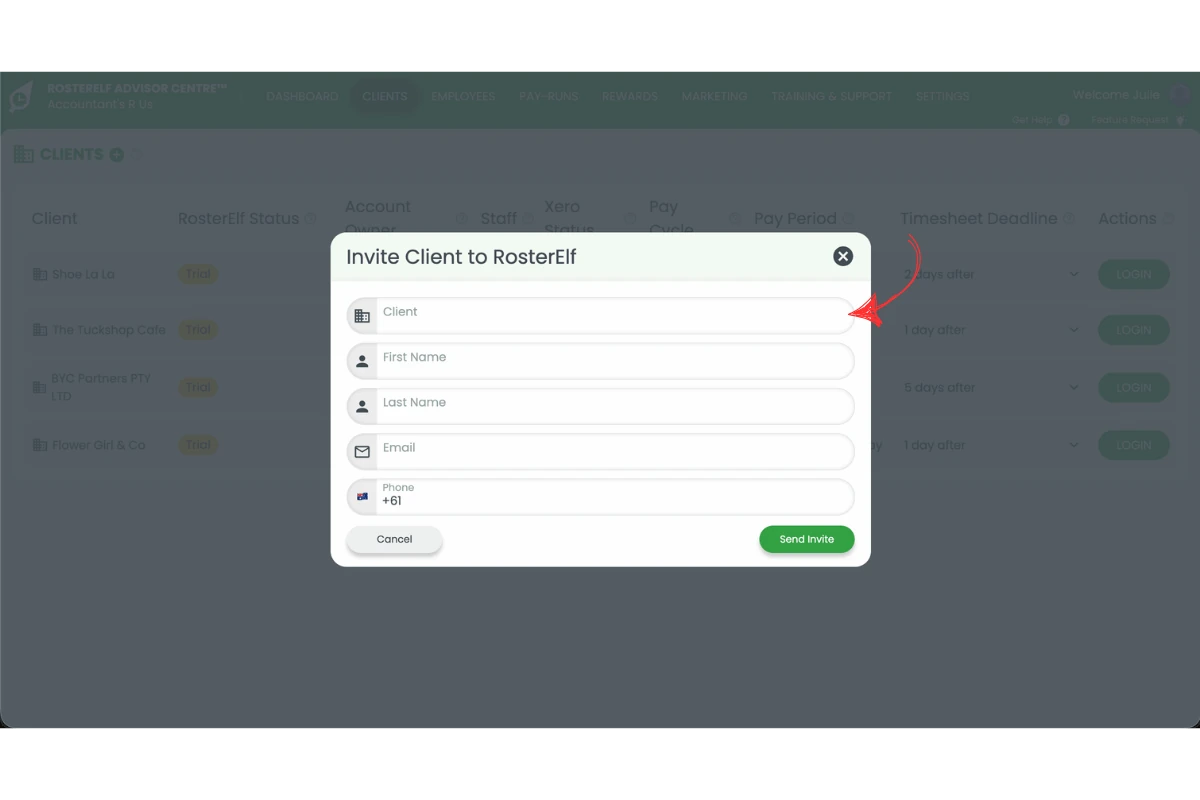
2.1.2 Enter the client’s details, including their business name and contact information.
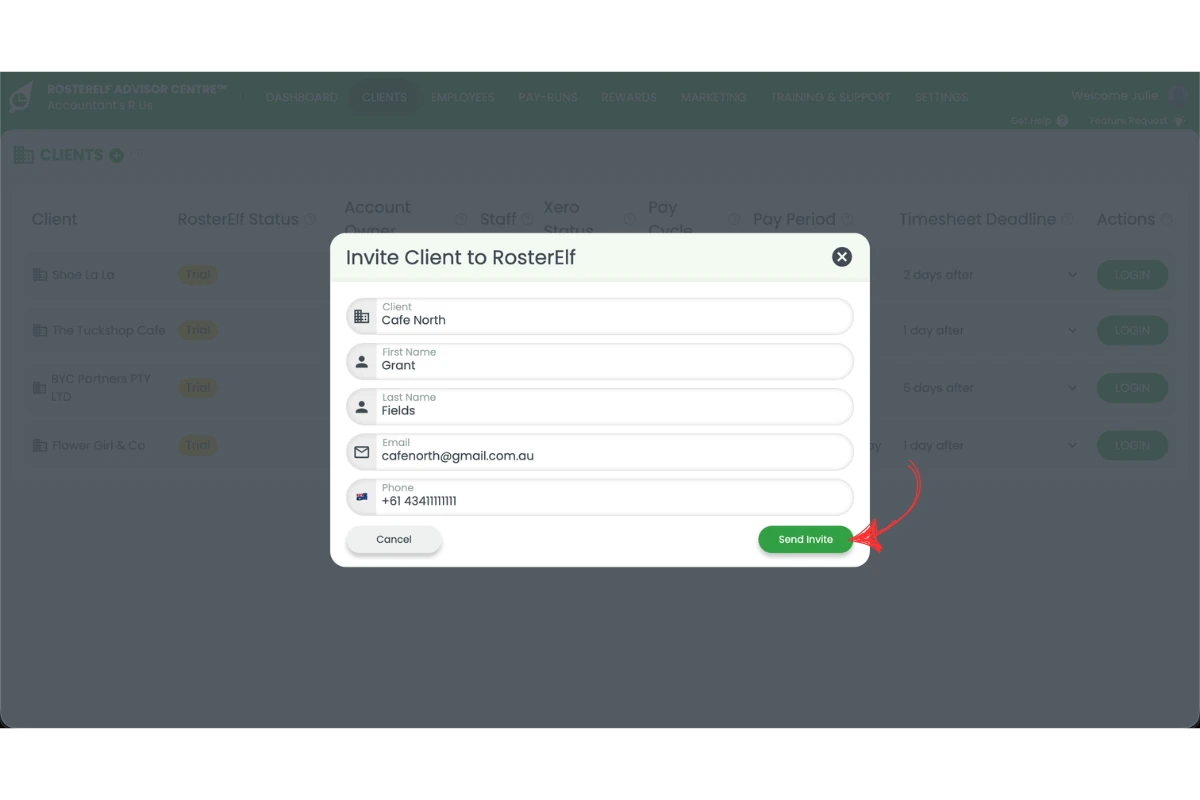
2.1.3 Click Send Invite. The client receives an email invitation to connect their business to your Advisor Centre login.
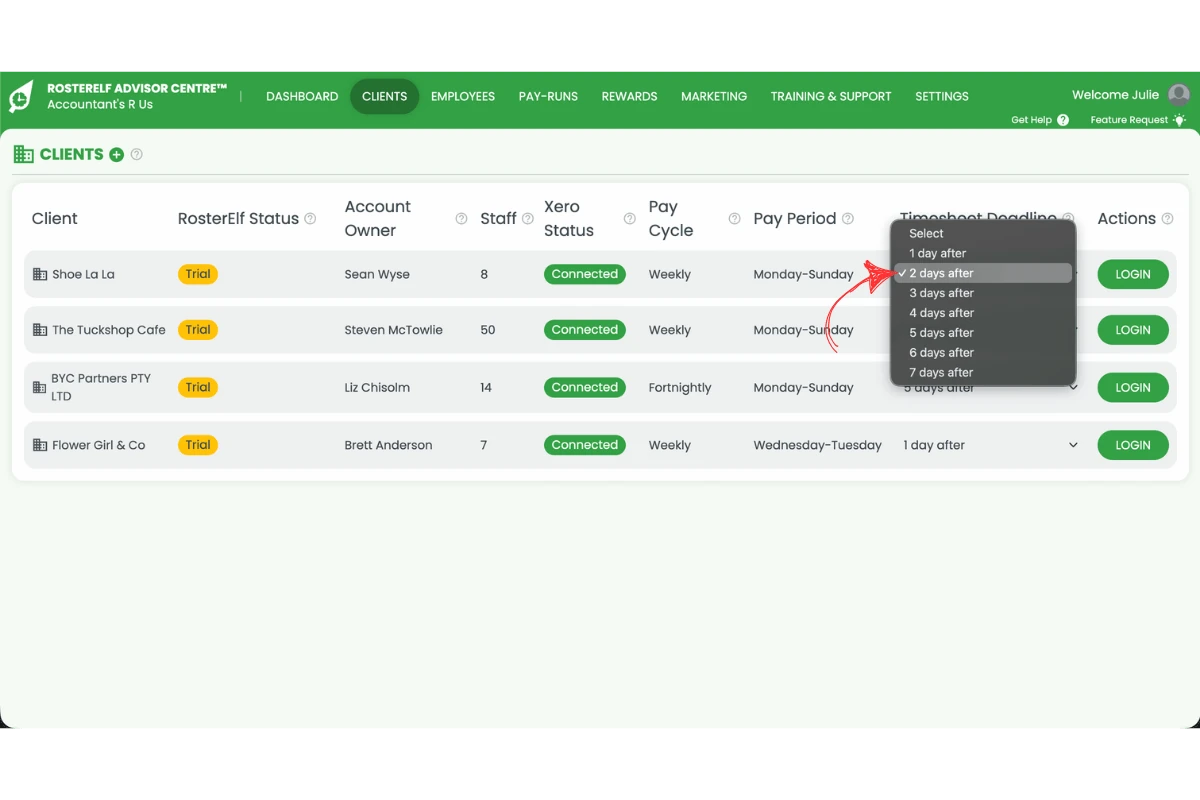
2.2 Set a client's timesheet deadline
2.2.1 Click the timesheet deadline dropdown on that client’s row.
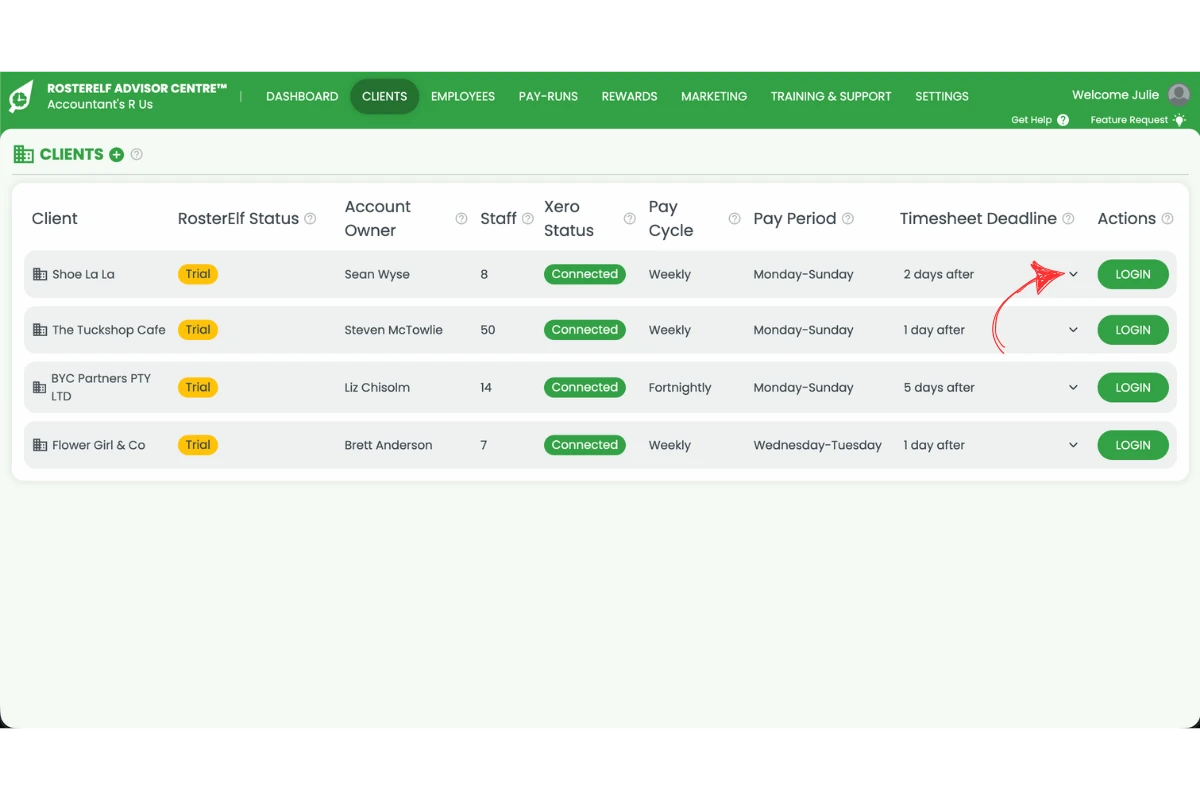
2.2.2 Select how many days after the pay period ends the client’s timesheets are due.
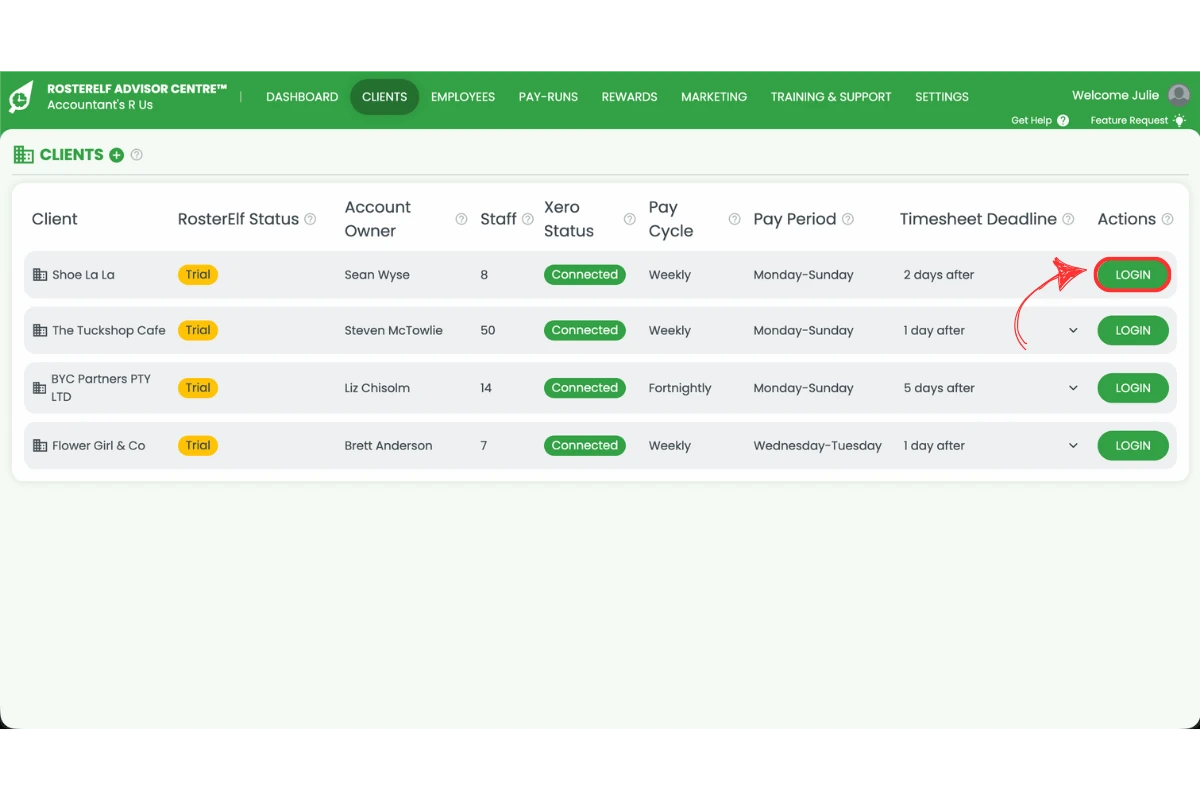
2.3 Log into a client's account
2.3.1 Click Login on the client’s row to open their RosterElf account directly, without needing separate credentials.
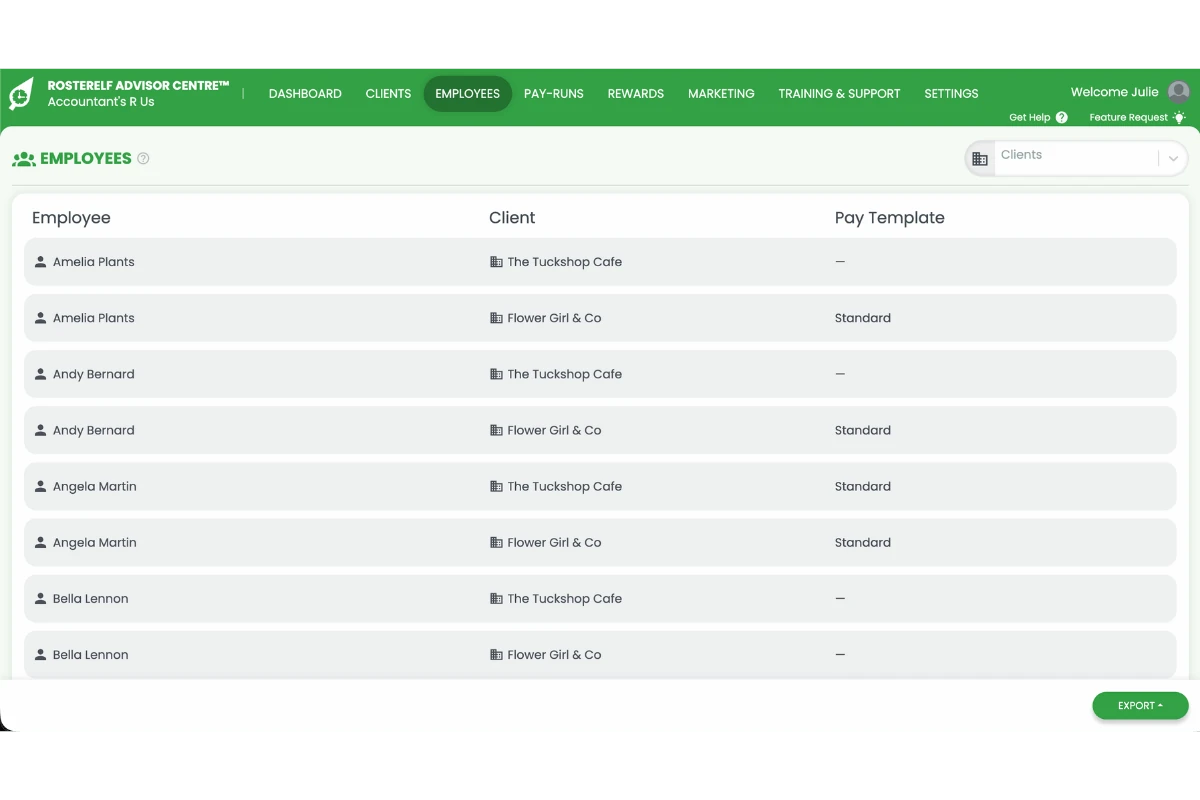
3. Employees
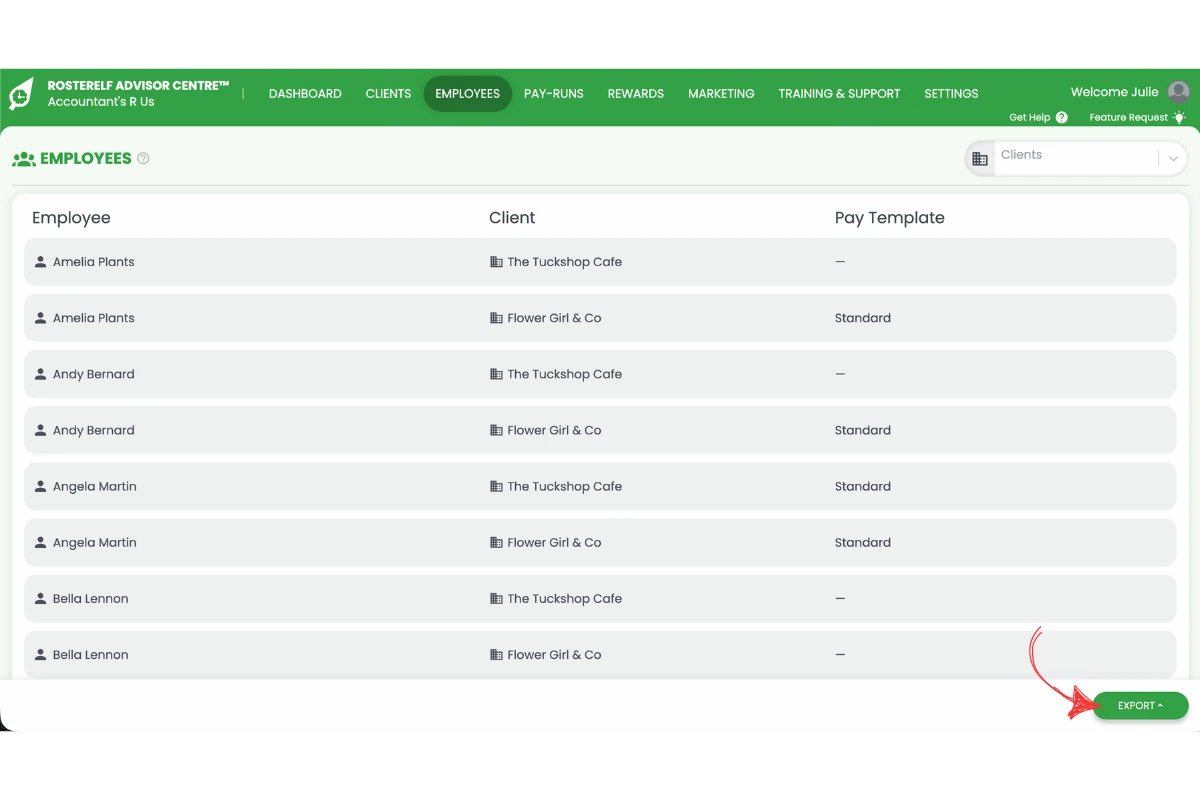
The Employees tab shows every staff member across the clients you manage, along with their client business and pay template — helpful for reviewing award rules or exporting a combined list.
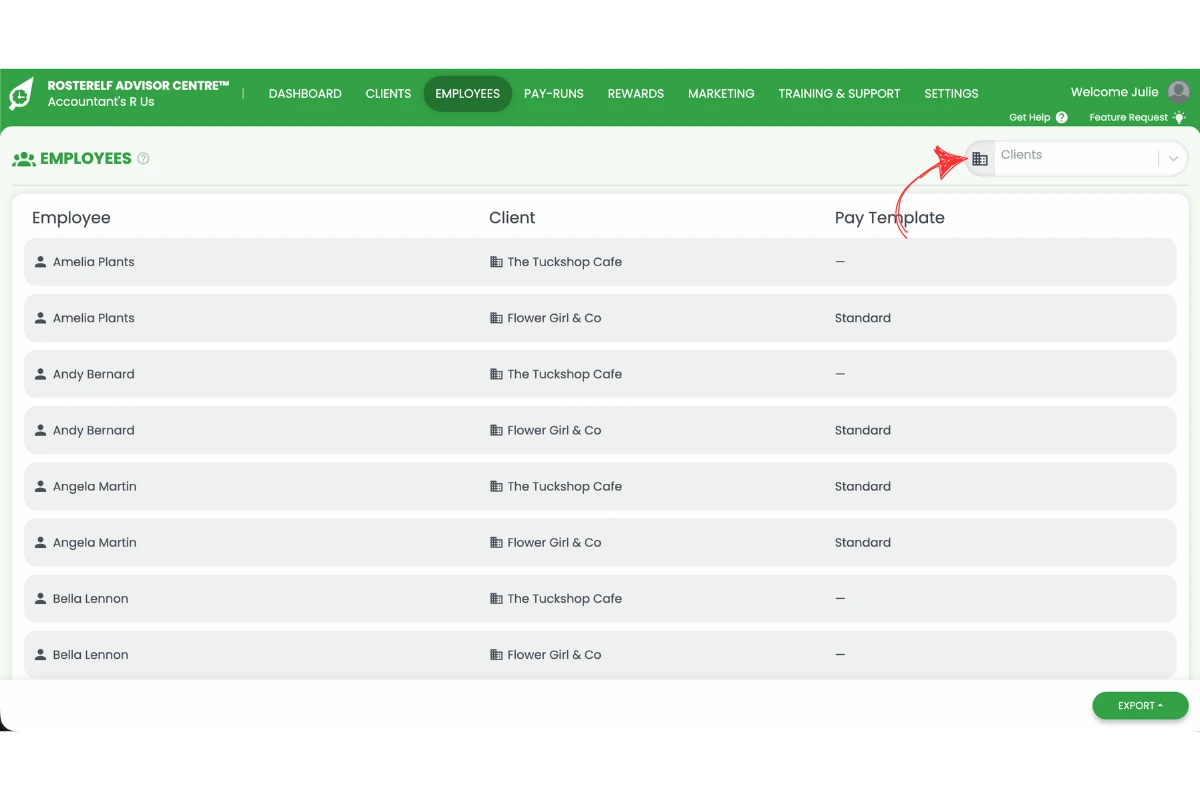
3.1 Toggle between clients
3.1.1 Select a client from the Clients dropdown to filter the list to that business, or leave it on all clients to see everyone.
3.2 Export employee data
3.2.1 Click Export to download the employee list for the clients currently shown.
4. Pay-runs
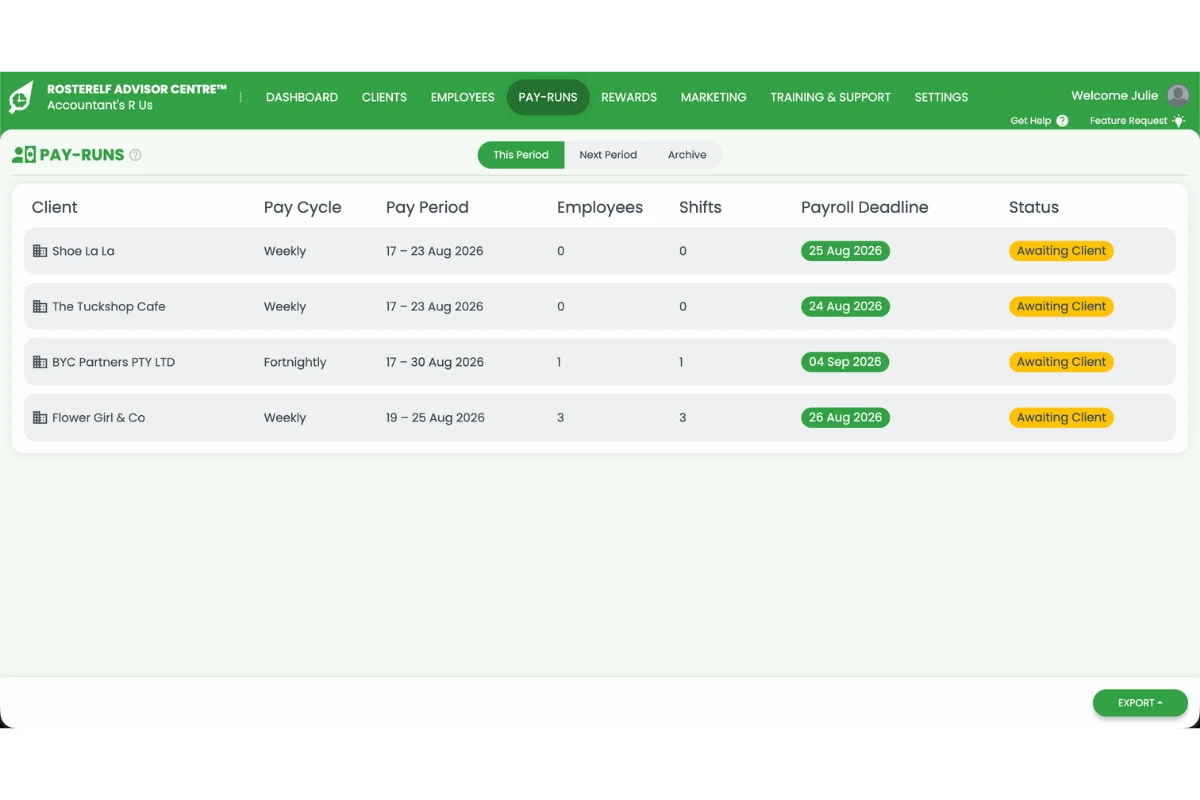
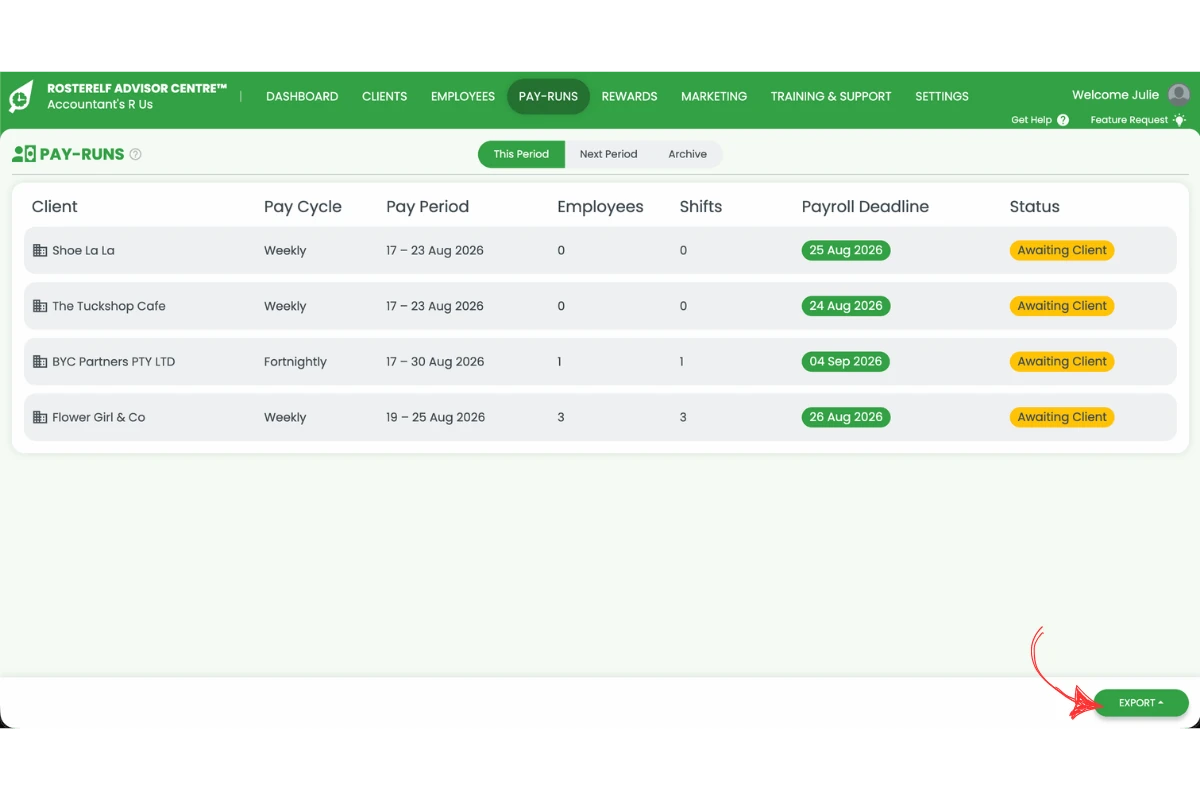
The Pay-runs tab tracks payroll for every client you manage, with separate views for the current period, the next period and past pay runs, plus the status and deadline for each.
4.1 Move to the next pay period
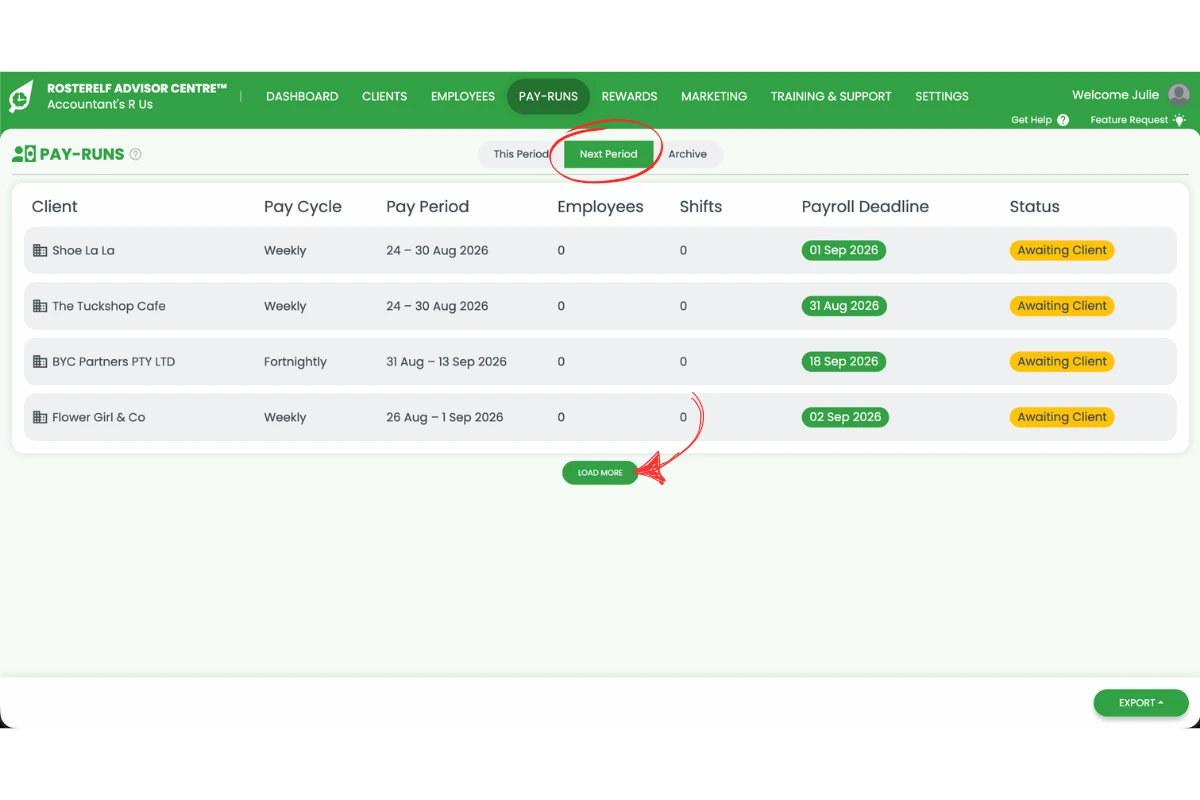
4.1.1 Click Next Period to see upcoming pay runs, then click Load More if there are more clients than fit on the screen.
4.2 View archived pay-runs
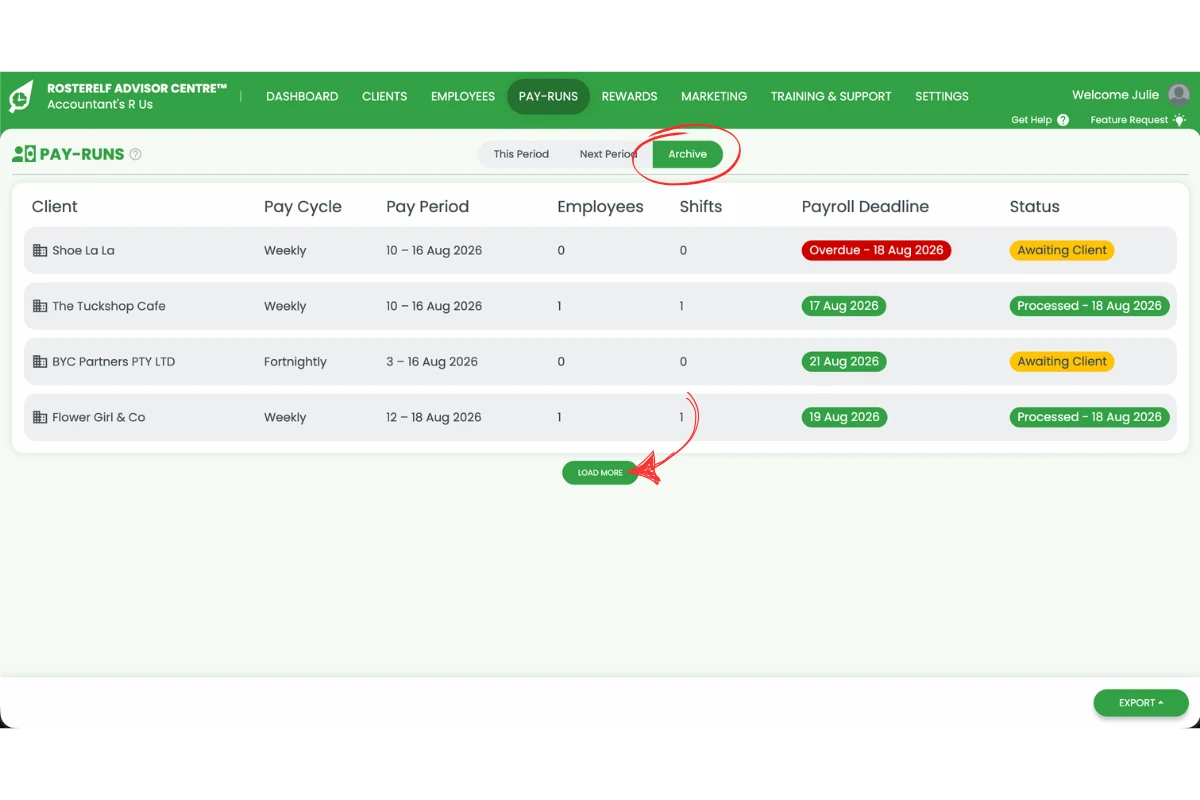
4.2.1 Click Archive to see past pay runs and their status, then click Load More to see older records.
4.3 Export pay-run data
4.3.1 Click Export to download pay-run data for the period you’re viewing.
5. Rewards
The Rewards tab shows your current tier, total active employees managed and this month’s commission in real time. Your tier is based on the total number of active employees you manage across every client — the more employees under management, the higher your per-employee rate.
5.1 Toggle to your reward tier
5.1.1 Click your current tier badge to see all five tiers and what’s needed to reach the next one.
| Tier | Active employees managed | Signup bonus | Commission per employee |
|---|---|---|---|
| Bronze | 100–499 | $100 | $1.00 / employee |
| Silver | 500–999 | $100 | $1.25 / employee |
| Gold | 1,000–2,499 | $100 | $1.50 / employee |
| Platinum | 2,500–4,999 | $100 | $1.75 / employee |
| Diamond | 5,000+ | $100 | $2.00 / employee |
The signup bonus above is a one-off payment per new client business — reward rates are per active employee, per month. See the full partner program reward structure.
6. Marketing
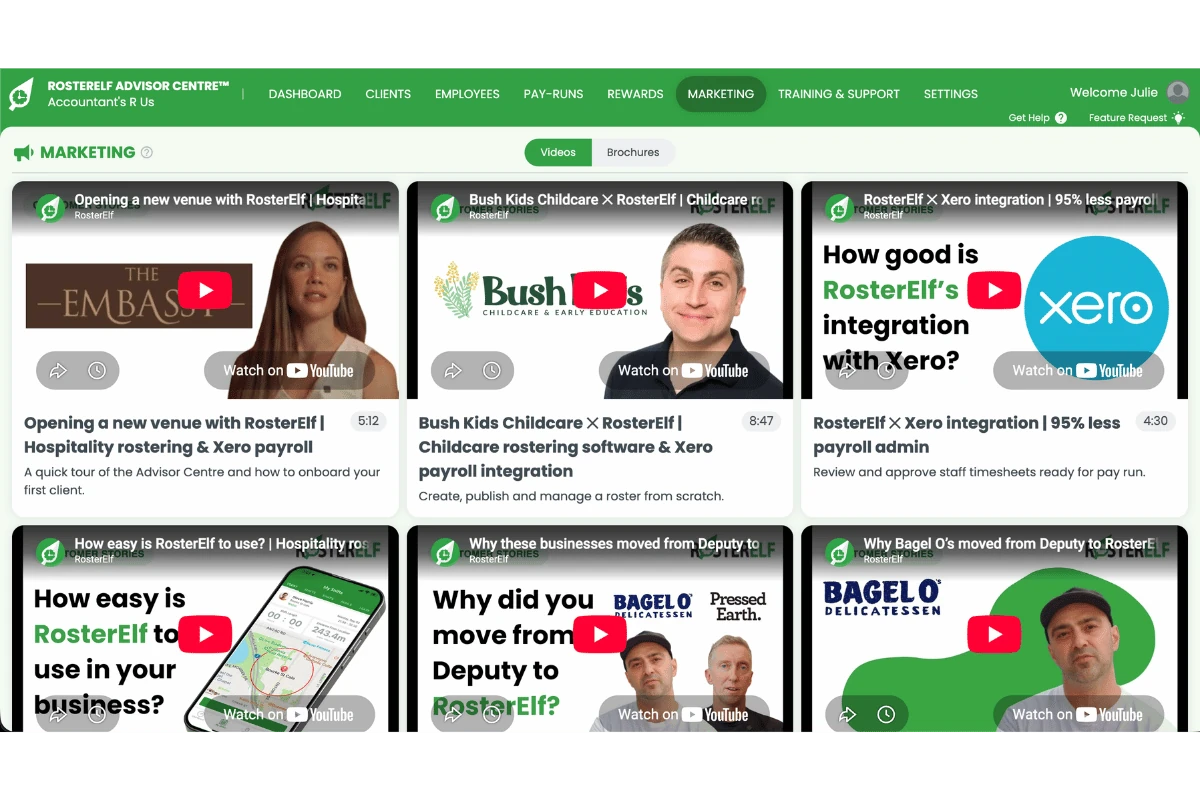
The Marketing tab gives you ready-made resources to help win and onboard clients, including RosterElf overview videos and downloadable brochures.
6.1 Switch to brochures
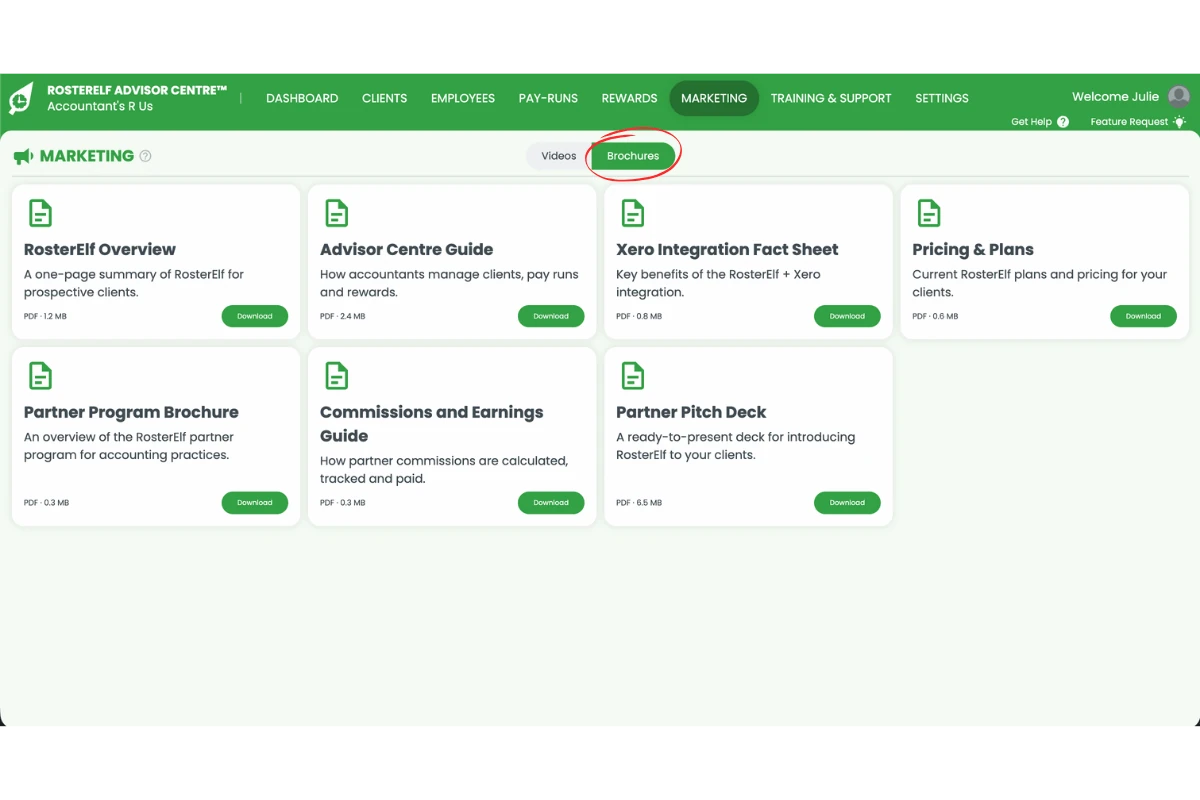
6.1.1 Click Brochures to see downloadable PDF resources, including pricing sheets and Xero fact sheets.
7. Training and support
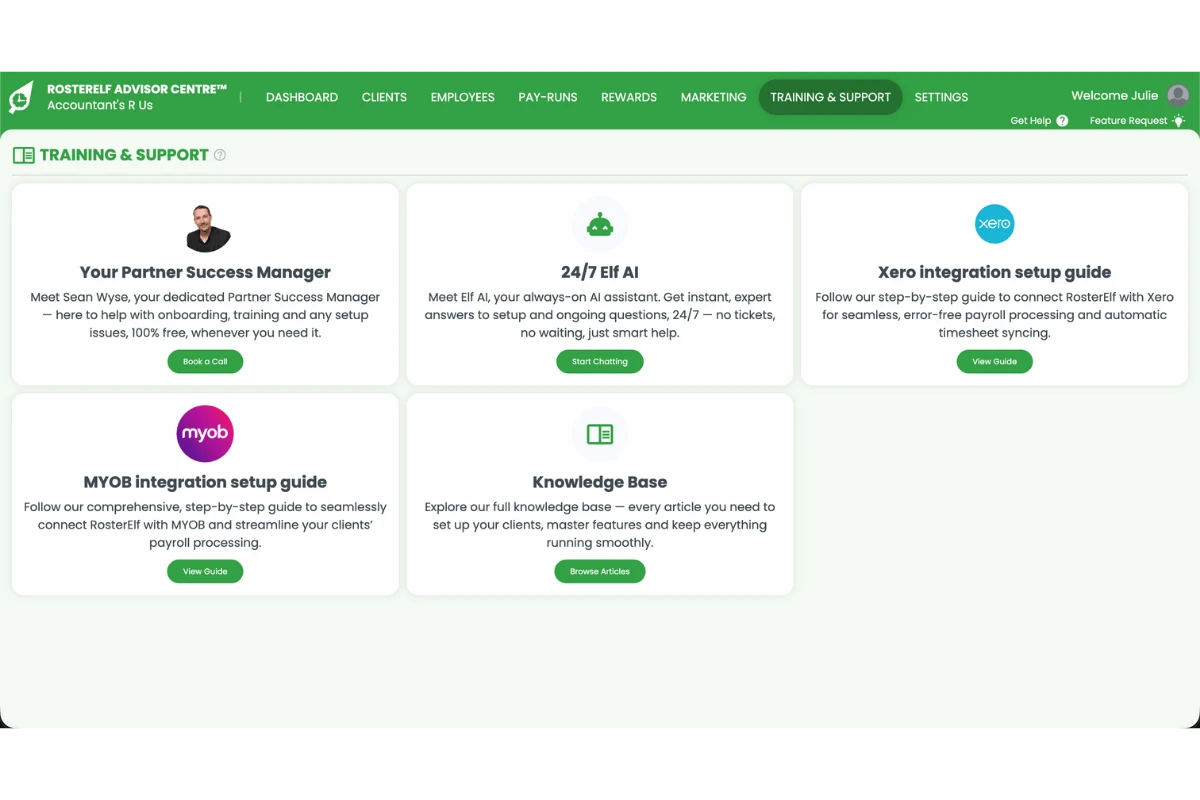
The Training and support tab is where you’ll find help using the Advisor Centre and RosterElf itself — your dedicated Partner Success Manager, the 24/7 Elf AI assistant, step-by-step Xero and MYOB integration guides, and a direct link to the full RosterElf Knowledge Base.
8. Settings
Use Settings to manage your own practice’s details within the Advisor Centre.
8.1 Set your practice details
8.1.1 Click Settings, then select Practice Details from the menu to update your practice’s name and contact information.
For more on becoming an accredited partner, see the RosterElf partner program and our accountant resources. Accredited partners are also listed in our find an accountant directory. Learn more about what an accountant or bookkeeper does on our glossary.
Frequently asked questions
1. What is the RosterElf Advisor Centre?
The Advisor Centre is a single, secure login that lets an accredited RosterElf partner — an accountant, bookkeeper or payroll bureau — manage rostering, timesheets, pay runs and Xero connections for every client business from one dashboard. Learn more about joining on the partner program page.
2. How do I add a new client in the Advisor Centre?
Go to the Clients tab and click the + icon, then enter the client’s details and click Send Invite. The client receives an email to connect their business to your Advisor Centre login.
3. How do I set a client's timesheet deadline?
On the Clients tab, click the timesheet deadline dropdown on that client’s row and select how many days after the pay period ends their timesheets are due.
4. How do I export employee or pay-run data from the Advisor Centre?
Use the Export button on the Employees tab or the Pay-runs tab. On Pay-runs, switch between This Period, Next Period and Archive first to export the data you need.
5. How do reward tiers work in the Advisor Centre?
Your tier is set by the total active employees you manage across all your clients — from Bronze up to Diamond, with your per-employee commission rate rising at each tier, plus a signup bonus for every new client business. See the reward tiers table in the Rewards section above for the current bands and rates, or check the Rewards tab in the Advisor Centre to see your own tier and commission.
6. Is the Advisor Centre different from adding an accountant to my RosterElf account?
Yes. The Advisor Centre is the multi-client portal accredited RosterElf partners use to manage every client business from one login. If you’re a business owner who wants to give your own accountant or bookkeeper free, admin-level view access to your single RosterElf account instead, see Add accountant or bookkeeper access to RosterElf.