


Overview of permissions in RosterElf
This article explains the different permission levels in RosterElf and how to manage them. It outlines the roles of the account Owner, Admins, Managers, and Assistant Managers, detailing their access across the platform. By understanding the permissions structure, you can assign roles to users based on their responsibilities within the organisation. This guide will help you manage user access levels, ensuring staff have the right permissions to perform their roles while maintaining security and control over your RosterElf account.
1. Basic staff permissions
When adding a new user to RosterElf, they begin with basic staff permissions. These include access to view shifts, receive notifications, and update their availability and personal details. This section explains the starting point for all users and the actions they can perform with basic access.
| Functionality | Admin | Manager | Assistant Manager | Staff |
|---|---|---|---|---|
| Dashboard | ||||
| Trends Data | - | - | - | |
| Pending Shifts | - | |||
| Leave Requests | - | |||
| Availability | - | |||
| Live Time Clock | - | |||
| My Calendar | ||||
| View Confirm Shifts | ||||
| Nominate for Open Shifts | ||||
| Request and Nominate for Shift Swaps | ||||
| Manage My Availability | ||||
| Request Leave | ||||
| Staff | ||||
| Add/Delete | - | |||
| Update Info | - | - | ||
| Update Payroll | - | - | - | |
| Update and view Standard Availability | - | |||
| Add and manage Leave | - | |||
| View and Manage Documents | - | - | - | |
| Call Staff from Smartphone App | - | |||
| Text Staff from Smartphone App | - | |||
| Sites | ||||
| Add/Delete | - | - | - | |
| Update Info | - | - | ||
| Update Manager / Assistant Manager Permissions | - | - | - | |
| View Manager / Assistant Manager Permissions | - | - | ||
| Manage Time & Attendance | - | - | ||
| Positions | ||||
| Add/Delete | - | - | ||
| Update Info | - | - | ||
| Add/Remove Staff | - | - | ||
| Roster | ||||
| Add/Edit Shifts | - | |||
| Add/Edit Shifts in the Past | - | |||
| Publish/Delete Rosters | - | |||
| Save Roster Templates | - | |||
| Copy Rosters | - | |||
| Upload a Roster Template | - | |||
| See Staff Wage Rates for Budgeting | - | - | ||
| Payroll | ||||
| Select approved payroll hours (Rostered, Time Clock, Auto Rounding, Custom) | - | |||
| Tick/Untick Shifts from Payroll | - | |||
| Add Payroll Notes | - | |||
| Add Shifts to Payroll | - | |||
| Save Payroll | - | |||
| Process payroll (final pay run) | - | - | - | |
| View Staff Labour Costs | - | - | ||
| Reports | ||||
| View and Use | - | - | - | |
| Settings | ||||
| View and Update | - | - | - | |
| My Settings | ||||
| My Profile - View my own | ||||
| Account Info | - | - | - | |
| MFA (NOTE: Xero customers must use MFA) |
| |||
| HR Hub | ||||
| Enable HR Hub | Owner only | - | - | - |
| Manage employment contracts | - | - | - | |
| Edit documents (contracts/policies) | - | - | - | |
| Manage certificates & permits (own profile) |
| |||
| Manage certificates & permits (other staff) | - | - | - | |
| Manage policies & procedures |
| |||
| View all staff information in HR Hub (other staff) | - | - | - | |
| Complete onboarding in My HR Hub |
| |||
| Workwise AI | ||||
| Enable Workwise AI | - | - | - | |
| Workwise AI | - | |||
| Chat | ||||
| Activate Chat | - | - | - | |
| Activate Direct Messages | - | - | - | |
| Create Channel | - | - | - | |
| Edit Channel | - | - | - | |
| Add staff to channel | - | - | - | |
| Remove staff from channel | - | - | - | |
| Delete Channel | - | - | - | |
| Mute Channel |
| |||
| Write message in a channel |
| |||
| Delete message |
| |||
| React to a channel |
| |||
1.1 understanding basic staff access
1.1.1 New users start with regular Staff permissions.
1.1.2 They can view shifts and receive notifications.
1.1.3 Staff can update personal information, such as email and phone number.
1.1.4 Basic staff cannot manage or alter any settings beyond their profile.
2. Elevated permission levels
Above basic Staff access, RosterElf has an account Owner plus three elevated permission levels: Admin, Manager, and Assistant Manager. These levels provide greater control and access to various parts of the platform. This section describes each level, their distinctions, and how they apply to different parts of your account.
2.1 the account owner
2.1.1 Every RosterElf account has exactly one Owner — typically whoever created the account or is the primary billing contact.
2.1.2 The Owner has every operational permission an Admin has (staff, sites, payroll, settings), plus two capabilities no Admin has.
2.1.3 Only the Owner can access and manage the account's billing and subscription details.
2.1.4 Only the Owner can enable HR Hub for the account — Admins cannot turn it on, though once enabled, Admins have full access to it (see the HR Hub row below).
2.2 admin permissions
2.2.1 Admins have access across the entire account.
2.2.2 They can manage users, settings, and account-wide configurations.
2.2.3 Admin permissions apply uniformly to all sites within the account.
2.3 manager and assistant manager permissions
2.3.1 Managers and Assistant Managers have access limited to specific sites.
2.3.2 A user can be assigned these roles at one or more selected sites.
2.3.3 Managers can view financial data related to rostering, unlike Assistant Managers.
2.3.4 If a user is not assigned as a Manager or Assistant Manager for a site, they hold basic Staff permissions there.
2.3.5 Managers and Assistant Managers can only view and manage their own HR Hub records (certificates, permits, onboarding). Viewing or managing another staff member's HR Hub records is Admin-only.
3. Managing staff permissions
Managing permissions effectively ensures that users have appropriate access to perform their duties. RosterElf provides multiple ways to manage permissions, depending on your needs. This section outlines how to assign and adjust permissions through the Sites tab, Settings dropdown, and Staff tab.
3.1 assign managers via sites tab
3.1.1 Go to the Sites tab to manage Manager and Assistant Manager roles.
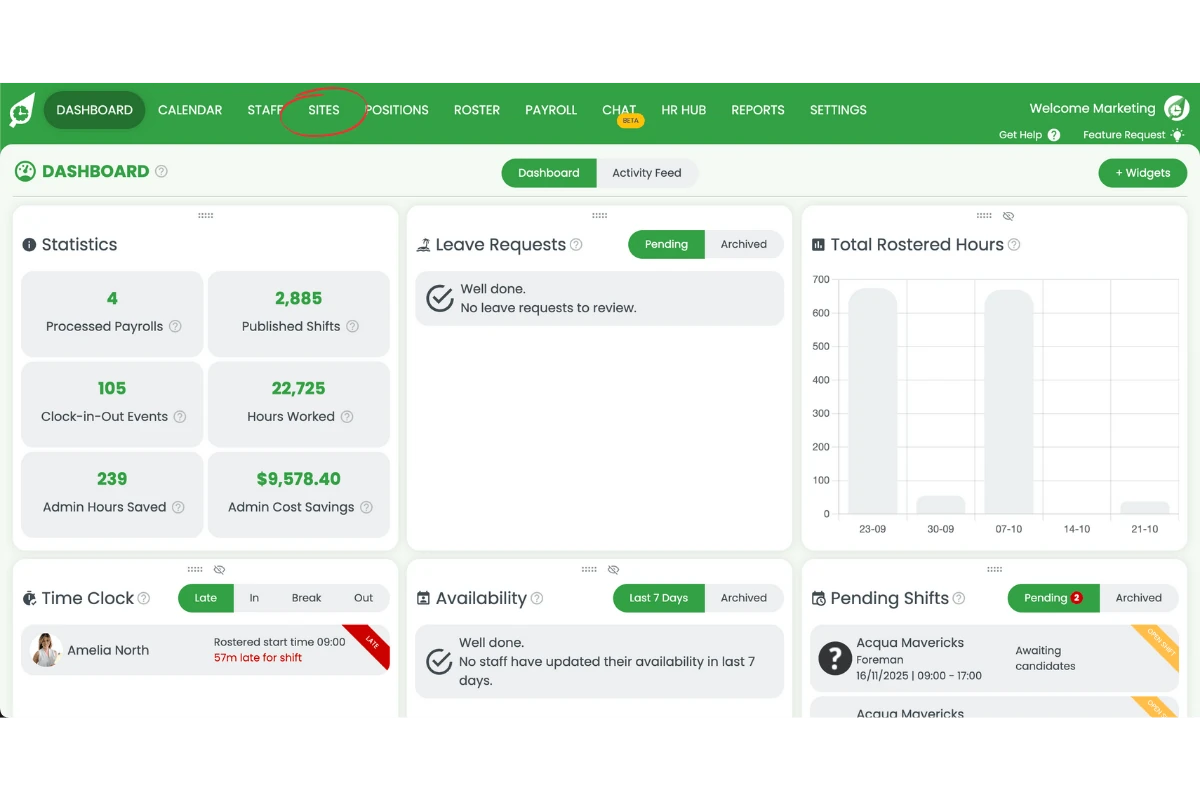
3.1.2 Click on the relevant Site.
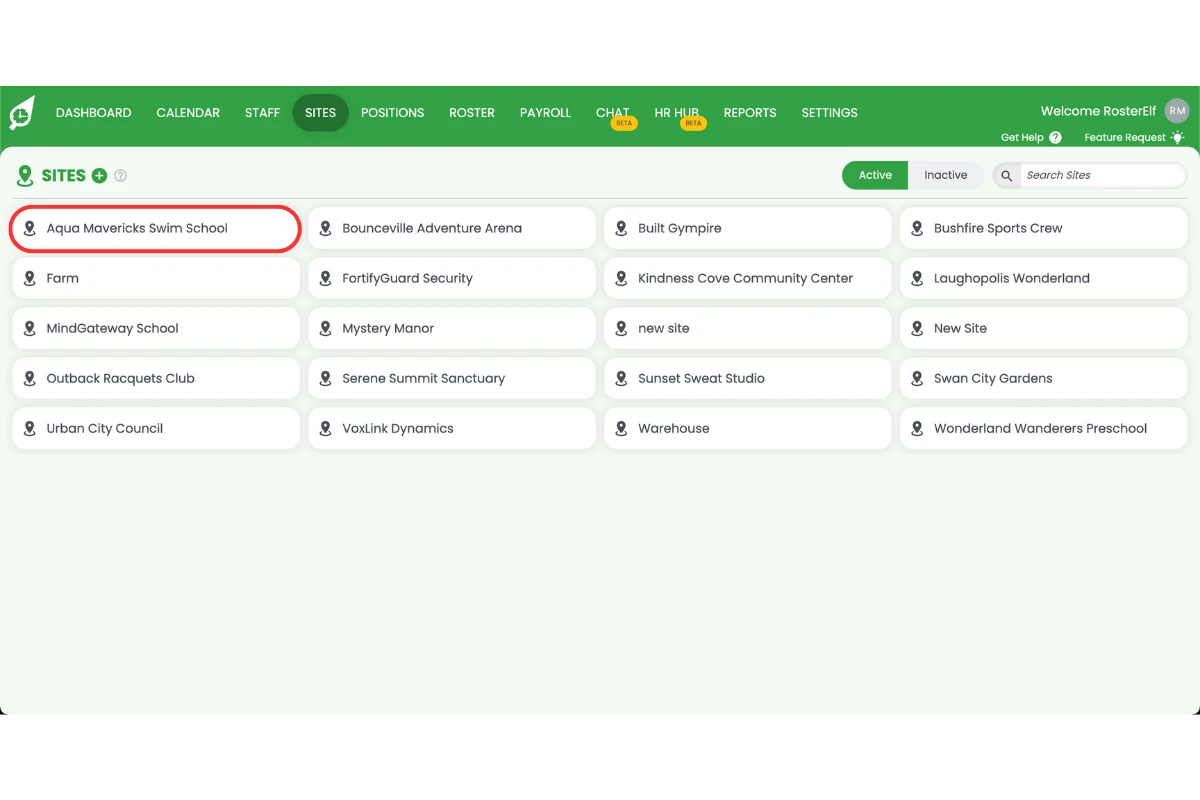
3.1.3 Click on the Managers tab from the pop-up view.
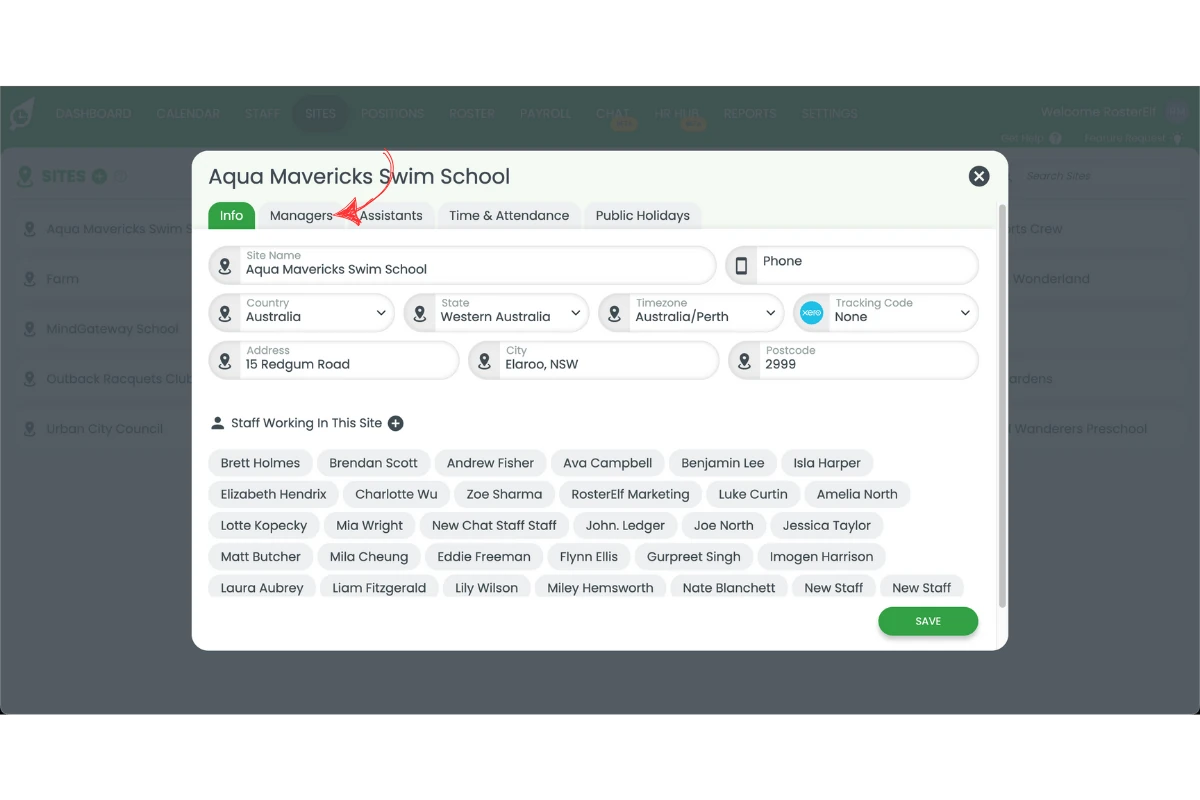
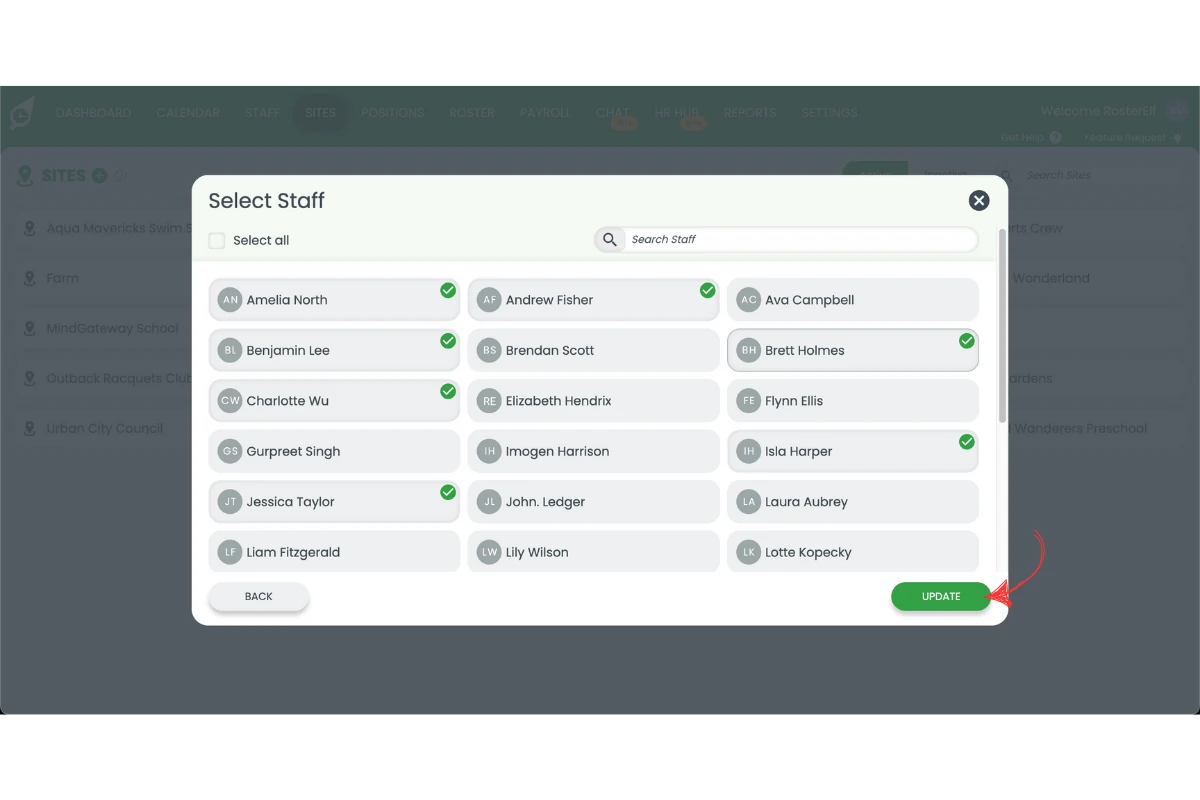
3.1.4 Click on the "+" symbol on the top menu.
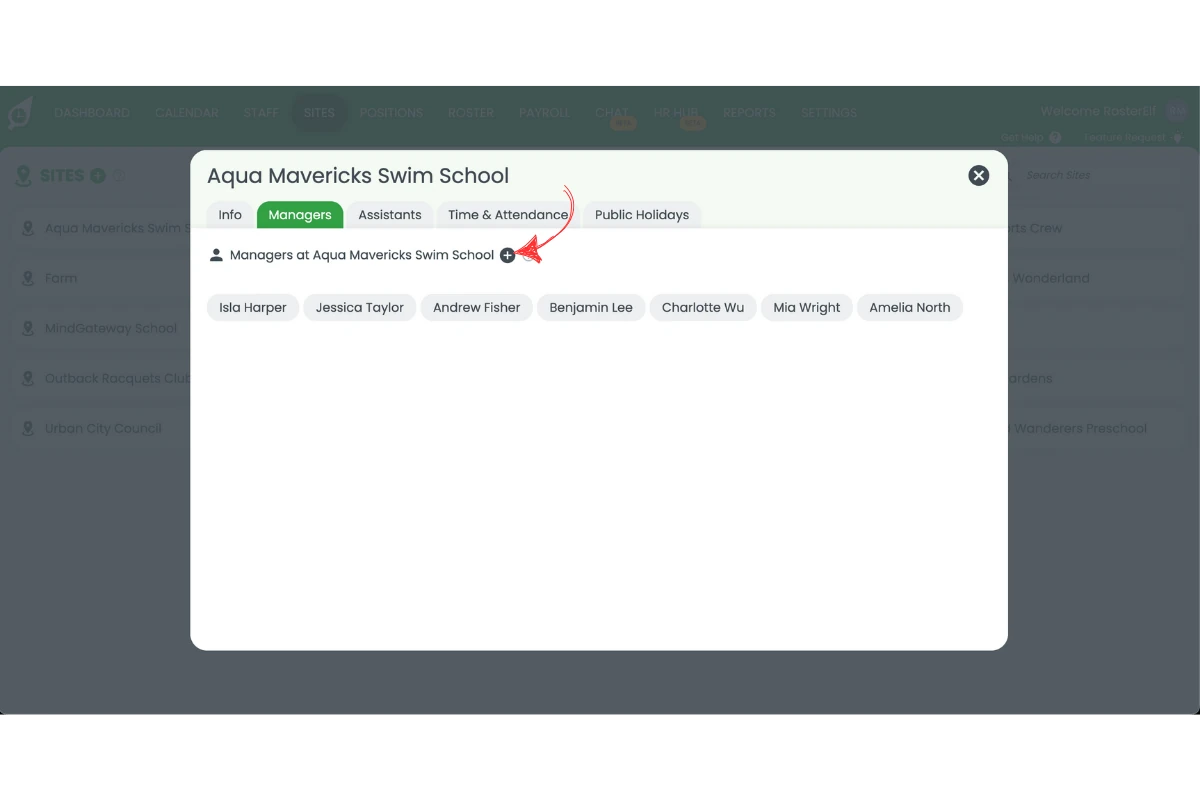
3.1.5 Select the relevant person who will be a manager for the site and click update.
3.2 manage admins via settings
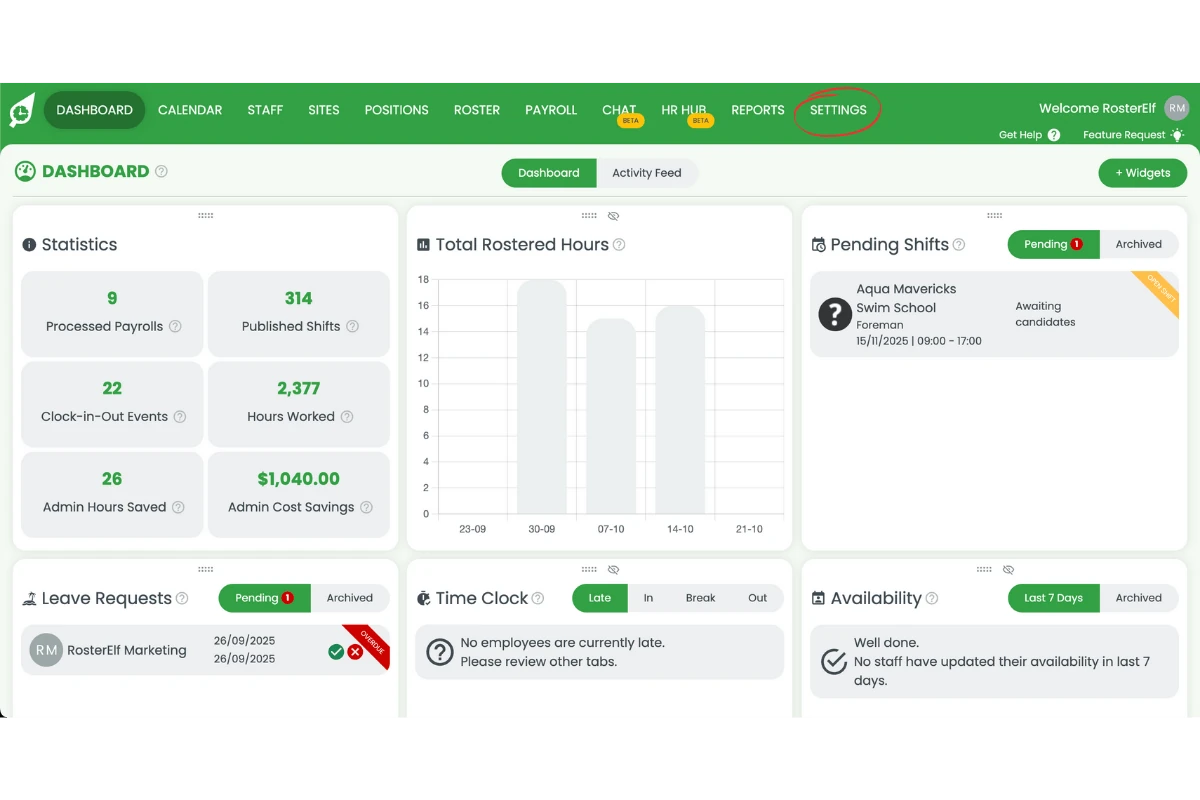
3.2.1 Navigate to Settings.
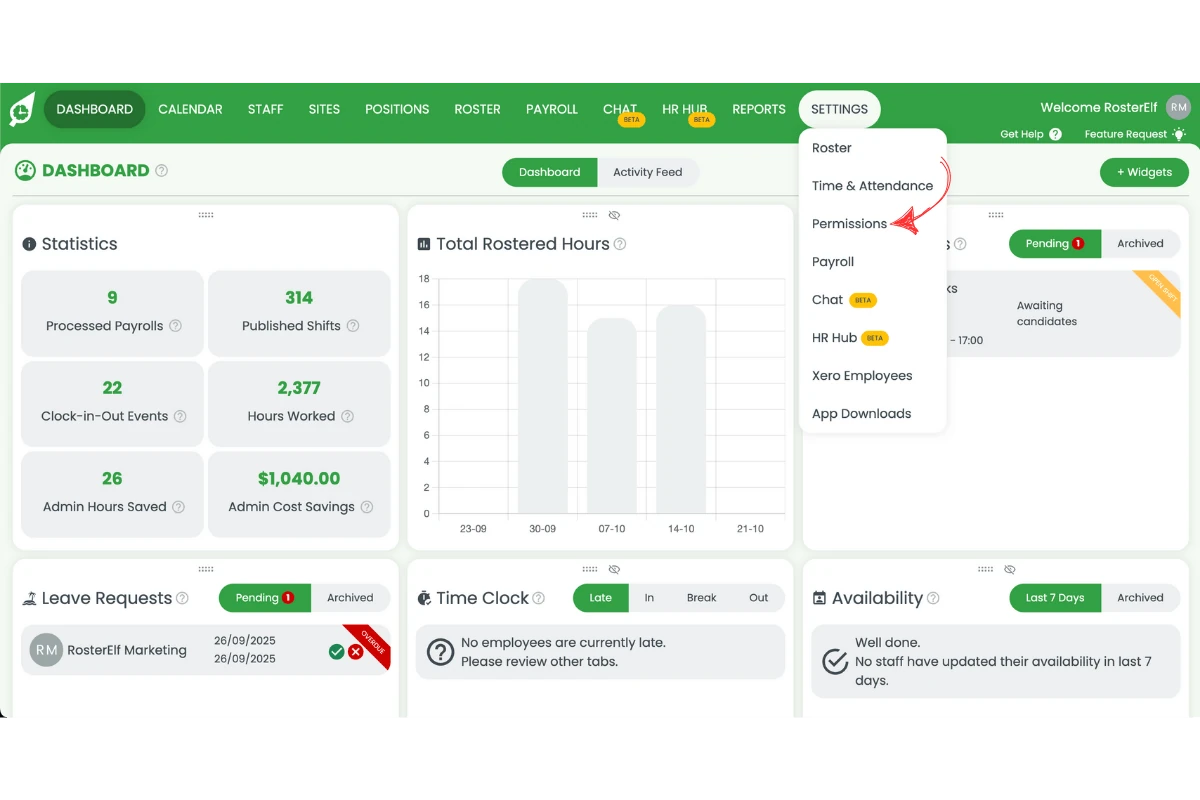
3.2.2 Click on Permissions from the dropdown menu.
3.2.3 To add an Admin, click the Plus (+) button, choose the user, and click Update.
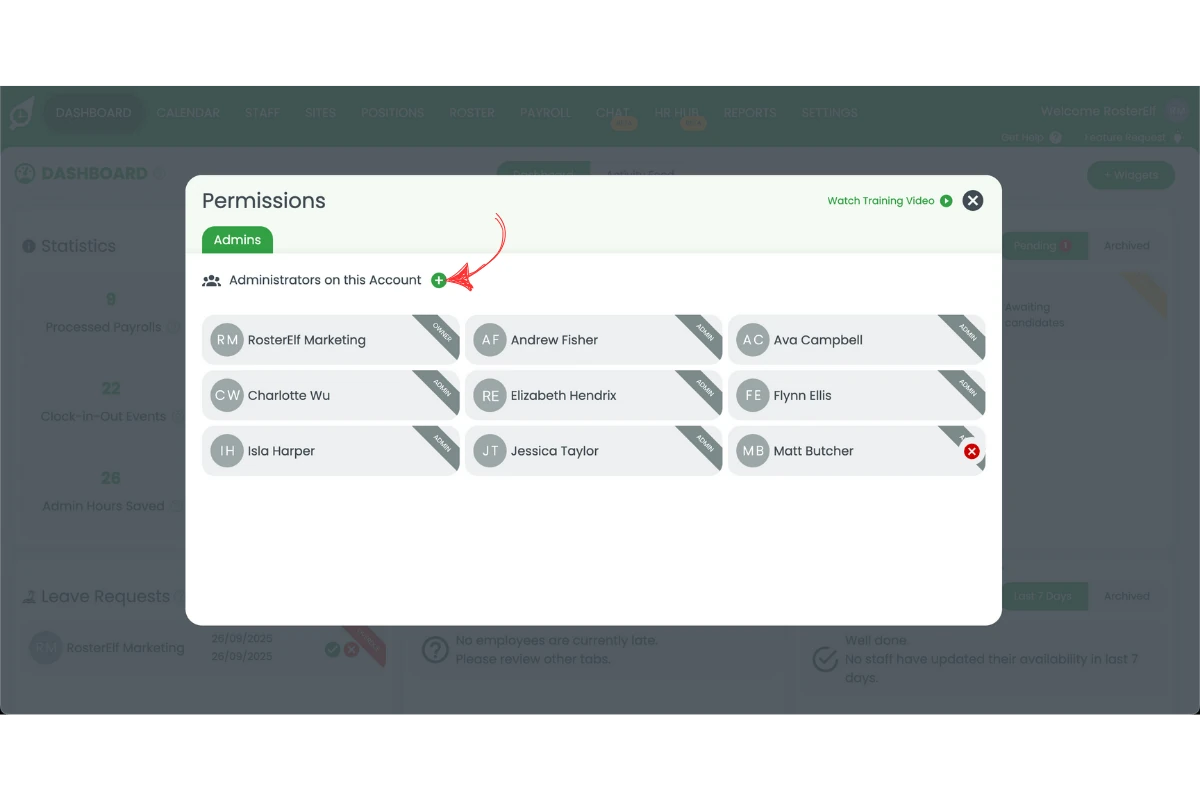
3.2.4 To remove Admin access, hover over the user's name and click the X.
3.3 view all permissions via staff tab
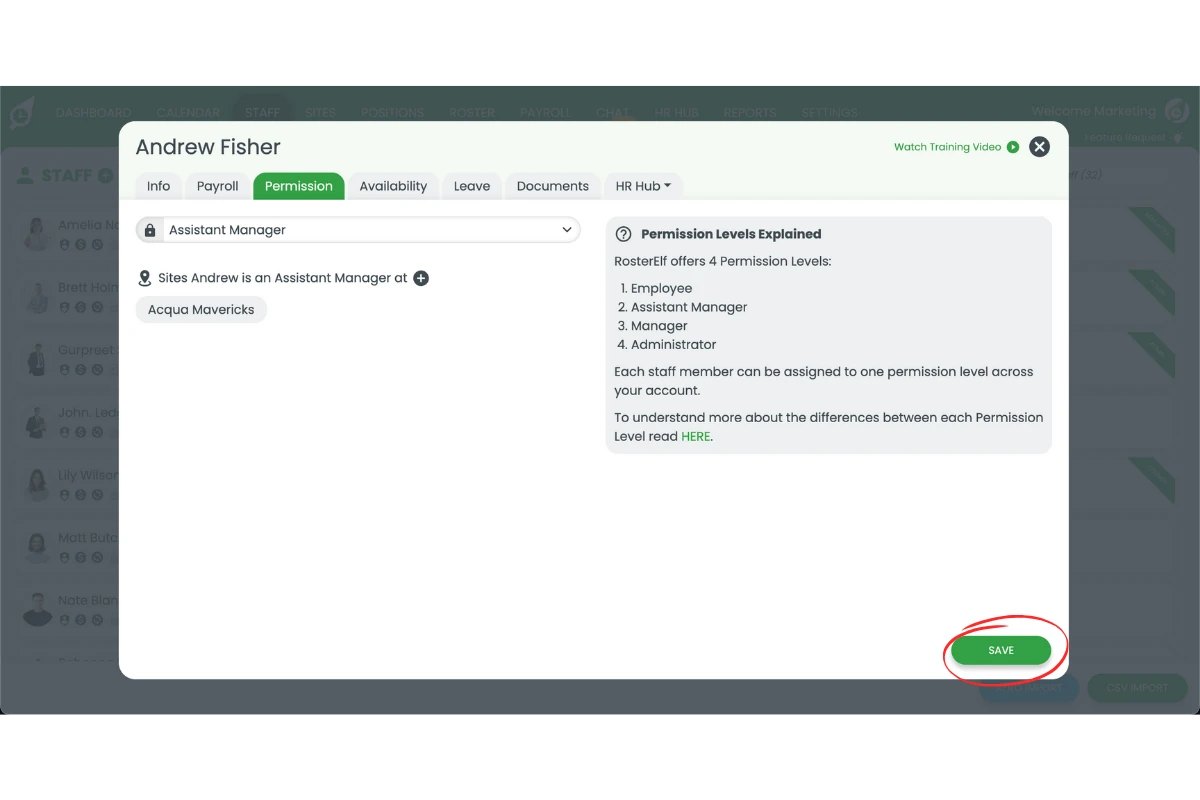
3.3.1 Access the Staff tab for an overview of all user permissions.
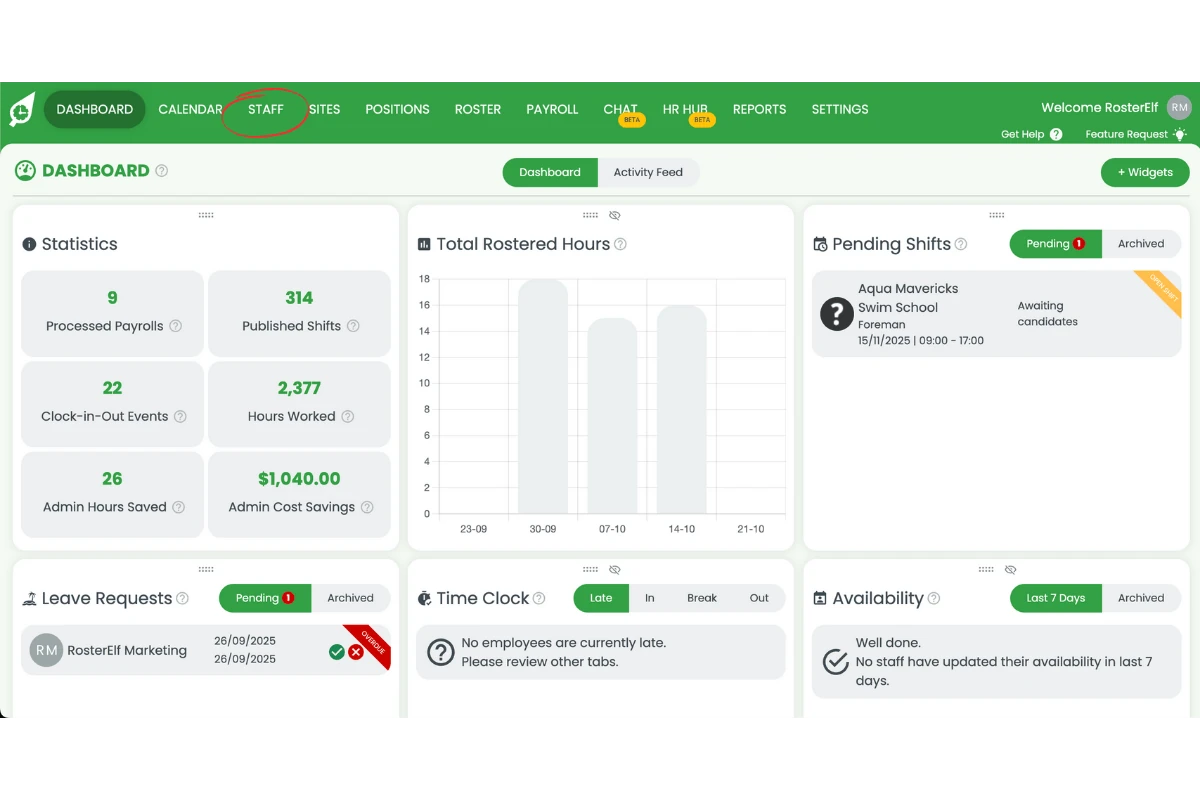
3.3.2 Use the Permission Level filter to find users by their access levels.
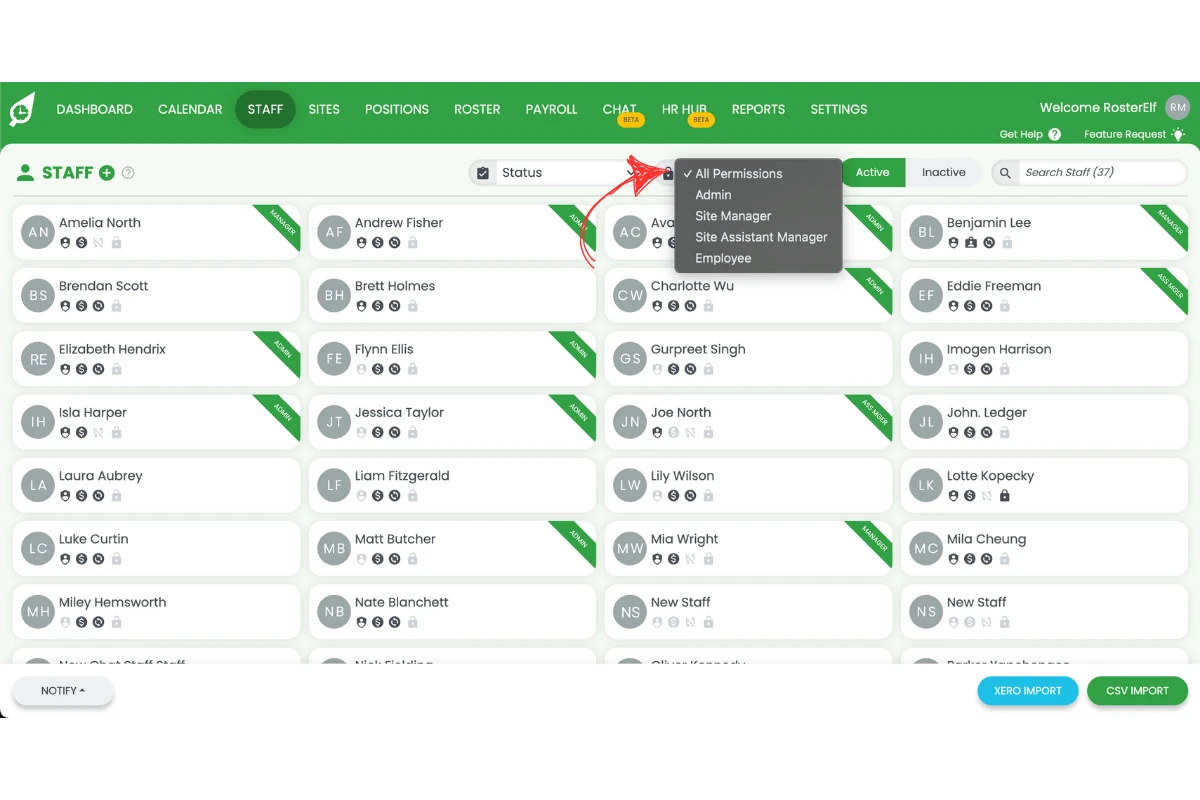
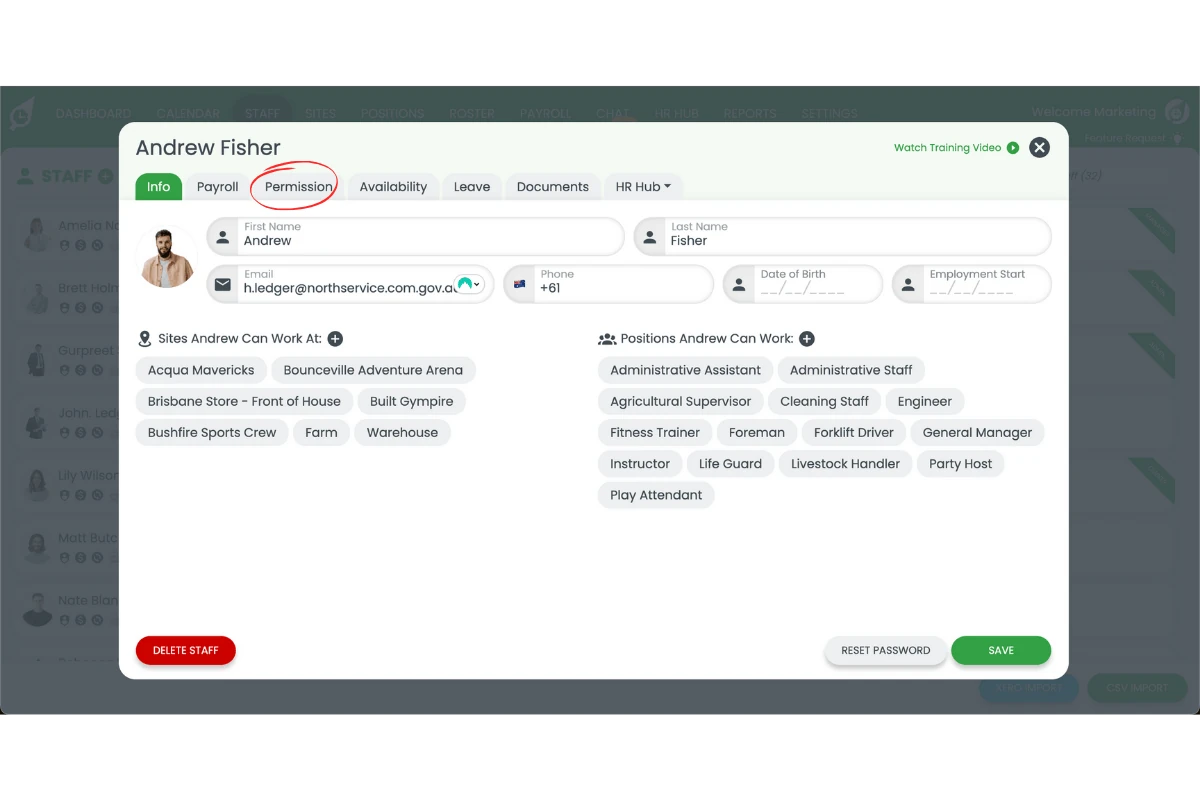
3.3.3 Select a user and go to their Permission tab to modify their access.
3.3.4 Assign Manager or Assistant Manager roles to specific sites as needed, or hover over the site to remove the permission by clicking on the X.
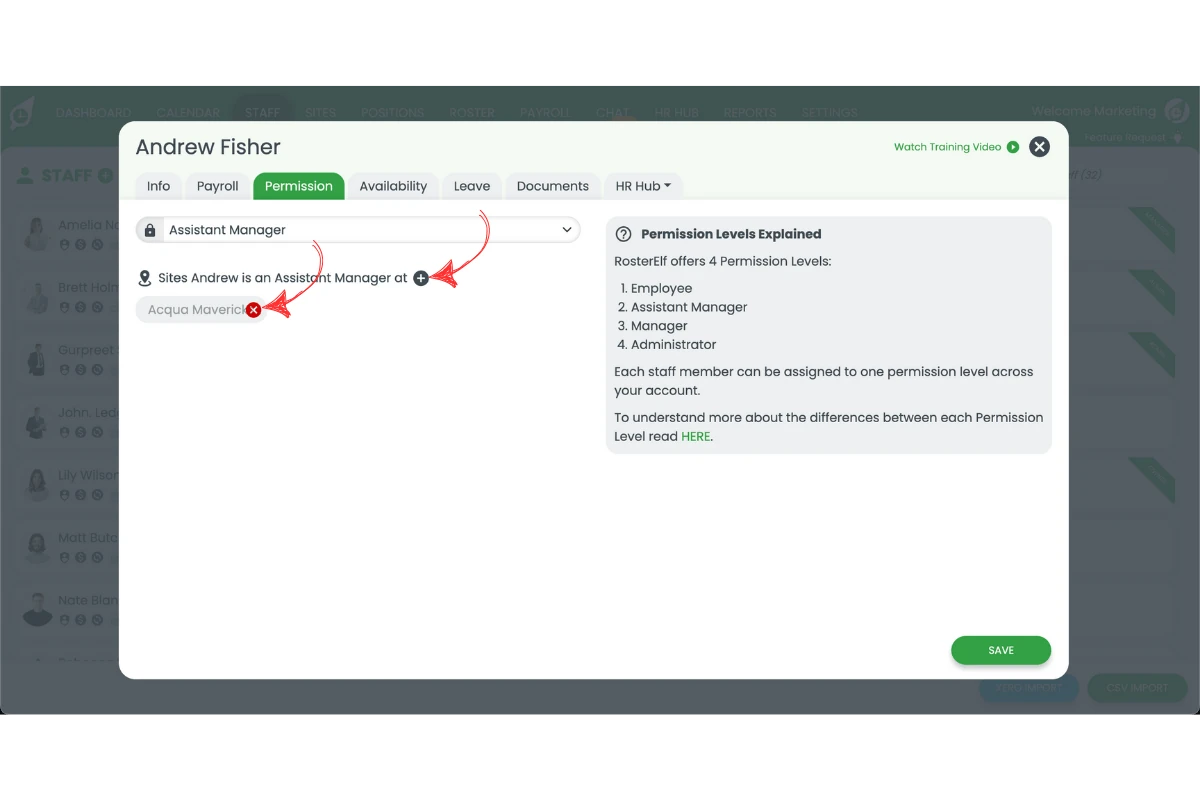
3.3.5 Click Save to confirm changes.
If you're connecting Xero, see required Xero permission levels for the specific access you'll need in both systems.