


Just need someone to clock in today?
This article covers adding a new employee to your RosterElf account. To add an existing employee to today’s roster from the Time Clock, see Add staff to Time Clock.
Adding staff manually
In RosterElf, you can manually add staff members to prepare your team for scheduling. This process ensures that you have all the necessary information to manage shifts effectively. This guide will walk you through the steps to add staff manually, focusing on entering basic details in the Info tab.
1. Access the staff section
To add employees to your RosterElf account, you need to access the Staff section. This area allows you to add, edit, or remove team members as needed.
1.1 navigate to the staff section
1.1.1 Log in to your RosterElf account.
1.1.2 Navigate to the Staff tab on the top menu.
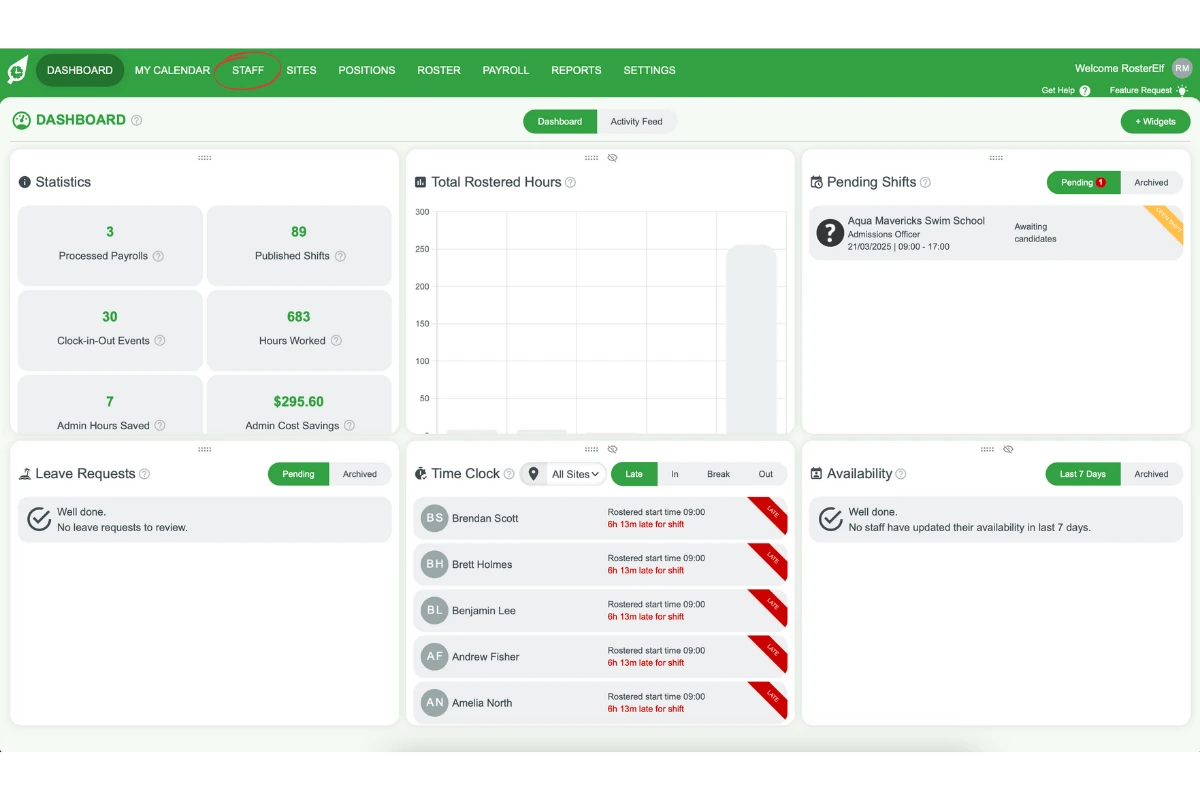
1.1.3 Click the + Add Employee button at the top left of the page.
2. Enter employee details in the info tab
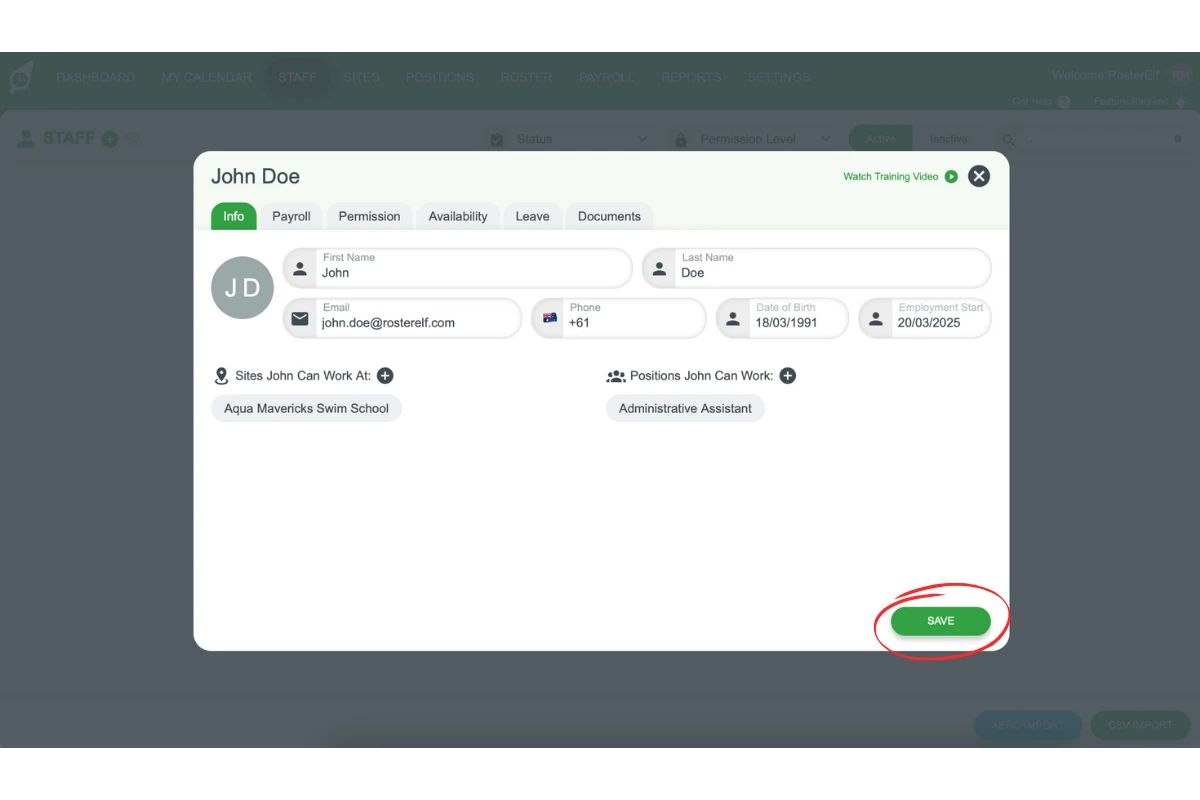
When adding a new employee, you need to provide their basic information in the Info tab. Additional sections like Payroll, Permissions, and Availability can be completed later.
2.1 Add basic employee information
2.1.1 Enter the employee’s full First Name and Last Name (required).
2.1.2 Add the employee’s Email Address (required) for receiving notifications.
2.1.3 Input the Phone Number (optional) to enable SMS notifications.
2.1.4 Enter the Date of Birth (optional).
2.1.5 Add the Employment Start Date (optional).
2.1.6 Click the Save button on the bottom right of the modal.
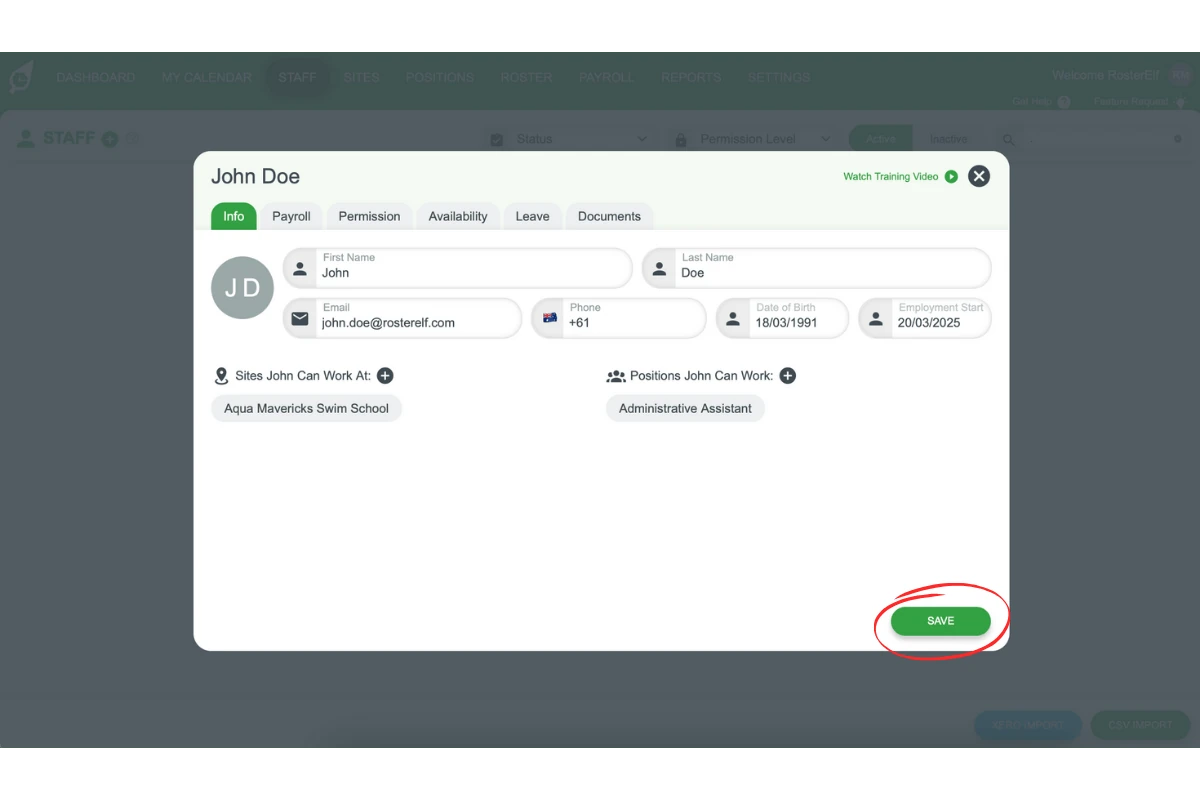
2.2 assign sites and positions
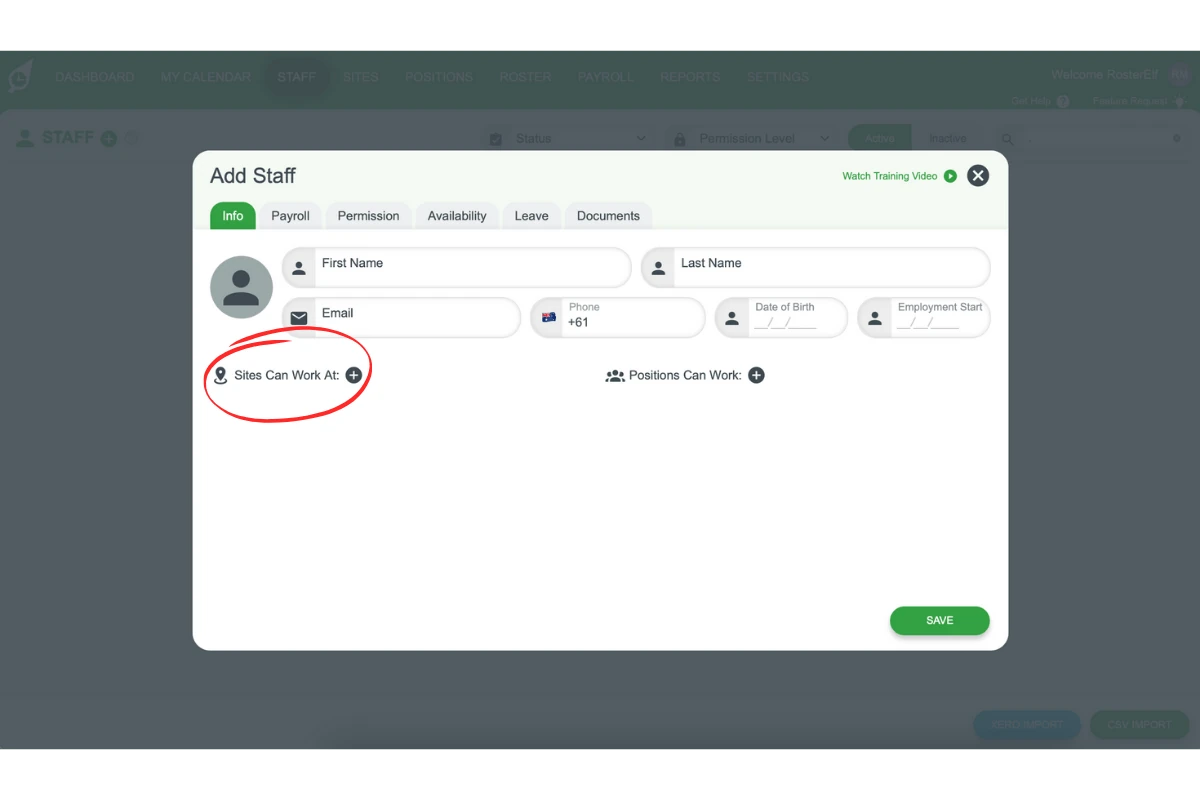
2.2.1 Add the sites where the employee can work by clicking the + symbol and selecting from available sites.
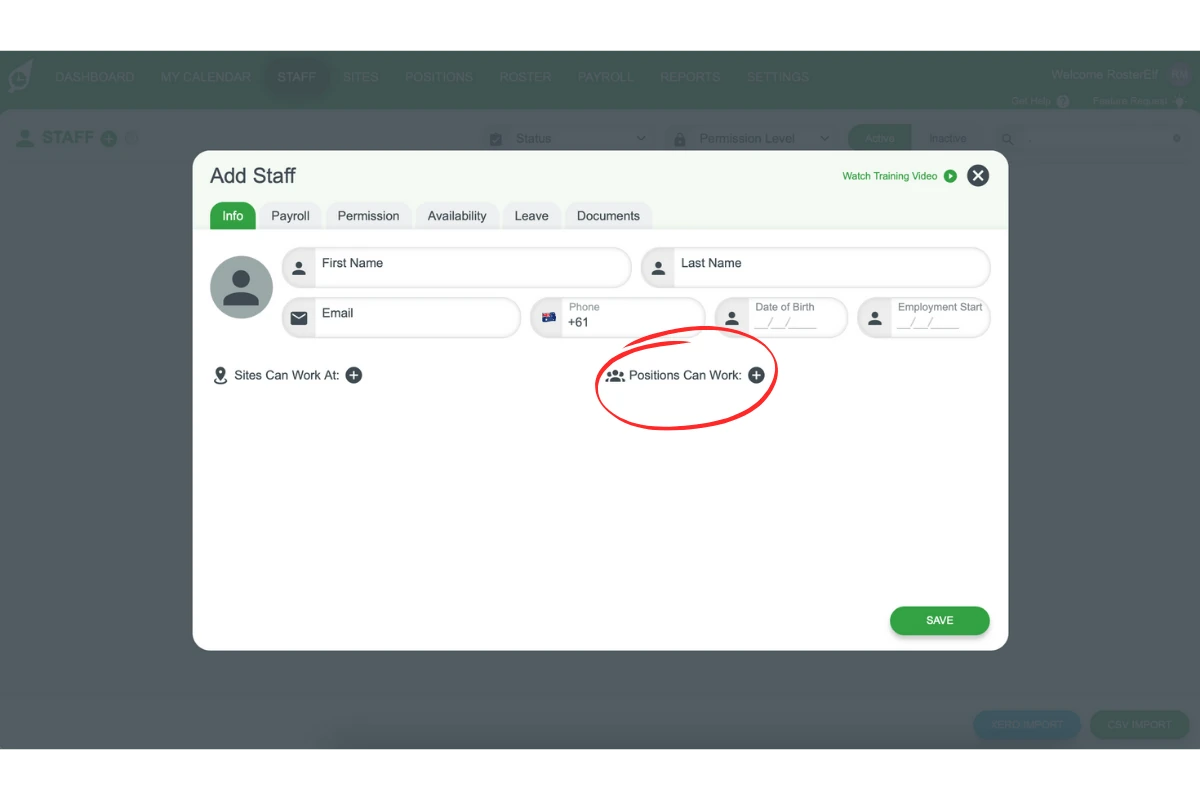
2.2.2 Assign roles or positions (e.g., Barista, Manager) by clicking the + button for each position.
2.2.3 Click the Save button at the bottom of the page after completing the required fields.
3. Employee welcome email with password
After saving the employee’s information, RosterElf will automatically send a welcome email. This email helps new employees get started by letting them choose how to access their account.
3.1 contents of the welcome email
3.1.1 The employee gets a Set your password link — they choose their own password, and the link lasts 48 hours.
3.1.2 The email also prompts them to complete their setup in My HR Hub, if your business needs them to provide documents or information first.
3.1.3 For Australian accounts, the email includes the Fair Work Information Statement and Casual Employment Information Statement.
See the full email text in what the welcome email says.
Note
This process ensures that your staff can quickly access their account and start using RosterElf, keeping them informed and connected right from the start.
Frequently asked questions
1. How do I manually add staff in RosterElf?
Log in to your account and navigate to the Staff tab on the top menu. Click the + Add Employee button at the top left of the page, then fill in the required information in the Info tab.
2. What details are required when adding a new employee?
You must provide their full first and last name and email address. Phone number, date of birth, and employment start date are all optional — though adding a phone number is recommended so they can receive SMS notifications.
3. How do I assign roles and sites to an employee?
Click the + symbol in the Info tab under the sites and positions sections. Select the appropriate sites and positions for the employee, then click Save to complete the setup.
4. What is included in the RosterElf welcome email?
The welcome email gives the employee the app download links, their login email address and a Set your password button (the link lasts 48 hours), and a prompt to complete setup in My HR Hub. For Australian accounts it also carries the Fair Work Information Statement and Casual Employment Information Statement. See the full text in what the welcome email says.
5. Will employees receive notifications after being added?
Yes, employees will receive an email welcome message with login details or a prompt to complete My HR Hub. If a phone number is added, they will also receive SMS notifications for roster updates.
6. Why isn't my new staff member showing up on the roster?
This almost always means Site and/or Position weren’t assigned when the staff member was added. Both are required for them to appear on the roster and in Payroll — go back into their profile in the Staff tab and add them under section 2.2 above.
7. I'm getting an error that this email is already in use — what do I do?
RosterElf requires each staff email to be unique across the whole platform, even across unrelated businesses and archived profiles. If you’re sure the email isn’t already used elsewhere in your own account, contact customersupport@rosterelf.com with the employee’s details — this sometimes needs to be resolved on our end rather than through self-service.